Table of Contents
Advertisement
19/22-inch
COMBINATION
19DV555DB
19DV556DB
22DV555DB
22DV556DB
OWNER'S MANUAL
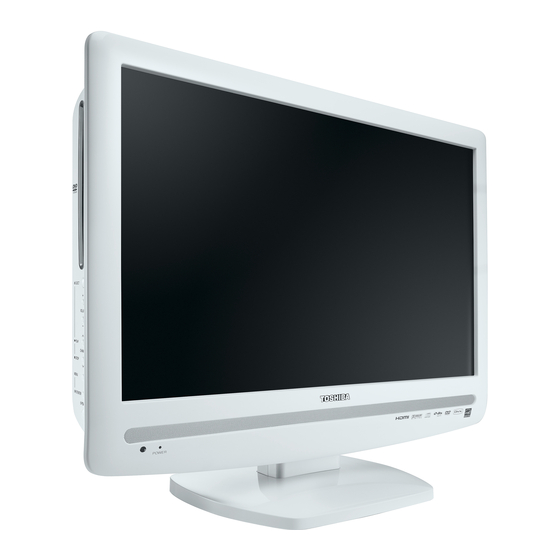
Illustration of 19DV555DB
©2008 Toshiba Corporation
Before operating the unit, please read this manual thoroughly.
*Screen size is approximate.
51Z0101A_ENG.indd 1
51Z0101A_ENG.indd 1
Diagonal LCD TV/DVD
*
Owner's Record
The model number and serial number
are on the back of your TV/DVD. Record
these numbers in the spaces below.
Refer to these numbers whenever you
communicate with your Toshiba dealer
about this TV/DVD.
Model number:
Serial number:
9/9/08 3:12:35 PM
9/9/08 3:12:35 PM
Advertisement
Table of Contents

Related Manuals for Toshiba 19DV555DB


Summary of Contents for Toshiba 19DV555DB
- Page 1 Illustration of 19DV555DB are on the back of your TV/DVD. Record these numbers in the spaces below. Refer to these numbers whenever you communicate with your Toshiba dealer about this TV/DVD. ©2008 Toshiba Corporation Model number: Before operating the unit, please read this manual thoroughly.
-
Page 2: Precautions
Precautions CAUTION: THIS UNIT IS A CLASS 1 LASER PRODUCT. HOWEVER THIS UNIT USES A VISIBLE LASER BEAM WHICH COULD CAUSE HAZARDOUS RADIATION EXPOSURE IF DIRECTED. BE SURE TO OPER- ATE THE PLAYER CORRECTLY AS INSTRUCTED. THE FOLLOWING CAUTION LABEL IS LOCATED ON THE REAR PANEL OF THE UNIT. CLASS 1 LASER PRODUCT WHEN THIS UNIT IS PLUGGED INTO THE WALL OUTLET, DO NOT PLACE YOUR EYES CLOSE TO... -
Page 3: Table Of Contents
Contents Precautions ............2 Temporary cancel the rating level by DVD disc ... 51 Contents ............... 3 Language Code List ..........52 Important safety information........4 PC connection ............ 53 Location of controls ..........6 Connecting an HDMI or a DVI device to the HDMI input .. 54 Remote Control ............. -
Page 4: Important Safety Information
Important safety information This unit has been produced according to all current safety regulations. The following safety tips should safeguard users against careless use and the dangers connected with such use. • Although this appliance has been carefully manufactured and rigorously checked prior to leaving the factory, as with all electrical appliances it is possible for problems to develop. - Page 5 NOTE: Do not operate the LCD TV when the pedestal stand is folded. The pedestal stand should not be folded at any time except for packing purposes. Please take note EXCLUSION CLAUSE Toshiba shall under no circumstances be liable for loss and/or damage to the product caused by: fire; earthquake; iii) accidental damage;...
-
Page 6: Location Of Controls
Location of controls Disc slot Adjusting the angle of the base You can adjust the angle of the TV-screen Illustration of 19DV555DB for 3° forward or for 10° backward from vertical angle. Hold the base of the TV while adjusting the angle. -
Page 7: Remote Control
Remote Control Function Page Eject a disc Select to operate TV/DVD 11, 32 Switches between the analogue TV and the digital TV 11, 20 Enter standby mode or turn on the power Select channel Select Teletext page Enter password 25, 50 Activate the channel organizer function Display program position number 14, 27, 29, 39... - Page 8 Remote Control Install the batteries Use batteries type UM4/R03 (AAA-Size). Do not use old or weak batteries. The remote control may not work properly with a weak voltage from such batteries. Replace exhausted batteries with new ones. Never try to recharge normal batteries - this could cause an explosion.
-
Page 9: Aerial Connection
Connect your aerial as shown below. Connections to other equipment is explained further on pages 55~57. If you have problems with reception, consult a specialist of aerial. Back Side (Illustration of 19DV555DB) (B) (C) (D) (E) (F) (G)(H)(I) (A) Power supply: Connect the supplied power cable to an AC 220-240V/50Hz mains power supply only - do not attempt to connect it to any other type of supply. -
Page 10: Auto Setup
Auto setup Your unit has an Automatic Preparation: installation which makes installation Press (Power) on the unit or press (On/Standby) on in your unit easy. When you turn the remote control. on the unit for the first time, the AUTO INSTALLATION menu will Automatic installation routine is appear. -
Page 11: Quick Guide For Analog Menu Operation
Quick guide for ANALOG MENU operation/Selecting the video input source/On-screen Language Selection Make sure the aerial connection and Quick guide for ANALOG MENU operation power supply are connected as per Call ANALOG MENU and for example: Select AUTO TUNING. the description on previous page. Press INPUT. -
Page 12: Automatic Station Presetting With The Built-In Tuner
Automatic station presetting with the built-in Tuner/ Changing the order of stored channels Automatic station presetting with the built-in Tuner Perform this feature to search for and store new analogue TV programmes after the Automatic installation. (see page 10) Preparation: Make sure your antenna is connected to the aerial input (see page 9). -
Page 13: Manual Tv Station Presetting
Manual TV station presetting If you like, you may manually tune a certain station into a selected program position, without deleting or modifying program position’s contents. Example: Store the BBC 2 into program position 2. Preparation: connect aerial cable. Select program position 2. -
Page 14: Basic Operation
Basic Operation Channel selection With the numbered buttons. Example: • No. 2: Press 0 and within 2 seconds, press 2. • No. 29: Press 2 and within 2 seconds, press 9. Press CH to change up or down a channel. This takes approx. -
Page 15: Teletext
Teletext Teletext is sent page by page. This unit is able to automatically store up to 256 pages, but they can only be accessed once they have been stored. This can take a few moments. Fastext/TOPtext Hold Pages Some pages are divided up into subpages by the The Fastext/TOPtext is teletext with a special channel. -
Page 16: Stereo Reception With The Built-In Analogue Tuner
Stereo reception with the built-in analogue tuner The built-in Tuner can detect and NICAM stereo sound reception: receive NICAM stereo broadcasts automatically. Select NICAM, then press ENTER. Press ◀ or ▶ to select AUTO or OFF. Select OFF if you do not want to NICAM AUTO BASS... -
Page 17: Picture Format
Picture format The broadcaster may transmit a Wide Screen Signalling (WSS) signal which can determine the correct picture width and set it automatically when the AUTO setting is used. If you want to change this setting, you can select from the formats listed below. Manual format setting AUTO Pressing PIC SIZE repeatedly scrolls through the following... -
Page 18: Other Convenience Functions
Other convenience functions You can change the default settings to convenience use. Icon Selected Items Setup hint PICTURE SPORTS Bright and dynamic picture (factory-set) PREFERENCE STANDARD Standard picture quality (factory-set) MOVIE Movie-like picture setting (factory-set) MEMORY Your personal preferences BRIGHTNESS / CONTRAST You can adjust the picture to your preference. -
Page 19: Guide To Using The Digital Menu System
Guide to using the Digital Menu system When the set is in the digital mode, you can access the main menu by pressing DIGTAL MENU on the remote control. This main menu contains several options, - Language Setup - Channel Organizer - Installation - System Configuration - Technical Information... -
Page 20: Language Setup
Language Setup/Auto Scan Language Setup Preparation: Switch on appliance. Press TV/DVD to select the TV mode, then press ATV/DTV. The appliance switches over to DVB-T-mode. Menu languages supported are English, French, German, Italian, Spanish, Russian, Portuguese, Dutch, Polish, Swedish, Turkish, Finnish, Greek, Danish and Norwegian. (Welsh and Gaelic are available only for Digital Service Language.) Press DIGITAL MENU, the menu will appear on the screen. -
Page 21: Manual Scan
Manual Scan/ Carrier Setup Manual Scan With the Manual Scan option, you can tune one carrier at a time, by entering the carrier parameters manually. Press ▲ or ▼ to select ‘Manual Scan’, then press ENTER. Texd Auto Scan Manual Scan Carrier Setup You can choose the carrier number from the Channel list by using ◀... -
Page 22: Channel Organizer
Channel Organizer The Channel Organizer feature Press ◀ or ▶ to select ‘Channel Organizer’, then press provides options to organise the ENTER. channels. The following options are supported: Lock, Skip, Go To, Delete, Rename, Move, Move To. Texd Channel Organizer The Channel Organizer menu will appear. - Page 23 Channel Organizer Setting details When the service is locked, you must enter your PIN whenever you tune to the service. ① Press ▲/▼ to select the desired service. ② Press 1 on the remote control. If you already set the PIN, enter it here. If not, enter the Lock factory preset PIN “0000”.
-
Page 24: Display Setup
Display Setup/Time Setup Display Setup Press ▲ or ▼ to select ‘Display Setup’, then press ENTER. Main menu System Configuration Texd Display Setup Time Setup assword Setup Subtitle Display Setup menu will appear. Press ▲ or ▼ to select the item you want to change. Then you can change each setting by pressing ◀... -
Page 25: Password Setup (Parental Lock)
Password Setup (Parental lock) Password Setup (Parental lock) This feature allows you to have a parental control of the service viewing as per your preference. Once a service is protected with a password, it cannot be viewed unless the correct password is provided. Press ▲... -
Page 26: Version
Version/Software Upgrade/Common Interface Version You can check the software and hardware versions. Press ▲ or ▼ to select ‘Version’, then press ENTER. The hardware and software versions are displayed. Main menu Technical Information Texd Version Software upgrade Press EXIT to return to the normal screen. Software Upgrade Software Upgrade allows you to download the latest software available on the Engineering channel. -
Page 27: Channel List
Channel list/Channel banner Channel list Press CH LIST to display the Channel list menu. S.No Services List of the services VWXYZ SAT.1 Navigate Enter Exit TV/Radio Select the Services: List of the services present under the selected Channel group will be displayed in the left side of the menu. Press ▲... -
Page 28: Multi Audio
Multi audio/DVB-Subtitle Multi audio You can select your preferred Audio mode and DVB (digital TV) subtitle Language. The Multi audio menu will display the Audio mode and Language options available with the current broadcast. Press AUDIO SELECT to display the Multi audio menu. The Audio mode and Language code will be displayed if available. -
Page 29: Epg (Electronic Program Guide)
EPG (Electronic Program Guide) The Guide menu shows the Press GUIDE to display the Guide menu. available programme listings for the next 8 days only, including today. However, the guide menu will show Guide 16:50 Sun 20/08/2008 ‘No Event Name’ for programmes 671 MNO 671_MNO_10Step_0820_0100_0120_Audio2_0100_0120... -
Page 30: Epg Timer
EPG Timer You can choose whether or not the screen switches on when the timer event begins - please see page 18 (Rec screen status (LCD Power on/off)). This is so that if you are using the timer to make a recording to your VCR or other device, the TV screen will not switch on unless you want it to. -
Page 31: Disc
Disc DVD discs must be Region 2 or Region ALL type to play on this unit. The suitable disc formats are: DVD-Video, DVD-R/-RW (Video format only), Audio CD, CD-R/CD-RW and Video CD. Some CD-R/RW discs may be incompatible. • This unit can play an 8cm disc. Please do not use a disc adapter. It may cause trouble. •... -
Page 32: Playing A Disc
Playing a disc This section shows you the basics on how to play a disc. Basic playback (DVD/VCD/Audio CD) Preparation Make sure that the (Power) switch on the unit is pushed in (ON). (The (Power) indicator lights up.) Press TV/DVD on the remote control to select the DVD mode. - Page 33 Playing a disc To pause playback (still mode) Press during playback. To resume normal playback, press PLAY ( • The sound is muted during still mode. To stop playback Press . To remove the disc Press Remove the disc after the disc comes out. Note: •...
- Page 34 Playing a disc You can play discs at various speeds. Playing in fast reverse or fast forward directions (DVD/ VCD/Audio CD) Press during playback. : Fast reverse playback : Fast forward playback Each time you press , the playback speed changes. To resume normal playback Press PLAY ( Note:...
-
Page 35: Zooming
Zooming/Locating desired scene Zooming (DVD/VCD) This unit will allow you to zoom in the frame image. You can then make selections by switching the position of the frame. Press ZOOM during playback. The centre part of the image will be zoomed in. Each press of ZOOM will change the ZOOM 1(x 1.3), (x 1.5) and... -
Page 36: Marking Desired Scenes
Marking desired scenes Marking the scenes (DVD/VCD/Audio CD) The unit stores the points that you want to watch again up to 3 points. You can resume playback from each scene. Press MARKER during playback. Marker 1 Marker 2 Marker 3 Select the blank Marker using ▲... -
Page 37: Repeat Playback
Repeat playback/A-B Repeat playback Repeat playback (DVD/VCD) Press PLAY MODE during playback or stop mode. Press ENTER repeatedly to Play Mode select “Chapter” or “Title”. Repeat : Off The unit automatically starts repeat playback after finishing the current title or chapter. [Video CD] Press ▼... -
Page 38: Changing Angles
Changing angles/Title selection/DVD menu Changing angles (DVD) When playing back a disc recorded with multi-angle facility, you can change the angle that you are viewing the scene from. Press ANGLE during playback. The current angle will appear. Press ANGLE repeatedly until the desired angle is selected. -
Page 39: Changing Soundtrack Language
Changing soundtrack language/Subtitles/Disc status Changing Soundtrack Language (DVD/VCD) You can select the language when you play a multilingual disc. Press AUDIO SELECT during 1/2 Eng Dolby Digital playback. The current soundtrack language will appear. Press AUDIO SELECT repeatedly 2/2 Fre Dolby Digital until the desired language is selected. -
Page 40: Mp3/Jpeg/Divx ® And Audio Cd Operation
MP3/JPEG/DivX and Audio CD operation ® This unit can playback the MP3/JPEG/DivX -data which has been recorded on CD-R/RW. Audio CD also ® can be played back. To produce the MP3/JPEG/DivX -data, you need a Windows-PC with CD-RW drive ® and a MP3/JPEG/DivX -encoding Software (not supplied). - Page 41 MP3/JPEG/DivX and Audio CD operation ® Loading CD Load a MP3/JPEG/DivX CD or an Audio CD into the disc slot. ® A file browser screen will appear on the screen. • In case the current directory includes 9 files or more, press ▲...
- Page 42 MP3/JPEG/Divx and Audio CD operation ® JPEG playback In the file browser, press ▲/▼ to select the desired JPEG file. To display a thumbnail list, press DVD MENU. Press ▲/▼/◀/▶ to select the desired file. (To return to the file browser, press TOP MENU.) When PLAY ( ) is pressed after displaying the file...
-
Page 43: Divx Playback
MP3/JPEG/Divx and Audio CD operation ® DivX playback ® In the file browser, press ▲/▼ to select the desired /Movie-01.DIVX file. Movie-01 Select Files Movie-02 Repeat :Off When PLAY ( ) has been Movie-03 Mode :Off Movie-04 pressed after the file browser Movie-05 displayed, playback begins Movie-06... - Page 44 MP3/JPEG/DivX and Audio CD operation ® Repeat playback (Audio CD/MP3/JPEG/DivX ® In the file browser, press ▲/▼/◀/▶ to select “Repeat” during stop mode. Folder-1 Select Files Folder-2 Repeat :Off MP3-1 Mode :Off Press ENTER repeatedly to select “Track” or “All”. Folder-1 Select Files Folder-2...
- Page 45 MP3/JPEG/DivX and Audio CD operation ® Program playback (Audio CD/MP3/JPEG/DivX ® In the file browser, press▲/▼/◀/▶ to select “Edit Mode”, then press ENTER. Folder-1 Repeat :Off Folder-2 Mode :Off MP3-1 Edit Mode When “Edit Mode” is black color, MP3 2 you can mark the files which you want to add into Program list.
-
Page 46: Program Playback
Program playback/Random playback You can arrange the playback order Program playback (VCD) of tracks or files on the disc. And Press PLAY MODE during the unit can also select tracks or Play Mode stop mode. files at random and playback them. Mode : Off –... -
Page 47: Customizing The Function Settings
Customizing The Function Settings You can change the default settings Setting procedure to customize performance to your Press SETUP in stop mode. preference. Parental E.B.L. Menu : Off : Off : Off : English QSound TV Screen Subtitle Set Password : On : 4:3 : English... - Page 48 Customizing The Function Settings Menu, Subtitle, Audio You can select the language of “Menu”, “Subtitle” and “Audio” if more than one language is recorded onto the disc. English, Francais, Espanol, Deutsch, Italiano: The selected language will be heard or seen. Other: Parental E.B.L.
-
Page 49: Picture Mode
Customizing The Function Settings Picture Mode There are two types of source content in pictures recorded in DVD video discs: film content (pictures recorded from films at 24 frames per second) and video content (video signals recorded at 30 frames per second). Make this selection according to the type of content being viewed. - Page 50 Customizing The Function Settings Parental Some discs are specified as not suitable for children. Such discs can be limited not to playback with the unit. 1) Press ▲ or ▼ to select “Parental”, then press ENTER. “Enter Password” screen will appear. 2) Press “0000”...
-
Page 51: Temporary Cancel The Rating Level By Dvd Disc
Temporary cancel the rating level by DVD disc Depending on the DVD disc, the Load a DVD disc. disc may try to temporarily cancel the rating level that you have set. It is up to you to decide whether to cancel the rating level or not. -
Page 52: Language Code List
Language Code List Enter the appropriate code number for the initial settings “Menu”, “Subtitle” and/or “Audio” (see pages 48). Language Name Code Language Name Code Language Name Code Language Name Code Abkhazian 1112 Fiji 1620 Lingala 2224 Singhalese 2919 Afar 1111 Finnish 1619 Lithuanian 2230 Slovak... -
Page 53: Pc Connection
PC connection As PCs are sometimes supplied with a ‘conventional’ CRT monitor, you may need to adjust the display settings of your PC’s graphics card, otherwise the pictures may not appear correctly. Switch on your PC (still with your original monitor) - select ‘1360 x 768’ for the screen resolution, and select 60 Hz for the on-screen refresh rate. -
Page 54: Connecting An Hdmi Or A Dvi Device To The Hdmi Input
Connecting an HDMI or a DVI device to the HDMI input The HDMI input receives digital audio and uncompressed video from a HDMI equipped device or uncompressed digital video from a DVI equipped device. When you connect to a DVI device with a HDMI-to-DVI adapter cable, it only transfers the video signal, so it is necessary to use separate analogue leads to transfer the audio signals. -
Page 55: Connection To Other Equipment
Connection to other equipment 1. Connecting other units to your TV Caution. Before connecting: • Make sure to disconnect the appliance from the power supply in order to avoid any potential damage from occurring. • Make sure to establish the required connection. •... - Page 56 Connection to other equipment 3. Connecting an audio system You can supply the TV sound to the stereo equipment with the scart socket. Use a special scart cable for the connection which sold at the accessory shop. (please consult your hi-fi instructions for details). Stereo amplifier Note: •...
- Page 57 Connection to other equipment 5. Connecting Video camera and Video recorder Select the “MONITOR” option in the SETUP menu (see No.7 on page 58). Select the AV2 input mode (see page 11). You can see the playback picture from video camera. This signal is output via AV1 and can be recorded by video recorder.
-
Page 58: Av Colour Adjustment
Connection to other equipment 7. Setting of Scart socket , select AV1 OUTPUT, then press ENTER. This determines whether the AV1 outputs the signal from the internal tuner or whatever input is shown on the screen. Press ◀ or ▶ to select TV or MONITOR. AV1 OUTPUT AV COLOUR AUTO... -
Page 59: Status Message
Status message Invalid entry The channel does not exist. (e.g., “000“) No radio services Cannot change to Radio mode because there is no radio service in the channel list. No TV services Cannot change to TV mode because there is no TV service in the channel list. -
Page 60: Troubleshooting Table
Troubleshooting table Please check the following list before requesting service. Symptom Possible solution Page No picture, no sound Switch on the set. Check that the mains power outlet is properly connected. Select appropriate input mode. Unplug unit for 1 minute, then plug it back in. No reception Have you tuned in the TV stations? 10, 11... -
Page 61: Specifications
Specifications Model 19DV555DB/19DV556DB 22DV555DB/22DV556DB System: Analogue: PAL UK, IR, CCIR, FRENCH System, B/G, D/K, I/I, L Digital: DVB-T (OFDM 2k/8k 16QAM/64QAM) Video Colour System: PAL/SECAM/NTSC 3.58/NTSC 4.43/PAL 60 Preset channels: Analogue channels (99) + Digital channels (Carrier 200/Service1000) Frequency Range:... - Page 62 51Z0101A_ENG.indd 62 51Z0101A_ENG.indd 62 9/9/08 3:14:18 PM 9/9/08 3:14:18 PM...
- Page 63 51Z0101A_ENG.indd 63 51Z0101A_ENG.indd 63 9/9/08 3:14:18 PM 9/9/08 3:14:18 PM...
- Page 64 “This product is marked with “CE” and complies therefore with the applicable harmonized European standards listed under the Low Voltage Directive 2006/95/EC and the EMC Directive 2004/108/EC.” Responsible for CE-marking is TOSHIBA INFORMATION SYSTEMS (U.K.) LTD, Toshiba Court, Weybridge Business Park, Addlestone Road, Weybridge,...