Table of Contents
Advertisement
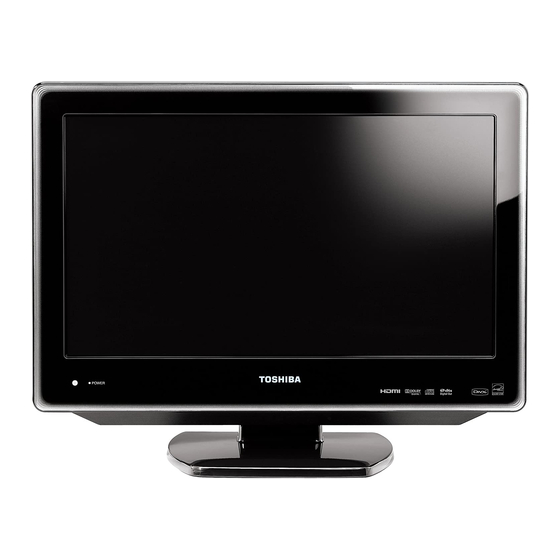
19-, 22-, 26-inch
LCD TV/DVD COMBINATION
19LV610U-T
22LV610U-T
22LV611U-T
26LV610U-T
OWNER'S MANUAL
© 2009 Toshiba Corporation
Before operating the unit, please read this manual thoroughly.
*Screen size is approximate.
Downloaded from
www.Manualslib.com
class
*
manuals search engine
Introduction
Connections
Basic setup
TV operation
Basic playback
Advanced playback
Function setup
Owner's Record
The model and serial numbers are on
the back of your TV/DVD.
Record these numbers in the spaces
below. Refer to these numbers
whenever you communicate with your
Toshiba dealer about this TV/DVD.
Model number: _________________
Serial number: _________________
2
14
27
32
52
55
68
73
Others
Advertisement
Table of Contents

Related Manuals for Toshiba 19LV610U-T


Summary of Contents for Toshiba 19LV610U-T
- Page 1 TV/DVD. Record these numbers in the spaces below. Refer to these numbers whenever you communicate with your Toshiba dealer about this TV/DVD. © 2009 Toshiba Corporation Model number: _________________ Before operating the unit, please read this manual thoroughly.
-
Page 2: Child Safety
Introduction Dear Customer, CHILD SAFETY: Thank you for purchasing this Toshiba LCD TV or TV/DVD Combination television. It Makes A Difference How and Where You Use Your This manual will help you use the many exciting features of Flat Panel Display your new LCD TV. -
Page 3: Fcc Compliance Information
- Connect the equipment into an outlet on a circuit different from that to which the receiver is connected. - Consult the dealer or an experienced radio/TV technician for help. WARNING: Changes or modifications to this equipment not expressly approved by Toshiba could void the user's authority to operate this equipment. -
Page 4: Introduction
Introduction SAFETY INSTRUCTIONS Important Safety Instructions Installation, Care, and Service 1) Read these instructions. Installation 2) Keep these instructions. Follow these recommendations and precautions and heed 3) Heed all warnings. all warnings when installing your TV: 4) Follow all instructions. 16) To avoid damage to this product, never place or store 5) Do not use this apparatus near water. - Page 5 Failure to follow this WARNING may result in 31) Always unplug the TV before death or serious injury. Refer all servicing to a Toshiba cleaning. Wipe the display Authorized Service Center. panel surface gently using 43) If you have the TV serviced: only a soft cloth (supplied.)
-
Page 6: Precautions
The following symptoms are technical limitations of LCD technology and are not an indication of malfunction; therefore, Observe the following safety precautions: Toshiba is not responsible for perceived defects resulting from 1. Ensure that the unpacking and transfer of the unit is carried out these symptoms. -
Page 7: Notes On Discs
Precautions Notes on discs (continued) Notes on moisture condensation On handling discs Moisture condensation damages the unit. Please read the • Do not touch the playback side of the disc. Handle the disc as following carefully. shown in the figure below. Moisture condensation occurs, for example, when you pour a cold drink into a glass on a warm day and drops of water form on the outside of the glass. -
Page 8: Playable Discs
DVD and CD software and/or the manufacture of DVD and CD work with some discs. discs, Toshiba cannot assure that the DVD player contained in this TV will successfully play every disc bearing the DVD and CD logos. If you happen to experience any difficulty playing a DVD or CD on the DVD player contained in this TV, please contact Toshiba Customer Service. -
Page 9: Table Of Contents
Contents Introduction Basic playback SAFETY INSTRUCTIONS.......4 Disc playback..........52 Precautions............6 Playback navigation........54 Notes on discs ..........7 Contents ............9 Advanced playback Identification of controls.........10 Zoom function ..........55 Scene navigation .......... 55 Connections Scene bookmark........... 56 Antenna connections ........14 Repeat playback ........... 57 Cable TV connections ........15 A-B repeat............. -
Page 10: Identification Of Controls
EJECT button Disc slot VOLUME (+/–) buttons Applicable to the following PLAY / CHANNEL button models only: - 19LV610U-T STOP / CHANNEL button - 22LV610U-T - 22LV611U-T MENU button INPUT/ENTER button POWER button You can adjust the angle of the TV screen 2° forward or 10°... - Page 11 Rear Side 19LV610U-T / 22LV610U-T / 22LV611U-T models HDMI / PC AUDIO IN jack PC MONITOR IN jack 16–18 VIDEO IN / GAME jack 16–19 AUDIO IN L/R jacks COLORSTREAM HD IN 14–15 Antenna jack jacks HEADPHONE jack AC INPUT jack 20–22...
-
Page 12: Remote Control
Introduction Identification of controls (continued) Remote control EJECT button POWER button / DVD button SLEEP button Direct channel selection / Number buttons (0-9) JUMP button DISPLAY button Channel SUBTITLE button AUDIO SELECT button VOL +/– button INPUT / ZOOM button MUTE button PLAY MODE button DVD MENU button *... -
Page 13: Inserting Batteries
Inserting batteries Open the battery compartment Install two “R03/AAA” batteries Replace the compartment cover. cover in the direction of the (supplied), paying attention to arrow. the polarity indicated in the battery compartment. Operation Aim the remote control at the remote sensor and press the control buttons to operate. Make sure the remote control is within approximately five meters and 30°... -
Page 14: Connections
Connections Antenna connections If you are using an indoor or outdoor antenna, follow the instructions below that correspond to your antenna system. If you are using a cable TV service (CABLE), go to page for related connections. Combination VHF/UHF antenna (Single 75 cable or 300 twin-lead wire) Connect the 75... -
Page 15: Cable Tv Connections
Cable TV connections This TV/DVD has an extended tuning range and can tune most cable channels without using a cable TV converter box. Some cable companies offer “premium pay channels” in which the signal is scrambled. Descrambling these signals for normal viewing requires the use of a descrambler device which is generally provided by the cable company. -
Page 16: Optional Equipment Connections
Connections Optional equipment connections You can enjoy VCR, camcorder or TV games with connection to an external input. INPUT Important: Read the optional equipment’s owner's manual for related connection instructions and reminders before connecting the device to your TV/DVD. GAME Using the audio/video inputs Press INPUT to view a signal from another device connected to your TV/DVD, such as a VCR player. - Page 17 Connecting to a camcorder Connect the camcorder to the TV/DVD as shown. Select “Video” by pressing INPUT repeatedly. 19- and 22-inch models To Audio/Video OUT To Audio/Video IN yellow, white, red Audio/Video cable (not supplied) 26-inch model To Audio/Video OUT To Audio/Video IN Audio/Video cable (not supplied) yellow, white, red...
- Page 18 Connections Optional equipment connections (continued) Connecting to an optional equipment with S-Video output If you connect a device with an S-Video cable to the TV’s S-VIDEO IN jack, you must also connect the audio cables to the AUDIO IN jacks as shown below. The S-Video cable only carries the video signal. The audio signal is separated. Select “Video”...
- Page 19 ® Connecting to an optional equipment with ColorStream (component video) output ® Your TV/DVD supports ColorStream (component video) connection. When using a component video cable, you must also connect the audio cables to the COLORSTREAM HD AUDIO IN jacks as shown below. Select “ColorStream HD” by pressing INPUT repeatedly.
- Page 20 Connections Optional equipment connections (continued) You can enjoy high quality dynamic sounds by connecting the TV to an optional audio equipment. The succeeding sections use the following reference marks. : Front speaker : Center speaker : Rear speaker : Signal flow : Subwoofer Optional audio equipment connection reminders •...
- Page 21 Connecting to an amplifier equipped with a DTS ® decoder Digital Theater Systems (DTS) DTS is a high quality surround technology used in theaters. If you have a DTS decoder or processor, you can obtain the full benefit of 5.1 channel DTS encoded soundtracks on DVDs and audio CDs. 19- and 22-inch models To Coaxial Type Digital Audio IN...
- Page 22 Connections Optional equipment connections (continued) Connecting to an amplifier equipped with an MPEG audio decoder MPEG2 sound You can watch motion picture and live concert DVDs encoded via the MPEG2 recording system. Enjoy dynamic realistic sound by connecting an amplifier equipped with an MPEG2 audio decoder or MPEG2 audio processor. 19- and 22-inch models To Coaxial Type Digital Audio IN...
- Page 23 Connecting an analog audio amplifier (26LV610U-T model only) This connection allows you to use an external analog audio amplifier to adjust the sound level. To control the audio: 1. Turn on the TV and the stereo amplifier. 2. Turn off the TV’s built-in speakers. Refer to the “Turning off the built-in speakers” section on page To Analog Audio OUT white, red To Audio IN...
- Page 24 Connections Optional equipment connections (continued) Connecting to an HDMI or a DVI device About HDMI HDMI (High Definition Multimedia Interface) supports both video and audio on a single digital connection for use with DVD players, DTV, set-top boxes, and other AV devices. HDMI was developed to provide the technologies of High Bandwidth Digital Content Protection (HDCP) as well as Digital Visual Interface (DVI) in one specification.
-
Page 25: Connecting A Computer
Connecting a computer You can use your TV as a display device for your computer. Before you connect the computer to your TV, adjust the computer’s resolution and refresh rates (60 Hz). There are several cable choices for connecting a computer to your TV. Using a VGA cable 1. -
Page 26: Ac Power Connection
Connections AC power connection Connecting to a power source To connect AC power: 1. Connect the AC cord plug into the TV/DVD’s AC INPUT jack. 2. Connect the AC cord into an AC outlet. 120 V, 60 Hz AC outlet AC input jack AC cord (supplied) Notes:... -
Page 27: Auto Setup
POWER Auto Setup The Auto Setup function helps to configure your TV/DVD for initial operation. It lets you select the system language, the TV signal type, and perform an automatic channel search. Important: Make sure that the antenna or cable TV system connection ENTER is made. -
Page 28: Language Setup
Basic setup Language setup POWER This TV/DVD can display the menu screens in English, French or Spanish. Select the language you prefer first, then proceed with the other menu options. MENU ENTER / / / EXIT/CANCEL Setting the language Press to select the preferred language: Press POWER on the unit or on the remote control. -
Page 29: Channel Memory
Channel memory This TV/DVD is equipped with a channel memory feature which allows channel browsing of saved channels only; unwanted channels are skipped. Before using this function, channels must first be programmed into the TV/DVD’s memory. When shipped from the factory, the “Signal Type” option is set to “Cable” mode. ENTER To use this TV/DVD with an antenna, set this option to “Air”... - Page 30 Basic setup Channel memory (continued) ENTER / / / EXIT/CANCEL MENU Adding/deleting a channel In TV mode, press MENU to display the Main Press to select a channel. Menu screen. Press to select “Channel”, then press or ENTER. MENU SETUP Press to select “Add”...
- Page 31 Channel memory (continued) ENTER EXIT/CANCEL MENU Adding channel (digital channel only) Removing all channels You can remove all channels from the channel memory. If you found a new unsaved channel, you can add it into the channel memory. In TV mode, press MENU to display the Main Tune in to the new channel.
-
Page 32: Tv Operation
TV operation TV operations POWER 0–9, – VOL +/- ENTER Basic operations Power on Analog channel selection Press 1-9 as needed. For example, to select Press POWER on the unit or on the remote control. The POWER indicator on the front of the unit changes to channel 2, press 2, then press ENTER. - Page 33 TV operation SLEEP (continued) DISPLAY VOL +/- MUTE CH RTN Basic operations (continued) Sleep function Information display Press SLEEP to set the TV/DVD to turn off after a preset Press DISPLAY to display the current settings information amount of time. on the screen.
-
Page 34: Channel Labels
TV operation Channel labels Channel labels appear with the channel number display each time you turn on the TV/DVD, select a channel, or press DISPLAY. ENTER / / / EXIT/CANCEL MENU Labeling channels Press repeatedly until the character you In TV mode, press MENU to display the Main Menu screen. -
Page 35: Video Input Labels
Video input labels The Video Label feature allows you to label each video input source. This is convenient when there are several optional equipment connected to your TV/DVD. ENTER / / / EXIT/CANCEL MENU Labeling video input sources Press select the label you want for the Press MENU to display the Main Menu screen. -
Page 36: V-Chip Setup
TV operation V-Chip setup 0–9 The V-Chip allows parents to select ratings level corresponding to allowable video content. This will restrict access to programs or movies that have scenes not unsuitable for young viewers. This restriction depends on the programs’ or movies’ DISPLAY rating data. - Page 37 V-Chip setup (continued) 0–9 ENTER / / / MENU Setting up the restriction level Note: The V-Chip function is only activated when the TV program or movie has a rating signal. Press to select whether to restrict Press MENU to display the Main Menu screen. content for TV programs (“TV Rating”) or Press to select “Lock”, then press...
- Page 38 TV operation 0–9 MUTE ENTER / / / EXIT/CANCEL Setting up the ratings level Removing the ratings restriction (continued) Press MENU to display the Main Menu screen. Press to select “Lock”, then press ENTER. MENU SETUP For movie programs, the rating level is based on the viewer’s age.
- Page 39 V-Chip setup (continued) 0–9 As a supplement to the standard V-Chip rating system, you can download an additional rating system, if such a system becomes available in the future. Notes: • You can only download an additional V-Chip rating system when the TV is ENTER receiving a digital signal.
-
Page 40: Closed Captioning
TV operation Closed captioning WHAT IS CLOSED CAPTIONING? Your TV/DVD has the capability to decode and display closed captioned TV programs. As the picture is shown, text captions are displayed that transcribe speech and often other relevant sounds. If available, it can also display captions in another language. -
Page 41: Advanced Closed Captioning
Advanced closed captioning You can customize the appearance of digital closed captions. Important: The “CC Setting” must first be set to “On” before you can customize the digital closed captions. ENTER / / / EXIT/CANCEL MENU Customizing the digital closed captions Press MENU in TV mode. -
Page 42: Picture Preference And Settings
TV operation Picture preference and settings You can select from four picture mode options to suit your current viewing condition. Or you can choose to configure individual picture settings. ENTER / / / EXIT/CANCEL MENU Selecting a picture mode Adjusting the picture settings Press MENU to display the Main Menu screen. -
Page 43: Picture Formats
Picture formats You can choose from six picture formats to view programs. ENTER EXIT/CANCEL PIC SIZE Selecting a picture format Press MENU. Press to select “Picture”, Theater Wide 3 (for letter box programs with subtitles) then press or ENTER. To fill the width of the screen, it is extended horizontally. It is only slightly extended at the top and the bottom.The Press to select “Picture Size”, then... -
Page 44: Film Mode
TV operation Film Mode / Digital Noise Reduction The Film Mode feature improves the appearance of movies converted from film to video, including DVD titles. When enabled picture is less jerky and has a cinematic picture quality. Enabling the Film Mode feature is recommended when viewing DVD Note: titles from a DVD player connected to the ColorStream (component video) ENTER... -
Page 45: Picture Control Adjustment In Pc Mode
Picture control adjustment in PC mode The PC Settings menu allows picture adjustment when using a computer with your TV. INPUT ENTER / / / EXIT/CANCEL MENU Adjusting the picture in PC mode Connect a computer to your TV. Press to select an item to change, then press to adjust it. -
Page 46: Sound Quality Adjustment
TV operation Sound quality adjustment / Sound stream selection The Audio menu provides individual controls to adjust the sound quality of the built-in speakers. Your TV supports the MTS (multichannel television sound) feature to let you ENTER select the preferred audio stream for analog programs. Options include “Mono”, / / / “Stereo”, “Surround”... -
Page 47: Digital Audio Language Selection
Digital audio language selection / HDMI audio input source selection For digital TV, programs may sometimes be available in two or more audio languages. You can select your preferred audio language. When an HDMI or DVI device is connected, you must select the appropriate HDMI audio input source. -
Page 48: Aspect Feature
TV operation Aspect feature When the Aspect feature is set to “On” and the TV receives a 480i signal, the picture size is automatically selected. ENTER / / / EXIT/CANCEL MENU Disabling the aspect feature Press MENU in Video or ColorStream HD mode. Press to select “Setup”, then press ENTER. -
Page 49: Built-In Speakers Status
Built-in speakers status / DTV signal strength For the 26LV610U-T model only, you can choose to turn off the built-in TV speakers when an external audio amplifier is connected. When in digital TV mode you can view the digital signal strength and adjust the ENTER antenna accordingly. -
Page 50: Logo Light
19LV610U-T, 22LV610U-T, and 26LV610U-T models only , when the “TOSHIBA Logo Light” feature is set to “On”, the TOSHIBA logo on the front panel lights up. When the “Auto Shut Off” feature is set to “On”, the TV will automatically shut... -
Page 51: Settings Reset
Settings reset Use the Reset menu to switch all TV settings to their default factory values. Do this only if any of the following conditions occurs: • The system fails to respond to the remote control (make sure the remote control batteries are still working and that you are within the transmission range). -
Page 52: Basic Playback
Basic playback TV/DVD POWER EJECT Disc playback VOLUME +/- VOLUME This section shows you the basics on how to play a disc. About VOL +/– PLAY PLAY CHANNEL icons on the heading bar indicate STOP ENTER STOP the kind of disc that can employ the function described MENU under that heading. -
Page 53: Removing A Disc
EJECT Disc playback POWER (continued) Removing a disc Press EJECT on the remote control. EJECT Wait for the disc to be ejected then remove the disc from the slot. Disc playback reminders • If the unit does not operate properly, static electricity build-up may be the cause. Turn off the TV/DVD, then disconnect the power cord from the AC outlet. -
Page 54: Playback Navigation
Basic playback Playback navigation Note: The “Prohibition” symbol “X” appears on the upper right corner of PAUSE the screen when you try to employ a playback function that is not PLAY available on the disc, or that is not yet accessible at this time. This does SKIP not indicate a problem with the TV/DVD. -
Page 55: Zoom Function
Zoom function / Scene navigation You can change the viewing scale of a picture by using the Zoom function. Once JUMP the image has been rescaled, use the Direction buttons / / / to pan the DISPLAY image. ZOOM Scene navigation options differ depending on the kind of disc. DVDs use the title, chapter or record time to locate the start point for playback. -
Page 56: Advanced Playback
Advanced playback Scene bookmark Scene bookmarks refer to specific points in the playback range that have been marked for later access. You can create up to three markers per disc. Note: The saved scene bookmarks are only accessible during the current ENTER session. -
Page 57: Repeat Playback
Repeat playback / A-B repeat PLAY MODE You can choose to repeat DVD playback by title or chapter. For audio and video CDs, ENTER you can repeat a single track or the entire disc. The A-B repeat function lets you repeat a specific section between two set points. This section will be played repeatedly until you turn off the A-B repeat mode. -
Page 58: Programmed Playback
Advanced playback Programmed playback / Random playback 0–9 You can program the playback sequence of tracks on a VCD. Or you can set the unit to play tracks at random. ® For procedures applicable to audio / MP3 / WMA / JPEG / DivX CDs, go to page Notes: PLAY MODE... -
Page 59: Scene Angle
Scene angle / Title selection / DVD menu DVD MENU / / / ENTER PLAY ANGLE TOP MENU Changing the scene angle When playing back a DVD recorded with multi-angle scenes, you can select the scene angle that you prefer. Press ANGLE repeatedly until the preferred Press ANGLE during playback. -
Page 60: Soundtrack Language
Advanced playback Soundtrack language / Audio channel / Subtitle AUDIO SELECT SUBTITLE Selecting a soundtrack language Using subtitles You can select the soundtrack language when you play a When playing back a disc recorded with subtitles, you can select the subtitle language or turn the subtitle off. multilingual DVD. -
Page 61: Playback Information
Playback information / VCD playback control DISPLAY PLAY MODE ENTER Viewing the playback info Turning off the PBC function Press DISPLAY during playback. Press PLAY MODE in stop mode. DISPLAY PLAY MODE DVD mode Press to select “Mode”, then press Elapsed / remaining Elapsed / remaining time for current title... -
Page 62: Mp3, Wma, Jpeg, Divx ® And Audio Cd Operation
Use of CD-RW discs for recording MP3 files is not recommended. You must obtain any required permission from copyright owners to download or use copyrighted content. Toshiba can not and does not grant such permission. -
Page 63: Playing An Audio File
MP3, WMA, JPEG, DivX ® and Audio CD DVD MENU operation (continued) ENTER STOP PLAY TOP MENU PIC SIZE About the file browser Playing an audio file Load an MP3 / WMA / Audio CD in the disc slot. Operation status Scroll bar Filename of The file browser appears on-screen. - Page 64 Advanced playback ZOOM ENTER PAUSE STOP PLAY SKIP ANGLE Viewing a JPEG file Viewing a slide show If there are multiple JPEG files in the selected directory, Load a disc containing JPEG files in the disc you can view them in a slide show. For instructions on how slot.
- Page 65 MP3, WMA, JPEG, DivX ® and Audio CD operation (continued) ENTER STOP PLAY Playing DivX ® files DivX ® VOD content ® ® Load a disc containing DivX files in the disc ABOUT DIVX VIDEO: DivX is a digital video format slot.
-
Page 66: Mp3, Wma, Jpeg, Divx ® And Audio Cd Playback Modes
Advanced playback MP3, WMA, JPEG, DivX ® and Audio CD playback modes You can choose to repeat CD playback by track or the entire disc. You can also / / / program the file playback sequence or set the unit to play files at random. ENTER PLAY Note: These playback modes are only applicable during the current session. - Page 67 MP3, WMA, JPEG, DivX ® and Audio CD playback modes (continued) / / / ENTER PLAY Programming the playback sequence In the Option panel of the file browser, press Press to select “Program View”, then to select “Edit Mode”, then press ENTER. press ENTER.
-
Page 68: Function Setup
Function setup TV/DVD Customizing disc playback You can customize the disc playback settings to suit your preferences. / / / ENTER SETUP RETURN Configuring the disc playback settings In DVD mode, press SETUP during stop mode. Press to select an option setting, then press ENTER to apply and save it. - Page 69 Customizing disc playback (continued) Disc playback setup Option Description Go to page Menu Select the language for the DVD menu display. Subtitle Select the subtitle language for disc playback. DivX subtitle ® Select the subtitle language for DivX VOD playback. Audio Select the audio language for disc playback.
- Page 70 Function setup Disc playback setup (continued) Parental Menu : Off : Off : English TV Screen :16:9 Menu Parental E.B.L. : Off : Off : Off :English Display QSound Subtitle Set Password : On : English Subtitle :English QSound TV Screen Set Password : On : 4:3...
- Page 71 Customizing disc playback (continued) Disc playback setup (continued) Picture Mode Night Mode :Off Parental Menu E.B.L. : Off : Off : English The source content of a DVD can either be recorded in: Digital Out :Bitstream Subtitle TV Screen Set Password : 4:3 : English film format (images are recorded at 24 frames per...
- Page 72 Function setup EJECT ENTER RETURN Disc playback setup (continued) Password Parental Menu E.B.L. : Off : English : Off :Off Select this option to change the access password for the Password :Change QSound Subtitle TV Screen : On : English : 4:3 parental control setting.
-
Page 73: Power Return Feature
Power Return feature If the power is cut off while the TV/DVD is turned on, the “Power Return” feature will enable the TV/DVD to automatically turn on once power has been reconnected as long as the power cord remains connected. If there will be no power connection for an extended period or if the TV/DVD will not to be use for a long time, make sure to unplug the power cord from the wall outlet to prevent the TV/DVD from turning on in your absence. - Page 74 Others Troubleshooting (continued) Symptom Possible solution Go to page Disc playback • No disc is loaded. Playback does not start. • The disc may be dirty. Clean the disc. • The disc format is not supported. No picture. • The unit is not in DVD mode. •...
-
Page 75: Reception Disturbances
Reception disturbances Most types of television interference can be resolved by adjusting the height and position of the VHF/UHF antenna. Outdoor antennas are recommended for best results. The most common types of television interference are shown below. If one of these symptoms occurs when the TV/DVD is connected to a cable TV system, the disturbance may be caused by the local cable TV company broadcast. -
Page 76: Specifications
0.5 V (p-p), 75 , pin jack × 1 Headphone 3.5-mm stereo mini jack × 1 – (1) Remote control SE-R0305 for 19LV610U-T / 22LV610U-T / 26LV610U-T SE-R0316 for 22LV611U-T (2) Batteries (R03/AAA) Accessories (1) AC cord (1) Cleaning cloth (1) Owner’s manual (this booklet) -
Page 77: Limited United States Warranty
Limited United States Warranty LCD TV/DVD Combination – Depot Repair Warranty Toshiba America Consumer Products, L.L.C. (“TACP”) makes the following limited warranties to original consumers in the United States. THESE LIMITED WARRANTIES EXTEND TO THE ORIGINAL CONSUMER PURCHASER OR ANY PERSON RECEIVING THIS LCD TV/DVD COMBINATION AS A GIFT FROM THE ORIGINAL CONSUMER PURCHASER AND TO NO OTHER PURCHASER OR TRANSFEREE. - Page 78 OR CONSEQUENTIAL DAMAGES, SO THE ABOVE PROVISIONS MAY NOT APPLY TO YOU For additional information, visit TACP’s website: UNDER SUCH CIRCUMSTANCES. www.tacp.toshiba.com ALL WARRANTIES IMPLIED BY THE LAW OF ANY STATE OF THE U.S.A., INCLUDING THE IMPLIED WARRANTIES OF MERCHANTABILITY AND...
- Page 79 Downloaded from www.Manualslib.com manuals search engine...
- Page 80 ColorStream and TheaterWide are registered trademarks of Toshiba America Consumer Products, L.L.C. Printed in China 49.76A01.002 Downloaded from www.Manualslib.com manuals search engine...