
Related Manuals for Delta Sidekick 36-235


Summary of Contents for Delta Sidekick 36-235
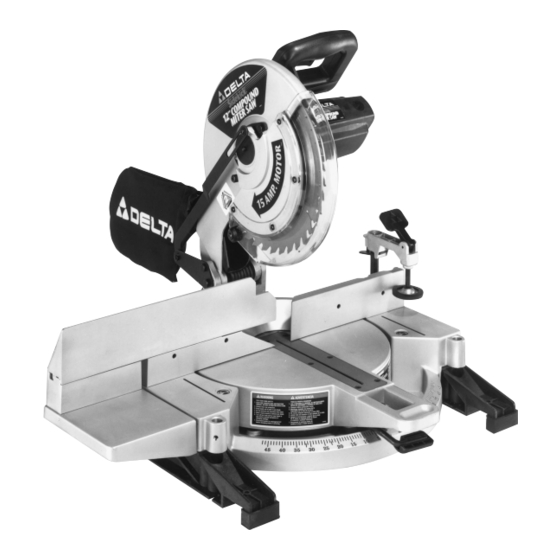
- Page 1 Sidekick 12 Compound Miter Saw (Model 36-235) REVISED 6-30-00 PA RT NO. 1349865 'Delta International Machinery Corp. 1999...
-
Page 2: Table Of Contents
TA B L E O F C O N T E N T S SAFETY RULES ................3 ADDITIONAL SAFETY RULES F O R C O M P O U N D MITER S AW S . -
Page 3: Safety Rules
If you have any questions relative to a particular applica- tion, DO N O T use the machine until you have first contacted Delta to determine if it can or should be performed on the product. -
Page 4: Additional Safety Rules F O R C O M P O U N D Miter S Aw S
ADDITIONAL SAFETY RULES F O R C O M P O U N D MITER S AW S 1 . W ARNING: U S E O N LY CROSS-CUTTING S AW 2 0 . NEVER lock the switch in the ON position. BLADES. -
Page 5: U N Packing A N D Cleaning
U N PACKING A N D CLEANING Your new compound miter saw is shipped complete in one carton. Carefully unpack the machine and all loose items from the carton. IMPORTA N T:D O N O T LIFT TH E MITER S AW B Y T H E S W I T C H H A N D L E O R TA B L E C O N T R O L H A N D L E A S THIS M AY C A U S E MIS- ALIGNMENT. -
Page 6: A S S E M B Ly Instructions
A S S E M B LY INSTRUCTIONS W ARNING: F O R Y O U R O W N SAFETY, DO N O T C O N N E C T T H E MITER S AW TO T H E P O W E R S O U R C E UNTIL T H E M A C H I N E I S C O M P L E T E LY A S S E M B L E D A N D Y O U H AV E R E A D A N D U N D E R S TO O D T H E ENTIRE O W N E R S MANUAL. -
Page 7: Assembling Extension Table And Fence Slide
2 . F i g . 7 , i l l u s t r a t e s t h e table (B) in the 90 degree s t r a i g h t c u t - o ff p o s i t i o n . NOTE: Table lock lever (A) must be depressed when rota t i n g ta b l e . - Page 8 4 . Assemble the fence slide support (E) Fig. 7D, to the extension table (B) using the two 1-1/4 long hex head screws, 5/16 lockwashers and 5/16 flat washers (F). Bring screws up through the two holes (G) in table exten- sion and thread them into the two threaded holes (H) on bottom of fence slide support.
-
Page 9: Assembling Work Clamp
9 . Position lock handle (M) Fig. 7J, on locking stud and replace screw and spring (L) that were removed in STEP 7 . NOTE: Lock handle (M) is spring-loaded and can be re- p o s i t i o n e d b y l i fting up on handle and repositioning it on stud located underneath handle. -
Page 10: Fastening Machine To Supporting Surfa C E
F i g . 11 FASTENING MACHINE TO SUPPORTING SURFA C E Before operating your compound miter saw, make sure it is firmly mounted to a workbench or other supporting surface. Four holes (A) F i g . 11, are provided for fastening the saw to a support- ing surface. -
Page 11: Connecting S Aw To P O W E R S O U R C E
CONNECTING S AW TO P O W E R S O U R C E P O W E R CONNECTIONS A separate electrical circuit should be used for your tools. This circuit should not be less than #12 wire and should be protected with a 20 Amp time lag fuse. -
Page 12: O P E R Ating Controls A N D Adjustments
IMPORTA N T:W e suggest that when the miter saw is not in use, the switch be locked in the OFF position using a padlock (B), as shown in Fig. 16. Available as an acces- sory from Delta is the 50-325 padlock, shown at (B). Fig. 16 R O TATING TABLE FOR MITER CUTTING 1 . -
Page 13: Adjusting Clamping Action Of Table Locking Mechanism
Fig. 18 3 . The compound miter saw is equipped with spring-loaded positive stops at the 90 degree straight cut-off position and at the 15, 22.5, 31.62 and 45 degrees right and left m i t e r p o s i t i o n s . These spring-loaded positive stops can be felt as you are rota t i n g t h e ta b l e . -
Page 14: Adjusting Sliding Fit Between Movable Table And Base
ADJUSTING SLIDING FIT BETWEEN MOVABLE TABLE AND BASE If it ever becomes necessary to adjust the sliding fit between the movable table and the base, turn nut (A) Fig. 20, clockwise to increase or counterclockwise to d e c r e a s e t h e s l i d i n g f i t . This adjustment should not be t o o t i g h t t h a t i t r e s t r i c ts t h e r o tating movement of the t a b l e o r t o o l o o s e t h a t i t a ff e c ts the accuracy of the saw. -
Page 15: Table Hazard Area
TABLE HAZARD A R E A W ARNING: THE A R E A INSIDE THE T W O R E D LINES ( A ) FIG. 23, ON THE TABLE I S DESIGNATED A S A HAZ- A R D ZONE. NEVER PLACE Y O U R H A N D S INSIDE THIS A R E A WHILE THE TO O L I S BEING O P E R ATED. -
Page 16: Tilting Cuttinghead For Bevel Cutting
TILTING CUTTINGHEAD FOR BEVEL CUTTING IMPORTA N T:W H E N TILTING THE CUTTINGHEAD F O R BEVEL CUTTING, THE SLIDING FENCE M U S T FIRST B E M O V E D TO T H E LEFT TO PROVIDE C L E A R A N C E F O R T H E B L A D E A N D GUARD. -
Page 17: Adjusting Sliding Fence
ADJUSTING SLIDING FENCE Fig. 28A Fig. 28B 1 . The high sliding fence (A) Fig. 28A, provides support for extra large workpieces used with your saw and should always be set as close as possible to the saw blade. When miter cutting (blade set 90 degrees to the table and at an angle to the right or left), the fence should be set all the way to the right, as shown in Fig. -
Page 18: Adjusting 90 And 45 Degree Bevel Positive Stops
ADJUSTING 9 0 AND 45 DEGREE BEVEL POSITIVE STO P S 1 . D I S C O N N E C T T H E S AW F R O M T H E P O W E R SOURCE. -
Page 19: Adjusting Sliding Fit Between Trunnion And Bevel Bracket
Fig. 36 ADJUSTING SLIDING FIT BETWEEN TRUNNION AND BEVEL B R A C K E T A fter a long period of time it may become necessary to adjust the sliding fit between the trunnion (A) Fig. 36, and the bevel bracket (B) by tightening adjusting nut (C) using a 3/4 socket wrench. -
Page 20: Adjusting Tension Of Cuttinghead Return Spring
Fig. 37 ADJUSTING TENSION OF CUTTINGHEAD RETURN SPRING The tension of the cuttinghead return spring has been adjusted at the factory in order that the cutting- head returns to the up position after a cut has been made. If it ever becomes necessary to re-adjust the spring tension, proceed as follows: 1 . -
Page 21: Tool Storage
TO O L STO R A G E A clip is provided on the rear of the saw and provides a con- venient storage area for wrench (A) Fig. 39, as shown. Fig. 39 ADJUSTING BLADE G U A R D Fig. -
Page 22: Typical O P E R Ations And Helpful Hints
TYPICAL O P E R ATIONS AND HELPFUL HINTS 1 . Before cutting, make certain the cutting arm and t able are at their correct settings and firmly locked in place. 2 . Before cutting, determine that the workpiece is the right size for the saw. -
Page 23: Auxiliary Wood Fence
Fig. 43 AUXILIARY WOOD FENCE When performing multiple or repetitive cut-off operations that result in small cut-off pieces, one inch or less, it is possible for the saw blade to catch the cut-off pieces and project them out of the machine or into the blade guard and housing, possibly causing damage or injury. -
Page 24: Cutting Bowed Material
CUTTING BOWED MATERIAL RIGHT W R O N G Fig. 46 Fig. 47 1 . When cutting flat pieces, first check to see if the 2 . If the material is positioned the wrong way, as shown material is bowed. If it is, make sure the material is posi- in Fig. -
Page 25: Cutting Crown Moulding
CUTTING CROWN MOULDING One of the many features of your saw is the ease of cutting crown moulding. The following is an example of cutting both inside and outside corners on 53/38 degree wall angle crown moulding. NOTE: When cutting 45 degree wall angle crown moulding, the following procedure for inside and out- side corners is the same with the exception that the bevel position will always be at 30 degrees and the miter position... -
Page 26: Maintenance Changing The Blade
MAINTENANCE CHANGING THE BLADE W ARNING: USE O N LY CROSS-CUTTING S AW BLADES. DO N O T U S E B L A D E S WITH D E E P GULLETS A S THEY C A N DEFLECT A N D C O N TA C T GUARD. 1 . -
Page 27: Brush Inspection And Replacement
BRUSH INSPECTION AND REPLACEMENT CAUTION: B E F O R E INSPECTING BRUSHES, DISCONNECT THE MACHINE F R O M THE P O W E R SOURCE. Brush life varies. It depends on the load on the motor. Check the brushes aft e r t h e f i r s t 5 0 hours of use for a new machine, or after a new set of brushes has been insta l l e d . -
Page 28: W A R R A N T Y
A l l D e l ta Machines and accessories are manufactured to high quality standards and are serviced by a network of Porter-Cable/Delta Factory Service Centers and Delta Authorized Service St a t i o n s . To obta i n additional information regarding your Delta quality product or to obta i n pa r ts, service, warranty assistance, or the location of the nearest service outlet, please call 1-888-848-5175.