Table of Contents
Advertisement
Available languages
Available languages
Charcoal/Wood Grill & Smoker
OWNER'S MANUAL
ASSEMBLY AND OPERATING IN STRUC TIONS
MANUAL DEL PROPIETARIO
INSTRUCCIONES DE ARMADO Y OPERACIÓN
SAVE THIS MANUAL FOR FUTURE REFERENCE
GUARDE ESTE MANUAL PARA REFERENCIA FUTURA
WARNING
NOTICE TO INSTALLER:
LEAVE THESE INSTRUCTIONS WITH THE GRILL
READ AND FOLLOW ALL WARNINGS AND INSTRUCTIONS IN THIS MANUAL
OWNER FOR FUTURE REFERENCE
TO AVOID PERSONAL INJURY OR PROPERTY DAMAGE.
AVISO PARA EL INSTALADOR:
ADVERTENCIA
ENTREGUE ESTAS INSTRUCCIONES AL
PROPIETARIO DE LA PARRILLA PARA REFERENCIA
LEA Y SIGA TODAS LAS ADVERTENCIAS E INSTRUCCIONES EN ESTE
MANUAL PARA EVITAR LESIONES PERSONALES O DAÑOS MATERIALES.
FUTURA
TRAILMASTER
LIMITED EDITION
SERIAL
#00125
FOR OUTDOOR USE ONLY
Advertisement
Table of Contents

Related Manuals for Brinkmann Trailmaster


Summary of Contents for Brinkmann Trailmaster
- Page 1 AVISO PARA EL INSTALADOR: ADVERTENCIA ENTREGUE ESTAS INSTRUCCIONES AL PROPIETARIO DE LA PARRILLA PARA REFERENCIA LEA Y SIGA TODAS LAS ADVERTENCIAS E INSTRUCCIONES EN ESTE MANUAL PARA EVITAR LESIONES PERSONALES O DAÑOS MATERIALES. FUTURA TRAILMASTER LIMITED EDITION SERIAL #00125 FOR OUTDOOR USE ONLY...
- Page 2 IMPORTANT SAFETY WARNINGS WE WANT YOU TO ASSEMBLE AND USE YOUR GRILL AS SAFELY AS POSSIBLE. THE PURPOSE OF THIS SAFETY ALERT SYMBOL IS TO ATTRACT YOUR ATTENTION TO POSSIBLE HAZARDS AS YOU ASSEMBLE AND USE YOUR GRILL. WHEN YOU SEE THE SAFETY ALERT SYMBOL, PAY CLOSE ATTENTION TO THE INFORMATION WHICH FOLLOWS! READ ALL SAFETY WARNINGS AND INSTRUCTIONS CAREFULLY BEFORE ASSEMBLING AND OPERATING YOUR GRILL.
-
Page 3: California Proposition 65 Warning
• We advise that a fire extinguisher be on hand. Refer to your local authority to determine proper size and type of fire extinguisher. • Accessory attachments not manufactured by The Brinkmann Corporation for this particular product are not recommended and may lead to personal injury or property damage. -
Page 4: Assembly Instructions
ASSEMBLY INSTRUCTIONS READ ALL SAFETY WARNING & ASSEMBLY INSTRUCTIONS CAREFULLY BEFORE ASSEMBLING OR OPERATING YOUR GRILL. WE RECOMMEND TWO PEOPLE WORK TOGETHER WHEN AS SEM BLING THIS UNIT. The following tools are required to assemble this Brinkmann ® Trailmaster ®... - Page 5 FOR COVERS, ACCESSORIES AND OTHER PRODUCTS, PLEASE VISIT US ONLINE AT: Inspect contents of the box to ensure all parts are included and undamaged.
- Page 6 PARTS BAG CONTENTS Make sure you have all items listed under PARTS LIST and PARTS BAG CONTENTS before you begin the installation process. Your Parts Bag will include: Qty. 48 M6 X 12 mm Bolts 28 M6 Nuts M12 Wheel Axle Nuts 16 M18 Washers M6 X 12 mm Bolts M6 Nuts...
- Page 7 Choose a good, cleared assembly area and get a friend to help you put your grill together. Lay card board down to protect grill finish and assembly area. Turn the grill on its side to begin assembly. Step 1 Remove the lid from the cooking chamber by removing hinge screws and sliding the hinge pins on the lid out of the hinges on the cooking chamber.
- Page 8 Note: With the help of a friend, turn the assembled grill upright. Try to minimize the stress to the legs. Step 5 Slide wheel axle through the holes in the wheel legs as shown. Step 6 Attach wheels to the wheel axle using two M12 wheel axle nuts.
- Page 9 Step 9 Grease Can Holder Insert grease can holder through the hole inside the cooking chamber on the left side to hang under the cooking chamber as shown. Step 10 Attach front table by sliding pegs into the tracks on the cooking chamber as shown. Step 11 Attach handle to the cooking chamber Handle...
- Page 10 Step 13 Assemble firebox by attaching firebox top and firebox bottom using six M6 X 12 mm bolts as shown. Step 14 Attach firebox air shutter inside the firebox using one M6 X 12 mm bolt and one M6 nut as shown. Step 15 Attach firebox lid stop to the firebox using one M6 X 12 mm bolt and one...
- Page 11 Step 16 Attach firebox to cooking chamber and firebox bracket using eight M6 X 12 mm bolts and two M6 nuts as shown. Step 17 Attach ash tray bracket to firebox using six M6 X 12 mm bolts and six M6 nuts as shown.
- Page 12 Step 19 Insert thermometer into the hole in the cooking chamber lid as shown. Step 20 Attach firebox lid handle to the firebox lid using two bolts and two nuts that came with the handle as shown. Step 21 Attach firebox lid and reattach cooking chamber lid by sliding the hinge pins into the lid hinges on the cooking chamber as shown.
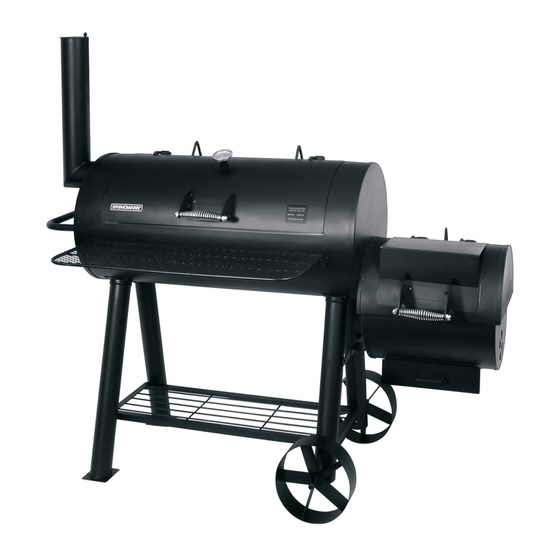
- Page 13 Trailmaster ® (Assembled) TRAILMASTER TRAILMASTER LIMITED EDITION LIMITED EDITION SERIAL SERIAL #00125 #00125 FOR OUTDOOR USE ONLY FOR OUTDOOR USE ONLY...
- Page 14 READ ALL SAFETY WARNINGS AND INSTRUCTIONS CAREFULLY BEFORE OPERATING YOUR GRILL. Curing Your Grill Prior to your first use of the Brinkmann Trailmaster, follow the in struc tions below carefully to cure your grill. Curing your grill will minimize damage to the exterior finish as well as rid the grill of paint odor that can impart unnatural flavors to the first meal prepared on your Brinkmann Trailmaster.
- Page 15 To protect your smoker from excessive rust, the unit must be cured periodically and covered at all times when not in use. A smoker cover can be ordered directly from Brinkmann by calling 800-468-5252. YOUR BRINKMANN TRAILMASTER IS NOW CURED AND...
-
Page 16: Operating Instructions
Place a charcoal grate in firebox. Place cooking grills in cooking chamber, then follow instructions below carefully to build a fire. You may use charcoal and/or wood as fuel in the Trailmaster (see “Adding Charcoal/Wood During Cooking” section of this manual). - Page 17 WARNING: Charcoal lighting fluid must be allowed to com plete ly burn off prior to closing firebox lid and cooking chamber door (approximately 20 minutes). Failure to do this could trap fumes from charcoal lighting fluid in smoker and may result in a flash-fire or explosion when lid or door is opened.
- Page 18 Step 2 Follow the instructions below carefully to build a fire. You may use charcoal and/or wood as fuel in the Trailmaster (see “Adding Charcoal/Wood During Cooking” section of this manual). NOTE: We recommend using charcoal that has been pre-treated with lighter fluid or a charcoal chimney starter.
- Page 19 IF USING LIGHTER FLUID, PROCEED TO STEP 8 If using pre-treated charcoal, follow all manufacturer’s warnings and instructions regarding the use of their product. Start with 8 pounds of charcoal on charcoal grates. Open the firebox air shutter approximately 1” to 2” and smokestack damper halfway. Step 7 With firebox lid and cooking chamber lid open, stand back and carefully light charcoal and allow to burn until covered with a light ash...
- Page 20 Adding Charcoal/Wood Additional charcoal and/or wood may be re quired to maintain or increase cooking tem per a ture. During Cooking Adding Charcoal/Wood in Firebox Step 1 Stand back and carefully open firebox lid. Use caution since flames can flare-up when fresh air suddenly comes in contact with fire.
- Page 21 • To protect your smoker from excessive rust, the unit must be properly cured and covered at all times when not in use. A grill cover may be ordered directly from Brinkmann by calling 800-468-5252. • Wash cooking grills and charcoal grates with hot, soapy water, rinse well and dry.
- Page 22 IMPORTANTES ADVERTENCIAS DE SEGURIDAD ES NUESTRO DESEO QUE ARME Y UTILICE SU PARRILLA EN LA FORMA MÁS SEGURA POSIBLE. EL PROPÓSITO DE ESTE SÍMBOLO DE ALERTA DE SEGURIDAD ES QUE USTED PRESTE ATENCIÓN A LOS POSIBLES PELIGROS CUANDO ARME Y UTILICE SU PARRILLA. ¡CUANDO VEA ESTE SÍMBOLO DE ALERTA DE SEGURIDAD, PRESTE ESPECIAL ATENCIÓN A LA INFORMACIÓN A CONTINUACIÓN! LEA DETENIDAMENTE TODAS LAS ADVERTENCIAS DE SEGURIDAD E INSTRUCCIONES ANTES DE ARMAR Y USAR LA PARRILLA.
- Page 23 • Recomendamos que tenga a mano un extinguidor de incendios. Consulte con la autoridad local para determinar el tamaño y tipo correctos. • No se recomienda usar accesorios no fabricados por The Brinkmann Corporation para este producto en particular ya que pueden causar lesiones personales o daños materiales.
- Page 24 INSTRUCCIONES DE ARMADO LEA DETENIDAMENTE TODAS LAS ADVERTENCIAS DE SEGURIDAD E INSTRUCCIONES ANTES DE ARMAR Y USAR LA PARRILLA. RECOMENDAMOS QUE ESTA UNIDAD SEA ARMADA POR DOS PERSONAS. Se necesitan las siguientes herramientas para armar esta parrilla Brinkmann ® Trailmaster ®...
- Page 25 PARA CUBIERTAS, ACCESORIOS Y OTROS PRODUCTOS, FAVOR DE VISITARNOS POR LA RED MUNDIAL EN: Inspeccione el contenido de la caja para verificar que todas las partes estén incluidas e intactas.
- Page 26 CONTENIDO DE LA BOLSA DE PARTES Verifique que tiene todos los artículos indicados en la LISTA DE PARTES y en el CONTENIDO DE LA BOLSA DE PARTES antes de comenzar con el proceso de instalación. La bolsa de partes incluirá lo siguiente: Cant.
- Page 27 Elija un lugar adecuado y despejado para armar la parrilla y pídale a un amigo que le ayude. Tienda cartón sobre el suelo para proteger el acabado de la parrilla y el área de armado. Coloque la parrilla de costado para comenzar el armado.
- Page 28 Nota: Con la ayuda de un amigo, de vuelta a la parrilla ensamblado. Trate de minimizar la tensión en las patas. Paso 5 Resbale el eje de rueda a través de los agujeros en las piernas con rueda como se muestra.
- Page 29 Sostenedor de la Lata de Grasa Paso 9 Inserte el sostenedor de la lata de grasa a través del agujero dentro del compartimiento para cocinar en el lado izquierdo para colgar bajo el compartimiento de cocinar como se muestra. Paso 10 Ate la mesa delantera por las clavijas en las pistas de el compartimiento para cocinar como se muestra.
- Page 30 Paso 13 Monte la caja de fuego atando la tapa de la caja de fuego y la parte inferior de la caja de fuego usando seis pernos M6 X 12 mm como se muestra. Paso 14 Ate el obturador del aire de la caja de fuego dentro de la caja de fuego usando un perno M6 X 12 mm y una tuerca M6 como se muestra.
- Page 31 Paso 16 Ate la caja de fuego al compartimiento para cocinar y al soporte de la caja de fuego usando ocho pernos M6 X 12 mm y dos tuercas M6 como se muestra. Paso 17 Ate el soporte de la bandeja de ceniza a la caja de fuego usando seis pernos M6 X 12 mm y seis tuercas M6 como se muestra.
- Page 32 Paso 19 Inserte el termómetro en el agujero en la tapa de el compartiemiento para cocinar como se muestra. Paso 20 Ate la manija de la tapa de la caja de fuego a la tapa de la caja de fuego usando dos pernos y dos tuercas que vino con la manija como se muestra.
- Page 33 Trailmaster ® (Armado) TRAILMASTER TRAILMASTER LIMITED EDITION LIMITED EDITION SERIAL SERIAL #00125 #00125 FOR OUTDOOR USE ONLY FOR OUTDOOR USE ONLY...
- Page 34 LEA CUIDADOSAMENTE TODAS LAS ADVERTENCIAS DE SEGURIDAD E INSTRUCCIONES ANTES DE USAR LA PARRILLA. Curado de la Parrilla Antes de usar el Brinkmann Trailmaster, siga las instrucciones a continuación para curarla. El curado de la parrilla reducirá al mínimo los daños al acabado exterior y eliminará...
- Page 35 Se puede ordenar una cubierta para el ahumador directamente de Brinkmann llamando al 800-468-5252. AHORA SU BRINKMANN TRAILMASTER ESTÁ CURADO Y LISTO PARA EL USO...
- Page 36 Puede usar carbón y/o leña como combustible en la Parrilla Trailmaster (ver la sección “Cómo agregar carbón/ leña mientras cocina” de este manual). Paso 2 Coloque una lata (lata de sopa) dentro del sujetador de la gaveta para grasa.
- Page 37 ADVERTENCIA Se debe permitir que el fluido de encendido se consuma por completo antes de cerrar la tapa de fogón y la puerta de la cámara de cocción (aproximadamente 20 minutos). De lo contrario, se pueden atrapar vapores del fluido en la parrilla y causar un incendio repentino o explosión al abrir las tapa o puerta.
- Page 38 Paso 2 Siga cuidadosamente las instrucciones a continuación para encender la parrilla. Puede usar carbón y/o leña como combustible en la parrilla Trailmaster (ver la sección “Cómo agregar carbón/leña mientras cocina” de este manual). NOTA: Recomendamos el uso de carbón que haya sido previamente tratado con líquido encendedor o un arrancador carbón chimenea.
- Page 39 No se requiere mucha leña para lograr un buen sabor ahumado. Una cantidad recomendada para el ahumador Trailmaster es 5 ó 6 trozos o astillas de leña. Experimente usando más leña para obtener un sabor ahumado más fuerte o menos madera para un sabor más suave.
- Page 40 Cómo Agregar Carbón/Leña Puede ser necesario añadir carbón y/o leña para mantener o aumentar la temperatura de cocción. Mientras Cocina Cómo Agregar Carbón/Leña en el Fogón Paso 1 Apártese y abra cuidadosamente la tapa del fogón. Sea precavido ya que pueden producirse llamaradas cuando el aire fresco hace contacto repentino con las llamas.
- Page 41 • Para proteger su ahumador contra la oxidación excesiva, la unidad debe curarse correctamente y mantenerse cubierta todo el tiempo cuando no la esté usando. Se puede ordenar una cubierta para el ahumador Trailmaster directamente de Brinkmann llamando al 800-468-5252.
- Page 42 Durante un año a partir de la fecha de compra, The Brinkmann Corporation garantiza al comprador original que el Ahumador Trailmaster está libre de defectos de materiales o mano de obra. Las obligaciones de The Brinkmann Corporation con respecto a esta garantía se limitan a lo siguiente:...