Table of Contents
Advertisement
Instructions for use
GB
English, 1
LTF 11M113 7C
Contents
Installation, 5-6-7
Connecting the electricity and water supplies
Transportation
Overall view
Loading the racks, 9-10
Adjusting the upper rack
Start-up and use, 11
Wash cycles, 12
Table of wash cycles
Cutting off the water and electricity supplies
Troubleshooting, 16
Guarantee, 18
DISHWASHER
Advertisement
Table of Contents

Related Manuals for Hotpoint LTF 11M113 7C


Summary of Contents for Hotpoint LTF 11M113 7C
-
Page 1: Table Of Contents
Technical data Switching the appliance on for the first time Advice regarding the first wash cycle Transportation Description of the appliance, 8 Overall view LTF 11M113 7C Control panel Loading the racks, 9-10 Lower rack Upper rack Cutlery basket Adjusting the upper rack... -
Page 2: Product Fiche
Product Fiche Product Fiche HOTPOINT ARISTON Brand LTF 11M113 7C Model Rated capacity in standard place settings (1) Energy efficiency class on a scale from A+++ (low consumption) to D (high consumption) 293.0 Energy consumption per year in kWh (2) 1.03... -
Page 3: Precautions And Safety Advice
Precautions and safety advice • The packaging material should not be used as a toy: The appliance was designed and manufactured in it can become a choking or suffocation hazard. compliance with current international safety standards. The following information has been provided for safety If your family includes children: reasons and should therefore be read carefully. -
Page 4: Recycling & Disposal Information
Recycling & Disposal Information As part of Hotpoint’s continued commitment to helping the environment, Hotpoint reserves the right to use quality recycled components to keep down customer costs and minimise material wastage. Please dispose of packaging and old appliances carefully. -
Page 5: Positioning And Levelling
‘L’ from the use of non-original spare parts. Electrical Connection Changing the Mains Lead Before inserting the plug into the electrical socket, make sure A lead can be ordered from Hotpoint Service that: UK: 08709 066 066 or Republic of Ireland: 1850 302 220 • the socket is earthed and complies with current regulations; - If you have damaged the existing lead or require a longer one • the socket can withstand the maximum load of the appliance,... -
Page 6: Installation, 5
The Company shall not be held responsible for any If the inlet hose is not long enough, contact a specialist incidents that occur if these regulations are not observed. (see Assistance) store or an authorised technician The water pressure must be within the values indicated Anti-condensation strip (see Installation). -
Page 7: Switching The Appliance On For The First Time
Switching the appliance on for the first time Ensure the drain hose is securely attached, to prevent it coming away while the machine is in use and Advice regarding the first wash cycle causing a flood. After the installation, remove the stoppers from the racks and the retaining elastic elements from the upper rack, if any. -
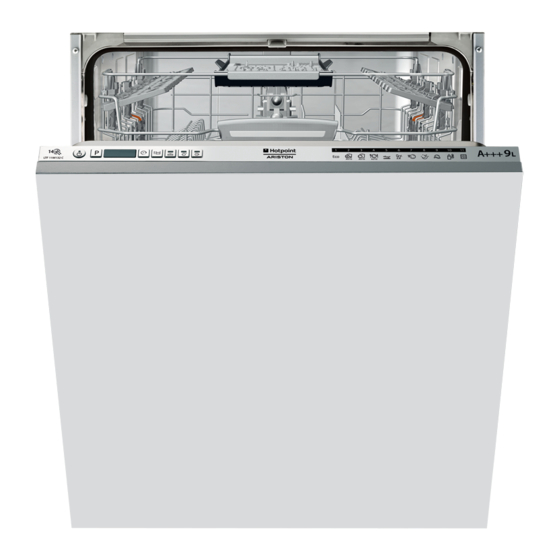
Page 8: Description Of The Appliance
Description of the appliance Overall view Upper rack Top sprayer arm Tip-up compartments Rack height adjuster Lower rack Bottom sprayer arm Washing filter Salt dispenser Detergent and rinse aid dispenser and Active Oxygen device* 10. Data plate Control panel Control panel Delayed start button Select wash cycle button Multi-functional tablets button and indicator light ON-OFF/Reset button Salt indicator light Extra dry button and indicator light... -
Page 9: Loading The Racks
Loading the racks Tips Several dishwasher models are fitted with tip-up sectors Before loading the racks, remove all food residues from the They can be used in a vertical position when arranging dishes crockery and empty liquids from glasses and containers. No or in a horizontal position (lower) to load pans and salad bowls preventive rinsing is needed under running water. -
Page 10: Upper Rack
Tip-up compartments with adjustable position The upper rack can be adjusted for height based on The side tip-up compartments can be positioned at three requirements: high position to place bulky crockery in the lower different heights to optimize the arrangement of crockery inside rack and low position to make the most of the tip-up dispensers/ the rack. -
Page 11: Start-Up And Use
Start-up and use Measuring out the detergent Starting the dishwasher 1. Turn the water tap on. A good wash result also depends on the correct amount of detergent being used. Exceeding the stated 2. Open the door and press ON-OFF button: the ON/OFF amount does not result in a more effective wash and indicator lights, options and the display come on. -
Page 12: Wash Cycles
Wash cycles Wash-cycle data is measured under laboratory conditions according to European Standard EN 50242. Based on the different conditions of use, the wash-cycle duration and data can change. The number and type of wash cycles and options may vary depending on the dishwasher model. Wash cycle Approximate Water Energy which Wash cycle Options duration of wash consumption... -
Page 13: Special Wash Cycles And Options
Special wash cycles and Options Notes: Multi-functional tablets (Tabs) Optimum performance levels when using the “Fast" and "Express This option optimises washing and drying results. 30’” cycles can be achieved by respecting the specified number When using multi-functional tablets, press the MULTI- of place settings. FUNCTIONAL TABLETS button; the corresponding indicator light/symbol will light up. If the button is pressed again, the To reduce consumption even further, only run the dishwasher option will be deselected. when it is full. -
Page 14: Rinse Aid And Refined Salt
Rinse aid and refined salt Switch on and off the dishwasher using the ON/OFF button. Press Only use products which have been specifically designed and hold the P button for a few seconds until you hear a beep. for dishwashers. Switch on the dishwasher with the ON/OFF button, the set level Do not use table/industrial salt or washing-up liquid. appears on the display (water softener set to medium level). -
Page 15: Care And Maintenance
Care and maintenance Shutting off the water and electricity Cleaning the filters supplies The filter assembly consists of three filters which remove food residues from the washing water and then recirculate the water. • Turn off the water tap after every wash cycle to avoid leaks. They should be cleaned if you wish to achieve the best results • Always unplug the appliance when cleaning it and when in every wash. -
Page 16: Troubleshooting
Troubleshooting Whenever the appliance fails to work properly, check for a solution from the following list before calling for Assistance Problem: Possible causes / Solutions: • Switch off the appliance by pressing the ON/OFF button, switch it back on after approximately The dishwasher does not start or one minute and reset the program. cannot be controlled. • The appliance has not been plugged in properly. •... -
Page 17: After-Sales Service
After Sales Service After Sales Service Appliance Registration No one is better placed to care for your Hotpoint We want to give you additional benefits of Hotpoint appliance during the course of its working life than ownership. To activate your free 5 year parts guarantee us - the manufacturer. -
Page 18: Guarantee
5 Year Parts Guarantee Hotpoint also offers you a free 5 year parts guarantee. This additional guarantee is conditional on you registering your appliance with us and the parts being fitted by one of our authorised engineers. There will be a charge for our engineer’s time. - Page 20 195111967.02 05/2013 jk - Xerox Fabriano...