Table of Contents

Related Manuals for Sony Effio E


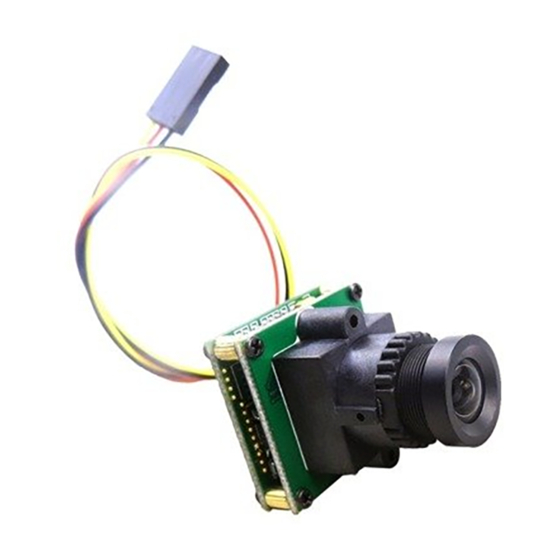
Summary of Contents for Sony Effio E
- Page 1 Sony Effio E Surveillance Camera (Built-in OSD) USER’S MANUAL Applicable for: Standard Cameras, Dome Cameras, Waterproof IR Cameras Thank you for purchasing our products. Please read the manual carefully before operating Version: 412710V01 9#...
- Page 2 The limited stated: The information included in this article is according to the current edition content establishment, regarding this contains, the content doesn’t make any statement or the guarantee. In addition this article will possibly not contain the information which will be changed, without notice situation.
-
Page 3: Safety Precaution
Safety Precaution This symbol means that there might exist uninsulated dangerous voltage inside the case, be careful of electric shock. This symbol reminds you to pay attention to important operation maintenance instructions accompanied information. Warning n order to prevent damage caused by fire or electric shock, please do not put cameras exposed in the moist environment or rainwater. - Page 4 Notes Do not make the products under great impact or stay away from strong electromagnetic interference and vibration. There are some sophisticated parts inside the camera, therefore, during transportation and installation, please avoid the damage cause by stress or severe vibration. For the sake of safety, please do not switch on power before accomplishing all installation.
-
Page 5: Table Of Contents
Contents Ⅰ、Features ................7 Ⅱ、InterfaceFunction Introduction ........9 2.1 Interface Function Description ........ 9 Ⅲ、OSD ................10 3.1 Lens type ............... 11 3.2 Shutter / AGC ............11 3.3 White Balance ............13 3.4 Backlight compensation......... 14 3.5 Image adjustment ........... 14 3.6 Adaptive Tone Reproduction ......... - Page 6 3.16 Exit/Save ............23 IV、Technical Specification ..........24 V、 FAQ ................26 Page6of27...
-
Page 7: Ⅰ、Features
Ⅰ、Features 1、 SONY CCD New Generation SONY CCD Adopting the latest Second-generation high-sensitive CCD and DSP, it can receive clear and lucid images even at circumstances with very low illumination. 2、 Hi-resolution Video Resolution Color horizontal resolution can reach 650TVL, B/W horizontal resolution reach 700TVL. - Page 8 appears completely. 7、 (PRIVACY)PRIVACY ZONES multi-district establishment function To carry on the privacy protection in the public region, stemming from the protection by the monitoring either the environment privacy, some special areas or the phantom will camouflage through the privacy the black block to camouflage the image, achieves the privacy protection goal.
-
Page 9: Ⅱ、Interfacefunction Introduction
Ⅱ、Interface Function Introduction 2.1 Interface Function Description This key is Enter key, used to enter and exit the menu ENTER operations, which needs to determine. With the UP and DOWN cursor keys to move up and UP/DOWN down the menu options. With the LEFT, RIGHT keys move around and modify LEFT/RIGHT the parameters of the activities of the menu options. -
Page 10: Ⅲ、Osd
Ⅲ、OSD Press the "OK" button for 2 seconds, the camera will pop up the main menu system (Figure 1) SETUP MENU LENS MANUAL SHUTTER/AGC AUTO WHITE BAL BACKLIGHT PICT ADJUST MOTION DET NEXT EXIT SAVE ALL SETUP MENU PRIVACY DAY/NIGHT AUTO CAMERA ID SYNC... -
Page 11: Lens Type
3.1 Lens type There are 2 types of lenses, respectively: DC lens (DC drive lens), video camera (manual lens). Users can select the lens type according to the using the camera. Press the "left" or "right" button on to choose the lens. - Page 12 AOTU SETUP HIGHT LUMINANCE MODE AUTO IRIS BRIGHTNESS 0---------------255 LOW LUMINANCE MODE BRIGHTNESS x0.50 RETURN High brightness mode has the two choices: "automatic shutter + auto iris, auto iris". User can select according to the lens equipped correspondingly. When using a fixed lens, user must select "Auto Shutter + auto iris"...
-
Page 13: White Balance
3.3 White Balance White balance can be set to ATW, PUSH, USER1, USER2, ANTI CR, MANUAL or PUSH LOCK. ATW (Auto Tracking White balance) and PUSH (Full pull-in) are continuously monitoring/analyzing the color temperature of the incoming light and correcting the white balance. ATW limits the color temperature range at about 2,500˚K~8,500˚K to reduce the excessive compensation for the big object which has a single color. -
Page 14: Backlight Compensation
3.4 Backlight compensation Backlight mode In the "Backlight Compensation" menu, press the "left" "right" to select "Backlight compensation, brightness compensation, closed". Users can select the appropriate backlight mode, according to the actual needs. 3.5 Image adjustment PICT ADJUST MIRROR BRIGHTNESS 0-255 CONTRAST 0-255... -
Page 15: Adaptive Tone Reproduction
3.6 Adaptive Tone Reproduction The ATR (Adaptive Tone Reproduction) function provides gradation compensation to improve the contrast of subjects whose gradation has been lost in cases where, for instance, both low-luminance areas and high-luminance areas exist in the same picture. LUMINANCE CONTRAST RETURN... - Page 16 Detection sensitivity Set motion detection sensitivity, the greater the value the higher the sensitivity, 0-127 adjustable. Block display There are "open" / "off" / "set" of three options. Select "On", if there is a moving picture, the box icon will be displayed; select "Off" does not appear;...
-
Page 17: Privacy Zone
Back When the setup is complete, press the "up" and "down" key to move the cursor to the "Back". Then, click "OK" button to return to the implementation for the appropriate functions. 3.8 Privacy zone In the "privacy shield" menu, press the "left" "right" to select "On". -
Page 18: Day/Night
Up, down, left and right set Press the "left" and "right" key to set the level and width of the fixed detection zone, the above side is as the benchmark for the below zone, 0~288 adjustable. The left side is as the benchmark for the right zone, 0~468 adjustable. - Page 19 DAY/NIGHT BURST DELAY CNT 0-255 DAY—NIGHT 0-255 NIGHT—DAY 0-255 RETURN Back Back Pulse burst signal: on and off, two options. Delay Control With this setting the camera achieves the delay time of the transferring: color to black/white or black/white to color. Conversion between the colors is through controlling of the camera’s brightness sensor of the scene.
- Page 20 adjustable. Note: Set the "Day - Night Set" and "Night - Day set" is to prevent the frequent changes in light caused by switching the camera has been in a state of users. On the choice of the value, do not set to the same value.
- Page 21 (1) Pulse Set the pulse switch, the default value: Off. 3.10 NR In the "noise reduction" menu click "OK" button to enter the "noise reduction" sub-menu, you can set the corresponding parameters. Noise reduction is in the case of very low light reduction caused by low-light point of the picture noise to enhance the signal to noise ratio (S / N) and image clarity, and the camera in low light conditions catches clearly sharpness image, the quality can be guaranteed.
-
Page 22: Camera Identification Code
Back When the setup complete, click "OK" button to return to the implementation for the appropriate functions. 3.11 Camera identification code In the "functional camera code" menu, press the "left" "right" to select "On" At this point the camera image will display the name of executive function. -
Page 23: Synchronous Mode
"Return" is the end of the name edit to return to the previous menu. 3.12 Synchronous Mode Synchronized pattern default for internal synchronization 3.13 Languages Chinese, Japanese, English, French, Russian, German, Spanish, Portuguese eight language selections. 3.14 Camera replacement Chooses this item, then presses confirms the key, all parameters will restore the leaving the plant default value. - Page 24 IV、Technical Specification Function Imaging Sensor 1 / 3" Sony Effio E PAL:976(H)×582(V) ; Pixel NTSC:976(H)×494(V) Signal System PAL/ NTSC Syn. System Internal Synchronization PAL:1/50~1/100000s; Shutter speed NTSC:1/60~1/100000s S/N Ratio More than 50dB(AGC OFF) Video Output 1.0Vp-p, 75 ohms Horizontal resolution Color: 650TVL, B/W: 700TVL Color0.1Lux(F1.2,50IRE,AGC ON)
- Page 25 Backlight Compensation 0~3 adjustable PRIVACY 1~8 Zones Privacy Zone Color Color 0~Color 7 optional Off/On/Auto WDR Sensitivity 0~10 adjustable On / Off (multi-sensitivity settings, alarm time Motion Detection optional) Alarm Display Icon ATW, PUSH, USER1, USER2, ANTI CR, MANUAL or PUSH LOCK Image Freeze On/Off Special...
- Page 26 V、 FAQ . Q: No image after installation? a. Check to connect the power supply correctly, whether the indicating led is always on or not; b. Check the video cable, make sure it is workable. c. Check if the monitor has been open. 2.
- Page 27 b. Please check if the lens is clean. Page27of27...