HP rx3000 Series User Manual
Ipaq rx3000 series mobile media companion
Hide thumbs
Also See for rx3000 Series:
- User manual (297 pages) ,
- Frequently asked questions manual (60 pages) ,
- Function manual (14 pages)

Related Manuals for HP rx3000 Series


Summary of Contents for HP rx3000 Series
- Page 1 User’s Guide HP iPAQ rx3000 series Mobile Media Companion Document Part Number: 364351-002 August 2004...
- Page 2 The warranties for HP products are set forth in the express limited warranty statements accompanying such products. Nothing herein should be construed as constituting an additional warranty.
-
Page 3: Table Of Contents
1 Getting to Know Your HP iPAQ Using the Stylus ....... . 1–5 Setting the Date and Time . - Page 4 Capturing ........5–3 HP Photosmart Camera ..... . . 5–3 User’s Guide...
- Page 5 HP Image Zone for PCs ......5–23 HP Image Transfer ......5–25 Printing.
- Page 6 Digital Media--not Copy-Protected ... . . 6–16 Copy-Protected Music (.wma format) ... 6–18 Using NevoMedia Server......6–19 Understanding the NevoMedia Server Options.
- Page 7 Currently Playing......6–42 Playing Digital Media on My HP iPAQ ... . 6–43 Playing Local Media (Local Media Mode) .
- Page 8 Playing Music ......6–64 Navigating the Media Control Music Folders ..6–65 Controlling Music Play .
- Page 9 Express Learning ......6–83 Adding and Deleting Pages ....6–84 Setting Up Favorites.
- Page 10 Automatically Connecting to a Network ..8–3 Manually Entering New Network Settings ..8–4 Searching for Networks to Access....8–7 Managing Wireless Network Settings .
- Page 11 Establishing a Serial Connection....9–18 Joining a Personal Area Network ....9–18 Establishing a Cell Phone Partnership... 9–19 Working with Files.
- Page 12 Viewing the Content of Memory Cards ... . . 11–4 12 Troubleshooting Common Problems......12–1 ActiveSync .
- Page 13 Contents User’s Guide xiii...
-
Page 14: Getting To Know Your Hp Ipaq
You can find detailed information for using these programs in the Help files on your HP iPAQ. To access these Help files, from the Start menu, tap Help and select a program. In addition, Microsoft Pocket PC Basics provides instructions on operating the HP iPAQ. - Page 15 Flash Player > Help. Tap Start > Help > iPAQ Mobile Media. Tap Start > Help > Nevo. Tap Start > Help > HP Image Zone. Tap Start > Help > Photosmart. Tap Start > Settings > System tab > Self Test.
- Page 16 Be sure you install ActiveSync on your computer before connecting the desktop cradle and HP iPAQ to your computer. Perform calculations and convert currency. Schedule appointments, meetings, and other events, and set an alarm to remind you of the appointments.
- Page 17 Internet. Create new documents or view and edit Word documents created on your computer. Sign up to get MSN services on your HP iPAQ, such as MSN Hotmail and MSN Messenger. Obtain quick access to settings for the backlight, clock, memory, power, regional settings, Launch page or Today screen, password, sounds and notifications, etc.
-
Page 18: Using The Stylus
Using the Stylus Your HP iPAQ comes with a stylus that you should use to tap or write on your screen. Ä CAUTION: To prevent damage to your HP iPAQ screen, never use any device other than the stylus that comes with it or an approved replacement to tap or write on the screen. -
Page 19: Setting The Time For Home And Locations You Are Visiting
You need to reset your time zone, time, and date if: ■ The location time (Home or Visiting) needs to be changed. ■ All power to the HP iPAQ is lost, which removes all saved settings. ■ You perform a full reset of your HP iPAQ. -
Page 20: Resetting The Unit
■ After installing a new application. ■ If your HP iPAQ “locks up.” Follow these steps to save data and reset your HP iPAQ: 1. Press the iTask 2. Tap and hold any application in the list. User’s Guide Getting to Know Your HP iPAQ for more information. - Page 21 3. Tap Close All Tasks. 4. Locate the recessed Reset button on the bottom of your HP iPAQ. 5. Use the stylus to lightly press the Reset button. The HP iPAQ restarts and displays the Launch Page or traditional Today screen.
-
Page 22: Performing A Full Reset
You want to restore default settings. ■ A problem with your HP iPAQ is not fixed after a soft reset. Performing a hard reset on your HP iPAQ does not erase programs that came with your HP iPAQ. The information that you have entered into your HP iPAQ will be erased. - Page 23 Mobile Media and iTasks buttons then remove the stylus from the Reset button. The HP iPAQ resets and powers on. If the HP iPAQ does not power on after a reset, try the following: ■ Check the battery door to ensure it is locked. If not,...
-
Page 24: Aligning The Screen
Aligning the Screen When the HP iPAQ is turned on for the first time, you are guided through a screen alignment process. You must realign your screen ■ The HP iPAQ does not respond accurately to your taps. ■ You perform a full reset of your HP iPAQ. - Page 25 ■ Never use any device other than the stylus that comes with the HP iPAQ or an approved replacement to tap or write on the screen. If you lose or break your stylus, you can order extras at www.hp.com/go/ipaqaccessories. ■...
-
Page 26: Learning The Basics
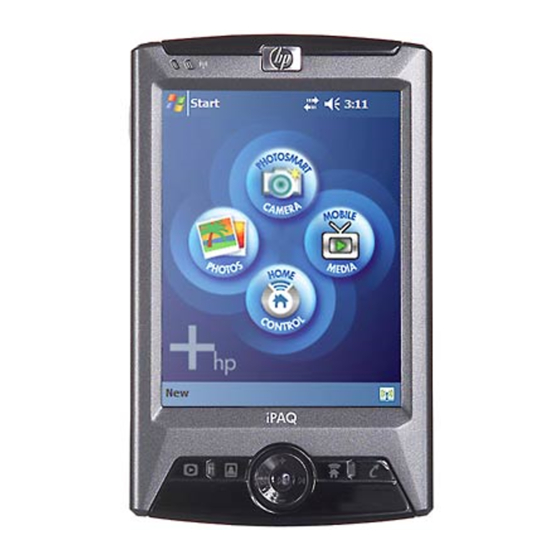
Using the Launch Page or Traditional Today Screen When you first turn on your HP iPAQ, the Launch page displays. You can also display it by tapping Start > Today. Tap to view Programs menu Tap to create a new item... - Page 27 You can switch from the Launch page to view the traditional Today screen. To begin, on your HP iPAQ: Tap to view Programs menu Tap to create a new item 1. Tap Start > Settings>Today. 2. In Settings, tap the Items tab and uncheck the iPAQ Entertainment box to turn off the Launch page.
-
Page 28: Navigation Bar And Command Bar
Traditional Today Screen Note: The built-in HP Photosmart camera is available only in select HP iPAQ models. To upgrade your model, please refer to the Accessories Brochure for information on the HP Photosmart Mobile Camera. Navigation Bar and Command Bar The Navigation bar is located at the top of the screen. -
Page 29: Status Icons
Tap to view online Help Within each program, use the Command bar located at the bottom of the screen to perform tasks. Tap New to create a new item in the current program. New button Menu actions Status Icons You may see the following status icons displayed on the Navigation bar or Command bar. -
Page 30: Pop-Up Menus
Microsoft ActiveSync is synchronizing. Speaker is on. Speaker is off. HP iPAQ and the desktop cradle are connected. This icon appears only when there is an active connection. Wireless icon. When Bluetooth or Wi-Fi is on, the Wireless LED turns blue. -
Page 31: Creating Information
Creating information From the Launch page or Today screen, you can create new information, including: ■ Appointments ■ Contacts ■ Messages ■ Excel Workbook ■ Notes ■ Tasks ■ Word documents 1. Tap , or from the Start menu, tap Today > New. 2. -
Page 32: Customizing The Today Screen
Customizing the Today Screen You can: ■ Add a picture as the background. ■ Select the information that appears on the traditional Today screen. ■ Set the order of the information. ■ Set when to see the traditional Today screen. 1. -
Page 33: Launching Applications
Tapping Start > Programs > iTask. The iTask menu is displayed. Choose your task. Launching Applications Open any application on your HP iPAQ from the Start menu. Note: You also can open an application by assigning it to an Application Button. To assign Applications buttons, from the Launch page or Today screen, tap Start >... -
Page 34: Pocket Internet Explorer
1. Tap Start > Internet Explorer. The Internet Explorer application is displayed. 2. Make your selection from the Home page. Icons Switching Between Landscape and Portrait Screen Orientations To change the display setting on your HP iPAQ: User’s Guide Button Function Back Takes you back to previous page. -
Page 35: Minimizing Applications
To minimize an open application, tap the x at the top right of the screen. Closing Applications Applications automatically close based on available memory. However, if your HP iPAQ is running slowly, you can close applications using iTask or the Settings menu. User’s Guide Learning the Basics... -
Page 36: Closing With Itask
Learning the Basics Closing with iTask 1. Press the iTask button 2. Tap and hold the program to be closed. 3. From the pop-up menu, tap Close This Task. User’s Guide 2–11... -
Page 37: Installing Applications
Wizard to install applications from your computer. ■ Tap the application file in File Explorer on your HP iPAQ. Then follow the instructions on the Installation Setup Wizard to install applications on your HP iPAQ. Backing Up Information Use iPAQ Backup or Microsoft ActiveSync Backup to back up and restore information on your HP iPAQ. - Page 38 Backup backs up to a memory card, main memory, or the iPAQ File Store folder. Close all programs on your HP iPAQ before backing up or restoring your information.
-
Page 39: Using Ipaq File Store Folder
Programs and files stored in iPAQ File Store are held in secure memory and are saved if you perform a full reset of your HP iPAQ or if the battery discharges completely. To store files in iPAQ File Store: 1. - Page 40 Learning the Basics 2. Select iPAQ File Store from the drop-down list. Note: Before saving files to the iPAQ File Store folder, it is a good idea to determine how much memory is available in the folder. To view the amount of memory, from the Start menu, tap Settings >...
-
Page 41: Synchronizing With Your Computer
In this manner, you only have to input information once either at your computer or your HP iPAQ. Using ActiveSync and the sync cable, you connect your HP iPAQ and a computer to: ■... - Page 42 HP iPAQ and your personal computer as follows: ❏ If you have an rx3700 series, connect the USB connector to the USB port on your computer. Insert the HP iPAQ into the desktop cradle. Connect the AC adapter to the desktop cradle to charge it. ❏...
-
Page 43: Changing Synchronization Settings
To synchronize files, select files in your computer; then drag and drop the files into the synchronization folder on your device. If you named your HP iPAQ “PC1” when you created your partnership, then the synchronized folder is named “PC1.”... - Page 44 HP iPAQ and the computer. Using the Serial Infrared (IR) Connection Your HP iPAQ has an infrared port. If your computer has an infrared port or an infrared USB adapter, you can synchronize your HP iPAQ and your computer using an infrared connection instead of the sync cable.
-
Page 45: Manually Copying Or Moving Files
5. Select Bluetooth ActiveSync from the drop-down arrow list. 6. Tap OK. 7. Then tap OK again. You can now synchronize your HP iPAQ with your computer using Bluetooth instead of the sync cable. Manually Copying or Moving Files You can copy or move files to and from your computer using Explore in ActiveSync and Windows Explorer. -
Page 46: Installing A Program
2. Follow the instructions on the computer screen for installing that particular program. 3. Check the screen on your HP iPAQ to see if further steps are necessary to complete the installation. Backing up and Restoring Files To help reduce the chance of losing information, you should back up information to your computer regularly. -
Page 47: Synchronizing Links
If you have not selected “Favorites” as an information type to be synchronized, ActiveSync will not copy your mobile favorite to your HP iPAQ the next time you synchronize. To manually synchronize your favorite links, follow the instructions described in this chapter. -
Page 48: Sending A Meeting Request
Synchronizing with Your Computer Sending a Meeting Request You can schedule a meeting and send a meeting request via ActiveSync. You create the meeting information in Messaging and the next time you synchronize with your computer, the meeting request will be sent. Note: The person(s) you invite must use Outlook or Pocket Outlook on their computer(s). -
Page 49: Learning Input Methods
Notes tab in the Calendar, Contacts, and Tasks applications. Changing Word Suggestion Options As you type or write, the HP iPAQ suggests words for you in a box above the keyboard, Letter Recognizer, or Block Recognizer, but not in the Transcriber. - Page 50 2. Tap the Word Completion tab. 3. Tap the down arrow associated with letters and select the number of letters you want to type before a word is suggested. 4. Tap the down arrow associated with words and select the number of words you want suggested.
- Page 51 Learning Input Methods 5. Tap OK. Note: If you do not want any words suggested, remove the checkmark by tapping the checkbox next to Suggest Words When Entering Text. User’s Guide 4–3...
-
Page 52: Using The On-Screen Keyboard
Using the On-Screen Keyboard Use the stylus to tap letters, numbers, and symbols on the on-screen keyboard to enter typed text directly onto the screen. 1. From any application, tap the up arrow next to the Input Panel icon. 2. Tap Keyboard to display a keyboard on the screen. Note: To see symbols, tap the 3. -
Page 53: Writing With The Stylus And Microsoft Transcriber
1. From any application, tap the up arrow next to the Input Panel icon. 2. Tap Letter Recognizer. 3. Write a letter or symbol between the dashed line and baseline. a. To display in uppercase, write a letter between the hatch marks labeled ABC. -
Page 54: Writing With The Stylus And Block Recognizer
1. From any application, tap the up arrow next to the Input Panel icon. 2. Tap Transcriber to display the Transcriber Intro screen. 3. Tap OK. 4. Tap New at the bottom of the screen. 5. Begin writing on the screen. What you write will be converted to text. -
Page 55: Drawing And Writing On The Screen
3. Write a word, letter, or symbol between the hatch marks. a. To type text, write a letter between the hatch marks labeled “abc.” b. To type numbers or symbols, write a number or symbol between the hatch marks labeled “123.” What you write will be converted to text. -
Page 56: Converting Writing To Text
Converting Writing to Text You can convert your writing to text when you write with the stylus in the Notes program or from the Notes tab in: ■ Calendar ■ Contacts ■ Tasks To convert writing to text: 1. From the Start menu, tap Notes or tap the Notes tab in Calendar, Contacts, or Tasks. -
Page 57: Using Digital Imaging Features
Using Digital Imaging Features Your HP iPAQ rx3000 series Mobile Media Companion may include a built-in camera that allows you to turn your HP iPAQ into a mobile digital imaging center. You can share images through e-mail or the Web, print from your HP iPAQ wirelessly, or transfer files to the HP iPAQ for storage. -
Page 58: Getting To Know Your Camera Components
The Image Capture button 1 is located on the left side. The mirror 2 and camera lens 3 are located on the back of the HP iPAQ. Pressing the Image Capture button allows you to launch the HP Photosmart camera software so you can capture photos or record video. -
Page 59: Capturing
Accessories Brochure for information on the HP Photosmart Mobile Camera. Use your HP Photosmart camera to take photos and videos of all of your memories. In this section, we discuss taking photos and videos, understanding and using instant review, and how to change the HP Photosmart camera settings. -
Page 60: Taking Photos
1. From the Start menu, tap Programs > HP Photosmart or from the Launch page, tap Photosmart camera. 2. Locate the camera lens on the back of the HP iPAQ and frame the subject to be photographed in the screen. - Page 61 5. Press the Image Capture button on the side of the HP iPAQ or tap Note: Once you have taken a photo, it takes a few seconds to process and store the image. During the processing, a wait cursor is displayed on the screen.
-
Page 62: Adjusting The Camera Settings
3. Tap the Play icon 4. Tap OK to close the Video Review screen in HP Image Zone. Understanding Instant Review Instant Review allows you to see a preview of the photo you just captured. This setting provides an opportunity to delete, save, or send the photo. - Page 63 File ■ Video Recording To make changes to the camera settings: 1. From the Start menu, tap Programs > HP Photosmart or from the Launch page, tap Photosmart camera. 2. Tap > Settings or Setup tab. 3. Tap the category you want to change, and then tap the Change button.
- Page 64 Auto where the camera automatically adjusts the color for the best possible photo or you can select a specific type. To change the white balance: 1. From the Start menu, tap Programs > HP Photosmart or from the Launch page, tap Photosmart camera. 2. Tap >...
- Page 65 You can choose one of three compression types to compress the photo file size. To change the compression setting: 1. From the Start menu, tap Programs > HP Photosmart or from the Launch page, tap Photosmart camera. 2. Tap >...
- Page 66 Choosing the Resolution You can choose from four resolutions (or sizes) for photos captured (width by height in pixels) on your HP iPAQ. By using one of the four resolutions, you can choose the photo quality for your snapshots. Higher-quality (high resolution) photos look and print better, especially at greater magnification.
- Page 67 With the camera sounds setting, you can turn on or off all camera sounds made by your HP iPAQ. To change the camera sounds setting: 1. From the Start menu, tap Programs > HP Photosmart or from the Launch page, tap Photosmart camera. 2. Tap >...
- Page 68 4. Tap OK to exit the Capture menu. Modifying Instant Review Settings To configure or change Instant Review setting options: 1. From the Start menu, tap Programs > HP Photosmart or from the Launch page, tap Photosmart camera. 2. Tap >...
- Page 69 Configuring File Settings The File Settings menu allows you to specify how photos and videos are named and stored on your HP iPAQ. Using the File tab, you can change the filename prefix of the photos and videos you capture and adjust the image counter. The combination of these two (filename prefix and counter value) provide the actual filename of your photo or video.
- Page 70 Changing Video Settings You can record video with audio using your HP iPAQ’s built-in camera. You can record in either MotionJPEG format or H.263 format (available only on the rx3700 series). With MJPEG, a higher resolution of video can be captured, but it requires much more memory space per minute of video.
-
Page 71: Reviewing And Displaying
5. Tap the Record audio checkbox to enable sound in the video. 6. Tap OK to exit the Video menu. Reviewing and Displaying Use HP Image Zone to view and edit photos and video stored on your HP iPAQ or SD card. HP Image Zone... - Page 72 When you launch the HP Image Zone, the following icons are displayed on the bottom of the screen. Icon Definition Tap to switch between video and camera mode. Tap to view the photo in full screen. Tap to start slideshow mode.
-
Page 73: Viewing Thumbnail Photos
Viewing Thumbnail Photos To view a photo: 1. From the Start menu, tap Programs > HP Image Zone, or from the Launch page, tap Photos. Note: By default, the viewer opens in Browse mode. Browse mode displays a thumbnail view of the photos in the current folder. -
Page 74: Viewing A Slideshow
3. Tap OK. HP Image Zone now displays the photos from the new file folder you selected. Note: To view photos in HP Image Zone, be sure your scroll bar has been moved all the way to the left. Otherwise, you might not be able to see other photos in the thumbnail view. -
Page 75: Dockware Screen Saver Application
4. Tap OK to exit the menu. Exiting HP Image Zone To exit from HP Image Zone, from the Command Bar, tap File > Exit. You also can tap the screen to close this application. DockWare Screen Saver Application Your HP iPAQ is preinstalled with a screen saver application called DockWare. -
Page 76: Editing
Starting DockWare When your HP iPAQ is not in use (after five minutes) and is still turned on or placed in its cradle, DockWare automatically starts. You also can start DockWare by tapping on Start > Programs > DockWare icon. -
Page 77: Editing Photos
Apply creative filters and effects to a photo Editing Photos To edit photos: 1. From the Start menu, tap Programs > HP Image Zone, or from the Launch page, tap Photos. 2. Select the photo you want to edit by tapping on its thumbnail. -
Page 78: Attaching A Sound File To A Photo
Attaching a Sound File to a Photo To add sound to a photo: 1. From the Start menu, tap Programs > HP Image Zone, or from the Launch page, tap Photos. 2. Select the photo to which you want to attach a sound file by tapping on its thumbnail. -
Page 79: Hp Image Zone For Pcs
5. Tap OK to exit this menu. HP Image Zone for PCs The HP Image Zone for PCs application allows you to view, print, and edit photos that were captured using your HP iPAQ. This application is located on the HP Image Zone CD that came with your HP iPAQ. - Page 80 ■ 115MB RAM required To install HP Image Zone for PCs, insert the appropriate CD into the CD-ROM drive on your computer. The HP Image Zone CD starts automatically. If the HP Image Zone CD doesn’t start automatically (auto run), click Start >...
-
Page 81: Hp Image Transfer
Using the HP Image Transfer software and Microsoft ActiveSync 3.7.1, you can automatically transfer photos and videos from your HP iPAQ to your personal computer for printing and sharing with family and friends. With HP Image Transfer, you can: ■... - Page 82 Once HP Image Transfer has been installed and is recognized by ActiveSync, the ActiveSync window displays the Image checkbox. To enable and modify HP Image Transfer settings: 1. Open ActiveSync on your personal computer, if it is not already open.
- Page 83 For example, you can configure the images to be transferred to a subfolder with the same name as the folder on your HP iPAQ. If you are transferring images from a folder with multiple subfolders, all the subfolders are automatically created in the folder you User’s Guide...
-
Page 84: Printing
Note: Some settings on the HP iPAQ Image Transfer screen only can be changed while your HP iPAQ is connected to your desktop computer. If your HP iPAQ is not connected, you are notified that some settings cannot be changed and some settings are inaccessible. - Page 85 1. From the Start menu, tap Programs > HP Image Zone or from the Launch page, tap Photos. 2. Tap the photo you want to print. Note: If you want to print several photos, tap Tools > Select > Range. Tap the first and last photo in the desired range. Once the photos are selected for printing, a green flag is displayed on each photo.
- Page 86 (You will be prompted to enter specific details about your printer. For additional information on configuring your printer, refer to the on-screen Help for HP Image Zone.) Note: You should only need to perform the above steps once for each printer you want to use.
- Page 87 Configure… button to add a printer. If a printer is grayed out, it is because HP Mobile Print does not currently support the document type you have chosen.
-
Page 88: Print Options
Printing to an IR Printer Make sure the IR port of your device is directly aligned with the IR port of the printer. Printing to a Bluetooth Printer Make sure the selected Bluetooth printer is in range of your device and the Bluetooth radio of your device is on. Printing to a network printer via 802.11 Make sure you have an active network connection and that the selected printer is connected to the same network. -
Page 89: Configuration
Print Options allow you to change the following: Copies Quality Paper size Color setting After setting the print options, you can save these options for this printer by checking the Save Settings box. All future documents you print to this printer will use these settings. 3. - Page 90 Using Digital Imaging Features To access the Configuration screen: 1. Enter the Print Manager or tap the Configure… button on the Printer Selection screen. User’s Guide 5–34...
- Page 91 To add a printer, tap the Add… button on the Configuration screen. How To Connect To The Printer Before selecting the printer, HP Mobile Print needs to know how it will be connecting to that printer. HP Mobile Print currently supports Infrared (IR), Bluetooth, Network-based, and Service-based connections.
- Page 92 Bluetooth built-in or it may be an optional accessory. Before continuing, you might want to familiarize yourself with the Bluetooth options available on your HP iPAQ and your Bluetooth printer. For more information on Bluetooth, refer to Bluetooth.”...
- Page 93 To search for Bluetooth Printer(s): 1. Once the Next button has been tapped, the Specify Bluetooth Printer screen gives the user the option to choose Search for a Bluetooth printer near me or to Add a Bluetooth printer. The option, Search for a Bluetooth printer near me, discovers Bluetooth printers near you and automatically sets up the connection.
- Page 94 2. Discovering Bluetooth Printer(s) Once the Next button has been tapped, a "Searching for devices…" message indicates the HP Mobile Print is searching for and will list the Bluetooth printers discovered. Tapping the Stop button will cancel discovery and allow you to choose any printer already discovered.
- Page 95 Using Digital Imaging Features 3. Specify the Bluetooth Printer by filling in the blank information fields. Mfg: Select the manufacturer of the printer you would like to print to, from the drop-down list. Model: Choose the printer model family that best represents the printer from the Model drop-down list.
- Page 96 1. Choose an IR printer and tap the Next button. This brings up the IR Printer Identification screen that asks the user to align IR port of the printer with the IR port of the HP iPAQ. 2. Align the IR ports and tap the OK button. This brings up the Specify IR Printer screen.
- Page 97 on the list, choose the closest possible match and try to print. If that fails, then try a different printer family until one is found that allows a good quality print to come out.) Address: This field will auto-populate with "IR." My Printer Name: Enter a unique name to identify the printer.
- Page 98 Using Digital Imaging Features 2. Specify the Network Printer by filling in the blank information fields. Mfg: Select Hewlett-Packard from the drop-down menu. HP Mobile Print supports currently only Hewlett-Packard printers. Model: Choose the printer model family that best represents the target printer from the Model drop-down menu.
- Page 99 Using Digital Imaging Features Enable Raw File Types: This is an advanced option and can be ignored by most users. This option enables certain file types to be sent directly to the printer in their native format. Raw PCL, JPG, and PS files are examples of file types that might be candidates for sending directly to the printer.
- Page 100 Configuration screen, and then tap the Remove button. Because the printer will be removed permanently, a message box will ask you to confirm the deletion. Tap Yes and the printer will be permanently removed/deleted from your HP iPAQ. User’s Guide 5–44...
- Page 101 Using Digital Imaging Features Modifying Printers from the Printer Selection List On the Configuration screen, select the printer you want to modify and tap the Modify… button. The following window can vary, depending on the printer type selected. Make any modifications necessary and tap Update to save the changes or tap Cancel to discard the changes.
-
Page 102: Changing System Settings
Tap the System tab at the bottom of the Configuration screen. The System Configuration screen is displayed with its current settings. If necessary, change the Bluetooth COM Port to the COM port that your HP iPAQ uses. To identify the outbound COM port: User’s Guide 5–46... -
Page 103: Print Manager
> Services tab. 3. Tap Serial Port > Advanced ... button. 4. Make any changes if necessary. 5. Tap the OK button located at the top right corner of your HP iPAQ to save the settings and close the screen. Print Manager... - Page 104 Using Digital Imaging Features the target printer for each print job is shown next to a "+" or "-". Users can expand a print job to view its details by tapping the "+" sign. Note: Jobs are identified by printer name; therefore, a printer can be listed more than once.
- Page 105 Using Digital Imaging Features The Details Button This Details button tells which item is being printed, what the current print status of is, where it is being printed to, and via what connection. To bring up a detailed view of the item to be printed, select a document, and then tap on the Details…...
-
Page 106: The Tools Menu
Using Digital Imaging Features not be stopped, but will finish printing unless it is directly canceled by selecting the document and tapping Cancel. The document following it in the print list will not print until Continue is tapped. If an error occurs in one of the currently printing documents, all print jobs are automatically paused and a message is displayed asking what the user would like to do. - Page 107 Using Digital Imaging Features The Past Print Jobs Screen The Past Print Jobs screen displays a list of past print jobs. Next to each print job's "+" or "-" is the name of the printer where the document was printed. When an item is expanded in the list view, it displays the documents printed to that target.
- Page 108 The Details Button Select a document from an expanded print job and then tap the Details button to bring up a detailed view of the item printed. This view displays which document was printed, what its final status was, where it was printed to, and what connection was used in which to print.
- Page 109 For instance, a bmp file (bitmap) can be printed through a CT module provided by HP or WestTek. If the application has no preference, it will print bmp files through the WestTek module since that is the one currently selected.
- Page 110 The Logging Screen The logging screen enables HP Mobile Print to record troubleshooting information in a file. ■ Off - turns all logging off. ■ Low: Errors - turns logging on for errors only. ■ Medium: Warnings - record more information about what is happening in the system.
- Page 111 Using Digital Imaging Features The Printing Notification Printing Notification displays whenever a document in a print job is printing. Clicking on the notification brings up a bubble window that allows for easy access to the Print Manager to view the current status of print jobs. Tap on Go To Print Manager to open the Print Manager.
- Page 112 Using Digital Imaging Features Configuring Notifications Some settings on the notifications can be adjusted by going to Start Menu > Settings > Sounds & Notifications and selecting the Notifications tab. The notification preferences are shown for the Printing notification. While it isn't possible to totally get rid of this notification, it is possible to control its behavior.
-
Page 113: Using File Explorer To Print Photos
Using File Explorer to Print Photos You can print a photo by using File Explorer on your HP iPAQ. The HP Mobile Printing Utility automatically adds "tap-and-hold" print support. To print a photo using File Explorer: 1. Tap and hold on a supported file type. -
Page 114: Using Hp Instant Share Printing
HP iPAQ to your PC. To tag a photo for HP Instant Share Printing: 1. From the Start menu, tap Programs > HP Image Zone, or from the Launch page, tap Photos. 2. Select the photo that you want to print. -
Page 115: Printing With A Memory Card
HP Instant Share to work. Printing With a Memory Card To print photos by inserting your memory card into an HP printer, you must use the Move To card feature. This feature places your photos in the optimal directory structure to use all the features of your HP printer. -
Page 116: Sharing
Sharing Using HP Image Zone you can share your photos using HP Instant Share. Services include: ■ e-mail photos ■ upload photos ■ order prints The Instant Share process is described in the following picture. 1. Capture photos using your HP iPAQ Photosmart camera. Tag the photos that you want to share or print. -
Page 117: Setting Up Your Share Menu
5. The person who receives your HP Instant Share e-mail is given a link to your photos on the HP Instant Share website. Here, they can view and print the photos, reply to your e-mail, or forward the photos to someone else. -
Page 118: Tagging Photos With Destinations
HP Instant Share Setup. Tagging Photos With Destinations While using your HP iPAQ, HP Image Zone allows you to tag your photos so you can share them using HP Instant Share. The HP Instant Share application sends the tagged photos the next time you connect your HP iPAQ to your PC. - Page 119 4. Tap Send and in the Send window, select HP Instant Share E-Mail. 5. Tap Next. 6. In the Share Menu, tap the boxes next to the appropriate destinations. 7. Tap Save. The next time you connect to your PC, HP Instant Share automatically sends the photos.
-
Page 120: Tips For Taking Better Pictures
Tips for Taking Better Pictures Note: The built-in HP Photosmart camera is available only in select HP iPAQ models. To upgrade your model, please refer to the Accessories Brochure for information on the HP Photosmart Mobile Camera. When taking pictures with your camera, you can do several things to ensure the pictures you snap are of the highest possible quality. -
Page 121: Getting To Know Ipaq Mobile Media
You can wirelessly stream digital content to your HP iPAQ or play your content on PCs around your Wi-Fi home network. You can view and share your media with family and friends. - Page 122 CD that came with your HP iPAQ.) You can get additional information about iPAQ Mobile Media in the online Help on your HP iPAQ. Tap Start > Help > iPAQ Mobile Media to access help topics. The following table defines the iPAQ Mobile Media icons and software buttons.
-
Page 123: Setting Up Ipaq Mobile Media On Your Hp Ipaq
Setting Up iPAQ Mobile Media on Your HP iPAQ iPAQ Mobile Media is preinstalled on your HP iPAQ rx3000 series Mobile Media Companion. You can access iPAQ Mobile Media from the Launch page or by tapping Start > Programs >... - Page 124 ■ You have not turned on the Wi-Fi networking feature of your HP iPAQ. ■ Your wireless settings on you HP iPAQ are incorrectly configured to connect to your network. ■ You are outside the range of your wireless network.
- Page 125 To set up your HP iPAQ to correctly connect to your wireless network: 1. Turn on the Wi-Fi networking feature on your HP iPAQ by selecting the iPAQ Wireless icon ( corner of the Launch page or traditional Today screen.
- Page 126 ■ Stream digital media from personal computers on your Wi-Fi network to play on your HP iPAQ (Media Stream mode) ■ Play and control digital media on PCs connected to your Wi-Fi network (Media Control mode) ■...
-
Page 127: Personal Computers
■ 256MB RAM recommended To install Mobile Media for PC, follow these steps 1. Insert the Companion CD that came with your HP iPAQ into a personal computer you want to access with iPAQ Mobile Media. 2. At the main menu, select Install Mobile Media for PC. - Page 128 NevoMedia Server – used to collect and organize your music, photos, and videos and make them available to be streamed to your HP iPAQ, copied to your HP iPAQ, or played on personal computers on your wireless network through NevoMedia Player.
-
Page 129: Using Digital Media With Ipaq Mobile Media
However, before fully enjoying iPAQ Mobile Media, it is helpful to understand how to organize your digital media on your personal computer or HP iPAQ. You also need to know which media formats are supported by iPAQ Mobile Media. User’s Guide... -
Page 130: Supported Media Formats
Music – .wma (Windows Media Audio) and .mp3 (all modes except in the Media Stream mode) Streaming of .mp3 music files from personal computers on your network to play on your HP iPAQ is not supported. Note: You cannot play copy-protected media with iPAQ Mobile Media. - Page 131 If you have content in other locations, you must move it to the appropriate folder in My Documents or add this location to your music library. To add a different location: 1. Ensure NevoMedia Server is running. If it is not open, select Start >...
-
Page 132: Copying Music Cds And Videos
Copying Music CDs and Videos To access your digital media with iPAQ Mobile Media, it must be stored on your personal computer and cataloged in a NevoMedia Server library. To view other home movies or pictures and listen to music not stored on your personal computer using iPAQ Mobile Media, you must first transfer this media to your personal computer. - Page 133 3. From the Media Guide view, select Copy from CD. By default, your CD is copied into your My Music folder in .wma format. Note: Copy-protection can be added to the music you copy from your CDs. By default, copy-protection is enabled in Windows Media Player.
- Page 134 Next. When the movie is saved, click Finish. ❏ If you want to save your movie to play on your HP iPAQ, during the Save Movie Wizard, click on the Show more choices... link. Click Other settings: then select a Video for Pocket PC setting from the drop-down menu.
-
Page 135: Organizing Digital Media On Your Hp Ipaq
You can use iPAQ Mobile Media to play or view digital media stored on personal computers connected to your home network, or stream this content to play on your HP iPAQ. When you are away from your home network and using the Local Media mode, you can also play this same content on your HP iPAQ. -
Page 136: Digital Media--Not Copy-Protected
SD card reader, you can: 1. insert an SD card, 2. copy your digital media to this card, 3. then insert the card into your HP iPAQ to make it available to iPAQ Mobile Media. (SD cards must be purchased separately.) User’s Guide... - Page 137 Note: By default, HP Image Zone stores pictures in the My Pictures folder located in My Documents on your HP iPAQ. To view these pictures using iPAQ Mobile Media, you need to modify your Storage Settings to point to that folder.
-
Page 138: Copy-Protected Music (.Wma Format)
To transfer copy-protected .wma music files to your HP iPAQ, follow these steps: 1. Place your HP iPAQ in its desktop cradle or connect it to the sync cable. 2. Ensure that your cradle or sync cable is connected to your personal computer. -
Page 139: Using Nevomedia Server
Media Copy feature with copy-protected media. To successfully copy any copy-protected media to your HP iPAQ, you must use Windows Media Player on your personal computer. To play copy-protected media, you must use Windows Media Player on your HP iPAQ. -
Page 140: Understanding The Nevomedia Server Options
If the icon is not present, only the named folder is scanned. ■ Rename—this option allows you to change the name of your media server. When you access the server from your HP iPAQ, the new name appears in the Media Server Selection area. - Page 141 ■ List—choose this option to view a simple list of local folders NevoMedia Server scans to populate the digital media database. ■ Details—choose this option to view the details of your personal computer digital media folders. The Details View is organized by: ❏...
-
Page 142: The Media Collection Menu
Disable NevoMedia Server—check this option to disable NevoMedia Server. Note: If you disable NevoMedia Server, the Media Control, Media Stream, and Media Copy modes will also be disabled (displayed with grayed-out icons) on your HP iPAQ. User’s Guide Getting to Know iPAQ Mobile Media 6–22... -
Page 143: The Help Menu
■ Launch NevoMedia Player at Startup—check this option if you want NevoMedia Player to start automatically every time NevoMedia Server starts. By default, this option is checked. ■ Database Tools—select this menu item to access database-specific options: ■ Validate Database—select this option to validate the database when you have deleted or moved contents using File Explorer. -
Page 144: The Nevomedia Server Icons
The NevoMedia Server Icons The NevoMedia Server icons put the features you'll use most often at your fingertips. Note: You must first select a media folder. Otherwise, the icon is inactive and appears grayed-out. Icon The Context Menu You can access the Context menu from the System tray of your personal computer. -
Page 145: Performing Common Nevomedia Server Tasks
Right-click on the Context menu for these menu options: ■ Click Open NevoMedia Server. ■ Click Disable NevoMedia Server. ■ Click Quick Add... ■ Run the Media Collection Wizard. ■ Click Scan All. ■ Click Exit. Performing Common NevoMedia Server Tasks Scanning a Folder When you use the Media Collection Wizard, NevoMedia Server automatically scans your local media folders on your personal... -
Page 146: Updating The List Of Media
Updating the List of Media NevoMedia Server automatically updates its database any time you add or delete digital media in folders you've added to the database. You can also manually scan folders to search for new media. Note: You must first add the folder you want to scan to the NevoMedia Server database. -
Page 147: Removing Your Entire Collection
When the warning message appears, select OK. Note: If you remove your entire collection, you'll need to rebuild the database to play or stream digital media through your HP iPAQ. Exiting NevoMedia Server To exit NevoMedia Server, go to File > Exit. If you selected Launch NevoMedia Player at Startup, then NevoMedia Player also shuts down when NevoMedia Server shuts down. -
Page 148: Using Nevomedia Player
Getting to Know iPAQ Mobile Media To restart the programs, go to Start > All Programs > Hewlett-Packard > Mobile Media for PC > NevoMedia Server. Using NevoMedia Player NevoMedia Player allows you to use your personal computer as a digital media player to view different music, pictures and videos. -
Page 149: Understanding The Nevomedia Player Options
You have two options on the NevoMedia Player File menu: ■ Rename—this option allows you to change the name of your media player. When you access the player from your HP iPAQ, the new name displays in the Media Player Selection area. -
Page 150: The Help Menu
■ Now Playing—choose this option to show or hide information (such as media title, duration, artist, and folder) about currently playing media.) Note: The View menu also lists the type and title of the currently playing media. You can use the View menu to choose which currently playing media you want to access. -
Page 151: Performing Common Nevomedia Player Tasks
For example, you might want to play a particular song while viewing digital photos of your last vacation. You can use your HP iPAQ to select media to play. Once you've selected the media player, choose the digital media you want to view. -
Page 152: Viewing Information About Currently
2. Select Full Screen. The player window reduces to its regular size. Note: Each time NevoMedia Player starts, it defaults back to regular-screen mode. If you want to exit the NevoMedia Player application, you must be in regular-screen mode. Viewing Information about Currently Playing Media In the View menu, you can view information about currently playing media using the Now Playing option. -
Page 153: Exiting Nevomedia Player
Companion CD. This application automatically protects your Universal Remote Control settings from loss due to a power failure or full reset of your HP iPAQ. Once NevoBackup is installed and is running, your two-most recent home entertainment device settings are automatically saved each time you cradle your HP iPAQ as Current Configuration and Previous Configuration. -
Page 154: Creating A Custom Backup
Your previous two configurations are automatically saved. Creating a Custom Backup 1. Place your HP iPAQ in its desktop cradle or connect it to the sync cable. 2. Right-click on the NevoBackup icon ( and select Open. -
Page 155: Restoring A Previous Backup Configuration
Restoring a Previous Backup Configuration 1. Place your HP iPAQ in its desktop cradle or connect it to the sync cable. 2. Right-click on the NevoBackup icon ( and select Open. 3. Select Next at the Welcome screen. 4. On the Backup Tasks screen, select Restore my Nevo configuration to an earlier backup. -
Page 156: Starting Ipaq Mobile Media
Tapping this icon shows the media server or player that is no longer available. Navigating iPAQ Mobile Media From the iPAQ Mobile Media main menu, you can easily access the digital content features: User’s Guide Getting to Know iPAQ Mobile Media ) on your HP iPAQ 6–36... -
Page 157: Navigating The Media Play Screens
Note: Even if you’ve set up the correct operating environment, you may have to wait up to 60 seconds for all of the icons to activate each time you start iPAQ Mobile Media. Note: Each time you tap one of the mode icons, Mobile Media will displays a swirling “working”... -
Page 158: Navigating Pop-Up Menus
Getting to Know iPAQ Mobile Media Navigating Pop-up Menus You can also navigate iPAQ Mobile Media by using the pop-up menus. An example of a pop-up menu is the Select Media Server menu: To select another item (make it the current item): User’s Guide 6–38... -
Page 159: Navigating The List View
■ Tap it using the sylus. ■ Use the Navigational Touch Pad. Navigating the List View To play music from the list view, simply tap a song. To easily switch between the List View and Controls view, tap at the top-right screen. You can also control music play. -
Page 160: Navigating The Controls View
Tap this key: Navigating the Controls View The Controls View allows you additional control over music play. The table lists controls that are available when you play music. Icon User’s Guide Getting to Know iPAQ Mobile Media Stop music play Control the volume Mute the sound Functions... -
Page 161: Selecting A Storage Location
Selecting a Storage Location You can store downloaded media directly onto your HP iPAQ, or you can store it on an optional expansion card (SD card). For more information on expansion cards and storage space, refer to the “Expansion Cards” chapter in this document. To select a storage location: 1. -
Page 162: Currently Playing
Currently Playing Similar to Quick Links, the Currently Playing pop-up menu allows you to view the type(s) and title(s) of currently playing media. From this menu, you can choose which media you want to control. To access the Currently Playing pop-up menu: 1. -
Page 163: Playing Digital Media On My Hp Ipaq
Playing Digital Media on My HP iPAQ There are two ways you can play media on your HP iPAQ. You can: ■ Play media stored in your local library (Local Media mode). ■ Stream media from a media server to your HP iPAQ (Media Stream mode). -
Page 164: Playing Local Media (Local Media Mode)
Playing Local Media (Local Media Mode) Before you can play local media, you have to store it in your local library. Your HP iPAQ may have available storage space for you to store your local media, or you may choose to purchase a Secure Digital (SD) card to store your local media. -
Page 165: The Local Media Customize Menu
Getting to Know iPAQ Mobile Media 3. From the pop-up menu, select the media location by tapping Note: All of the media accessed at the same time are stored in a single, flat directory. If you create a hierarchical file structure in any of the three Local Library locations, then you should specify the exact locations by using the Storage Settings items on the Customize menu. -
Page 166: Playing Music
About iPAQ Mobile Media Playing Music Now that you’ve stored music in your local library, you can start listening to it on your HP iPAQ. 1. From the main Local Media screen, tap My Music. The My Music menu appears. -
Page 167: Controlling Music Play
2. To start play: a. Navigate to a song, then tap it. b. If you navigate using the up and down arrow keys, press the Navigational Touch Pad. Controlling Music Play You can choose between two different My Music screen views— the List View and the Controls View: User’s Guide Getting to Know iPAQ Mobile Media... -
Page 168: Viewing Pictures
List View, uncheck the Change Display on Play option from the Customize menu. Viewing Pictures You can view many different types of pictures on your HP iPAQ. Note: You have to add media to your Local Library before you can view pictures. -
Page 169: Controlling Pictures
2. Tap the picture you want to view. Note: When you start the media, the screen automatically switches to controls view because the Change Display on Play option is selected by default. Note: You can also change the media location from the My Pictures screen. -
Page 170: Navigating The Controls View
Note: Each time you start Local Media, the My Pictures screen defaults to controls view. To set the default to List View, uncheck the Change Display on Play option from the Customize menu. Icon Navigating the Controls View The Controls View allows you additional control over pictures: User’s Guide Getting to Know iPAQ Mobile Media Function... -
Page 171: Playing Videos
Pad key in the down direction. Press it again to rotate picture back to portrait orientation. Playing Videos You can also play videos on your HP iPAQ. 1. From the main Local Media screen, tap My Videos. The My Videos menu appears. - Page 172 Mobile Media can play .wma videos that have been created for using the pocket PC screen. For more information on saving your videos for diplay on your HP iPAQ, refer to the “Copying Music CDs and Videos” section of this document.
-
Page 173: Controlling Video Play
Controlling Video Play The My Videos screen also has two different views—the List View and the Controls View. Note: Each time you start Local Media, the My Videos screen defaults to controls view. To set the default to list view, uncheck the Change Display on Play option from the customize menu. - Page 174 Getting to Know iPAQ Mobile Media 3. From the pop-up menu, tap Delete. The following screen appears: The Wrench icon starts blinking. If you want to exit Delete mode, tap the blinking wrench then tap Cancel Delete. User’s Guide 6–54...
-
Page 175: Deleting Individual Tracks
Note: You’ll only see media stored in the media location you’ve selected. Deleting Individual Tracks 1. Select the tracks you want to delete by tapping in the checkbox. 2. Tap 3. To exit Delete mode, tap the blinking wrench then tap Cancel Delete. -
Page 176: Streaming Media (Media Stream Mode)
Streaming Media (Media Stream Mode) With Media Stream, you can stream media from a media server onto your HP iPAQ. 1. To access Media Stream mode, tap Mobile Media screen. The Media Stream screen appears: Selecting a Media Server Before you can stream media, you have to select a media server. -
Page 177: The Media Stream Customize Menu
The Media Stream Customize Menu As previously mentioned, the different options based on the mode you’re in. The media stream customize menu allows you to: Tap this menu option: Edit Media Server... Edit Media Player... Change Display on Play Play All Search... -
Page 178: Playing Music
Navigational Touch Pad. Note: In Media Stream mode, streaming .mp3-formatted music is not supported. Only non copy-protected .wma formatted music can be streamed to play on your HP iPAQ. User’s Guide Getting to Know iPAQ Mobile Media Exit Download mode. -
Page 179: Controlling Music Play
Viewing Pictures Stream pictures stored on a media server and view them on your your HP iPAQ. To stream pictures: 1. From the main Media Stream screen, tap My Pictures. The My Pictures menu appears. In Media Stream mode, the My Pictures list view is organized by folders. -
Page 180: Playing Videos
Mobile Media can play .wma videos that have been created for using the pocket PC screen. For more information on saving your videos for diplay on your HP iPAQ, refer to the “Copying Music CDs and Videos” section of this document. - Page 181 ■ All—results will include all items (and folders) that contain the text you entered. For example, if you entered the word "Pat", the results would include: ❏ Any artist with Pat in their name, like Pat Benatar or Pat Metheny ❏...
-
Page 182: Playing Digital Media On Other Devices (Media Control)
Search icon. Playing Digital Media on Other Devices (Media Control) Nevo Media Control allows you to use your HP iPAQ to play media from a media server onto any UPnP (universal plug-and-play) digital media player. You can choose the media from any recognized media server. -
Page 183: The Media Control Customize Menu
1. From the Media Control screen, tap the media player selection area ( 2. From the pop-up list of available media players, select one by tapping it. When you play the media, it plays in the digital media player you selected. -
Page 184: User's Guide
Note: If you’re using both a NevoMedia Server and a NevoMedia Player, your media will continue playing even if you turn off your HP iPAQ or if your HP iPAQ goes to sleep after a period of inactivity. Search for media if the selected media server supports the search function. -
Page 185: Navigating The Media Control Music Folders
2. To start play: ❏ Navigate to a song, then tap it, or If you navigate using the Up and Down keys on your HP iPAQ, press the Navigational Touch Pad. Controlling Music Play You can choose between two different My Music screen views—... -
Page 186: Viewing Pictures
View. To play music from the List view, simply tap a song in the list. Viewing Pictures You can simultaneouly view pictures on your HP iPAQ and other digital media players. 1. From the main Media Control screen, tap My Pictures. The My Pictures menu appears. -
Page 187: Playing Videos
Navigational Touch Pad in the down direction. Press it again to return to its original view. Playing Videos You can also play videos from your HP iPAQ to any recognized digital media player. 1. From the main Media Control screen, tap My Videos. The My Videos menu appears. - Page 188 ■ Title—results will include any titles that contain the whole word or phrase you entered ■ Artist—results will include any artists whose name contains the whole word or phrase you entered ■ All—results will include all items (and folders) that contain the text you entered.
-
Page 189: Downloading Media (Media Copy)
While the search is processing for results, you can cancel the search request by pressing the Search button. Downloading Media (Media Copy) With Media Copy, you can download media onto your HP iPAQ to enjoy later. You can access Media Copy three different ways: ■... -
Page 190: Selecting A Media Server
Search... Cancel Search... Download... Cancel Download... Refresh Servers and Players Refresh Folder Storage Settings... About iPAQ Mobile Media Selecting a Media Server Select the server from which you want to download media: 1. Tap the media server selection arrow at the bottom of the Media Copy screen. -
Page 191: Selecting Music To Download
If you’ve selected a NevoMedia Server, the My Music list view is organized by folders. You can select music to download by: ■ Albums ■ Artists / Albums ■ Artists / Titles ■ Genres / Artists ■ Genres / Titles ■... - Page 192 Note: You can only download individual tracks, not entire folders. 2. Tap the track(s) you want to download. ❏ If there’s not enough available storage space in the folder you’ve selected, the storage pie chart appears full, and Media Copy won’t allow you to select media. ❏...
-
Page 193: Downloading Pictures
Downloading Pictures 1. From the main Media Copy screen, tap My Pictures. The My Pictures menu appears. In Media Copy mode, the My Pictures list view is organized by folders. Selecting Pictures to Download 1. Tap to select a folder. A checkbox appears to the left of each picture name. -
Page 194: Selecting Videos To Download
Selecting Videos to Download Note: You can download any type of video to your HP iPAQ. However, your HP iPAQ will only play .wmv files that were specifically created for handheld devices. 1. Tap to select a folder. A checkbox appears to the left of each video name. -
Page 195: Starting Up Nevohome Control
■ creating activities Starting Up NevoHome Control To access NevoHome Control from your HP iPAQ, tap the Launch page. You can also tap Start > Programs > iPAQ Mobile Media. Navigating the NevoHome Control Screens The NevoHome Control screens are divided into three main tabs: ■... - Page 196 The device wheel has default placeholders (called ghosted devices) for commonly-used home entertainment devices, making it easier for you to set up the devices you want to control. Even an "empty" room has ghosted devices, making it easier for you to set up rooms. Note: The default user for NevoHome Control is Victoria.
-
Page 197: Setting Up The Key Guides
Setting up the Key Guides The Key Guides menu allows you to customize the middle navigational hard key so you can use it to control your home media devices. You can set up the Navigational Touch Pad keys three different ways: ■... -
Page 198: Downloading Device Codes
■ , then Add Device. The Device Wizard Initialization screen appears. 1. Tap Next to continue. 2. Select the device you want to add from the Device drop-down menu, then tap Next. The Device Setup Methods screen appears. From this screen, you have four options: ❏... -
Page 199: Controlling A Device
To download device codes, enter information about your device on myNevo.com: ❏ Select the device type. ❏ Select the brand. Note: You can also download extended key functions, key graphics and network logos for your device from myNevo.com. Controlling a Device Contol multiple home entertainment devices with just a few taps. -
Page 200: Customizing The Control Screen
Customizing the Control Screen The control screen looks different based on the brand/type of device you’re controlling. For example, if you’re controlling a cable box, you won’t see a Record key. You can also customize the control screens by adding new key functions, changing the look or location of the keys, and adding extra pages. -
Page 201: Editing A Key
7. From the Key Button/Symbol Selection screen: ❏ Select the way you want the new key to look from the Button drop-down menu. ❏ Select the symbol you want on the key from the Symbol drop-down menu, then tap Done. Your new function key appears on the control screen. -
Page 202: Copying A Key
Copying a Key 1. Tap 2. From the pop-up menu, tap Copy Key... The Wrench icon starts blinking. If you want to exit copy key mode, tap the blinking wrench, then tap Cancel Copy. 3. Tap the key you want to copy. 4. -
Page 203: Display Labels
2. From the pop-up menu, tap Delete Key... The Wrench icon starts blinking. If you want to exit Delete Key mode, tap the blinking wrench, then tap Cancel Delete. Note: While the wrench icon is blinking, a "mini-help tip" appears to step you through customizing your NevoHome Control. -
Page 204: Adding And Deleting Pages
Control. 3. Tap the Nevo key you want to capture the new IR code. 4. Align your HP iPAQ with the existing remote so that the IR areas are facing each other. 5. Press and hold the source key you want to Nevo to remember. -
Page 205: Setting Up Favorites
3. On the Confirm Control Page Delete screen, tap Yes. Setting Up Favorites With NevoHome Control, you can add up to 16 pages of personalized favorites and access your favorite channels with just a couple taps. Note: Favorites lists are specific to each user, so make sure you’ve selected the correct user before creating your list. - Page 206 Easy Channel Setup If you choose Easy Channel Setup, the Master Control Channel Device screen appears. The Master Control Wizard allows you to set up how you normally change the channels. The following table describes your options: Tasks 2 Digits 3 Digits 4 Digits +10/100 or --/--- required...
-
Page 207: Manually Adding A Favorite
Custom Channel Setup If you choose Custom Favorites Setup, the How to Record Keystrokes... screen appears. 1. Make sure the Record a new sequence of keystrokes? checkbox is selected, then tap Next. 2. Record the keystrokes for your favorite, then tap Stop from the Customize (Wrench) menu. - Page 208 2. Tap 3. From the pop-up menu, tap Add Favorite... The Favorites Wizard Initialization screen appears. 4. Tap Easy Channel Setup or Custom Favorites Setup, then tap Next. 5. Follow the instructions on the scree. Editing a Favorite 1. Tap 2.
-
Page 209: Moving A Favorite
3. Tap the favorite you want to copy. 4. Tap an empty space on the screen where you want to copy the favorite. Note: If you want to copy the favorite to a different page, tap the arrows at the bottom-right of the screen. Moving a Favorite 1. -
Page 210: Adding And Deleting Pages
Note: While the Wrench icon is blinking, a "mini help tip" appears to step you through customizing your NevoHome Control. 3. Tap the favorite you want to delete. 4. From the Confirm Favorite Delete screen, tap Yes. Note: You can also add multiple favorites from another user or reset the favorites to the NevoHome Control default. -
Page 211: Adding Rooms
3. Select: ❏ Append built-in favorite list. ❏ Append favorites from a user and select a user from the User drop-down menu. 4. Then select OK. Adding Rooms You can set up different device configurations for each room in your home. When you select the room, NevoHome Control displays only the devices you added to that room. -
Page 212: Deleting A Room
Note: The default user is created from the owner registration information you established when you set up your HP iPAQ. If you did not create an owner registration profile for your HP iPAQ, when you start Nevo Home Control for the first time, the default user name is Victoria. -
Page 213: Editing Users
To add a user: 1. From the Home screen, tap 2. From the pop-up menu, tap Add User... 3. From the User Wizard screen, tap Next. 4. From the Name User screen, enter the user name, then tap Done. The new user’s name appears on the Home screen. Note: All user names must be unique. -
Page 214: Adding Activities
Note: If you change your mind after deleting a user, follow the steps in the Adding Activities You can ‘train’ your NevoHome Control to perform a variety of actions at a time. For example, you can turn on the stereo and the lights and tune to your favorite station with only one tap. -
Page 215: Editing An Activity
9. When you’re finished, tap Done. Editing an Activity 1. Make sure you’ve selected the correct user. 2. From the Home screen, tap 3. From the pop-up menu, tap Edit Activity... 4. From the Activity Wizard Initialization screen, tap Next. 5. -
Page 216: Downloading Additional Features
Downloading Additional Features Go to myNevo.com to download extra features for your NevoHome Control, such as device key functions or graphics. You can download two types of graphics: ■ TV network logos for your favorites list ■ Control Key designs to customize the look of your control screens First, you need to register your NevoHome Control (also on myNevo.com). - Page 217 2. Tap Display Device Codes... The device code list for the current user and room appears. 3. When you’re finished, tap Close. Enter the device code information on myNevo.com: ■ Select the device type. ■ Select the brand. For additional information, tips, and troubleshooting on using Home Control, refer to the Nevo Help.
-
Page 218: Getting To Know The Ipaq Wireless Manager
Getting to Know the iPAQ The iPAQ Wireless Manager application provides a centralized control for you to manage all wireless features on your HP iPAQ. The iPAQ Wireless screen has individual power buttons to turn wireless features on and off--one at a time, and one All Off button to turn off all wireless features at the same time. -
Page 219: Power Buttons
■ To power on one or more wireless activities, tap the desired button(s). ■ To power off one or more wireless activities, tap the desired button(s) or tap the All Off button to power off all activities. Power Buttons All power buttons (with the exception of the All Off button) display a: ■... -
Page 220: Wi-Fi Settings Button
Wi-Fi Settings Button This button is enabled whenever the Wi-Fi button is in an available or connected state. Press the Wi-Fi Settings button to open the Wi-Fi configuration page. Note: For information on configuring the Wi-Fi settings, refer to Chapter 7, “Getting to Know the iPAQ Wireless Manager.” Bluetooth Settings Button This button is enabled whenever the Bluetooth button is on. -
Page 221: Using Wi-Fi
With wireless access, you do not need to use cables to connect your HP iPAQ to the Internet. Instead, access points transmit data to and from your wireless device. Your HP iPAQ can connect to an 802.11b Wi-Fi or connect directly to other Wi-Fi-enabled devices. -
Page 222: Getting Started With Wi-Fi
Note: The Wi-Fi antenna for the HP iPAQ is located in the top of the unit. If you cover up the top of the HP iPAQ after you have turned on Wi-Fi, signal strength diminishes. To turn on Wi-Fi from the Launch Page or traditional Today screen, tap the Wireless icon ( button. -
Page 223: Automatically Connecting To A Network
Automatically Connecting to a Network 1. To turn on Wi-Fi from the Launch Page or traditional Today screen, tap the Wireless icon ( button. 2. If one or more networks are present, the Network indicator icon ( want to connect to, then tap whether the network connects to the Internet (does not use proxy settings) or Work (uses proxy settings). -
Page 224: Manually Entering New Network Settings
3. If you are prompted for a Network Key (WEP), enter the security settings for your network and tap Connect. Manually Entering New Network Settings A wireless network can be added either when the network is detected (when the Network Indicator icon displays in the Navigation bar) or manually by entering setting information. - Page 225 3. Review the list of networks, then tap your network name if it is present. (If one or more networks are present, the Network indicator icon ( Note: If your network name is not listed, you need to add it to the preferred network lists.
- Page 226 Note: To use iPAQ Mobile Media, you must select “Work” to use the wireless network. For more information about the iPAQ Mobile Media features, refer to the Special Features Guide. 4. Tap the Network Key tab, enter any data encryption settings. 5.
-
Page 227: Searching For Networks To Access
Wireless screen > Settings > Wireless Networks list box. You can choose whether to connect only to preferred networks or to have your HP iPAQ search for and connect to any available network (preferred or not). -
Page 228: Viewing Or Editing A Wireless Network
4. Tap Remove Settings. Monitoring Signal Strength and Status To view the signal strength between your HP iPAQ and an access point Wi-Fi connection: 1. Tap the Connections icon ( 2. When the Connectivity box displays, you will be able to... -
Page 229: Advanced Network Settings
4. To exit the Connectivity box, tap the Hide button. Advanced Network Settings Use the next few sections to learn how to set up and change network configuration settings so your HP iPAQ can communicate with other networks. Advanced Wi-Fi Terms It is recommended that you become familiar with the following terms as you use Wi-Fi technology. -
Page 230: Looking Up An Ip Address
Term SSID or Network Name Transmission Control Protocol/ Internet Protocol Wireless Access Point Windows Internet Naming Service (WINS) Looking Up an IP Address To find the IP address the wireless network is using: 1. Be sure Wi-Fi is on. 2. Connect to a network by tapping the Connections icon ( ) >... -
Page 231: Changing Tcp/Ip Settings
If you are connecting to your ISP at home, tap The Internet. If you are connecting to a private network, such as a corporate network at work, tap Work. 5. In the Tap an adapter to modify settings box, tap HP iPAQ Wi-Fi Adapter. 6. Tap the IP Address tab. -
Page 232: Changing Dns And Wins Settings
If you are connecting to your ISP at home, tap The Internet. If you are connecting to a private network such as a corporate network at work, you should tap Work. 5. In the Tap an adapter to modify settings box, tap HP iPAQ Wi-Fi Adapter. User’s Guide Using Wi-Fi 8–12... -
Page 233: Setting Up Vpn Server Connections
6. Tap the Name Servers tab and enter the requested information. 7. Tap OK to save your settings. Setting Up VPN Server Connections A VPN connection enables you to securely connect to servers, such as a corporate network, via the Internet. To set up a VPN server connection: 1. -
Page 234: Starting Vpn Server Connections
To start a connection through a VPN server: 1. Be sure Wi-Fi is on. 2. Select the VPN network by tapping the Connections icon Your HP iPAQ will automatically begin connecting to the Virtual Private Network. Setting Up Proxy Server Settings... -
Page 235: Using Bluetooth
Your HP iPAQ comes with built-in Bluetooth technology that allows short-range connections and provides fast, reliable, wireless communication. With Bluetooth powered on, you can send information or perform the following tasks wirelessly between two Bluetooth devices, within a range of approximately 30 feet (10 meters): ■... -
Page 236: Getting Acquainted With Bluetooth
Check with your service provider for availability and coverage in your area. Not all Web content may be available. Some Web sites may not be formatted to fit HP iPAQ screens and may require installation of additional software. -
Page 237: Understanding Terms
Understanding Terms The following Bluetooth terms are used throughout this chapter. Term Authentication Authorization Bonding (Paired devices) Device address Device discovery Device name Encryption Passkey Personal Information Manager (PIM) Profiles Service discovery User’s Guide Definition Verification of a numeric passkey before a connection or activity can be completed. -
Page 238: Supported Services
From the tabs in Bluetooth Settings, you can: ■ Select or add a user profile ■ Turn Bluetooth on and off ■ Enter or change your HP iPAQ Bluetooth Identification ■ Set your connection preferences ■ Enable Bluetooth services ■... -
Page 239: Turning On Bluetooth
2. On the iPAQ Wireless screen, tap Bluetooth Settings. Setting Accessibility Properties Before your HP iPAQ interacts with other Bluetooth devices, you need to enter or change the accessibility properties to define how you want your HP iPAQ to interact. -
Page 240: Enabling Bluetooth Services
Ä CAUTION: Selecting All devices allows any device, even those unknown to you, to connect to your HP iPAQ. After they are connected, security settings for specific services apply as specified in the Bluetooth Settings. Selecting Paired devices only allows only devices that you trust to connect to your HP iPAQ. - Page 241 5. Tap OK to return to the iPAQ Wireless screen. Note: If you select Authorization required in the Service Settings, you must authorize each connection. Your HP iPAQ will then always ask you if the connection should be permitted. Secure Connections using a Passkey or Bond To establish a secure connection with another device, you can use the passkey feature or an established bond.
-
Page 242: Setting A Shared Folder
5. Tap OK. Setting a Shared Folder You can determine the folder that other devices access when they connect to your HP iPAQ. To select a shared folder: 1. From the Today screen, tap the iPAQ Wireless icon > Bluetooth Settings > Services tab. -
Page 243: Understanding Profiles
5. Tap the Folder icon and locate a desired file folder. 6. Tap OK twice to return to the iPAQ Wireless screen. Understanding Profiles Use profiles to quickly enable selected personal settings in multiple environments. Creating a Profile To create a profile: 1. -
Page 244: Activating A Profile
Command bar > Bluetooth Settings. 2. From the General tab, select it from the Current Profile drop-down arrow list. 3. Tap Saving Bluetooth Configuration Settings in a Profile To save the HP iPAQ Bluetooth configuration settings to any profile: User’s Guide Using Bluetooth 9–10... -
Page 245: Renaming A Profile
1. From the Today screen, tap the iPAQ Wireless icon in the Command bar > Bluetooth Settings. 2. From the drop-down arrow list. 3. Tap the Services tab and specify the desired connection, sharing, and security settings in all Bluetooth Services selections. -
Page 246: Working With Bluetooth Manager
Working with Bluetooth Manager Use Bluetooth Manager to: ■ Establish connections ■ Exchange business cards ■ Control the on-screen display ■ Display shortcuts Opening Bluetooth Manager From the Today screen, tap the iPAQ Wireless icon in the Command bar > Bluetooth Manager. The first screen that displays is My Shortcuts. -
Page 247: Unpairing Devices
After two devices are paired, they have a trusted relationship with each other. No additional input is needed from the user. Therefore, connections and activities can be performed between the paired devices without constant authorization from the user. To pair devices: 1. -
Page 248: Connecting To Other Devices
Connecting to Other Devices Use ActiveSync, serial and dial-up connections to communicate with other Bluetooth devices. Establish a partnership with a cell phone and set up the Bluetooth services it offers. Identifying the Communications Port You can identify the virtual COM ports used to create a serial port connection. -
Page 249: Deleting A Shortcut
1. From the Today screen, tap the iPAQ Wireless icon in the Command bar > Bluetooth > Manager. 2. Tap New, then a type of service, and tap Next. 3. Follow the connection wizard instructions. Note: Paired devices are designated by a checkmark. Deleting a Shortcut 1. -
Page 250: Establishing An Activesync Connection
You can set up an ActiveSync partnership with a Bluetooth-enabled computer by first setting up your computer, then setting up your HP iPAQ. If you are using other Bluetooth modules or cards on your computer, refer to the Bluetooth Configuration Manager or Settings for similar setup procedures, then skip to ActiveSync Partnership on Your HP iPAQ.”... - Page 251 3. Follow the connection wizard instructions. Note: Be sure the ActiveSync COM port setting on your HP iPAQ is the same as the COM port setting used for Bluetooth on your computer. 4. From the Bluetooth Browser screen, select the computer you want to synchronize with.
-
Page 252: Establishing A Serial Connection
5. Under Serial Port Selection, select the name of the serial port for the computer selected above, then tap Next > Finish. Establishing a Serial Connection Use the wireless Bluetooth serial port connection just as you would a physical serial cable connection. You must configure the application that will use the connection to the correct serial port. -
Page 253: Establishing A Cell Phone Partnership
1. From the Today screen, tap iPAQ Wireless > Bluetooth > Manager. 2. Tap New > Join a personal network > Next. 3. Follow the Connection Wizard instructions. Establishing a Cell Phone Partnership You can establish a partnership with a cell phone, then set up the Bluetooth services it offers. -
Page 254: Sending Files
2. Tap New > Browse files on a remote device > Next. 3. Follow the connection wizard instructions. Note: The remote device must have Bluetooth turned on and set up to allow discovery before the connection can occur. Sending Files 1. -
Page 255: Deleting A File From A Remote Device
5. Tap OK. Deleting a File from a Remote Device 1. Tap and hold a file transfer shortcut icon, and tap Connect. 2. Navigate to the file location on the remote device. 3. Tap the file. 4. Tap File > Delete. 5. -
Page 256: Sending Business Cards
2. From the Today screen, tap iPAQ Wireless > Bluetooth Settings > Services tab. 3. Under Services, select Information Exchange. 4. Tap the Advanced... button. 5. Tap the My business card (vCard) icon. 6. Select your contact from the Contacts list. 7. -
Page 257: Requesting Business Cards
3. Tap the Send icon. 4. Tap the device where you want to send your business card. 5. Tap OK. Note: Be sure the receiving device has been enabled to accept the transfer. Requesting Business Cards 1. From the Today screen, tap the iPAQ Wireless icon in the Command bar >... -
Page 258: Opening A Connection
Exchanging Business Cards You can exchange business card information with another device. If available, the device’s information will be sent directly into your Contacts list in Pocket Outlook. To exchange business cards: 1. From the Today screen, tap the iPAQ Wireless icon in the Command bar >... -
Page 259: Closing A Connection
■ Connection status ■ Length of connection ■ Signal strength To view the connection status: 1. From the Today screen, tap the iPAQ Wireless icon in the Command bar > Bluetooth > Manager. 2. Tap and hold an active connection icon or list name, and tap Status. -
Page 260: Managing The Battery
Your HP iPAQ is shipped with the battery partially charged. To install the removable/rechargeable battery in the HP iPAQ: 1. On the back of the HP iPAQ, slide the Cover Release latch 1, pull the cover’s edge away from the unit 2, and remove the cover 3. - Page 261 Managing the Battery Note: The built-in HP Photosmart camera is available only in select HP iPAQ models. To upgrade your model, please refer to the Accessories Brochure for information on the HP Photosmart Mobile Camera. User’s Guide 10–2...
- Page 262 2. Insert the battery into the battery slot on the right side of the HP iPAQ with the connectors lined up on the upper right 1, and push the left side of the battery into place 2. Note: Ensure the large battery label is visible when the battery is installed.
- Page 263 Managing the Battery Ä CAUTION: The cover must be tightly latched in place for the HP iPAQ to operate. Note: If the battery is not fully charged, you must connect the AC adapter to the HP iPAQ to fully charge it before continuing. It takes about four hours to fully charge the battery.
-
Page 264: Removing The Battery
Ä CAUTION: Because most of the applications and data you install on your HP iPAQ are held in main memory, you need to reinstall them if the battery completely discharges or if the battery is removed from the unit for extended periods of time. - Page 265 1. Plug the AC adapter into an electrical outlet 1. 2. Insert the AC adapter plug into the charger adapter 2. 3. Insert the charger adapter into the bottom of the HP iPAQ 3. Ä CAUTION: To avoid damaging your HP iPAQ or the AC adapter, check to be sure all connectors are properly aligned before connecting them.
-
Page 266: Charging With The Desktop Cradle And Ac Adapter
1. Plug the AC adapter into an electrical outlet 1 and connect the other end of the AC adapter to the AC connector on the desktop cradle 2. 2. Slide the bottom of your HP iPAQ into the cradle 3 and push firmly to seat it. Ä... - Page 267 Managing the Battery Note: The amber charge light on the HP iPAQ blinks while the battery is recharging and turns solid (nonblinking) when the battery is fully charged. User’s Guide 10–8...
-
Page 268: Changing The Backlight Settings
External Power Battery Saving Tips: Set the backlight to go off quickly after you stop using your HP iPAQ. Tap Start > Settings > System tab > Backlight to get to these settings. Settings can be different when the HP iPAQ is connected to external power or running on battery power. -
Page 269: Disabling The Application Buttons
The Extended power-saving mode is not recommended if Bluetooth is also on. Disabling the Application Buttons Pressing the Application Buttons on your HP iPAQ will turn on your device by default. Battery Saving Tip: To reduce incidence of accidentally powering on the HP iPAQ, you may choose to disable the Application and Image Capture Buttons Auto Power On feature. - Page 270 Managing the Battery 3. Tap OK. Note: If you disable the Auto Power On feature for the Application Buttons, the Power Button still turns on the unit. Once the unit is turned on, all buttons will function according to their programmed functions. User’s Guide 10–11...
-
Page 271: Manually Monitoring The Battery
Tap Start > Settings > System tab > Power > Advanced tab. Tap the On battery power: checkbox, then tap the drop-down arrow to specify how long before your HP iPAQ turns itself off. User’s Guide Managing the Battery 10–12... -
Page 272: (Mmc) Expansion Cards
You can expand the memory and connectivity of your HP iPAQ rx3000 series Mobile Media Companion. Use optional expansion cards for: ■ Expanding the memory of your HP iPAQ ■ Viewing the content of memory cards (SD/MMC) Note: Expansion cards must be purchased separately and are not included with your HP iPAQ. -
Page 273: Mmc) Expansion Cards
To install a Secure Digital (SD) or MultiMedia (MMC) card into the expansion slot on the HP iPAQ: 1. Locate the slot on the top of the HP iPAQ. 2. Remove the protective plastic card. 3. Insert the expansion card into the expansion slot and push the connection edge of the card firmly into the expansion slot. -
Page 274: Removing Secure Digital (Sd) Or Multimedia (Mmc) Expansion Cards
MultiMedia (MMC) Expansion Cards To remove an SD or MMC card from the expansion slot on the HP iPAQ: 1. Close all applications that are using the expansion card. 2. Remove a card from the Secure Digital expansion slot by slightly pushing down on the card 1 to unlock it. -
Page 275: Viewing The Content Of Memory Cards
Viewing the Content of Memory Cards Use File Explorer to view the files that are located on your optional SD or MMC card. 1. From the Start menu, tap Programs > File Explorer. 2. Tap the root directory of My Device, and select the Storage Card folder to see a list of files and folders. -
Page 276: Troubleshooting
User’s Guide Troubleshooting • Be sure the HP iPAQ is powered on. • Be sure the HP iPAQ is connected to the AC adapter and the Desktop Cradle. • Reset the device by using the stylus to lightly press the Reset button. - Page 277 • Disconnect all external devices. • Take the AC adapter and Charger adapter with you. • Keep your HP iPAQ in a protective case and keep it in your carry-on luggage. 1. Back up your information. 2. Disconnect all external devices.
- Page 278 • Be sure the WEP key is correct. • Be sure the IP Address is correct. • Be sure the hardware you are using with your HP iPAQ is properly configured and operational. • Reset the device by using the stylus to lightly press the Reset button.
- Page 279 Solution (Continued) Problem I cannot find Pocket Word and Excel recognize and display documents in the document only one folder below My Documents. For example, if you or workbook created another folder in the Personal folder in My I saved. Documents, the documents in that folder will not be shown.
-
Page 280: Activesync
Cradle. • Be sure your HP iPAQ is connected to the Desktop Cradle, • Be sure your HP iPAQ is securely seated in the cradle and • Be sure you are running Microsoft Windows 98SE, Me, • Uninstall and reinstall ActiveSync. - Page 281 • Be sure the device is on. ActiveSync cannot • Be sure all cables are securely connected. locate my HP • Remove your HP iPAQ from the Universal Desktop Cradle iPAQ when I synchronize. • Reset the device by using the stylus to lightly press the •...
-
Page 282: Expansion Cards
• Be sure you have loaded any drivers that came with the cannot recognize my card. • Reset the device by using the stylus to lightly press the User’s Guide into the HP iPAQ. appropriate slot. expansion card you purchased. Reset button. Troubleshooting Chapter 11, 12–7... -
Page 283: Bluetooth
Bluetooth For more information on Bluetooth, refer to Bluetooth.” Problem Solution I cannot discover • Be sure Bluetooth is turned on. another device. • Move closer to the device. • Be sure you have not limited your ability to see devices. •... -
Page 284: Wireless Lan
• Be sure the device identified the network you want to point. • Be sure you provided any necessary authentication keys if • Be sure your HP iPAQ is within range of the access point. I am connected to If the wireless network you are connected to connects to Work, an access point, the network may require a proxy. -
Page 285: Ipaq Mobile Media
Solution (Continued) Problem I cannot connect It is likely that the network is a “hidden” or non-SSID broadcast to an available network. You must know the network name (SSID) to be able to network that connect. shows in the list of 1. - Page 286 User’s Guide • The Media Control, Media Stream, and Media Copy icons will appear grayed out if your HP iPAQ is not connected to your Wi-Fi network, or you if don’t have the Mobile Media for PC components installed on your PCs, they are not running, or your PCs are turned off.
- Page 287 • f you are in Local mode, verify that your Storage Settings are set to look in the proper location on your HP iPAQ. From the Customize (Wrench) menu select Storage Settings and select the appropriate folder where your media is stored.
- Page 288 Problem Solution When I select a • The digital media formats are supported by your HP iPAQ particular digital media file I get an error message that says this file format is not supported. In Media Control • Check to see that the computer you are trying to access is mode, I cannot play.wma or.wmv...
- Page 289 HP Photosmart Camera. I cannot view • Videos can only be viewed on your HP iPAQ if they have some .wmv video files on my HP iPAQ even though I can view them on my computers.
- Page 290 Media. To play copy-protected music, you must use Window Media Player on your computer to transfer the music to your HP iPAQ and then use Windows Media Player on your HP iPAQ to play. supported with iPAQ Mobile Media. Only .wma and .mp3 (except Media Stream mode) are supported with...
-
Page 291: A Regulatory Notices
Consult the dealer or an experienced radio or television technician for help This PDA has been tested and demonstrated compliance when Bluetooth and WLAN are transmitting simultaneously. This PDA must not be co-located or operating in conjunction with any other antenna or transmitter. User’s Guide Regulatory Notices... -
Page 292: Declaration Of Conformity For Products Marked With The Fcc Logo-United States Only
Modifications The FCC requires the user to be notified that any changes or modifications made to this device that are not expressly approved by Hewlett-Packard Company may void the authority to operate the equipment. Cables Connections to this device must be made with shielded cables with metallic RFI/EMI connector hoods in order to maintain compliance with FCC Rules and Regulations. -
Page 293: Canadian Notice
Canadian Notice This Class B digital apparatus meets all requirements of the Canadian Interference-Causing Equipment Regulations. Avis Canadien Cet appareil numérique de la classe B respecte toutes les exigences du Règlement sur le matériel brouilleur du Canada. Japanese Notice Korean Notice European Regulatory Notice Radio product for indoor use in Home and Office environment operating in the 2.4 GHz band –... -
Page 294: Declaration Of Conformity
■ R&TTE Directive 1999/5/EC CE Compliance of this equipment is valid only if powered with an HP-provided and CE marked AC adapter. Compliance with these directives implies conformity to the following European Norms (in parentheses are the equivalent international standards and regulations): ■... -
Page 295: Battery Warning
Notice for Use in France and Italy Italy: E’necessaria una concessione ministeriale anche per l’uso del prodotto. Verifici per favore con il proprio distributore o direttamente presso la Direzione Generale Pianificazione e Gestione Frequenze. License required for use. Verify with your dealer or directly with General Direction for Frequency Planning and Management (Direzione Generale Pianificazione e Gestione Frequenze). -
Page 296: Equipment Warning
Ä CAUTION: Use only an HP approved battery for your iPAQ Pocket PC. Inserting a battery that does not comply with HP requirements might cause the Pocket PC to malfunction. Because of the type of battery used in your device, follow local regulations regarding the safe disposal of the battery. -
Page 297: Airline Travel Notice
Airline Travel Notice Use of electronic equipment aboard commercial aircraft is at the discretion of the airline. Wireless Notices In some environments, the use of wireless devices may be restricted. Such restrictions may apply aboard airplanes, in hospitals, near explosives, in hazardous locations, etc. If you are uncertain of the policy that applies to the use of this device, please ask for authorization to use it prior to turning it on. -
Page 298: Japanese Regulatory Wireless Notice
Japanese Regulatory Wireless Notice Brazilian Regulatory Wireless Notice Este equipamento opera em caráter secundário, isto é, não tem direito a proteção contra interferência prejudicial, mesmo de estações do mesmo tipo, e não pode causar interferência a sistemas operando em caráter primário. User’s Guide A–8... -
Page 299: System Specifications
System Specifications Note: Not all models described are available in all regions. The built-in HP Photosmart camera is available only in select HP iPAQ models. To upgrade your model, please refer to the Accessories Brochure for information on the HP Photosmart Mobile Camera. -
Page 300: Physical Specifications
System Description (Continued) Feature Built-in Digital HP Photosmart 1.2 megapixel camera w/4x digital zoom, Camera 1280 x 960 pixel resolution, and self-portrait mirror. Captured image file format: JPEG. Motion JPEG, H.263 (rx3700 only), Video playback formats, MPEG1, MPEG4 (rx3700 only), and MotionJPEG. -
Page 301: Operating Environment
HP iPAQ rx3700 series Depth Weight (including standard battery and stylus) HP iPAQ rx3400 and rx3100 series Length Width Depth Weight (including standard battery and stylus) Operating Environment Environment Temperature Relative Humidity Maximum Altitude User’s Guide 0.64 in 158 g 4.5 in...