
Related Manuals for Extron electronics DVS 510


Summary of Contents for Extron electronics DVS 510
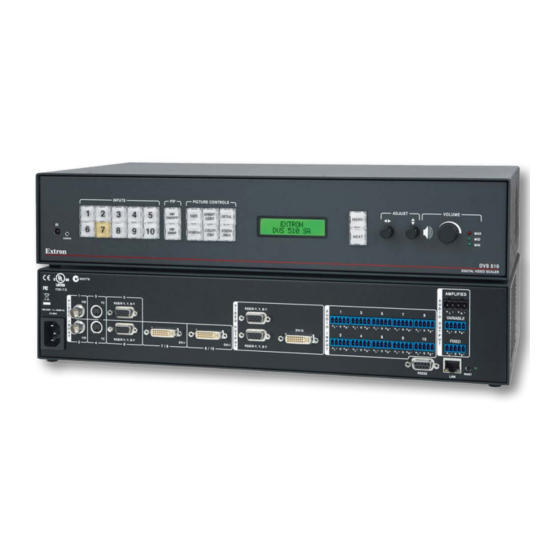
- Page 1 User Guide Scalers and Scan Converters DVS 510 Series Switching Scalers 68-1290-01 Rev. B 04 12...
- Page 2 Safety Instructions • English Warning This symbol is intended to alert the user of important operating and mainte- Power sources • This equipment should be operated only from the power source indicated on the product. This nance (servicing) instructions in the literature provided with the equipment. equipment is intended to be used with a main power system with a grounded (neutral) conductor.
- Page 3 FCC Class A Notice This equipment has been tested and found to comply with the limits for a Class A digital device, pursuant to part 15 of the FCC Rules. Operation is subject to the following two conditions: This device may not cause harmful interference. This device must accept any interference received, including interference that may cause undesired operation.
- Page 4 Conventions Used in this Guide In this user guide, the following are used: CAUTION: A caution indicates a potential hazard to equipment or data. NOTE: A note draws attention to important information. TIP: A tip provides a suggestion to make working with the application easier. WARNING: A warning warns of things or actions that might cause injury, death, or other severe consequences.
-
Page 5: Table Of Contents
Front Panel Lockout (Executive Mode) ....42 Additional Features ........... 42 About this Guide ..........1 Freeze ............42 About the DVS 510 Series Scalers ....... 1 Power Save Modes ........42 Features .............. 2 Output Sync Mute ........43 Controlling the DVS 510 Series ...... - Page 6 ........107 Specifications ..........107 Part Numbers ..........110 Included Parts ..........110 Optional Accessories ........110 Mounting the DVS 510 Scaler ......111 Rack Mounting ........... 111 Tabletop Use ..........112 Button Labels ..........112 Replacing Button Labels ......112 Creating Labels Using the Button Label Generator ..........
-
Page 7: Introduction
Introduction This section gives an overview of the DVS 510 and DVS 510 SA scalers. Topics include: • About this Guide About the DVS 510 Series Scalers • • Features Controlling the DVS 510 Series • • Application Diagram About this Guide... -
Page 8: Features
• Outputs — The DVS 510 has a scaled DVI-D video output on a DVI-I connector, two scaled RGB/YUV outputs on 15-pin HD connectors, and two audio outputs (one fixed and one variable) providing balanced and unbalanced stereo audio on 3.5 mm 5-pole captive screw connectors. - Page 9 • Power Save Mode — The DVS 510 can be set to mute video and sync output to the display device when no active input signal is detected. This allows the projector or flat-panel display to automatically enter into standby mode to save energy and enhance lamp or panel life.
-
Page 10: Controlling The Dvs 510 Series
• supply provides worldwide power compatibility. Controlling the DVS 510 Series You can control the DVS 510 and the DVS 510 SA using one or more of the following methods: • The front panel controls include back-lit buttons, a Volume Control knob, and rotary Adjustment encoders. -
Page 11: Application Diagram
Application Diagram The following diagram shows an example of a DVS 510 SA application. Extron Extron DVS 510 SA SI 28 Scaling Presentation TouchLink Surface-mount ™ Switcher Control Speakers System LAPT D OU IF IE DISP SCRE SCRE TCP/IP LI NE ®... -
Page 12: Installation
Installation This section gives an overview of the steps to installing the DVS 510. It also provides a description of the rear panel connectors and instructions for cabling. The following topics are discussed: • Installation Overview • Rear Panel Connecting to the RS-232 Config Port (Front Panel) •... -
Page 13: Rear Panel
85), or any combination of these methods. Rear Panel The illustration below shows the connectors and indicators on the DVS 510 Series rear panel. CAUTION: Use Electrostatic discharge precautions (be electrically grounded) when making connections. Electrostatic discharge (ESD) can damage equipment, although you may not feel, see, or hear it. - Page 14 Female Connector FOR ANALOG ONLY Figure 3. DVIIM-VGAF/DVIIF DVI and Analog Breakout Cable (See the DVI Analog Breakout Adapter Instruction Card, part number 68-1172-01, [provided with the adapter], for pin assignments for this Y cable.) DVS 510 Series • Installation...
- Page 15 Figure 4. Audio Input Connector Wiring Amplified audio output connector (DVS 510 SA only) — This 4-pole, 5 mm captive screw connector enables you to connect a set of speakers or another output device to the DVS 510 SA internal amplifier for amplified output.
- Page 16 A cable that is wired the same at both ends Connector and T568B at the other (Tx and Rx pairs is called a "straight-through" cable, because reversed) is a "crossover" cable. no pin or pair assignments are swapped. Figure 6. Wiring the LAN Connector DVS 510 Series • Installation...
-
Page 17: Connecting To The Rs-232 Config Port (Front Panel)
Pin 3 Computer Tx line Ring Pin 5 Computer signal ground Sleeve Figure 8. Optional 2.5 mm Connector Cable for the Configuration Port (See “ Config port“ on page 16 for more information on this connector.) DVS 510 Series • Installation... -
Page 18: Wiring The Amplified Audio Port (Dvs 510 Sa Only)
Wiring the Amplified Audio Port (DVS 510 SA Only) To connect speakers to the DVS 510 SA built-in amplifier, terminate the speaker cable as follows: Strip the end of the cable 3/16 inches (5 mm). CAUTIONS: • The length of the exposed wires in the stripping process is critical. - Page 19 4 ohm load. Stereo L+ Stereo R+ 8 ohms 8 ohms 8 ohms 8 ohms Mono – Mono – Stereo L- Stereo R- 4 Ohm Total Load 4 Ohm Total Load Figure 10. Speaker Connection Examples DVS 510 Series • Installation...
-
Page 20: Operation
Operation This section discusses the functions available through the front panel to set up and operate the DVS 510 or DVS 510 SA. Topics include: Front Panel • • Powering On Picture-in-Picture (PIP) Mode • • Menus on the LCD Screen •... - Page 21 PIP mode. PIP Swap button: Toggles the primary (main or background) and secondary (PIP) • pictures between the main image and the PIP window. (See “Picture-in-Picture (PIP) Mode” for more information on the picture-in-picture function.) DVS 510 Series • Operation...
- Page 22 Panel)” on page 11 for the configuration and pin assignments for this cable.) Infrared sensor — This sensor receives infrared (IR) signals from the IR 904 remote control (see “Using the Optional IR 904 Remote Control” on page 43 for details). DVS 510 Series • Operation...
-
Page 23: Powering On
47.8KhZ 60.0Hz Default Cycle 5 sec. 5 sec. Output Rate 1080i @ 60Hz Figure 12. Power-up and Default Cycle NOTE: Audio and video mute settings are not retained when power is cycled to the DVS. DVS 510 Series • Operation... -
Page 24: Picture-In-Picture (Pip) Mode
If the PIP window source is not active, the PIP mode exits until an active signal is detected. When the main window source is removed, a black background is displayed. • Audio and video breakaway are not allowed. DVS 510 Series • Operation... -
Page 25: Enabling Pip Mode
You can set audio to follow the main (default) window or the PIP window. Audio breakaway is not possible while PIP mode is on; audio must follow either the main window or the PIP window. DVS 510 Series • Operation... -
Page 26: Menus On The Lcd Screen
Menus on the LCD Screen The DVS 510 menus that are displayed on the LCD screen enable you to configure and operate the scaler. The menu navigation buttons (Menu and Next) are located to the right of the LCD screen. Press these buttons to cycle through the available menus and submenus, and use the horizontal and vertical Adjust knobs to select options. - Page 27 Advanced Configuration 30 sec. Menu View Comm Setting 30 sec. Menu Exit Menu? Menu Press NEXT 30 sec. Next Figure 13. Main Menu The following sections describe the submenu options for each of the menus. DVS 510 Series • Operation...
-
Page 28: User Presets Menu
“letterbox” image for a 16:9 input resolution and save it to a user preset. Subsequently, if a 1080p resolution is applied to the unit, the letterbox preset that was saved at 720p can be recalled with the new 1080p input resolution. DVS 510 Series • Operation... -
Page 29: Input Configuration Menu
Refresh Rate table in the • be sampled. 60 Hz “Output Configuration Menu” • 75 Hz section for a complete list of available resolutions. Figure 15. Input Configuration Menu DVS 510 Series • Operation... -
Page 30: Selecting An Input
Active Pixels Active Lines EDID (Inputs 5 and 6 only) Input configuration submenu adjustments table on the next page shows how to make the selections and adjustments that are accessed through the Input Configuration submenus. DVS 510 Series • Operation... - Page 31 The resolution and refresh rate of a display device resolution. (available only for RGB and DVI inputs) • The Vertical ({) Adjust knob selects the refresh rate. NOTE: This submenu is not displayed when input 1-4, 7, or 9 is selected. DVS 510 Series • Operation...
-
Page 32: Output Configuration Menu
While the Output Configuration menu is displayed, rotate the horizontal Adjust ([) knob to select the output resolution and the vertical Adjust ({) knob to select the refresh rate. The default resolution and rate for the DVS 510 Series are 1024x768 @ 60 Hz. table on the next page shows the available resolutions and refresh rates on the DVS 510 Series. - Page 33 ([) or vertical ({) Adjust knob. Options are H-V- (default), H+V- H-V+ , or H+V+ NOTE: This submenu applies only to RGBHV format. For all other output formats, N/A i displayed for this submenu. DVS 510 Series • Operation...
-
Page 34: Audio Configuration Menu
The Audio Configuration menu enables you to adjust the levels of gain, attenuation, bass, and treble; enable and disable the limiter for the amplifier (DVS 510 SA only); turn audio delay on and off; and select the audio output type (stereo or dual mono). The flow diagram below shows the Audio Configuration submenus and the adjustments that can be made from them. -
Page 35: Advanced Configuration Menu
• Crosshatch • 1.33 Aspect • Fade (default) • 4x4 Crosshatch • 1.78 Aspect • Grayscale • 1.85 Aspect • Ramp • 2.35 Aspect • Alternating Pixels • Blue Mode Figure 18. Advanced Configuration Menu DVS 510 Series • Operation... - Page 36 If you do not want to use the auto memories settings, disable auto memories before allowing Auto-Image to be performed. (See the table below for the results of the possible combinations of Auto-Image and auto memories settings.) DVS 510 Series • Operation...
- Page 37 Action New signals or rates that have not been previously detected by the DVS 510 are initially set up using default parameters, then Auto-Image is applied and the values are stored. The next time that signal is detected, the values stored in the auto memory location are applied.
-
Page 38: Test Pattern Submenu
Color Bars is used to calibrate color settings on the display and to confirm proper system wiring. • Blue Mode causes only sync and blue video signals to pass to the display. This can assist you in setting up the color and tint levels of the video input. DVS 510 Series • Operation... - Page 39 Blue Mode Alt Pixels White Field Figure 19. DVS 510 Series Test Patterns To select a test pattern: From the Advanced Configuration menu, press Next until the Test Pattern submenu is displayed. Rotate either Adjust knob to select a test pattern. The default is (no test pattern).
-
Page 40: View Comm Settings Menu
While holding the Next button, press the Detail and Color/Tint buttons simultaneously. Hold all three buttons until the Edit Comm Settings screen is displayed (approximately 2 seconds). If no activity occurs within 30 seconds, the DVS saves all settings and returns to the default cycle. DVS 510 Series • Operation... - Page 41 On the Set DHCP Mode screen, rotate either Adjust knob to the right to turn DHCP on or to the left to turn DHCP off. Contact your system administrator for the setting to select. DVS 510 Series • Operation...
-
Page 42: Exiting The Menu System
NOTE: When PIP mode is active, all these picture controls apply to the PIP window. To configure the main window, press the PIP On/Off button to exit PIP mode. DVS 510 Series • Operation... -
Page 43: Adjusting The Picture Controls
Zoom; twice to set Pan: Move the focus on the For H and V: H: Horizontal ([) Pan. ±nnn ±nnn image right, left, up, or -100 through +100 V: Vertical ({) down. Default: 000 DVS 510 Series • Operation... -
Page 44: Input Presets
Windows-based control software (see the Signal Processing Products Control Program help file), SIS commands (see the Input Presets commands on page 63 in the Command and Response Table for SIS Commands) or the DVS 510 Series web pages (see “Memory/Input Presets Page” on page 102). -
Page 45: Volume Control
When the volume is muted, all the Volume LEDs go dark except Min, which flashes. • When an incremental Volume LED lights, the LEDs below it remain lit. For example, when the Max LED lights, the Mid and Min LEDS are also lit. DVS 510 Series • Operation... -
Page 46: Audio Or Video Breakaway
The reset modes listed in the table on the next page close all open IP and Telnet connections and all sockets. • Each mode is a separate function, not a continuation from mode 1 to mode 5. • There is no reset mode 2 for the DVS 510 Series. DVS 510 Series • Operation... - Page 47 DVS 510 Series Reset Mode Summary Mode Activation Result Purpose and Notes Hold in the recessed Reset The DVS reverts to the factory Use mode 1 to revert to button while applying power default firmware for a single the factory default version power cycle.
-
Page 48: Front Panel Lockout (Executive Mode)
Front Panel Lockout (Executive Mode) To prevent accidental changes to settings, you can lock the DVS 510 front panel controls by placing the scaler in lock (executive) mode 1 or 2. While the DVS is in lock mode, RS-232, RS-422, and Ethernet communication, as well as IR remote control, remain available. -
Page 49: Output Sync Mute
INPUT SELECTION AUTO IMAGE SIZE POSITION MUTE VIDEO MUTE ADJUST AUDIO MUTE ZOOM IMAGE ADJUSTMENTS COLOR TINT CONT BRIGHT DETAIL FREEZE IR 904 REMOTE IR 904 Remote Control Figure 24. Area for Remote Signal Reception DVS 510 Series • Operation... -
Page 50: Locking Ir Remote Control Access
Install two AAA batteries in the IR 904 Remote Control as shown below. Figure 25. Installing Batteries in the IR 904 Remote Control Buttons on the IR 904 Remote Control The following DVS 510 Series functions are available through the buttons on the IR 904 IR Remote Control: ON/OFF VOLUME... - Page 51 Vertical position: Zoom Increase or decrease the size of the image Either while keeping the aspect ratio constant. Move the focus on the image right, left, up, Pan horizontally: or down. < > Pan vertically: DVS 510 Series • Operation...
- Page 52 Audio Mute button — Toggles audio output muting on and off. Video Mute button — Toggles video output muting (hiding) on and off. AV Mute button — Mutes and unmutes both video and audio simultaneously. DVS 510 Series • Operation...
-
Page 53: Remote Configuration And Control
Configuration and Control The DVS 510 can be remotely controlled via a host computer or other device (such as a control system) attached to the rear panel RS232 connector, the front panel RS-232 Config port, or the LAN port. You can configure and control the DVS by the Extron Simple... -
Page 54: Ip Address
IP Address To access the DVS 510 or DVS 510 SA via the Ethernet port, obtain the IP address of the scaler from your network administrator. If the IP address has been changed to an address comprised of words and characters, you can determine the actual numeric IP address using the ping (ICMP) utility (see “IP... -
Page 55: Scaler-Initiated Messages
No response is required from the host. Some scaler-initiated messages are listed here. • (c) Copyright 20nn, Extron Electronics, DVS 510, Vn.nn., 60-835-0n Www, DD Mmm YYYY hh:mm:ss The DVS sends the copyright message upon connecting to the computer via IP, or when powering up while connected. -
Page 56: Error Response References
Command and Response Tables for SIS Commands, starting on page 55, list the commands that the DVS 510 scaler recognizes as valid, the responses that are returned to the host, a description of the command function or the results of executing the command, and command examples. -
Page 57: Symbol Definitions For Dvs 510 Series Sis Commands
Figure 28. ASCII to Hexadecimal Character Conversion Table NOTE: Upper- and lowercase text can be used interchangeably except where noted. Symbol Definitions for DVS 510 Series SIS Commands • Space Carriage return with line feed Carriage return with no line feed Pipe (vertical bar) character. - Page 58 1366 x 768 1400 x 1050 1440 x 900 1600 x 1200 1680 x 1050 1920 x 1200 480p 576p 720p 1080i 1080p 2048 x 1080 Figure 29. SIS Commands EDID Table DVS 510 Series • Remote Configuration and Control...
- Page 59 1 = Receiver or source detected with HDCP (digital inputs or outputs only) 2 = Receiver or source detected but no HDCP present (analog or digital inputs or outputs) DVS 510 Series • Remote Configuration and Control...
- Page 60 Front panel security lock (executive mode) 1 = Lock mode 1: all front panel functions locked 2 = Lock mode 2: limited front panel access (input selection, PIP, volume control, and Auto-Image) DVS 510 Series • Remote Configuration and Control...
-
Page 61: Command And Response Table For Dvs 510 Series Sis Commands
Command and Response Table for DVS 510 Series SIS Commands ASCII Command Response Command Additional Description (Host to Scaler) (Scaler to Host) Input Selection Video and audio Select video and audio from input source • Video & Select video from input source •... - Page 62 = Total pixels ±512 of the default value for high resolution video and ±127 for interlaced video = Active pixels ±512 of the default value for high resolution video and ±127 for interlaced video DVS 510 Series • Remote Configuration and Control...
- Page 63 0 through 127 (for color, tint, contrast, brightness, and detail filter) = Picture adjustments = Video mute status 0 = unmuted, 1 = muted to black screen, 2 = all output video and sync muted DVS 510 Series • Remote Configuration and Control...
- Page 64 = Picture adjustments filter) = Horizontal and vertical shift (center) Range depends on the current output rate. X1& = Horizontal and vertical size (width and height) Range depends on the current output rate. DVS 510 Series • Remote Configuration and Control...
- Page 65 = Pan value -100 through +100 (Values depend on the zoom setting.) Default = 0. EDID resolution table = EDID resolution and refresh rate See the on page 53 for the available values. DVS 510 Series • Remote Configuration and Control...
- Page 66 0 = Black screen; output sync retained = Power save and screen saver modes 1 = Blue screen; continuous sync 2 = Timed blue screen. Screen is blue for 1 minute, then output video and sync are muted. DVS 510 Series • Remote Configuration and Control...
- Page 67 = Audio gain or attenuation (unit response) 0 through 16 (-12 dB through +12 dB) in increments of 1.5 dB: = Audio bass and treble 0 = -12 dB, 8 = 0 dB (default), 16 = 12 dB DVS 510 Series • Remote Configuration and Control...
- Page 68 0 = follow main window, 1 = follow PIP window 2 = digital, 2-channel LPCM 48 kHz (default) = Digital audio input type 3 = digital full audio (7.1, DTS, and so on) DVS 510 Series • Remote Configuration and Control...
-
Page 69: Advanced Configuration
= Test pattern 0 through 13 (see “Test pattern” under “Symbol Definitions for DVS 510 Series SIS Commands” for the available test patterns). 1 through 128 = Input preset number X3& 0 through 50 in 0.1-second increments. Default is 05 (0.5 seconds). - Page 70 = Front panel lock (executive mode) 0 = executive mode disabled, 1 = full front panel lockout, 2 = Partial front panel lockout (Only input selection, PIP, volume control, and Auto-Image are available.) DVS 510 Series • Remote Configuration and Control...
- Page 71 0 = Cut. Instantly switches audio output to the next input. = Video switching effect 1 = Fade. Audio ramps down from the current input, then ramps up to the new input (default). DVS 510 Series • Remote Configuration and Control...
- Page 72 IP address, subnet mask, gateway IP address, unit name, DHCP setting, and port mapping (Telnet, web, and direct access). This preserves communication with the device, and is recommended after a firmware update. DVS 510 Series • Remote Configuration and Control...
-
Page 73: Symbol Definitions For Ip-Specific Sis Commands
Default broadcast IP address: 255.255.255.255 X8& 10 through 32767 Time (in 10-ms increments) to wait for characters to arrive at a serial Default = 10, or 100 ms port before terminating the connection DVS 510 Series • Remote Configuration and Control... - Page 74 2 = Europe (Begins last Sunday in March and ends last Sunday in October.) 3 = Brazil (Begins third Sunday in October and ends third Sunday in February.) X10$ 0 through 99 (The event must be running.) Event number DVS 510 Series • Remote Configuration and Control...
- Page 75 16-bit decimal number. X13$ Hardware (MAC) address with Can be up to 10 digits. the 8 least significant hex nibbles converted into a single 32-bit decimal number. DVS 510 Series • Remote Configuration and Control...
-
Page 76: Command And Response Table For Ip-Specific Sis Commands
For 0 = Use Send data string command parameters (default); 1 = Use Configure receive timeout command parameters. The response includes leading zeros. E X7! X8& X9! ] View receive timeout DVS 510 Series • Remote Configuration and Control... - Page 77 NOTE: In the command, the divider between hours and minutes can be a colon or a period. In the response, it is a colon. Example: 8.0CZ Ipz+08:00 X7# ] View GMT offset DVS 510 Series • Remote Configuration and Control...
- Page 78 Set the IP address for the Domain Name System (DNS) in the format (nnn.nnn.nnn.nnn). Leading zeros in the octets are optional. X8$ ] View DNS server IP address Leading zeros are not shown response. DVS 510 Series • Remote Configuration and Control...
- Page 79 (****) (IP connection). If there is no password, the response is empty. X10( ] View administrator password Reset (clear) administrator • CA Ipa • Clear or remove all passwords password (administrator and user). DVS 510 Series • Remote Configuration and Control...
- Page 80 View web port map X7@ ] E X7@ X7@ ] Set Direct Access port map Reset Direct Access port map 2001MD PMD02001 Disable Direct Access port map PMD00000 View Direct Access port map X7@ ] DVS 510 Series • Remote Configuration and Control...
- Page 81 [n] = ‘filenamen , daten, filesizen ‘; file [n+1] ‘space remaining , bytes left’ NOTE: LF has the same response from the unit as DF, except path/directory precede filenames for files from directories below the current directory. DVS 510 Series • Remote Configuration and Control...
- Page 82 2 = Unit-specific parameters (box.cfg) The files are stored in the directory /nortxe-backup created on the unit by the Save commands. Restore unit configuration 0 * configuration type XF Cfg0 * configuration type DVS 510 Series • Remote Configuration and Control...
- Page 83 24,27 Stop events 24,27 Query the number of events nnnnn Response is a 5-digit number. running Telnet text responses: In Verbose Mode: event0 starting loc, Enm nnnnn length event1 starting loc, length DVS 510 Series • Remote Configuration and Control...
-
Page 84: Using The Signal Processing Products Control Program (Sppcp)
The Windows-based Extron Signal Processing Products Control Program (SPPCP) offers an alternative way to control the DVS 510 Series via an RS-232, RS-422, or Ethernet connection. The graphical user interface includes the same functions as those on the scaler front panel with additional features that are available only through the software. - Page 85 Locate the Signal Processing Products Control Program file from the list and click the Download link at right. Figure 33. Download Link for SPPCP Software Follow the on-screen instructions to download the program to your computer. DVS 510 Series • Remote Configuration and Control...
-
Page 86: Starting The Software
Tabs on the SPPCP: Select Connection Type Window Click . The Signal Processing Products Control Program main window opens Connect figure 35 (see on the next page), and the software is ready for operation. DVS 510 Series • Remote Configuration and Control... -
Page 87: Accessing The Help File
For instructions on using the SPPCP software, see the control program help file. To view this file, do either of the following: • Select Contents from the Help menu. • Press the <F1> key on your computer keyboard. DVS 510 Series • Remote Configuration and Control... -
Page 88: Updating The Firmware Using Sppcp
The Firmware Loader utility, accessed through the Signal Processing Products Control Program, provides a way to replace the DVS 510 firmware. In addition to being provided on the Extron Software DVD, the Firmware Loader is available free of charge from the Extron website. - Page 89 NOTES: • The original factory-installed firmware is permanently available on the DVS 510. If the attempted firmware upload fails for any reason, the scaler reverts to the factory-installed firmware. • When downloaded from the Extron website, the firmware is placed in a...
- Page 90 LCD screen returns to the default cycle. When the firmware upload and unit reset are complete, close the Firmware Loader window. The SPPCP window is redisplayed. DVS 510 Series • Remote Configuration and Control...
-
Page 91: Accessing The Web Pages
HTML Configuration and Control This section provides procedures for accessing and using the DVS 510 embedded web pages. The following topics are included: • Accessing the Web Pages Special Characters • • System Status Page • Configuration Pages File Management Page •... -
Page 92: Special Characters
DVS IP address. Click NOTE: User name entry is not required. The DVS 510 checks several possibilities, in the following order, and then responds accordingly: If the address includes a specific file name, such as , the scaler downloads that HTML page. -
Page 93: System Status Page
The System Status web page updates itself periodically to reflect the latest status of the scaler. If a variable changes, the display shows the change in status the next time it updates. You can also update the page by clicking the Refresh button in your browser. DVS 510 Series • HTML Configuration and Control... -
Page 94: Configuration Pages
The following sections describe the changes you can make from these pages. System Settings Page The DVS 510 displays the System Settings page when you click the tab. Configuration The screen consists of fields in which you can view and edit IP administration and system settings. - Page 95 The MAC (media access control) address is a unique hardware address by which each individual DVS 510 can be identified. It consists of six pairs of characters separated by hyphens. For all Extron products, the first three character pairs are 00-05-A6, followed by three more pairs unique to the individual device.
- Page 96 Europe and Brazil. When daylight savings time is turned off, the scaler does not adjust its time reference. Click the button at the bottom of the Date/Time Settings section to implement Submit your selections. DVS 510 Series • HTML Configuration and Control...
- Page 97 Scaler Settings page The Scaler Settings page simulates elements of the DVS 510 front panel menu system and also allows you to set video input signals (for inputs 5, 6, 7, and 9 only), configure the output, and remotely select advanced configuration options.
- Page 98 : Select a test pattern to assist you in adjusting the display device for color, Test Pattern Figure 44 convergence, focus, resolution, contrast, grayscale, and aspect ratio. on the next page shows the test patterns that are available. DVS 510 Series • HTML Configuration and Control...
- Page 99 (the input signal at each rate fills the entire output raster), (the input signal at each rate is displayed with its native aspect ratio [default Follow setting]). (See “Aspect Ratio submenu” on page 31 for more information about these fill modes.) DVS 510 Series • HTML Configuration and Control...
-
Page 100: Passwords Page
To clear an existing password so that no password is required, delete the bullets in the Password Re-enter Password fields and enter a space in each field, then click the button at the bottom of the page. Submit DVS 510 Series • HTML Configuration and Control... -
Page 101: Firmware Upgrade Page
On the Download Center page, click the link on the left sidebar menu. Firmware On the list of available firmware files, locate the DVS 510 and click the Download link at right. On the next screen, fill in the required information, then click the Download button. - Page 102 NOTES: • The original factory-installed firmware is permanently available on the DVS 510. If the attempted firmware upload fails for any reason, the scaler reverts to the factory-installed firmware. • When downloaded from the Extron website, the firmware is placed in a...
-
Page 103: File Management Page
File Management page. (Files are listed separately under headings of their extensions.) NOTE: If you want one of the pages that you create and upload to be the default startup page, name that file “index.html.” DVS 510 Series • HTML Configuration and Control... -
Page 104: Adding A Directory
Select to display all uploaded files. Control Pages tab provides access to unique DVS 510 features such as input selection, audio Control configuration, saving and recalling memory (user) and input presets, and picture-in-picture (PIP) setup. -
Page 105: User Control Page
User Control Page The User Control page simulates elements of the DVS 510 front panel and also includes other features such as picture control, mute and freeze options, Auto-Image, film mode detection, aspect ratio selection, and front panel lockout (executive mode). - Page 106 The selected button is highlighted. The default is Stereo • : (DVS 510 SA only) From the drop-down menu, select the Audio Start Up Limiter maximum volume level that the limiter will permit when the DVS is powered up. You...
- Page 107 Vertical Start: Specify the distance in pixels from the top edge of the total video display • area of the selected input to the top edge of its active area. The default is DVS 510 Series • HTML Configuration and Control...
-
Page 108: Memory/Input Presets Page
In the Input Selection section, click the button for the input for which you want to create the preset. Make any desired changes to the picture and input sampling controls and other attributes for your chosen input. DVS 510 Series • HTML Configuration and Control... - Page 109 The preset is applied to the current input. Input presets The DVS 510 Series has 128 input preset slots, which can save signal type, input configuration settings, and picture control settings for any of the inputs. These presets can be saved and recalled using the Windows-based control software (see the Signal Processing Presets”...
-
Page 110: Pip Setup Page
Use the PIP Setup page to configure the picture-in-picture window. Figure 51. PIP Setup Page On this screen, you can specify the parameters described on the next page for the PIP window. DVS 510 Series • HTML Configuration and Control... - Page 111 • : Performs an Auto-Image (adjusts the image to fill the screen) on the Auto-Image “Auto Image submenu” on page 30 for more information selected PIP input (see about the Auto-Image function). DVS 510 Series • HTML Configuration and Control...
- Page 112 Active Lines: Increase or decrease the height in lines of the active video area of the selected input. The default is the auto-sensed value. The range is from the ±512 auto-sensed value. DVS 510 Series • HTML Configuration and Control...
-
Page 113: Reference Information
Reference Information This section provides reference information on the DVS 510 Series. The following topics are covered: Specifications • • Part Numbers • Mounting the DVS 510 Scaler Button Labels • • IP Addressing Specifications Video input Number/signal type ......2 composite video... -
Page 114: Video Output
Maximum level ....... +10.4 dBu, (balanced or unbalanced) at 1% THD+N Input gain adjustment ....-12 dBu to +12 dBu, adjustable to input NOTE: 0 dBu = 0.775 Vrms, 0 dBV = 1 Vrms, 0 dBV ≈ 2 dBu DVS 510 Series • Reference Information... -
Page 115: Audio Output
Maximum level (600 ohm) ....>+14 dBm, balanced at 1% THD+N >+10 dBm, unbalanced at 1% THD+N Audio output — amplified — DVS 510 SA only Number/signal type ......1 stereo or 2 mono (2 channels total) Connectors ........(1) 5 mm captive screw, 4-pole Load impedance ...... -
Page 116: Part Numbers
SVHSM-BNCF 8" (20 cm) male 4-pin S-video to female 2-BNC adapter 26-353-01 cable DVIAM-VGAF male DVI-A to female 15-pin VGA adapter 26-589-01 DVIIM-VGAF/DVIIF 12" (30 cm) male DVI-I to female 15-pin VGA and 26-612-01 female DVI-I “Y” adapter DVS 510 Series • Reference Information... -
Page 117: Mounting The Dvs 510 Scaler
(such as the use of power strips). Rack mounting procedure The DVS 510 scaler is delivered with MBD 249 mounting brackets attached. For optional rack mounting, do not install the rubber feet. Mount the scaler in the rack as follows (see... -
Page 118: Tabletop Use
Attach one of the provided self-adhesive rubber feet to each corner of the bottom of the unit. Button Labels The DVS 510 is delivered with button caps pre-labeled for your convenience. However, you can replace these labels with your own button labels, if desired. Page 115 contains blank button labels. -
Page 119: Creating Labels Using The Button Label Generator
Extron Electronics group or folder. To run the label creation program, double-click on the Button Label icon (shown at right) in the Extron Electronics group or folder. Generator The Button Label Generator window opens. DVS 510 Series • Reference Information... - Page 120 Figure 54. Button Label Generator Window (Example) From the pull-down menu, select a layout that most resembles the DVS 510 Systems front panel buttons (although you can select any layout from this menu). You can also select from the menu to open the...
-
Page 121: Blank Button Labels
Blank Button Labels DVS 510 Series • Reference Information... -
Page 122: Ip Addressing
208.132.180.42 NOTE: The host identifiers (41 and 42 in the example above) do not need to be sequential or in any particular order. However, it is recommended that you group the numbers for simplicity. DVS 510 Series • Reference Information... -
Page 123: Subnet Mask
(See Pinging for the IP Address To access the DVS 510 via the Ethernet port, you need the scaler IP address. If the address has been changed to an address comprised of words and characters, you can determine the actual numeric IP address using the Ping utility. If the address has not been changed, the factory-specified default is 192.168.254.254. -
Page 124: Connecting As A Telnet Client
SIS commands to the DVS from the PC via the Ethernet link and the LAN. To start Telnet as follows: From the menu, select . The window opens. Start Run... In the Open text field, enter command Click . A command window opens. DVS 510 Series • Reference Information... - Page 125 Telnet. Connecting to the DVS (Open command) Use the Open command to connect the computer to the DVS 510 scale. After the computer and scaler are connected, you can enter the SIS commands the same as you would if you were using the RS-232 or RS-422 link.
-
Page 126: Subnetting, A Primer
Local echo Once your computer is connected to the DVS 510, by default Telnet does not display your keystrokes on the screen. SIS commands are entered blindly, and only the SIS responses are displayed on the screen. To command Telnet to show all keystrokes, enter set local_echo at the Telnet prompt before you open the connection to the scaler. - Page 127 192.190.2.25 ≠ . ≠ .X.X — No match = . ≠ .X.X — No match Match?: = . = .X.X — Match (Same subnet) (Different subnet) (Different subnet) Figure 59. Comparing the IP Addresses DVS 510 Series • Reference Information...
- Page 128 Extron Warranty Extron Electronics warrants this product against defects in materials and workmanship for a period of three years from the date of purchase. In the event of malfunction during the warranty period attributable directly to faulty workmanship and/or materials, Extron Electronics will, at its option, repair or replace said products or components, to whatever extent it shall deem necessary to restore said product to proper operating condition, provided that it is returned within the warranty period, with proof of purchase and description of malfunction to: USA, Canada, South America,...