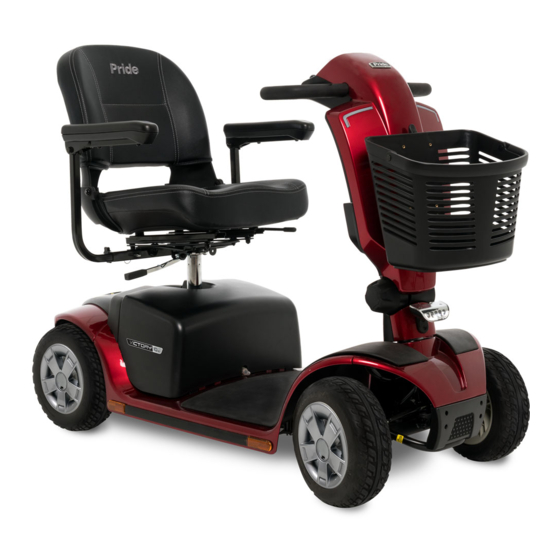
Pride Mobility VICTORY SERIES Owner's Manual
Victory series
Hide thumbs
Also See for VICTORY SERIES:
- Manual (40 pages) ,
- Owner's manual (37 pages) ,
- Owner's manual (35 pages)
Table of Contents
Advertisement
Advertisement
Table of Contents
Troubleshooting

Related Manuals for Pride Mobility VICTORY SERIES


Summary of Contents for Pride Mobility VICTORY SERIES
- Page 1 VICTORY SERIES Including Models: Victory 9, Victory 9 PS, and Victory 10...
- Page 2 NTENDED The intended use of the Pride Mobility Products device is to provide mobility to persons limited to a seated position that have the capability of operating a scooter. Please fill out the following information for quick reference:...
-
Page 3: Table Of Contents
INTRODUCTION ........................4 SAFETY ............................5 III. YOUR SCOOTER ........................19 IV. BATTERIES AND CHARGING ..................24 OPERATION ..........................30 VI. COMFORT ADJUSTMENTS ....................32 VII. DISASSEMBLY AND ASSEMBLY ...................35 VIII.BASIC TROUBLESHOOTING ...................37 IX. CARE AND MAINTENANCE ....................39 APPENDIX I - SPECIFICATIONS ....................42 Victory Series www.pridemobility.com... -
Page 4: Introduction
I . I N T R O D U C T I O N SAFETY Welcome to Pride Mobility Products Corporation (Pride). The product you have purchased combines state-of the-art components with safety, comfort, and styling in mind. We are confident the design features will provide you with the conveniences you expect during your daily activities. - Page 5 Corrosive chemicals contained in battery. EMI-RFI- This product has been tested and passed at an immunity level of 20 V/m. Explosive conditions exist! Read and follow the information in the owner’s manual. Do not remove anti-tip wheels. Victory Series www.pridemobility.com...
-
Page 6: Ii. Safety
Locked and in drive mode. Wear safety goggles. Use only AGM or Gel-Cell batteries to reduce the risk of leakage or explosive conditions. Do not raise or lower the power seat while the scooter is in motion. www.pridemobility.com Victory Series... - Page 7 Do not allow unsupervised children to play near the scooter while the batteries are charging. Do not use batteries with different amp-hour (Ah) capacities. Do not mix old and new batteries. Always replace both batteries at the same time. Victory Series www.pridemobility.com...
- Page 8 Battery charger for indoor use only. Disposal and recycling - Contact your authorized Pride Provider for information on proper disposal and recycling of your Pride product and its packaging. Contains Lead. www.pridemobility.com Victory Series...
- Page 9 PRE-RIDE SAFETY CHECK Get to know the feel of your scooter and its capabilities. Pride recommends that you perform a safety check before each use to make sure your scooter operates smoothly and safely. Victory Series www.pridemobility.com...
- Page 10 When driving down a ramp, keep the scooter’s speed adjustment set to the slowest speed setting to ensure a safely controlled descent. Avoid sudden stops and starts. www.pridemobility.com Victory Series...
- Page 11 "roll back" approximately 1 foot (30.48 cm) before the brake engages. If the throttle control lever is released while moving in reverse, the powered scooter may "roll back" approx- imately 3 feet (1 meter) before the brake engages. Victory Series www.pridemobility.com...
- Page 12 Avoid loosely packed gravel and sand. Do not use your scooter in fresh or salt water. Do not use your scooter at the edge of a stream, lake, or ocean. If you feel unsure about a driving surface, avoid that surface. www.pridemobility.com Victory Series...
- Page 13 Exercise caution when using your scooter in extremely hot or cold conditions or when exposing your scooter to direct sunlight for prolonged periods of time. Victory Series www.pridemobility.com...
- Page 14 NOTE: If your scooter’s turning radius is greater than 60 in. (152.4 cm), it may be difficult to maneuver in elevators and building entrances. Use caution when attempting to turn or maneuver your scooter in small spaces, and avoid areas that might pose a problem. www.pridemobility.com Victory Series...
- Page 15 PREVENTING UNINTENDED MOVEMENT WARNING! If you anticipate being seated in a stationary position for an extended period of time, turn off the power. This will prevent unexpected motion from inadvertent throttle control lever contact. Victory Series www.pridemobility.com...
- Page 16 PROHIBITED! Keep your hands away from the tires when driving. Be aware that loose fitting clothing can become caught in drive tires. www.pridemobility.com Victory Series...
- Page 17 EMI. Exercise caution when using any of these items while operating your mobility vehicle and avoid coming into close proximity of radio and TV stations. Victory Series www.pridemobility.com...
- Page 18 NOTE: For further information on EMI/RFI, visit the Resource Center on www.pridemobility.com. If unintended motion or brake release occurs, turn your scooter off as soon as it is safe to do so. Contact your authorized Pride Provider to report the incident. www.pridemobility.com Victory Series...
- Page 19 Battery Condition Meter When the key is fully inserted and turned clockwise to power up your scooter, this meter indicates the approximate battery voltage strength. For further information on battery charging, see IV. “Batteries and Charging.” Victory Series www.pridemobility.com...
-
Page 20: Iii. Your Scooter
Power Seat Switch (Optional) The power seat switch activates the power seat actuator and enables you to raise and lower the seat auto- matically. Refer to VI. “Comfort Adjustments” for more information regarding power seat operation and safety. www.pridemobility.com Victory Series... - Page 21 See figure 6. See IX. “Care and Maintenance” for fuse replacement. NOTE: Keep all electrical areas clean and free of moisture and foreign material. Victory Series www.pridemobility.com...
-
Page 22: Rear Section
PROHIBITED! Do not remove the anti-tip wheels or modify your scooter in any way that is not authorized by Pride. Motor/Transaxle Assembly The motor/transaxle assembly is an electromechanical unit that converts electrical energy from your scooter’s batteries into the controlled mechanical energy that drives the scooter’s wheels. www.pridemobility.com Victory Series... - Page 23 NOTE: If the scooter is placed in freewheel mode (manual freewheel lever forward) while the key is in the “on” position, the scooter will not run until the manual freewheel lever is pushed backward and the key is turned to the “off” position, then back to the “on” position. Victory Series www.pridemobility.com...
-
Page 24: Batteries And Charging
If the battery charger is exposed to adverse or extreme weather conditions, then it must be allowed to adjust to the difference in environmental conditions before use indoors. Refer to the manual supplied with the battery charger for more information. www.pridemobility.com Victory Series... -
Page 25: Iv. Batteries And Charging
Ensure the red (+) and black (-) battery cables are connected properly to the battery terminals. Ensure both battery harnesses that extend from the batteries are plugged into their mating harness leading to the charger. Ensure both ends of the charger power cord are inserted fully. Victory Series www.pridemobility.com... - Page 26 Do not use wet-cell batteries, which have removable caps. WARNING! Corrosive chemicals are contained in batteries. Use only AGM or Gel- Cell batteries to reduce the risk of leakage or explosive conditions. NOTE: Sealed batteries are not serviceable. Do not remove the caps. www.pridemobility.com Victory Series...
- Page 27 NOTE: If you encounter a damaged or cracked battery, immediately enclose it in a plastic bag. Contact your local waste disposal agency or your authorized Pride Provider for instructions on disposal and battery recycling, which is our recommended course of action. Victory Series www.pridemobility.com...
- Page 28 It may take a few days for the temperature of your scooter’s batteries to stabilize and adjust to their new room or ambient temperature. More importantly, it takes a few charging cycles (partial draining followed by full recharging) to establish the critical chemical balance that is essential to a deep-cycle battery’s peak performance and long life. www.pridemobility.com Victory Series...
- Page 29 What about public transportation? If you intend to use public transportation with your scooter, you must contact the transportation provider in advance to determine their specific requirements. Victory Series www.pridemobility.com...
-
Page 30: Operation
Pull on the left handgrip to steer your scooter to the left. Pull on the right handgrip to steer your scooter to the right. Move the tiller to the center position to drive straight ahead. www.pridemobility.com Victory Series... -
Page 31: V. Operation
Although the controller is shut down, power will still be supplied to the scooter’s lighting system. If the power down timer feature takes effect, perform the following steps to resume normal operation: 1. Remove the key from the key switch. 2. Reinsert the key and power up your scooter. Victory Series www.pridemobility.com... -
Page 32: Adjustments
4. Align the adjustment holes on the seat frame and armrest, then reinsert the detent pin. ARMREST 5. Tighten the armrest adjustment knobs. ADJUSTMENT KNOBS NOTE: Pivot the armrests upward to aid in getting onto and off of your scooter. Figure 16. Armrest Width Adjustment www.pridemobility.com Victory Series... -
Page 33: Vi. Comfort Adjustments
LOWER posts. SEAT HEIGHT SEAT POST 6. Reinstall the nut onto the seat height adjustment ADJUSTMENT BOLT bolt and tighten. 7. Reinstall the rear shroud and the seat. Figure 18. Seat Height Adjustment Victory Series www.pridemobility.com... - Page 34 The scooter cannot be driven at full speed until the scooter’s seat is lowered to approximately one-half its maximum height. It is strongly recommended that the scooter not be operated with the power seat elevated. www.pridemobility.com Victory Series...
-
Page 35: Disassembly And Assembly
See figure 20. 5. Remove the batteries from the battery wells. Figure 20. Harness Connections WARNING! Failure to unplug both battery harnesses prior separating the front and rear sections could result permanent damage scooter. Victory Series www.pridemobility.com... -
Page 36: Vii. Disassembly And Assembly
5. Reinstall the batteries to the battery wells. 6. Connect both battery harnesses. See figure 20. 7. Secure the battery tie-down strap. 8. Reinstall the battery shroud. 9. Reinstall the seat and rotate it into place. www.pridemobility.com Victory Series... -
Page 37: Troubleshooting
Push in the main circuit breaker reset button. See III. “Your Scooter.” Make certain that both battery harnesses and the front-to-rear harness are firmly connected. See VII. “Disassembly and Assembly.” Be sure the power down timer feature has not been activated. See V. “Operation.” Victory Series www.pridemobility.com... -
Page 38: Viii.basic Troubleshooting
See the previous troubleshooting question for load testing the batteries yourself. If you experience any problems with your scooter that you are not able to solve, immediately contact your authorized Pride Provider for information, maintenance, and service. www.pridemobility.com Victory Series... -
Page 39: Care And Maintenance
PROHIBITED! Even though the scooter has passed the necessary testing requirements for ingress of liquids, you should keep electrical connections away from sources of dampness, including direct exposure to water or bodily fluids and incontinence. Check electrical components frequently for signs of corrosion and replace as necessary. Victory Series www.pridemobility.com... - Page 40 Pride Provider. CONSOLE, CHARGER, AND REAR ELECTRONICS Keep these areas free of moisture. Allow these areas to dry thoroughly if they have been exposed to moisture before operating your scooter again. www.pridemobility.com Victory Series...
- Page 41 Your scooter must be disposed of according to applicable local and national statutory regulations. Contact your local waste disposal agency or authorized Pride Provider for information on proper disposal of pack- aging, metal frame components, plastic components, electronics, and batteries. Victory Series www.pridemobility.com...
-
Page 42: Appendix I - Specifications
AGM or Gel-Cell type required. See IV. “Batteries and Charging.” Battery weight may vary based on battery manufacturer. Includes standard seat. NOTE: This product conforms to all applicable ANSI-RESNA testing requirements and ISO 7176 series EN12184 standards. All specifications subject to change without notice. www.pridemobility.com Victory Series... - Page 43 3-Wheel: 45.25 in. (115 cm) 17 in. 4-Wheel: 47 in. (119.38 cm) (43.18 cm) 18 in. (45.72 cm) 3-Wheel Turning Radius 4-Wheel Turning Radius 42 in. (106.68 cm) 54 in. (137.16 cm) 22.25 in. (56.5 cm) Figure 25. Victory 10 Dimensions Victory Series www.pridemobility.com...
- Page 44 AGM or Gel-Cell type required. See IV. “Batteries and Charging.” Battery weight may vary based on battery manufacturer. Includes standard seat. NOTE: This product conforms to all applicable ANSI-RESNA testing requirements and ISO 7176 series EN12184 standards. All specifications subject to change without notice. www.pridemobility.com Victory Series...
- Page 45 17 in. (43.18 cm) 18 in. (45.72 cm) 4-Wheel Turning Radius 3-Wheel Turning Radius 51.5 in. (130.81 cm) 40.25 in. (102.24 cm) 3-wheel: 22.125 in. (56.2 cm) 4-wheel: 22.5 in. (57.15 cm) Figure 26. Victory 9 Dimensions Victory Series www.pridemobility.com...
- Page 46 AGM or Gel-Cell type required. See IV. “Batteries and Charging.” Battery weight may vary based on battery manufacturer. Includes standard seat. NOTE: This product conforms to all applicable ANSI-RESNA testing requirements and ISO 7176 series EN12184 standards. All specifications subject to change without notice. www.pridemobility.com Victory Series...
- Page 47 (43.8 - 59.1 cm) 3-wheel: 2 in. (5 cm) 43.5 in. (110.5 cm) 17 in. (43.18 cm) 18 in. (45.72 cm) Turning Radius 40.25 in. (102.24 cm) 22.125 in. (56.2 cm) Figure 27. Victory 9 PS Dimensions Victory Series www.pridemobility.com...
- Page 48 N O T E S www.pridemobility.com Victory Series...
- Page 49 N O T E S Victory Series www.pridemobility.com...
- Page 50 N O T E S www.pridemobility.com Victory Series...
- Page 52 *INFMANU3629*...