Table of Contents
Advertisement
Advertisement
Table of Contents

Related Manuals for AEG LAVAMAT 16850A3


Summary of Contents for AEG LAVAMAT 16850A3
- Page 1 EN User manual LAVAMAT 16850A3...
- Page 2 FOR PERFECT RESULTS Thank you for choosing this AEG product. We have created it to give you impeccable performance for many years, with innovative technologies that help make life simpler – features you might not find on ordinary appliances. Please spend a few minutes reading to get the very best from it.
-
Page 3: Table Of Contents
Contents CONTENTS 4 Safety information 5 Safety instructions 7 Product description 9 Control panel 11 First use 11 Personalization 12 Daily use 21 Washing programmes 24 Drying Programmes 24 Helpful hints and tips 27 Care and cleaning 33 What to do if… 37 Consumption values 37 Technical data 37 Installation... -
Page 4: Safety Information
Safety information SAFETY INFORMATION Before the installation and use of the appliance, carefully read the supplied instructions. The manufacturer is not responsible if an incor- rect installation and use causes injuries and damages. Always keep the instructions with the appliance for future reference. Children and vulnerable people safety WARNING! Risk of suffocation, injury or permanent disability. -
Page 5: Safety Instructions
Safety instructions • The ventilation openings in the base (if applicable) must not be ob- structed by a carpet. • The appliance is to be connected to the water mains using the new supplied hose-sets. Old hose sets must not be reused. SAFETY INSTRUCTIONS Installation •... -
Page 6: Water Connection
Safety instructions • This appliance complies with the E.E.C. Directives. Water connection • Make sure not to cause damage to the water hoses. • The appliance is to be connected to the water mains using the new supplied hose-sets. Old hose sets must not be reused. •... -
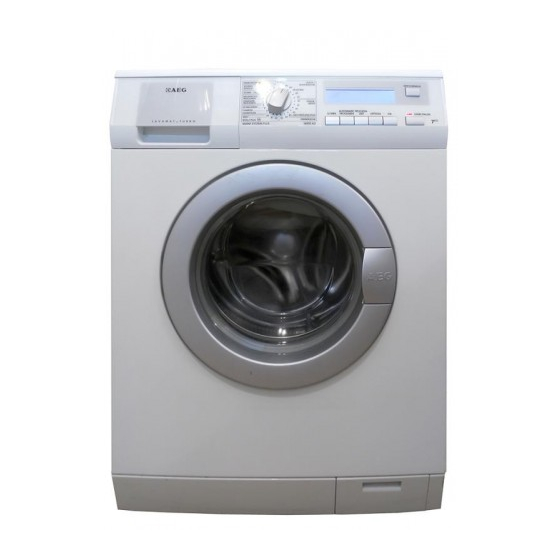
Page 7: Product Description
Product description – If you use a detergent ball, remove it before you set the drying programme. – Do not use a detergent ball when you set a non-stop programme. WARNING! Risk of injury or damage to the appliance. • Do not sit or stand on the open door. •... -
Page 8: Child Safety
Product description Detergent dispenser drawer Control panel Door opening handle Rating plate Drain pump Adjustable feet Child Safety Make sure that children or pets do not climb in- side the drum. To prevent children or pets becom- ing trapped inside the drum the machine incorpo- rates a special feature. -
Page 9: Control Panel
Control panel Detergent dispenser drawer Compartment for prewash phase or stain re- mover. The prewash detergent is added at the beginning of the wash programme. The stain remover is added during the STAIN-Ac- tion phase in the main wash. Compartment for powder or liquid detergent used for main wash. - Page 10 DELAY START button Display Display 9.1 - Spin Speed indicator, RINSE HOLD , NIGHT CYCLE - symbols 9.2 - Drying degree indicator, allowed by the set programme: IRON DRY , CUPBOARD - symbols, selectable by pressing the button 3; indicator AUTO, and EXTRA DRY connected to the drying programme and to button 4.
-
Page 11: First Use
First use The DELAY START symbol will appear on the display. The delay time value decreases by one unit every hour and then, when 1 hour remains, the time decreases every minute. • Selected drying time After selecting a drying programme, the drying time is displayed in minutes and/or hours (max 250 mins). -
Page 12: Daily Use
Daily use • Before pressing button 7: it will be impossible to start the machine. • after pressing button 7: it will be impossible to change any other programme or option. To enable or disable this option press simultaneously for about 6 seconds buttons 4 and 5 until the symbol 9.3 appears or disappears on or from the display. - Page 13 Daily use If required, pour fabric softener into the compartment marked (the amount used must not exceed the MAX mark in the drawer). Close the drawer gently. Select the required programme by turning the programme selector dial (1) You can choose the right programme for any type of laundry following the descriptions on the washing programme tables (see «Washing Programmes»).
-
Page 14: Programme Option Buttons
Daily use NIGHT CYCLE: by selecting this option, the machine will not drain the water of the last rinse, so as not to wrinkle the laundry. As all spinning phases are suppressed, this washing cycle is very quiet and it can be selected at night or in times with a more economical power rate. -
Page 15: Sensitive Option
Daily use If you wish to perform a programme with the stain option, pour stain remover into stain compartment SENSITIVE option By selecting this option the washing intensity will be reduced. The machine adds one rinse in the programmes for cottons and synthetics. The relevant symbol will appear on the dis- play. -
Page 16: Altering An Option Or A Running Programme
Daily use Before you start the programme, if you wish to delay the start, press this button repeated- ly, to select the desired delay. The delay time value will appear on the display for about 3 seconds, then the duration of the programme will appear again. -
Page 17: At The End Of The Programme
Use - Drying • If the DOOR symbol stays on, and the door remains locked, this means that the machine is already heating or that the water level is too high. In this case the door can not be opened. If you cannot open the door but you need to open it you have to switch the machine off by . - Page 18 Use - Drying – Set the automatic drying (button 3). With this button you can select the degree of dryness by an electronic drying. The machine adapts automatically the duration of the drying cycle to the selected de- gree of dryness. If you press this button, a black dash appears under the selected symbol to indicate the degree set.
- Page 19 Use - Washing and Drying USE - WASHING AND DRYING NON-STOP programme: Washing and Automatic drying The recommended load size is 3.5 kg for cotton and 2 kg for synthetic. It is also possible to dry up to 5 kg of cotton items (see the «Drying Programme » table). CAUTION! Do not use a dosing device/ball when carrying out a washing and drying programme.
- Page 20 In any case the lowest values you can select are 900 r.p.m. for cottons and synthetics and 700 r.p.m. for delicate fabrics. The reduction of the spin speed is only possible after selecting drying. Press the button 4 to set the drying time. The display shows the entire duration of the washing and the set drying cycle.
-
Page 21: Washing Programmes
Washing programmes WASHING PROGRAMMES Programme - Maximum and Minimum Tempera- Detergent Com- ture - Cycle Description - Maximum Fabrics Load - Options partment Type of Laundry COTTONS/LINEN SPIN REDUCTION 95° and 60° NIGHT CYCLE Main wash - Rinses - Long spin at the maximum spin RINSE HOLD speed PREWASH... - Page 22 Washing programmes Programme - Maximum and Minimum Tempera- Detergent Com- ture - Cycle Description - Maximum Fabrics Load - Options partment Type of Laundry EASY IRON PLUS SPIN REDUCTION 40° RINSE HOLD Main wash - Rinses - Short spin at 1200 rpm PREWASH Max.
- Page 23 Washing programmes Programme - Maximum and Minimum Tempera- Detergent Com- ture - Cycle Description - Maximum Fabrics Load - Options partment Type of Laundry SPIN SPIN REDUCTION Drain and long spin at the maximum spin speed Max. load 7 kg Separate spin for hand washed cotton garments and after programmes with the option selected, which ends with water left in the tub.
-
Page 24: Drying Programmes
Drying Programmes DRYING PROGRAMMES Automatic Programmes Degree of Drying Type of Fabric Max Load EXTRA DRY Cotton and linen (bathrobes, 3.5 kg Ideal for towelling material bath towels, etc) CUPBOARD DRY Cotton and linen (bathrobes, Suitable for items to put away without iron- bath towels, etc) 3.5 kg CUPBOARD DRY... -
Page 25: Before Loading The Laundry
Helpful hints and tips Before loading the laundry Never wash whites and coloureds together. Whites may lose their «whiteness» in the wash. New coloured items may run in the first wash; they should therefore be washed separately the first time. Button up pillowcases, close zip fasteners, hooks and poppers. -
Page 26: Quantity Of Detergent To Be Used
Drying Hints The detergent and any additives must be placed in the appropriate compartments of the dispenser drawer before starting the wash programme. If using liquid detergents, a programme without prewash must be selected. Your appliance incorporates a recirculation system which allows an optimal use of the con- centrated detergent. -
Page 27: Care And Cleaning
Care and cleaning • Also, fabrics containing residue of setting lotions or hair sprays, nail solvents or similar solutions must not be machine dried in order to avoid the formation of harmful vapours. The detergent and any additives must be placed in the appropriate compartments of the dispenser drawer before starting the wash programme. -
Page 28: After Each Wash
Care and cleaning After each wash Leave the door open for a while. This helps to prevent mould and stagnant smells forming inside the appliance. Keeping the door open after a wash will also help to preserve the door seal. Maintenance wash With the use of low temperature washes it is possible to get a build up of residues inside the drum. -
Page 29: Door Seal
Care and cleaning Do not clean the drum with acidic descaling agents, scouring agents containing chlorine or iron or steel wool. Remove any rust deposits on the drum with a cleaning agent for stainless steel. Run a washing cycle without any washing to clean off any cleaning agent residues. Programme: Short Cotton Programme at maximum temperature and add approx. - Page 30 Care and cleaning Pull out the emergency emptying hose, place it in the container and remove its cap. When no more water comes out, un- screw the pump cover by turning it an- ti-clockwise and remove the filter. Use pliers, if necessary. Always keep a rag nearby to dry up any water spillages when removing the cover.
-
Page 31: Cleaning The Water Inlet Filters
Care and cleaning When the appliance is in use and depending on the programme selected there can be hot water in the pump. Never remove the pump cover during a wash cycle, always wait until the appliance has fin- ished the cycle, and is empty. When refitting the pump cover, ensure it is securely re-tight- ened so as to stop leaks and young children being able to remove it. -
Page 32: Frost Precautions
Care and cleaning Screw the hose back to the machine and make sure the connection is tight. Turn on the water tap. Frost precautions If the machine is installed in a place where the temperature could drop below 0°C, proceed as follows: close the water tap and unscrew the water inlet hose from the tap;... -
Page 33: What To Do If
What to do if… WHAT TO DO IF… Certain problems are due to lack of simple maintenance or oversights, which can be solved easily without calling out an engineer. Before contacting your local Service Centre, please carry out the checks listed below. During machine operation it is possible that the yellow pilot light of button 7 blinks, one of the following alarm codes appears on the display and at the same time some acoustic sig- nals sound every 20 seconds to indicate that the machine is not working:... - Page 34 What to do if… Problem Possible cause/Solution The end of the drain hose is too low. The machine fills then empties immediately: • Refer to relevant paragraph in «Water drain- age» section. The drain hose is squashed or kinked. • Check the drain hose connection. The drain filter is clogged.
- Page 35 What to do if… Problem Possible cause/Solution The programme is still running. • Wait the end of washing cycle. The door lock has not been released. The door will not open: • Wait until the symbol 9.6 has gone off. There is water in the drum.
- Page 36 What to do if… Problem Possible cause/Solution The machine is fitted with a type of motor which makes an unusual noise compared with other traditional motors. This new motor en- The machine makes an unusual noise: sures a softer start and more even distribution of the laundry in the drum when spinning, as well as increased stability of the machine.
-
Page 37: Consumption Values
Consumption values CONSUMPTION VALUES Programme Energy consumption Water consumption Programme duration (KWh) (litres) (Minutes) Cottons 60° 1.35 For the duration of the programmes, Cotton Energy Saving 1.05 please refer to the Programme 60° display on the control panel. Cottons 40° 0.80 Synthetics 40°... - Page 38 Installation After removing all the packaging, care- fully lay machine on it’s back to remove the polystyrene base from the bottom. Remove the power supply cable and the draining hose from the hose holders on the rear of the appliance. Unscrew the three bolts with the key supplied with the machine.
- Page 39 Installation Slide out the relevant plastic spacers. Open the porthole, take out the inlet hose from the drum and remove the polystyrene block fitted on the door seal. Fill the smaller upper hole and the two large ones with the corresponding plas- tic plug caps supplied in the bag con- taining the instruction booklet.
-
Page 40: Positioning And Levelling
Installation Positioning and levelling Install the machine on a flat hard floor. Make sure that air circulation around the machine is not impeded by carpets, rugs etc. Before placing it on small tiles, apply a rubber coating. Never try to correct any unevenness in the floor by putting pieces of wood, cardboard or similar materials under the machine. - Page 41 Installation Open the porthole and extract the inlet hose. Connect the hose with the angled con- nection to the machine. Do not place the inlet hose downwards. Angle the hose to the left or right depend- ing on the position of your water tap. Set the hose correctly by loosening the ring nut.
-
Page 42: Water Drainage
Installation Water-stop device The inlet hose is provided with a water stop device, which protects against damage caused by water leaks in the hose which could develop due to natural ageing of the hose. This fault is shown by a red sector in the window «A». - Page 43 Installation Place the drain hose into your stand- 38 mm (11.2”) standpipe pipe, which should have an internal di- diameter ameter of approximately 38 mm thus ensuring there is an air break between the drain hose and standpipe. When discharging into a standpipe en- sure that the top of the standpipe is no more than 90 cm (35.4'') and no less than 60 cm (23.6'') above floor level.
-
Page 44: Electrical Connection
Electrical connection Before connecting up the machine to new pipework or to pipework that has not been used for some time, run off a reasonable amount of water to flush out any debris that may have collected in the pipes. In the interest of the environment The appliance should be connected to the FOUL drainage system, the water will then be taken to a... -
Page 45: Environment Concerns
Environment concerns The power supply cable must be easily accessible after installing the machine. ENVIRONMENT CONCERNS The symbol on the product or on its packaging indicates that this product may not be treated as household waste. Instead it should be taken to the appropriate collection point for the recycling of electrical and electronic equipment. - Page 48 www.aeg.com/shop...