Table of Contents
Advertisement
Advertisement
Table of Contents

Related Manuals for AEG LAVAMAT 16850A3


Summary of Contents for AEG LAVAMAT 16850A3
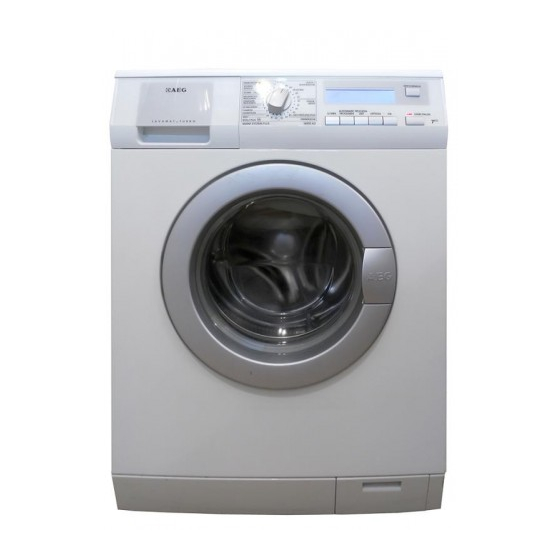
- Page 1 EN User manual LAVAMAT 16850A3...
- Page 2 FOR PERFECT RESULTS Thank you for choosing this AEG product. We have created it to give you impeccable performance for many years, with innovative technologies that help make life simpler – features you might not find on ordinary appliances. Please spend a few minutes reading to get the very best from it.
-
Page 3: Table Of Contents
Contents CONTENTS 4 Safety information 5 Safety instructions 7 Product description 8 Special accessories for installation 9 Control panel 11 First use 11 Personalization 12 Daily use 20 Washing programmes 23 Drying Programmes 24 Consumption values 25 Helpful hints and tips 29 Care and cleaning 34 What to do if…... -
Page 4: Safety Information
Safety information SAFETY INFORMATION Before the installation and use of the appliance, carefully read the supplied instructions. The manufacturer is not responsible if an incor- rect installation and use causes injuries and damages. Always keep the instructions with the appliance for future reference. Children and vulnerable people safety WARNING! Risk of suffocation, injury or permanent disability. -
Page 5: Safety Instructions
Safety instructions • The ventilation openings in the base (if applicable) must not be ob- structed by a carpet. • The appliance is to be connected to the water mains using the new supplied hose-sets. Old hose sets must not be reused. SAFETY INSTRUCTIONS Installation •... - Page 6 Safety instructions • The appliance is to be connected to the water mains using the new supplied hose-sets. Old hose sets must not be reused. • Before you connect the appliance to new pipes or pipes not used for a long time, let the water flow until it is clean.
-
Page 7: Product Description
Product description • Obey the maximum load volume. • Do not dry dripping wet clothes in the appliance. Care and Cleaning WARNING! Risk of injury or damage to the appliance. • Do not use water spray and steam to clean the appliance. •... -
Page 8: Special Accessories For Installation
Control panel Door opening handle Rating plate Drain pump Adjustable feet Detergent dispenser drawer Compartment for prewash phase or stain re- mover. The prewash detergent is added at the beginning of the wash programme. The stain remover is added during the STAIN-Ac- tion phase in the main wash. -
Page 9: Control Panel
Control panel Fixing plate kit (4055171146) Available from your authorized dealer. If you install the appliance on a plinth, secure the appliance in the fixing plates. Follow the instructions supplied with the kit. CONTROL PANEL Below is a picture of the control panel. It shows the programme selector dial as well as the buttons and the display. - Page 10 Display 9.1 - Spin Speed indicator, RINSE HOLD , NIGHT CYCLE - symbols 9.2 - Drying degree indicator, allowed by the set programme: IRON DRY , CUPBOARD and EXTRA DRY - symbols, selectable by pressing the button 3; indicator AUTO, connected to the drying programme and to button 4.
-
Page 11: First Use
First use After selecting a drying programme, the drying time is displayed in minutes and/or hours (max 250 mins). After the programme has started , the time remaining id updated every minutes. • Incorrect option selection If an option, which is not compatible with the set wash programme is selected, the mes- sage Err is displayed for a few seconds and the yellow light of button 7 starts blinking. -
Page 12: Daily Use
Daily use DAILY USE Load the laundry Open the door by carefully pulling the door handle outwards. Place the laundry in the drum, one item at a time, shaking them out as much as possible. Close the door firmly. You must hear a click during closing. -
Page 13: Programme Option Buttons
Daily use Select the required programme by turning the programme selector dial (1) You can choose the right programme for any type of laundry following the descriptions on the washing programme tables (see «Washing Programmes»). Turn the programme selector dial to the required programme. The programme selector de- termines the type of washing cycle (e.g. -
Page 14: Prewash Option
Daily use WARNING! Not all the options are compatible among themselves. The symbols of the incompatible op- tions disappear. Anyway, if an option, which is not compatible with the set washing programme or any oth- er option, is selected, the Err message is displayed for few seconds and the yellow pilot of button 7 light starts blinking. - Page 15 Daily use SUPER QUICK option By selecting this option, it will be possible to reduce the washing duration to wash lightly soiled laundry. The display will show the corresponding symbol and the reduced washing time. To be used for very lightly soiled laundry only. We recommend that you reduce the laundry load. EXTRA RINSE option (additional rinse) This appliance is designed for saving water.
-
Page 16: Altering An Option Or A Running Programme
Daily use Cancelling the delayed start • Set the washing machine to PAUSE by pressing the button 7; • Press button 8until the symbol ’ is displayed; • Press the button 7 again to start the programme. The selected delay can be changed only after selecting the washing programme again. The Delay Start can not be selected with the draining programme. -
Page 17: Drying Only
• select the draining or spinning programme • reduce the spin speed if needed, by pressing the relevant button • press the button 7 • when the programme has finished the display shows a blinking . On the display the DOOR symbol disappears. - Page 18 Use - Washing and Drying The DRYING TIME DURATION symbol appears for a few seconds on the display near the duration value. Press then button 7 to start the programme. A black dash flash- es under the DRYING symbol. Note! The programme time will automatically increase by a few minutes.
- Page 19 Press the button 3 to set the required dryness degree. The display shows the entire duration of the washing and the selected drying cycle. Press button 7 to start the programme. After the programme has started, the time re- maining is updated every minute. At the end of the programme, follow the indications given in the corresponding previ- ous chapter.
-
Page 20: Washing Programmes
Washing programmes • To clean the filter. • Perform one or more rinse cycles to wash the drum between the washing and drying of fabrics with different colors. • After the drying phase, thoroughly clean the empty drum, the gasket and the door with a wet rag. - Page 21 Washing programmes Programme - Maximum and Minimum Tempera- Detergent Com- ture - Cycle Description - Maximum Fabrics Load - Options partment Type of Laundry PFLEGELEICHT SPIN REDUCTION 60° - 50° - 40° - 30° NIGHT CYCLE Main wash - Rinses - Short spin RINSE HOLD Max.
- Page 22 Washing programmes Programme - Maximum and Minimum Tempera- Detergent Com- ture - Cycle Description - Maximum Fabrics Load - Options partment Type of Laundry FEINSPÜLEN SPIN REDUCTION Rinses - Short spin NIGHT CYCLE Max. load 7 kg RINSE HOLD With this programme it is possible to rinse and spin EXTRA RINSE garments which have been washed by hand.
-
Page 23: Drying Programmes
Drying Programmes Programme - Maximum and Minimum Tempera- Detergent Com- ture - Cycle Description - Maximum Fabrics Load - Options partment Type of Laundry ENERGIESPAREN SPIN REDUCTION 60° NIGHT CYCLE Main wash - Rinses - Long spin at the maximum spin RINSE HOLD speed PREWASH... -
Page 24: Consumption Values
Consumption values Timed Programmes Suggested Spin Speed Degree of Drying Type of Fabric Drying Load drying time (rpm) (minutes) Cotton and linen 4 kg 110-130 EXTRA DRY (bathrobes, bath 3 kg 1600 85-95 Ideal for towelling materials towels, etc) 1.5 kg 40-50 STORE DRY Cotton and linen... -
Page 25: Helpful Hints And Tips
Helpful hints and tips Washing Pro- Beladung Energiever- Wasserverbrauch Programmdauer gramme brauch (in Litern) (Stunden, Mi- (KWh) nuten) Wolle Plus 30° 2 kg 0.25 20 MIN, — 3 KG 3 kg 0.20 30° Schnell Intensiv 5 kg 0.65 60° Automatik Trocknen Baumwolle 4 kg 2.70... -
Page 26: Before Loading The Laundry
Helpful hints and tips Temperatures for normally soiled white cottons and linen (e.g. tea cloths, towels, 95° or 90° tablecloths, sheets...) for normally soiled, colour fast garments (e.g. shirts, night dresses, 60°/50° pyjamas..) in linen, cotton or synthetic fibres and for lightly soiled white cotton (e.g. -
Page 27: Detergents And Additives
Helpful hints and tips Blood: treat fresh stains with cold water. For dried stains, soak overnight in water with a special detergent then rub in the soap and water. Oil based paint: moisten with benzine stain remover, lay the garment on a soft cloth and dab the stain;... -
Page 28: Drying Hints
Drying Hints A water softener must be added when water has a medium-high degree of hardness (from degree of hardness II). Follow the manufacturer’s instructions. The quantity of detergent can then always be adjusted to degree of hardness I (= soft). Degrees of water hardness Level Characteristic... -
Page 29: Care And Cleaning
Care and cleaning • = May be tumble dried • = Drying at high temperature • = Drying at reduced temperature • = Do not tumble dry. Drying cycle duration The drying time may vary depending on: • speed of the final spin •... -
Page 30: External Cleaning
Care and cleaning External cleaning Clean the exterior cabinet of the appliance with soap and water only, and then dry thor- oughly. Do not use methylated spirits, solvents or similar products to clean the cabinet. Detergent dispenser drawer The detergent dispenser drawer should be cleaned regularly. Remove the detergent dispenser drawer by pulling it firmly. -
Page 31: Door Seal
Care and cleaning Door seal Check from time to time the door seal and objects that could be trapped in the fold. Drain pump The pump should be inspected regularly and particularly if: • the machine does not empty and/or spin •... - Page 32 Care and cleaning When no more water comes out, un- screw the pump and remove it. Always keep a rag nearby to dry up spillage of water when removing the pump. Remove any objects from the pump impeller by rotating it. Put the cap back on the emergency emptying hose and place the latter back in its seat.
-
Page 33: Cleaning The Water Inlet Filters
Care and cleaning Cleaning the water inlet filters If the appliance doesn't fill, it takes a long time to fill with water, the starting button blinks yellow or the display (if available) shows the relevant alarm (see chapter "What to do if..." for more details), check if the water inlet filters are blocked . -
Page 34: What To Do If
What to do if… Frost precautions If the machine is installed in a place where the temperature could drop below 0°C, proceed as follows: close the water tap and unscrew the water inlet hose from the tap; place the end of the emergency emptying hose and that of the inlet hose in a bowl placed on the floor and let water drain out;... - Page 35 What to do if… Problem Possible cause/Solution The door has not been closed. • Close the door firmly. The plug is not properly inserted in the power socket. • Insert the plug into the power socket. There is no power at the socket. •...
- Page 36 What to do if… Problem Possible cause/Solution Too much detergent or unsuitable detergent (creates too much foam) has been used. • Reduce the detergent quantity or use anoth- er one. Check whether there are any leaks from one of the inlet hose fittings. It is not always easy to see this as the water runs down the hose;...
- Page 37 What to do if… Problem Possible cause/Solution The transit bolts and packing have not been re- moved. • Check the correct installation of the appli- ance. The support feet have not been adjusted The machine vibrates or is noisy: • Check the correct levelling of the appliance. The laundry is not evenly distributed in the drum.
-
Page 38: Technical Data
Technical data Problem Possible cause/Solution Anti-flooding system has activated. • Pull out the plug from the power socket, The display shows the alarm code close the water tap and contact the Service Force Centre. The inlet valve is blocked. • Pull out the plug from the power socket, The display shows the alarm code EC1: close the water tap and contact the Service Force Centre. -
Page 39: Installation
Installation Maximum Dry Load Cotton 3.5 Kg Cotton Big Capacity 4 Kg Synthetic 2 Kg Spin Speed Maximum 1600 rpm INSTALLATION Unpacking All transit bolts and packing must be removed before using the appliance. You are advised to keep all transit devices so that they can be refitted if the machine ever has to be transported again. - Page 40 Installation Unscrew the three bolts using the key supplied with the machine. Slide out the relevant plastic spacers. Open the porthole, take out the inlet hose from the drum and remove the polystyrene block fitted on the door seal.
-
Page 41: Positioning And Levelling
Installation Fill the smaller upper hole and the two large ones with the corresponding plas- tic plug caps supplied in the bag con- taining the instruction booklet. Connect the water inlet hose as descri- bed under the paragraph «Water inlet». Positioning and levelling Install the machine on a flat hard floor. - Page 42 Installation Open the porthole and extract the inlet hose. Connect the hose with the angled con- nection to the machine. Do not place the inlet hose downwards. Angle the hose to the left or right depend- ing on the position of your water tap. Set the hose correctly by loosening the ring nut.
-
Page 43: Water Drainage
Installation Water-stop device The inlet hose is provided with a water stop device, which protects against damage caused by water leaks in the hose which could develop due to natural ageing of the hose. This fault is shown by a red sector in the window «A». -
Page 44: Environment Concerns
Environment concerns You can connect the drain hose to a siphon. The drain hose must be above the siphon. Fix the drain hose to the siphon with a clamp. The drain hose may be extended to a maximum of 4 metres. An additional drain hose and joining piece is available from your local Service Centre. -
Page 45: Ecological Hints
Ecological hints To save water, energy and to help protect the environment, we recommend that you follow these tips: • Normally soiled laundry may be washed without prewashing in order to save detergent, water and time (the environment is protected too!). •... - Page 48 www.aeg.com/shop...