Table of Contents
Advertisement
Advertisement
Table of Contents

Related Manuals for AT&T MiFi 2372


Summary of Contents for AT&T MiFi 2372
- Page 1 AT&T M obile H otspot MiFi® 2 372 User G uide Version: 2.0 ...
-
Page 2: Software License
©2011 Novatel Wireless, Inc. All rights reserved. The information contained in this document is subject to change without notice and should not be construed as a commitment by Novatel Wireless, Inc. Visit www.novatelwireless.com/patents for a complete list of all Novatel Wireless patents. Software License Proprietary Rights Provisions: The software drivers provided with this product are copyrighted by Novatel Wireless and/or Novatel Wireless’... -
Page 3: Table Of Contents
Contents Getting Started ............1 Device Overview . - Page 4 MiFi Administration Menu Bar............30 Home Menu .
- Page 5 Troubleshooting ............60 Overview.
-
Page 6: Getting Started
Getting Started Device Overview Using the Device for the First Time Install the SIM Card and Battery Wi-Fi Setup Configure Security... -
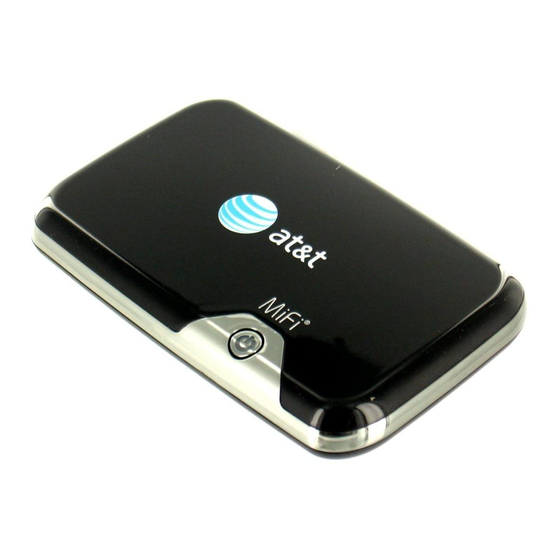
Page 7: Device Overview
MiFi device without having to give them your security settings. With the DLNA CERTIFIED® AT&T Mobile Hotspot MiFi 2372, you can access and play your movies, music and photos anywhere, anytime, on any DLNA-capable device. The MiFi DLNA® Server makes it easy to browse and share—no complicated configuration required. -
Page 8: Mifi Os And Mifi Landing Page (Http://Att.mifi)
MiFi OS and MiFi Landing Page (http://att.mifi) Your MiFi device has a built-in operating system in the form of a web interface for simple management, configuration, and personalization. This is the MiFi OS and here you can manage your MiFi device’s Wi-Fi network, set up a temporary hotspot, share files on your MiFi device’s Wi-Fi network, and more. -
Page 9: Using The Device For The First Time
Using the Device for the First Time System Requirements To manage your MiFi device with the MiFi OS, you need the following: A computer or computing device supporting Wi-Fi 802.11 b/g • Internet browser software: i.e., Microsoft Internet Explorer 6.0 or higher, Firefox, Safari, •... -
Page 10: Components
Components ➊ Micro USB Port — The A/C charger, USB cable, and optional car charger connect here. ➋ microSDHC™ Slot — Removable memory storage slot supports microSDHC and microSD cards up to 32GB (card not included). ➌ Wi-Fi LED — Indicates Wi-Fi connection status. See LED States on page 7. -
Page 11: Power Sources For Your Mifi Device
Power Sources for Your MiFi Device Your device will work from its battery or when plugged into a power source. Battery — The battery lasts up to four hours. Charge the battery by plugging in the A/C • charger or optional car charger. While the battery is charging the Power/Connection LED flashes amber. -
Page 12: Led States
LED States Connection LED LED Color Status Description No light Off, and the The device is powered off or otherwise not receiving power. Power Button LED is also off Blinking: Low battery. Solid: The SIM card is not inserted or the device has an error. See Common Problems and Solutions on page 62. -
Page 13: Install The Sim Card And Battery
Install the SIM Card and Battery Install the SIM Card and Battery Insert the SIM card, and then insert and charge the battery. If your SIM card was pre-installed, skip step 7. IMPORTANT The battery must be fully charged (for a minimum of four hours) before using your MiFi device for the first time. - Page 14 ➍ Using normal thumb pressure on the traction bars, slide the battery door away from you. ➎ The door should move approximately 0.6 cm (1/4 inch) before it clicks and stops moving. ➏ Remove the door by picking up the edge of the battery door that moved over your fingers. ➐...
-
Page 15: Remove The Battery
➑ Insert the battery, lining up the contact points as shown, and then replace the door. ➒ Connect the A/C charger to your MiFi device and charge at least four hours before use. The power button LED flashes amber while charging and glows solid amber if the device is off. Remove the Battery WARNING ! Never use tools, knives, keys, pens or any type of object to force the door open... - Page 16 ➍ Using normal thumb pressure on the traction bars, slide the battery door away from you. ➎ The door should move approximately 0.6 cm (1/4 inch) before it clicks and stops moving. ➏ Remove the door by picking up the edge of the battery door that moved over your fingers. ➐...
-
Page 17: Battery Advisory
Battery Advisory As with any battery-operated mobile device being used for a certain amount of time, the • MiFi device can get warm to the touch. This is normal and within standard specifications, and poses no hazard. The MiFi device is configured to automatically stop charging and disconnect the battery •... -
Page 18: Wi-Fi Setup
Wi-Fi Setup To properly set up your MiFi device, you need to do both of the following tasks: Set Up a Wi-Fi Connection • Configure Security • IMPORTANT Your MiFi device is pre-configured with AT&T network settings. If you need to modify the AT&T network settings, contact AT&T before attempting to set up your MiFi device. -
Page 19: Log In To The Mifi Landing Page (Http://Att.mifi)
Log In to the MiFi Landing Page (http://att.mifi) ➊ From your computer’s Web browser, type http://att.mifi (alternatively, http://192.168.1.1) without adding “www” in the address bar and press the Enter or Return key. The MiFi Landing Page launches. This guest version of the MiFi Landing Page is accessible to anyone who connects to the MiFi device. - Page 20 ➌ Type the administrative password: attmifi (case sensitive) into the field in the upper left corner of the window. ➍ Click the Login button. The administrator’s version of the MiFi Landing Page opens.
-
Page 21: Configure Security
Configure Security Though your device is pre-configured to have security enabled, you should change the network key (Wi-Fi Key) to a password you can easily remember and that is hard for others to guess. You should also change the administrative password. Using security with your wireless network is very important. -
Page 22: Change The Network Key (Wi-Fi Key)
Change the Network Key (Wi-Fi Key) You can use WEP (64- or 128-bit), WPA-PSK, WPA2-PSK, or WPA/WPA2 mixed mode security. IMPORTANT Record your network key (also referred to as the wi-fi key, network security key, or password depending on your operating system). ➊... - Page 23 ➎ Choose the type of security you want to use from the Security list. WEP 64 bit is the least secure but the most compatible with other systems. WPA/WPA2 is the most secure but the least compatible with other systems. Choose the most secure protocol that works with the computers and other computing devices you want to connect to your MiFi device.
-
Page 24: Sharing Files With The Mifi Device
Sharing Files with the MiFi Device Using a microSDHC Card With Your MiFi Device... -
Page 25: Using A Microsdhc Card With Your Mifi Device
Using a microSDHC Card With Your MiFi Device Your MiFi device comes with a microSDHC card slot that allows you to bring files with you without having to carry an additional flash drive. Insert the microSDHC Card ➤ Insert the microSDHC card into the microSDHC slot. NOTE –... - Page 26 ➌ Place a checkmark in the Enable File Sharing checkbox, and click Apply. ➍ Click Browse microSD Card to view and access the files. From here you can enable file sharing and see how much free space you have available on the microSDHC card.
-
Page 27: Accessing Mifi Features
Accessing MiFi Features MiFi OS and the MiFi Landing Page (http://att.mifi) Settings Wi-Fi Configuration Internet Configuration Router Configuration System Configuration... -
Page 28: Mifi Os And The Mifi Landing Page (Http://Att.mifi)
MiFi OS and the MiFi Landing Page (http://att.mifi) The MiFi OS is part of your MiFi device. It’s a web interface you can log in to that contains customizable widgets with frequently-used information, as well as the means to log in and change the MiFi settings. - Page 29 The navigation bar after you log in, but before you go to the admin user Settings section. • NOTE If a microSD or microSDHC card is inserted into your MiFi device, the microSD icon will also appear in the Status bar. Settings —...
-
Page 30: Status Icons
Status Icons Below the Navigation Bar, at the top right corner of the window, icons indicate the device status. Some of these icons might not be accessible to guest users. SMS messaging; this icon is an active link to SMS message information Battery life;... -
Page 31: Mifi Landing Page For Guest Users
MiFi Landing Page for Guest Users The MiFi Landing Page is the page you see when you first connect to your MiFi device with your browser when you go to http://att.mifi (alternatively, http://192.168.1.1). The MiFi Landing Page is where guests can see and interact with widgets. See Widgets on page 28. -
Page 32: Mifi Landing Page For Admin Users
MiFi Landing Page for Admin Users The MiFi Landing Page differs depending on whether you are logged in. The first page you see when you go to http://att.mifi (alternatively, http://192.168.1.1) is a public page for guests. To see the admin MiFi Landing Page with the ability to permanently change the settings, you must log in. Log In to the MiFi Landing Page (att.mifi) on page 12. -
Page 33: Widgets
Widgets Widgets are little programs that give you information really quickly. For example, your MiFi device can give you the weather where you are right now or anywhere in the world. Another example is a widget that can help you track your data usage and visibly show how much data you have left this period. -
Page 34: Settings
Settings You can configure and customize your MiFi device. Settings for Guest Users Guest users can modify the MiFi Landing Page widgets in the guest MiFi Landing Page Settings page accessible from the guest MiFi Landing Page. They can also change settings related to where they are in the world, including date and time format, temperature units, measurement units, and numeric formatting. -
Page 35: Mifi Administration Menu Bar
MiFi Administration Menu Bar The MiFi Administration section contains a menu bar to help you navigate, and includes Home, Applications, Wi-Fi, Internet, Router, and System options. Except for the Home menu item, each menu bar item has a submenu with several additional items available. - Page 36 Applications Menu Options ➊ Choose Applications from the menu bar. ➋ Select one of the following: File Sharing — Make it possible to share the files on the inserted microSDHC card. • MiFi Landing Page Settings — Control which widgets appear on each of the MiFi Landing •...
- Page 37 MiFi Landing Page Settings The MiFi Landing Page Settings page helps you enable or disable widgets and determine which are available to admin users and guest users. Enabled means the widget is turned on but not necessarily visible on the MiFi Landing Page. Available means that the user can view the widget on the appropriate MiFi Landing Page.
-
Page 38: Wi-Fi Configuration
Wi-Fi Configuration The Wi-Fi menu allows you to work with profiles, set up a temporary hotspot, set MAC filters, and view status information for the Wi-Fi network. This section contains the following information: Wi-Fi Status • Wi-Fi Profiles • MAC Filter •... -
Page 39: Wi-Fi Status
Wi-Fi Status The Wi-Fi Status page provides you with information about your wireless network. ➤ Choose Wi-Fi > Status from the menu bar. The Wi-Fi Status page opens. Wi-Fi Network The Wi-Fi Network section of the Wi-Fi Status page provides the following information: Current Profile —... -
Page 40: Wi-Fi Profiles
Wi-Fi Profiles The Wi-Fi Profiles page allows you to configure your secure profile or set up a temporary hotspot. ➤ Choose Wi-Fi > Profiles from the menu bar. The Wi-Fi Profiles – Set Profile page opens. This page provides the following information: Profile —... -
Page 41: Choosing A Profile
Choosing a Profile A profile controls how you connect to the MiFi device. Each profile has a specific purpose, though generally the secure profile is recommended. You can choose one of three Wi-Fi profiles. Secure — Your pre-configured profile is set to Secure. You can set up an additional profile •... -
Page 42: Setting Security
Setting Security You can only set security for the Secure profile. You can use WEP (64- or 128-bit), WPA, WPA2, or WPA/WPA2 Mixed Mode security. Tip! Some Wi-Fi clients become confused if the security is changed and the network name is not. If you change security settings and do not get asked for the new network key when you try to reconnect, delete the existing “old”... -
Page 43: Setting Up A Temporary Hotspot
Setting Up a Temporary Hotspot Your MiFi device allows you to set up a temporary network name and network key. This allows you to share your MiFi network securely with friends and colleagues but without changing your regular secure network name and network key. Your MiFi device can have up to five devices connected to it at any one time. - Page 44 ➎ Optional: Click the Generate new values link at the bottom. The Network Name and Network Key fields change to a new temporary network name (SSID) and network key. Tip! You can click the Generate new values link again to have a different network name and network key generated.
-
Page 45: Mac Filter
MAC Filter MAC Filtering allows you to restrict access to your MiFi device to only those devices with a specific MAC address. The MAC address is a unique code specific to a particular piece of hardware such as a network adapter. See Finding the MAC Address on page 40. - Page 46 Using the MAC Filter The MAC Filter page allows you to enable or disable MAC filtering and to add or delete MAC addresses from the trusted client list. IMPORTANT Do not enable MAC filtering unless you have added your own MAC address to the trusted client list.
-
Page 47: Wi-Fi Settings
Wi-Fi Settings The Wi-Fi Settings page allows you to enable or disable broadcasting the network name. ➤ Choose Wi-Fi > Settings from the menu bar. The Wi-Fi Settings page opens. Broadcast Network Name (also known as SSID broadcast) causes the device to send the network name (SSID) out where it can be picked up by nearby computers. -
Page 48: Internet Configuration
Internet Configuration The Internet menu provides status information for your connection to the Internet, allows you to configure your MiFi device, and view information about your MiFi device. The section contains the following information: Internet Status • Internet Profiles • Internet Diagnostics •... -
Page 49: Internet Status
Internet Status The Internet Status page provides information about the Internet connection. ➤ Choose Internet > Status from the menu bar. The Internet Status page opens. Internet Connection The Internet Connection section gives you the following information: Connection Status — Connection status •... -
Page 50: Internet Profiles
Internet Profiles Internet Profiles are for network configuration only. AT&T has two default profiles. A third profile is available for Enterprises with their own APN. Changing these settings is not recommended. Internet Diagnostics The Internet Diagnostics page provides status information about your Internet connection and your MiFi device. -
Page 51: Internet Settings
Internet Settings The Internet Settings page allows your MiFi device to automatically connect, allow guests to establish the Internet connection, and determine network technology. ➤ Choose Internet > Settings from the menu bar. The Internet Settings page opens. Connection Options You can set your MiFi device to automatically connect to the network by selecting Auto-connect enable. - Page 52 Roaming The Roaming setting allows you to determine how your MiFi device connects to the network while outside of the home network coverage area. This option is only available when you are outside of your home network. Home network only — Requires the user to login to the Web UI each time and select connect. •...
- Page 53 Manual Network Selection Check this box to manually select your mobile broadband network. A confirmation window will open while the MiFi device is detecting the available networks. ➊ Click Select network to display a list of available networks. Choose your preferred network and click OK.
-
Page 54: Router Configuration
Router Configuration The Router Menu has options that allow you to configure traffic through your MiFi device. The section contains the following information: Port Filtering • Port Forwarding • TCP/IP • Router Settings • Router Menu ➊ Choose Router from the menu bar. ➋... -
Page 55: Port Filtering
Port Filtering Port Filtering allows you to enhance the security of your system by only allowing certain applications to reach the Internet. ➤ Choose Router > Port Filtering from the menu bar. The Port Filtering page opens. This page allows you to enable Port Filtering, select common applications to allow access to the Internet. - Page 56 ➤ Choose Router > Port Forwarding from the menu bar. The Port Forwarding page opens. Port Forwarding Page This page allows you to enter the local static IP address for each application that you want to receive traffic from the Internet. ➊...
-
Page 57: Tcp/Ip
TCP/IP The TCP/IP page allows you to view the IP address and the MAC address for your MiFi device. ➤ Choose Router > TCP/IP from the menu bar. The TCP/IP page opens. This page gives you the following status information about your device: IP Address —... -
Page 58: Vpn Passthrough Enable
VPN Passthrough enable VPN Passthrough is required if you want to connect to a Virtual Private Network (VPN). Typically this is used by companies to connect from other networks to secure private networks (such as connecting from home to your office). ➤... -
Page 59: System Configuration
System Configuration The System Menu gives you access to settings and features that affect your MiFi device as a whole. The section contains the following information: System Status • Backup • Software Update • Power Management • Password • System Settings •... -
Page 60: System Status
System Information System Information includes the following: Manufacturer — Novatel Wireless • Model Number — MiFi 2372 • Serial Number — The serial number of your MiFi device. • Access Point Firmware Version — The version of the firmware used to control the MiFi’s •... -
Page 61: Restart/Reboot
Restart/Reboot You can restart your MiFi device from this page. ➤ Click Restart/Reboot to reset your MiFi device (as if you turned the power off, and then on again). IMPORTANT Your Internet and Wi-Fi connections will be lost and you will have to reconnect. Reset to Factory Defaults ➤... -
Page 62: Software Update
Software Update The Software Update page allows you to upload a package or bundle file to update your widget software. ➤ Choose System > Software Update from the menu bar. The Software Update page opens. ➤ Click Choose File to upload a software update file. Power Management Your MiFi device can turn itself off after a specified time (30 minutes by default), if no clients are connected to it through Wi-Fi. -
Page 63: Password
Password The Password page allows you to change the administrative password that gives access to the browser interface. ➤ Choose System > Password from the menu bar. The Password page opens. This page allows you to create a new administrative password. ➊... -
Page 64: Gps Startup
GPS Startup You can determine when GPS service starts. To turn on the GPS, select an option from the drop- down list and GPS automatically turns itself on accordingly. Turning on the GPS can affect battery life. Never — The GPS does not turn on. •... -
Page 65: Troubleshooting
Troubleshooting Overview Common Problems and Solutions Using the Master Reset Button... -
Page 66: Overview
Overview When properly set up, your MiFi device is a highly reliable product. Ensure that you are in the coverage area. • Ensure you have an active subscription plan. • Ensure the SIM card is correctly installed. • Restarting your computer and your MiFi device can resolve many issues. •... -
Page 67: Common Problems And Solutions
Common Problems and Solutions Before you read on, all of the steps mentioned here are given in more detailed form elsewhere in the user guide. When a reference is given, click the link to go to the more detailed information. The following are some common problems and solutions. - Page 68 When your computer is connected to your MiFi device, the Wi-Fi LED begins to blink. My network does not appear in the wireless network list. Verify the MiFi LEDs are on and are not showing an error condition. See LED States on page 7.
- Page 69 How do I check the model number and firmware versions of my MiFi device? Log in to the admin MiFi Landing Page. Click Settings, and then go to System > Status. See System ➤ Status on page 55. How can I check the battery level of my MiFi device? Open the admin or guest MiFi Landing Page.
-
Page 70: Using The Master Reset Button
Using the Master Reset Button Your MiFi device comes with a master reset button that allows you to return it to its factory default state. The master reset button is recessed in a hole on the back of the device. You need a paperclip or similar object to push the button. -
Page 71: Technical Support
Customer Service For Customer Service while in the U.S. or Canada, call 800-331-0500. When calling, enter the wireless number of your MiFi 2372 device found in the top left corner of the MiFi Landing Page. See Log In to the MiFi Landing Page (http://att.mifi) on page 14. -
Page 72: Product Specifications And Regulatory Information
Product Specifications and Regulatory Information Product Specifications Regulatory Safety Hazards Proper Battery Use and Disposal Limited Warranty and Liability... -
Page 73: Product Specifications
Product Specifications General Name AT&T Mobile Hotspot, MiFi 2372 by Novatel Wireless, Inc. Model MiFi 2372 Approvals FCC, CE, IC, PTCRB, Microsoft WHQL, DLNA, RoHS, R&TTE, WEEE, GCF, GSM P2, A-Tick, ICASA Interface Battery Rechargeable, lithium ion battery microSDHC Up to 32GB SIM socket 1.8V and 3.0V standard USIM... -
Page 74: Regulatory
Regulatory CE Marking This device has been tested to and conforms to the essential regulatory requirements of the European Union R&TTE directive 1999/5/EC and has attained CE Marking. Federal Communications Commission Notice (FCC United States) This equipment has been tested to, and found to be within the acceptable limits for a Class B digital device, pursuant to part 15 of the FCC Rules and Industry Canada ICES-003. -
Page 75: Limitation Of Liability
FCC Equipment Authorization ID: NBZNRM-MIFI2372 To comply with FCC RF exposure requirements, the MiFi 2372 device should not be used in configurations that cannot maintain at least 13 mm (0.47 inches or 1/2 inch) from a user. To maintain a distance of 12 mm (0.51 inches or 1/2 inch) from a user this device shall not be used while in your pocket. -
Page 76: Safety Hazards
Safety Hazards Do not operate your MiFi device in an environment that may be susceptible to radio interference resulting in danger, specifically: Areas where prohibited by the law Follow any special rules and regulations and obey all signs and notices. Always turn off your MiFi device (or the host device and remove the modem from the USB port) when instructed to do so, or when you suspect that it may cause interference or danger. - Page 77 Electrostatic discharge (ESD) Electrical and electronic devices are sensitive to electrostatic discharge (ESD). Macintosh native connection software might attempt to reinitialize the device should a substantial electrostatic discharge reset the device. If the software is not operational after an ESD occurrence, then restart your computer.
-
Page 78: Proper Battery Use And Disposal
Proper Battery Use and Disposal CAUTION! Never dispose of batteries in a fire because they might explode. WARNING! In the event of a battery leak: • Do not allow the liquid to come in contact with the skin or the eyes. If contact has been made, wash the affected area with large amounts of water and seek medical advice. -
Page 79: Limited Warranty And Liability
Limited Warranty and Liability Novatel Wireless, Inc. warrants for the 12 month period immediately following receipt of the Product by Purchaser that the Product will be free from defects in material and workmanship under normal use. THESE WARRANTIES ARE EXPRESSLY IN LIEU OF ALL OTHER WARRANTIES, EXPRESS OR IMPLIED, INCLUDING, WITHOUT LIMITATION, ALL IMPLIED WARRANTIES OF MERCHANTABILITY AND FITNESS FOR A PARTICULAR PURPOSE. -
Page 80: Glossary
Glossary... - Page 81 Glossary ● 3G — Third Generation. 3G refers to the third generation of mobile telephony technology.. ● 802.11 (b, g, n) — A set of WLAN communication standards in the 2.4, 3.6 and 5 GHz frequency bands. ● Access Point — A device that allows wireless communication devices to connect to a wireless network using a standard such as WiFi.
- Page 82 ● GPS — Global Positioning System. A radio-based navigation system that allows users to determine their location. The device uses satellite data to calculate its position. Commonly used in mapping and navigation systems. ● Host Name — The unique name by which a network-attached device is known on a network. ●...
- Page 83 ● MEID — Mobile Equipment IDentifier. A globally unique number for a physical piece of mobile station equipment. ● Mbps — Megabits per second. ● microSD / microSDHC — A small, removable flash memory card available in various storage sizes. Some products have a slot that allows them to utilize this external memory.
- Page 84 ● RFB — Remote Frame Buffer. A protocol for remote access to graphical user interfaces. ● Router — A device that directs traffic from one network to another. ● RTP — Real-time Transport Protocol. A packet format for streaming multimedia over the Internet. ●...
- Page 85 ● Wi-Fi (R) — Wireless Fidelity. Any system that uses the 802.11 wireless standard developed and released in 1997 by the IEEE. ● WiFi Client — A wireless device that connects to the Internet via WiFi. ● WLAN — Wireless Local Area Network. A typically low-power network that transmits a wireless signal over a span of a few hundred feet and usually only to stationary devices.