
Related Manuals for Pride Mobility JET 1


Summary of Contents for Pride Mobility JET 1
- Page 1 Owner’s Manual Stylish Design and Premium Performance ® Exeter, PA St. Catharines, ON 1-800-800-8586 www.pridemobility.com...
- Page 2 WARNING! Failure to heed the warnings in this owner’s manual may result in personal injury. CAUTION! Failure to heed the cautions in this owner’s manual may result in damage to your power chair. Copyright © 2003 Pride Mobility Products Corp. INFMANU1588...
-
Page 3: Table Of Contents
C O N T E N T S INTRODUCTION......................... 4 SAFETY ............................6 III. EMI/RFI ............................14 IV. THE JET 1 ATS........................16 ASSEMBLY..........................21 VI. COMFORT ADJUSTMENTS....................23 VII. DISASSEMBLY ......................... 26 VIII. OPERATION ..........................27 IX. BATTERIES AND CHARGING .................... 30 CARE AND MAINTENANCE .................... -
Page 4: Introduction
I N T R O D U C T I O N INTRODUCTION Welcome to Pride Mobility Products Corporation (Pride). Congratulations on the purchase of your new Pride Power Chair. The Pride Power Chair design combines the most advanced state-of-the-art components with modern, attractive styling. - Page 5 Phone Number:________________________________________________________________________ Purchase Date:________________________________________________________________________ NOTE: If you ever lose or misplace your product registration card or your copy of this manual, contact us and we will be glad to send you a new one immediately. US Jet 1 ATS/Rev B/Jul03 www.pridemobility.com...
-
Page 6: Safety
Check all electrical connections. Make sure they are tight and not corroded. n Check all controller connections to the electronics tray. Make sure they are secured properly. n Check the brakes. See X. “Care and Maintenance.” n Check battery charge. See IX. “Batteries and Charging.” www.pridemobility.com US Jet 1 ATS/Rev B/Jul03... -
Page 7: Weight Limitations
If your power chair starts to move down the incline faster than you anticipated or desired, allow it to come to a complete stop by releasing the joystick, then push the joystick forward slightly to ensure a safely controlled descent. US Jet 1 ATS/Rev B/Jul03 www.pridemobility.com... - Page 8 – especially at high speed while turning), and abrupt directional changes. High cornering speeds are not recommended. If you feel that you may tip over in a corner, reduce your speed and steering angle (i.e., lessen the sharpness of the turn) to prevent your power chair from tipping. www.pridemobility.com US Jet 1 ATS/Rev B/Jul03...
- Page 9 Proceed with extreme caution when driving near raised surfaces, unprotected ledges and/or drop-offs (curbs, porches, stairs, etc.). The correct method for approaching a curb is illustrated in figure 1a. Figure 1a. Curb Approach (Correct and Incorrect) US Jet 1 ATS/Rev B/Jul03 www.pridemobility.com...
- Page 10 Motor Vehicle Transport Currently, there are no standards approved for tie-down systems in a moving vehicle of any type to transport a person while seated in a power chair. www.pridemobility.com US Jet 1 ATS/Rev B/Jul03...
-
Page 11: Positioning Belts
Turn the power off. See VIII. “Operation.” n Ensure your power chair is not in freewheel mode. See IV. “The Jet 1 ATS.” n Turn both caster wheels toward the transfer destination to improve power chair stability during transfer. -
Page 12: Reaching And Bending
WARNING! Consult your physician if you are taking prescribed or over-the-counter medication or if you have certain physical limitations. Some medications and limitations may impair your ability to operate your power chair in a safe manner. www.pridemobility.com US Jet 1 ATS/Rev B/Jul03... -
Page 13: Removable Parts
Removable Parts WARNING! Do not attempt to lift or move a power chair by any of its removable parts. Personal injury and/or damage to the power chair may result. US Jet 1 ATS/Rev B/Jul03 www.pridemobility.com... -
Page 14: Emi/Rfi
EMI-RFI to unexpectedly release the brakes on a power chair. Some intense sources of EMI-RFI can even damage the control system of your Jet 1. Is there any way to know for sure whether radio waves are responsible for the unintended motion... - Page 15 But it is always possible that problems could arise if you are close to a source of radio waves. Therefore, it is very important to be alert to this possibility. The Jet 1 meets or exceeds an immunity level of at least 20 V/m.
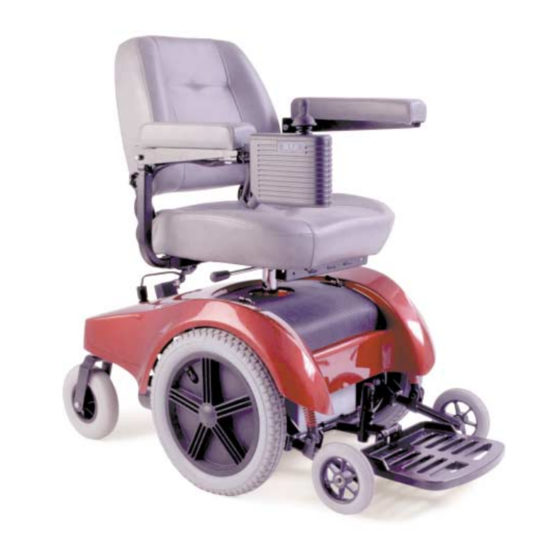
- Page 16 See XI. “Optional Accessories.” The power base is the heart of your Jet 1. The power base assembly includes a frame, two drive wheels, two anti- tip wheels, two caster wheels, controller harnesses and a body shroud.
- Page 17 I V . T H E J E T ARMREST ARMREST WIDTH ADJUSTMENT SETSCREWS CONTROLLER HARNESSES Figure 2. Rear View Figure 3. Battery Charger Cord US Jet 1 ATS/Rev B/Jul03 www.pridemobility.com...
-
Page 18: Specifications
Onboard Electronics: 50-amp Dynamic controller Weight Capacity: 250 lbs. Base: 81 lbs. Seat: 29 lbs. Batteries: 38 lbs. each Warranty: Five-year limited warranty on frame One-year warranty on electronics One-year warranty on drive motors www.pridemobility.com US Jet 1 ATS/Rev B/Jul03... - Page 19 UTILITY TRAY The utility tray is located at the rear of your Jet 1. The utility tray is exposed through the body shroud. The utility tray consists of the battery charger power outlet, the ammeter, the main circuit breaker, and the controller harness connectors.
-
Page 20: Freewheel Levers
J E T FREEWHEEL LEVERS For your convenience, your Jet 1 is equipped with two freewheel levers. See figures 5 and 6. These levers allow you to disengage the drive motors and maneuver the chair manually. WARNING! Do not use your power chair while the drive motors are disengaged unless you are in the presence of an attendant! Do not disengage the drive motors when your Jet 1 is on an incline. -
Page 21: Assembly
Jet 1 is shipped. The joystick may also have been removed from the armrest. The following is a set of instructions to help you quickly and easily prepare your Jet 1 for immediate use. -
Page 22: Seat Installation
3. Plug the controller harness into the connector on the utility tray. See figure 10. Figure 8. Seat Tower JOYSTICK INSTALLATION If your Jet 1 is equipped with a Dynamic joystick controller (see figure 11), it may have been shipped without the joystick installed in the armrest. Figure 9. Seat Installation Figure 10. -
Page 23: Comfort Adjustments
After you have become familiar with your Jet 1’s operation, you may find the need to adjust the seat. There are some adjustments you can make to increase your comfort such as seat height, armrest width, armrest angle, footrest height and angle, joystick extension, footrest height, and foot rest angle. -
Page 24: Armrest Width
5. Lock the adjusting screw into place by tightening the jam nut. TO ADJUST JOYSTICK ARMREST HEIGHT (OPTIONAL) Your Jet 1 may be equipped with height-adjustable armrests. To change the armrest height: 1. Loosen the knob located underneath each armrest. 2. Raise or lower the armrests to the desired height. - Page 25 4. Tighten the jam nut. SWING-AWAY FOOTRESTS OPTION Swing-away Footrests (SFRs) are an option. They enable you to move the footrests to the side before getting on or off your Jet 1. Figure 19. Swing-Away Footrests To move the SFRs: 1.
-
Page 26: Disassembly
BODY SHROUD REMOVAL The body shroud is a one-piece, molded plastic body that covers the power base frame. It helps protect the Jet 1 components from the environment. You must remove the body shroud to change the batteries and check the cable connections. -
Page 27: Operation
All six red lights lit represents a full state-of-charge and a single red light lit represents lowest state-of- charge. A low state-of-charge warning is represented by the left-most light flashing on and off. NOTE: Check your battery condition meter regularly and charge the batteries before they are completely discharged. US Jet 1 ATS/Rev B/Jul03 www.pridemobility.com... -
Page 28: Speed Control
122° F), the power module reduces the motor voltage. For every degree above 122° F, the power module reduces the voltage by 5 volts. This reduces your speed and allows the components to cool down. When the temperature returns to a safe level, your power chair will resume its normal speed. www.pridemobility.com US Jet 1 ATS/Rev B/Jul03... -
Page 29: Troubleshooting
If more than one fault exists, then the fault having the highest priority is indicated. The controller must be turned off and then on again even if the source of the fault is removed. If you cannot resolve the problem, contact your authorized Pride provider. US Jet 1 ATS/Rev B/Jul03 www.pridemobility.com... -
Page 30: Charging The Batteries
CHARGING THE BATTERIES The battery charger is essential in providing long life for your Jet 1’s batteries. See figure 24. The battery charger is designed to optimize your Jet 1’s performance by charging the batteries safely, quickly, and easily. The charging system consists of the battery charger, the charger fuse, and the ammeter. - Page 31 7. When your Jet 1’s batteries are fully charged, you can unplug the power cord from the wall outlet, wind it up using the hook and loop strap, and place the cord back into the Jet 1’s back pouch.
-
Page 32: Batteries And Charging
Daily Use If you use your Jet 1 on a daily basis, charge the batteries as soon as you are finished using your Jet 1 for the day. Your Jet 1 will be ready each morning to give you a full day’s service. We recommend that you charge the batteries for 8 to 14 hours after each day’s use. - Page 33 More importantly, it will take a few “charging cycles” (a partial drain—then a full recharge) to establish the critical chemical balance that is essential to the battery’s peak performance and long life. It will be well worth it to you if you take the time to break in your Jet 1’s batteries properly. US Jet 1 ATS/Rev B/Jul03 www.pridemobility.com...
- Page 34 What about shipping? If you wish to use a freight company to ship your Jet 1 to your final destination, repack your Jet 1 in the original shipping container and ship the batteries in separate boxes. www.pridemobility.com...
-
Page 35: Care And Maintenance
If you follow the maintenance checks in this section as scheduled, you can help ensure that your Jet 1 gives you years of trouble-free operation. If you have any doubt as to your Jet 1’s care or operation, contact your authorized Pride provider. -
Page 36: Daily Checks
Contact your authorized Pride provider if necessary. n Ensure that all parts of the controller system are securely fastened to your Jet 1. Do not overtighten any screws. n Check for proper tire inflation. There should be 30–35 psi in each tire. If a tire will not hold air, see an authorized Pride provider for replacement of the tube. -
Page 37: Cleaning Instructions
TIRES AND TUBES If your Jet 1 is equipped with pneumatic tires, you should check the air pressure at least once each week. Proper inflation (30–35 psi) will prolong the life of the tires as well as help ensure the perfect operation of your chair. If you have a flat tire, replace the tube. -
Page 38: Battery Replacement
8. Remove the wires. 9. Replace the batteries. 10. Install the batteries into your Jet 1 with the terminal sides of the batteries facing inward, toward each other. 11. Connect the wire marked (+) to the closest positive (red) battery terminal. -
Page 39: Corrective Maintenance
Disconnect both batteries before load testing and follow the directions that come with the load tester. If either one of the batteries fails the load test, replace both of them. If your Jet 1 still does not power up, contact your authorized Pride provider. -
Page 40: Optional Accessories
The rear basket is mounted to the accessory bracket. It has a handle that you can use when you remove the basket from your Jet 1. CUP HOLDER (NOT SHOWN) The cup holder is mounted to the armrest. www.pridemobility.com US Jet 1 ATS/Rev B/Jul03... -
Page 41: Warranty
Labor, service calls, shipping, and other charges incurred for repair of the product unless specifically authorized by Pride Damage caused by: n Battery fluid spillage or leakage n Abuse, misuse, accident, or negligence n Improper operation, maintenance, or storage n Commercial use, or use other than normal US Jet 1 ATS/Rev B/Jul03 www.pridemobility.com... - Page 42 This warranty gives you specific rights, and you may also have other rights that vary from state to state. Please fill out and return the warranty card to Pride. This will aid Pride in providing the best possible technical and customer service. www.pridemobility.com US Jet 1 ATS/Rev B/Jul03...
- Page 43 Quality Control - Model Jet 1 ATS Thank you for making the Jet 1 ATS your choice in power chairs. We have thoroughly inspected your Jet 1 ATS. The following checkmarks indicate that it has been driven and inspected. Controller...