Table of Contents
Advertisement
Advertisement
Table of Contents

Related Manuals for Cardo Systems G9


Summary of Contents for Cardo Systems G9
-
Page 1: User Guide
G9 / G9 PowerSet ™ User Guide... -
Page 2: Table Of Contents
MP3 PLAYER ..........20 2. CHARGING THE SCALA RIDER G9® ...... 4 ... -
Page 3: Introduction
1. INTRODUCTION Thank you for choosing the scala rider G9® Bluetooth® • Create, find and join riding tours communication and entertainment system for motorcycle helmets. • Customize your G9 settings This manual will help you set up, configure and operate the adVaNced TecHNOlOGY scala rider G9. ➤ Voice Command and V OX technology: If you have purchased the G9 Powerset™, your retail box contains • Make / Receive mobile calls by voice command two factory-paired scala rider G9 units. • Make / Receive intercom calls by voice command ➤ AGC technology (Automatic Gain Control), allowing the Among others, the scala rider G9 offers the following key features: automatic adjustment of volume according to ambient noise iNTercOM OPTiONs and driving speed. You can also control the volume level • I ntercom Conference mode between 2, 3 or 4 riders at a range of manually. AGC sensitivity levels can be customized to suit up to 1 mile /1.6 km* your personal preferences. -
Page 4: Charging The Scala Rider G9
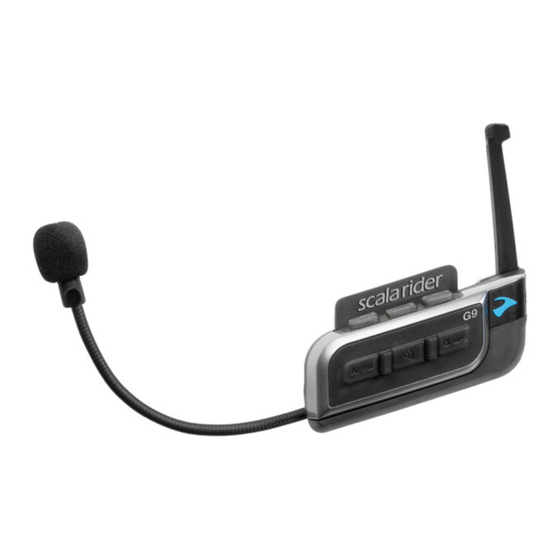
Glue plate Carry pouch MP3 Jack * The large microphone sponge is recommended for use with open helmets (back) scala rider G9 Unit 2. CHARGING THE SCAlA RIDER G9 Make sure that your scala rider G9 is fully charged for at least Flip-up Antenna 4 hours before initial use. Volume Down / Rewind button 1. Open the silicone cover protecting the Charging Jack. Mobile phone button 2. ... -
Page 5: Cardo Community™ Platform And "One+8" Intercom
(alias) for the “One+8” See “Using the Back Plate” on See “Using the Glue Plate” Intercom mode and next page on next page Connect your G9 and personalize the settings your PC by inserting the Glue the Audio Kit onto of your G9 through USB cable into the your helmet when the your PC*... - Page 6 Adjust the audio kit’s microphone is located opposite location so that the the center of your mouth. microphone is located in front of the center of your mouth. scala rider scala rider G9 / G9 PowerSet G9 / G9 PowerSet ® ®...
- Page 7 If this is the case, postion both speakers on one side Allow the glue to dry of the helmet. for 24 hours Fasten both screws tightly scala rider scala rider G9 / G9 PowerSet G9 / G9 PowerSet ® ®...
- Page 8 The Corded Microphone can be used with Full face helmets only (not Modular helmets). Removing Remove both screws Remove the screw Tighten the screw Tighten the screws scala rider scala rider G9 / G9 PowerSet G9 / G9 PowerSet ® ®...
- Page 9 Remove protective backing sheet from replacement sponge Carefully attach the new sponge to the microphone Attach Velcro to inside front of helmet Velcro Pad scala rider scala rider G9 / G9 PowerSet G9 / G9 PowerSet ® ®...
-
Page 10: General Functions
4.2 GeNeral FUNcTiONs ATTACHING AND REMOVING THE G9 FROM THE AUDIO KIT GeNeral FUNcTiONs Power ON Press and hold the Mobile Button for 2 seconds • Light: 3 BLUE flashes • Sound: Ascending tone Power OFF Press and hold the Mobile Button for 2 seconds push! • Light: 3 RED flashes • Sound: Descending tone Volume Tap the Volume Up or Volume Down Button Adjust and set volume of current audio source Mute speakers push! Tap Volume Up and Volume Down buttons simultaneously Battery level Press and hold the Volume Up Button for 2 seconds indicator Light: • BLUE = Full charge • PURPLE = Half charge • RED = Almost empty 4.3 sTaTUs liGHTs... -
Page 11: Audio Sources And Priorities
The G9 allows you to perform certain actions by simply using your sponge and closing the visor. voice. Using advanced Voice Recognition, you can control the G9 completely handsfree. 4.6 seTTiNGs cUsTOMiZaTiON The default Voice Command language is English. Other languages Your G9 offers various customizable settings, allowing you to can be selected via the Cardo Community platform including personalize it according to your preferences. Among these German, French, Italian and Spanish (see section 3). settings, you can: Throughout this manual, features which are available via Voice • e nable/disable spoken status announcements, i.e. Command are marked with the icon. informing you about the respective connectivity status, like if you are in mobile phone or intercom mode, and confirm changes of such modes. By default the feature is ON. scala rider scala rider G9 / G9 PowerSet G9 / G9 PowerSet ® ®... -
Page 12: Voice Menu
• s et custom aGc and VOX sensitivity levels suited to your Once paired, the scala rider G9 will automatically recognize the specific riding style and conditions. second unit whenever it is within range. G9 settings can be customized in two ways: • V ia the Cardo Community platform at NOTe: If you have purchased the G9 PowerSet, the retail package http://community.cardosystems.com (requires Windows PC). contains two factory-paired units configured to communicate via their Channel A buttons. See Section 3. • V ia the Voice Menu and the buttons on your G9 unit – see below. Intercom communication is possible using one of the three 4.7 VOice MeNU Intercom modes: The Voice menu is available in several languages. ... -
Page 13: One+8" Intercom Toggling Mode
G9 device(s) a Buddy Name, so that other “One+8” participants can call you by this name. If you change your G9 Buddy Name, you must Flash Pair again with your “One+8” Buddies for their G9 to receive your new Buddy Name. -
Page 14: Paired Device Indication
Channel “A” Buttons. If for any reason you have to pair them again, OR if you purchased a single scala rider G9 and wish to pair with 5.1d Paired deVice iNdicaTiON a second unit to make Intercom calls, proceed as follows: Use the Paired Device indication to quickly see which G9 units ... -
Page 15: Three-Way Intercom
If you purchased the scala rider G9 Powerset, both units are flash every 3 seconds). factory-paired and configured to communicate via their respective Channel “A” Buttons. To pair a third scala rider G9 use Channel “B”. 2. C hoose a channel to pair the G9 unit (channel “a” or “B”). To set up three-way intercom conference mode proceed as NOTe: Selecting a Channel that is already in use will override the follows: ... -
Page 16: Four-Way Intercom
During a 4-Way Intercom call, the two passengers who maintain two active connections simultaneously will not be able to receive mobile phone calls or GPS instructions as long as the conference call is in progress. scala rider scala rider G9 / G9 PowerSet G9 / G9 PowerSet ® ®... -
Page 17: Using The Intercom
Channel A button Channel B button Connect to Rider A Connect to Rider B scala rider scala rider G9 / G9 PowerSet G9 / G9 PowerSet ® ®... -
Page 18: Making Three-Way Intercom Calls
Tap the Channel “A” Button Once you have successfully paired the four G9s as described in or Speak any word loudly 5.2c. proceed as follows: to answer by VOX 1. Make sure all four G9s are in Standby mode. Reject a Click-to-Link call While hearing the Click-to-Link ringtone: 2. P assenger 2 should tap Button “B” to initiate an Intercom call Remain silent until the ring with Passenger 4. Wait until audio is heard on both G9s. tone stops 3. R ider 1 should tap Button “A” to initiate an Intercom call with Passenger 2. If other scala rider users are nearby, your next Click-to-Link call 4. R ider 3 should tap Button “A” to initiate an Intercom call with may randomly connect to any of them. Passenger 4. scala rider scala rider G9 / G9 PowerSet G9 / G9 PowerSet ® ®... -
Page 19: Receiving Intercom Calls
The VOX feature can be customized to adjust its sensitivity level. while on a phone call, intercom call with Channels “A” and “B”, VOX activation for Intercom calls can also be disabled completely. “One+8” intercom call or Click-to-Link call. You can choose between ‘Regular’ (default), ‘Low’ and ‘High’ VOX sensitivity. If you experience difficulties starting a conversation 6.7 GrOUP siGNal using VOX, change the setting to ‘High’ via the Cardo Community Send an instant message to all paired G9s within a range of website or directly on your G9 via the Voice Menu (see Section 4.6). up to 350 m / 1,150 ft. The recipients will hear a “signal!” voice announcement. To reach a maximum number of riders, the eNaBle/disaBle VOX message is automatically forwarded to all paired G9s within the Press and hold Volume Up and Down buttons simultaneously for recipient’s range. In this manner the total range is extended to up 2 seconds. to 1 km / 3,280 ft. Feedback: • Enable: Blue flash for 2 seconds • Disable: Red flash for 2 seconds For incoming calls, just pronounce loudly any word (e.g. “hello”). To reject an incoming call, remain silent for about 15 seconds. scala rider scala rider G9 / G9 PowerSet G9 / G9 PowerSet ® ®... -
Page 20: Pairing And Using A Mobile Phone, Gps Or Mp3 Player
Bluetooth device and the scala rider G9 will automatically NOTes: recognize each other whenever they are within range (10m / 33ft). • I f Pairing is not completed within 2 minutes, the scala rider G9 will Your scala rider G9 offers Multiple Device Connectivity (“MDC”) : return to Standby mode. ➤ I ntercom with up to 10 other scala rider G9 units (Rider A, • N ot all Bluetooth mobile phones can broadcast Bluetooth Stereo Rider B, and “One+8” Buddies) music (A2DP), even if the phone has an MP3 player function. Consult your mobile phone’s User Manual for more information. -
Page 21: Hot Dial
• Not all Bluetooth GPS devices allow connections to Bluetooth audio devices. Please consult your GPS User Manual for more 1. T urn on the Music Player and make sure that Bluetooth information. function is activated. • If Pairing is not completed within 2 minutes, the scala rider G9 will return to Standby mode. 2. V erify that the scala rider G9 is turned ON and in Standby mode (single BLUE flash every 3 seconds). 1. Turn on your GPS. -
Page 22: Listening To Music Via A2Dp
NOTe: If Pairing is not completed within two minutes, the scala rider G9 will return to Standby mode. 7.3b lisTeNiNG TO MUsic Via a2dP Basic FUNcTiONs available only on aVrcP compatible Bluetooth AUX Line-in Port audio sources Play Press and hold the MP3 Button for 2 seconds Pause/stop Press and hold the MP3 Button for 2 seconds 1. V erify that the scala rider G9 is turned ON and in Standby Forward Press and hold the Volume Up Button for 2 seconds mode (single BLUE flash every 3 seconds). rewind* Press and hold the Volume Down Button for 2 seconds 2. C onnect the MP3 cable to the Music Player’s jack and insert ... -
Page 23: Radio Tuning
• P ressing Volume Down searches downwards (lower and do not replace the FM Presets you may have saved. frequency) for a station 2. T ap the Channel “B” button within 20 seconds of finding the Turning off your G9 will clear the Automatic Radio Tuning stations FM station to save it as the current Preset. and restore the FM Presets. scan and save: Scan through FM stations 8.4 rds (alTerNaTiVe FreQUeNcies) 1. P ress and hold the Volume Up button for 5 seconds. The G9 will search upwards (higher frequency) for a station. When a This feature allows your G9 to automatically re-tune to the station is found, it can be heard for a few seconds. strongest frequency available for the FM station you are listening to when the first signal becomes too weak. 2. T o stop the scan on this station: Tap the Volume Up Button. Toggle rds On/Off 3. T ap the Channel “B” button within 20 seconds of finding the ... -
Page 24: Troubleshooting Connections
FROM AUTHORIZED CARDO DEALERS. transmitter, except in accordance with FCC/IC multi-transmitter product procedures. PRODUCTS THAT WERE IMPORTED FROM NORTH AMERICA MUST ALSO BE SERVICED IN THE USA. scala rider scala rider G9 / G9 PowerSet G9 / G9 PowerSet ® ®... - Page 25 The Health Industry Manufacturers Association recommends that a minimum separation of about Cardo Systems Inc., (“Cardo” or the “Company”) notifies you that your complete and undivided six inches (or 16 cm) to be maintained between a mobile phone or wireless device and a pacemaker attention is required when using a communication device (the “Product”) while riding.
- Page 26 Your warranty will not cover such events. consent and without which the product would not be provided to you absent such limitations. scala rider scala rider G9 / G9 PowerSet G9 / G9 PowerSet ® ®...
- Page 27 By using the Product, you are irrevocably releasing, indemnifying from any liability, loss, claim and expense (including attorneys fees) and holding Cardo harmless for any bodily injuries, harm or www.cardosystems.com scala rider scala rider G9 / G9 PowerSet G9 / G9 PowerSet ® ®...
- Page 28 G9 / PowerSet ®...