Table of Contents
Advertisement
Advertisement
Table of Contents

Related Manuals for Hitron CDA-RES


Summary of Contents for Hitron CDA-RES
- Page 1 CDA-RES Residential Cable Modem User’s Guide Version 1.1 - 03/2014...
-
Page 2: About This User's Guide
Use the Index (page 77) to find information on a specific keyword. Use the rest of this User’s Guide to see in-depth descriptions of the CDA-RES’s features. Related Documentation Quick Installation Guide: see this for information on getting your CDA-RES up and running right away. -
Page 3: Document Conventions
Settings in the GUI, then Advanced settings. A key stroke is denoted by square brackets and uppercase text. For example: Press [ENTER] to continue. Customer Support For technical assistance or other customer support issues, please consult your Hitron representative. Version 1.1, 03/2014. Copyright 2012 Hitron Technologies Version 1.1, 03/2014. -
Page 4: Table 1: Default Credentials
Hitron CDA-RES User’s Guide Default Credentials The CDA-RES’s default login credentials are as follows. For more information, see Login to the CDA-RES on page 19 Table 1: Default Credentials Username cusadmin Password password Copyright 2014 Hitron Technologies. All rights reserved. All trademarks and registered trademarks used are the properties of their respective owners. - Page 5 This User’s Guide is provided “as is” without express or implied warranty of any kind. Neither Hitron Technologies nor its agents assume any liability for inaccuracies in this User’s Guide, or losses incurred by use or misuse of the information in this User’s Guide.
-
Page 6: Table Of Contents
1.2 Hardware Connections ..............11 1.3 LEDs ....................14 1.4 IP Address Setup ................17 1.4.1 Manual IP Address Setup ............18 1.5 Login to the CDA-RES ..............19 1.6 GUI Overview ..................20 1.7 Resetting the CDA-RES ..............21 Cable Overview ................... 23 2.1 DOCSIS .................... - Page 7 Hitron CDA-RES User’s Guide 2.9 Modulation ..................28 2.10 TDMA, FDMA and SCDMA ............. 28 System Info ....................30 3.1 System Info Overview ............... 30 3.2 The System Info Screen ..............30 Initialization ....................33 4.1 Initialization Overview ............... 33 4.2 The Initialization Screen ..............
-
Page 8: List Of Figures
Hitron CDA-RES User’s Guide List of Figures Figure 1: Application Overview ................10 Figure 2: Hardware Connections ................12 Figure 3: Power Adapter ..................14 Figure 4: LEDs ....................15 Figure 5: Login ....................20 Figure 6: GUI Overview ..................21 Figure 7: The Cable: System Info Screen ............31 Figure 8: The Cable: Initialization Screen ............34... -
Page 9: List Of Tables
Hitron CDA-RES User’s Guide List of Tables Table 1: Default Credentials ................4 Table 2: Hardware Connections ................13 Table 3: LEDs ....................15 Table 4: GUI Overview ..................21 Table 5: Private IP Address Ranges ..............24 Table 6: IP Address: Decimal and Binary ............25 Table 7: Subnet Mask: Decimal and Binary ............25... -
Page 10: Introduction
This chapter introduces the CDA-RES and its GUI (Graphical User Interface). CDA-RES Overview Your CDA-RES is a cable modem that allows you to connect your computers and to the Internet via the cable connection. Computers with a wired connection to the Hitron CDA-RES User’s Guide are on the Local Area Network (LAN) and the CDA-RES connects to the service provider over the Wide Area Network (WAN). -
Page 11: Hardware Connections
Dynamic Host Configuration Protocol (DHCP) for devices on the LAN LAN troubleshooting tools (Ping and Traceroute) Secure configuration interface, accessible by Web browser Hardware Connections This section describes the CDA-RES’s physical ports and buttons. Version 1.1, 03/2014. Copyright 2012 Hitron Technologies Version 1.1, 03/2014. Copyright... -
Page 12: Figure 2: Hardware Connections
Hitron CDA-RES User’s Guide Figure 2: Hardware Connections Version 1.1, 03/2014. Copyright 2012 Hitron Technologies Version 1.1, 03/2014. Copyright 2014 Hitron Technologies INTRODUCTION... -
Page 13: Table 2: Hardware Connections
Hitron CDA-RES User’s Guide Table 2: Hardware Connections Reset Use this button to reboot or reset your CDA-RES. Press the button and hold it for less than five seconds to reboot the CDA-RES. The CDA-RES restarts, using your existing settings. -
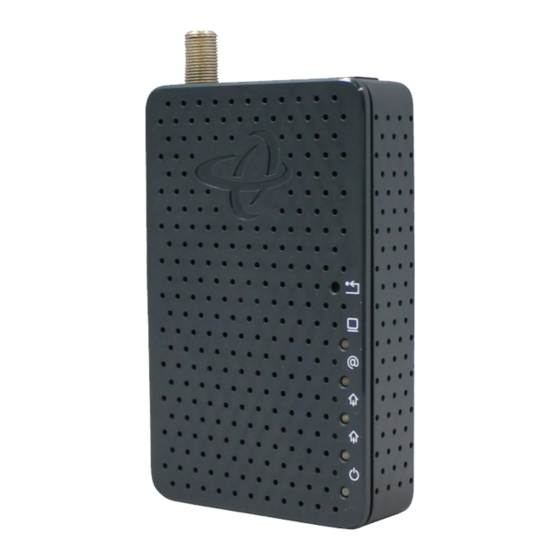
Page 14: Leds
Use this to connect to the 12v/2A power adapter that came with your CDA-RES. NEVER use another power adapter with your CDA-RES. Doing so could harm your CDA-RES. Figure 3: Power Adapter LEDs This section describes the CDA-RES’s LEDs (lights). -
Page 15: Figure 4: Leds
Hitron CDA-RES User’s Guide Figure 4: LEDs Table 3: LEDs STATUS DESCRIPTION POWER The CDA-RES is not receiving power. Blue, steady The CDA-RES is receiving power. Version 1.1, 03/2014. Copyright 2012 Hitron Technologies Version 1.1, 03/2014. Copyright 2014 Hitron Technologies INTRODUCTION... - Page 16 A device is connected to the LAN ports via a Gigabit Ethernet (1000Mbps) link, but is not transmitting or receiving data. When you turn on the CDA-RES, the LEDs light up in the following order: POWER Version 1.1, 03/2014. Copyright 2012 Hitron Technologies Version 1.1, 03/2014.
-
Page 17: Ip Address Setup
21. Bear in mind that ALL user-configured settings are lost. IP Address Setup Before you log into the CDA-RES’s GUI, your computer’s IP address must be in the same subnet as the CDA-RES. This allows your computer to communicate with the CDA-RES. -
Page 18: Manual Ip Address Setup
Hitron CDA-RES User’s Guide The CDA-RES has a built-in DHCP server that, when active, assigns IP addresses to computers on the LAN. When the DHCP server is active, you can get an IP address automatically. The DHCP server is active by default. -
Page 19: Login To The Cda-Res
(default). NOTE: If your CDA-RES is not using the default IP address, enter an IP address and subnet mask that places your computer in the same subnet as the CDA-RES. Click OK. The Internet Protocol (TCP/IP) window closes. In the Local Area Connection Properties window, click OK. -
Page 20: Gui Overview
The System Info Screen on page 30). GUI Overview This section describes the CDA-RES’s GUI. Select the Language, if required. By default, the CDA-RES’s interface displays in English. Version 1.1, 03/2014. Copyright 2012 Hitron Technologies Version 1.1, 03/2014. Copyright 2014 Hitron Technologies... -
Page 21: Resetting The Cda-Res
Use this section to read information about your CDA-RES’s configuration, and make configuration changes. Resetting the CDA-RES When you reset the CDA-RES to its factory defaults, all user-configured settings are lost, and the CDA-RES is returned to its initial configuration state. Here’s the way to reset the CDA-RES: Version 1.1, 03/2014. - Page 22 Hitron CDA-RES User’s Guide Press the RESET button on the CDA-RES, and hold it in for ten seconds or longer. The CDA-RES turns off and on again, using its factory default settings. NOTE: Depending on your CDA-RES’s previous configuration, you may need to re- configure your computer’s IP settings;...
-
Page 23: Cable Overview
Internet access) over a traditional cable TV (CATV) network. Your CDA-RES supports DOCSIS version 3.0. IP Addresses and Subnets Every computer on the Internet must have a unique Internet Protocol (IP) address. -
Page 24: Ip Address Assignment
10.255.255.255 172.16.0.0 172.31.255.255 192.168.0.0 192.168.255.255 If you assign addresses manually, they must be within the CDA-RES’s LAN subnet. 2.2.3 Subnets A subnet (short for sub-network) is, as the name suggests, a separate section of a network, distinct from the main network of which it is a part. A subnet may contain all of the computers at one corporate local office, for example, while the main network includes several offices. -
Page 25: Table 6: Ip Address: Decimal And Binary
Hitron CDA-RES User’s Guide In order to define the extent of a subnet, and to differentiate it from the main network, a subnet mask is used. This “masks” the part of the IP address that refers to the main network, leaving the part of the IP address that refers to the sub-network. -
Page 26: Dhcp
By default, the CDA-RES is a DHCP client on the WAN (the CATV connection). It broadcasts an IP address over the cable network, and receives one from the service provider. By default, the CDA-RES is a DHCP server on the LAN; it provides IP addresses to computers on the LAN which request them. -
Page 27: Configuration Files
Bear in mind that a MAC address does not precisely represent a computer on your network (or elsewhere), it represents a network device, which may be part of a computer (or other device). In the case of the CDA-RES, each internal module (cable modem module, Ethernet module, etc.) possesses its own MAC address. -
Page 28: Modulation
Hitron CDA-RES User’s Guide Modulation Transmissions over the cable network are based on a strong, high frequency periodic waveform known as the “carrier wave.” This carrier wave is so called because it “carries” the data signal. The data signal itself is defined by variations in the carrier wave. - Page 29 Hitron CDA-RES User’s Guide FDMA allows multiple users to share the same frequency channel by assigning a frequency band within the existing channel to each user. SCDMA allows multiple users to share the same frequency channel by assigning a unique orthogonal code to each user.
-
Page 30: System Info
The System Info Screen on page System Info Overview Use the System Info screen to see general information about your CDA-RES’s hardware, its software, and its connection to the Internet. NOTE: Most of the information that displays in this screen is for troubleshooting purposes only. -
Page 31: Figure 7: The Cable: System Info Screen
MAC Address RF MAC Address This displays the Media Access Control (MAC) address of the CDA-RES’s RF module. This is the module that connects to the Internet through the Cable connection. Ethernet MAC This displays the Media Access Control (MAC) address Address of the CDA-RES’s Ethernet. - Page 32 System Time This displays the current date and time. System Uptime This displays the number of days, hours, minutes and seconds since the CDA-RES was last switched on or rebooted. Version 1.1, 03/2014. Copyright 2012 Hitron Technologies Version 1.1, 03/2014. Copyright...
-
Page 33: Initialization
The Initialization Screen on page Initialization Overview Use the Initialization screen for troubleshooting purposes to ensure that the CDA-RES has successfully connected to the Internet; if an error has occurred you can identify the stage at which the failure occurred. -
Page 34: Figure 8: The Cable: Initialization Screen
Hitron CDA-RES User’s Guide Figure 8: The Cable: Initialization Screen For each step: Process displays when the CDA-RES is attempting to complete a connection step. Success displays when the CDA-RES has completed a connection step. Version 1.1, 03/2014. Copyright 2012 Hitron Technologies Version 1.1, 03/2014. -
Page 35: Status
Status Overview Use the Status screen to discover information about: The nature of the upstream and downstream connection between the CDA-RES and the device to which it is connected through the CABLE interface. IP details of the CDA-RES’s WAN connection. -
Page 36: Figure 9: The Cable: Status Screen
Permitted displays if you can access the Internet. Denied displays if you cannot access the Internet. Downstream Overview NOTE: The downstream signal is the signal transmitted to the CDA-RES. Version 1.1, 03/2014. Copyright 2012 Hitron Technologies Version 1.1, 03/2014. Copyright... - Page 37 When an upstream connection cannot be made on the specified channel, the CDA-RES attempts to connect on the next channel. If you want the CDA-RES to attempt to connect on a different channel, enter it in the field and click Apply. NOTE: Do not change the channel unless you have a good reason to do so.
- Page 38 Table 9: The Cable: Status Screen (continued) Frequency (MHz) This displays the actual frequency in Megahertz (MHz) of each upstream data channel to which the CDA-RES is connected. Modulation This displays the type of modulation that each upstream channel uses.
-
Page 39: Event Log
The Event Log Screen on page Event Log Overview Use the Event Log screen to view information about CDA-RES’s events. The Event Log Screen Click Event Log in the toolbar. The following screen displays. Figure 10: The Cable: Event Log Screen Version 1.1, 03/2014. -
Page 40: Table 10: The Cable: Event Log Screen
Hitron CDA-RES User’s Guide The following table describes the labels in this screen. Table 10: The Cable: Event Log Screen Index This displays the arbitrary, incremental index number assigned to the event. Date/Time This displays the date and time at which the event occurred. -
Page 41: Password
Password Overview Use the Password screen to make changes to the CDA-RES’s username and password. If you forget your password, you will need to reset the CDA-RES to its factory defaults. The Password Screen Click Cable > Password. The following screen displays. -
Page 42: Figure 11: The Cable: Password Screen
Enter the password with which you currently log into the CDA-RES for this account. Enter New Password Enter and re-enter the password you want to use to log into the CDA-RES for this account. Re-enter New Password Apply Click this to save your changes to the fields in this screen. -
Page 43: Troubleshooting
Hitron CDA-RES User’s Guide Troubleshooting Use this section to solve common problems with the CDA-RES and your network. It contains the following sections: None of the LEDs Turn On on page One of the LEDs does not Display as Expected on page I Forgot the CDA-RES’s IP Address... - Page 44 I Forgot the CDA-RES’s IP Address The CDA-RES’s default LAN IP address is 192.168.100.1. You can locate the CDA-RES’s GUI by entering the LAN domain suffix into your browser’s address bar (on a computer connected to the LAN). Depending on your operating system and your network, you may be able to find the CDA-RES’s IP address by looking up your computer’s default gateway.
- Page 45 Status LEDs light up as soon as there is activity on the port IP Address Setup page 17. If the above steps do not work, you need to reset the CDA-RES. All user- configured data is lost, and the CDA-RES is returned to its default settings. If the problem persists, contact your vendor.
-
Page 46: Index
Hitron CDA-RES User’s Guide Index access logs accounts, login address, IP address, IP, local admin management attached network devices bar, navigation buttons cable connection cable modem CATV configuration file conventions, document customer support default IP address default username and password DHCP Version 1.1, 03/2014. - Page 47 Hitron CDA-RES User’s Guide DHCP lease document conventions downstream transmission Ethernet Ethernet cables Ethernet port Event logs factory reset fast Ethernet FDMA frequencies, cable F-type RF connector graphical user interface GUI overview hardware host ID Version 1.1, 03/2014. Copyright 2012 Hitron Technologies Version 1.1, 03/2014.
- Page 48 Hitron CDA-RES User’s Guide IANA interface, user IP address IP address lease IP address renewal IP address setup IP address, default IP address, format IP address, local LAN 1~4 LEDs lights local IP address logging in login accounts login screen...
- Page 49 Hitron CDA-RES User’s Guide navigation navigation bar network devices, attached network number overview, GUI password password and username port, Ethernet ports private IP address QAM TCM QPSK reset RF connector RJ45 connectors Version 1.1, 03/2014. Copyright 2012 Hitron Technologies Version 1.1, 03/2014. Copyright...
- Page 50 Hitron CDA-RES User’s Guide SCDMA status subnet subnet, IP support, customer TCP/IP TDMA traceroute upstream transmission user interface username username and password WAN connection website blocking, scheduled window, main Windows XP Version 1.1, 03/2014. Copyright 2012 Hitron Technologies Version 1.1, 03/2014. Copyright...
- Page 51 Hitron CDA-RES User’s Guide XP, Windows Version 1.1, 03/2014. Copyright 2012 Hitron Technologies Version 1.1, 03/2014. Copyright 2014 Hitron Technologies INDEX...