
Related Manuals for Vita-Mix Touch and GO


Summary of Contents for Vita-Mix Touch and GO
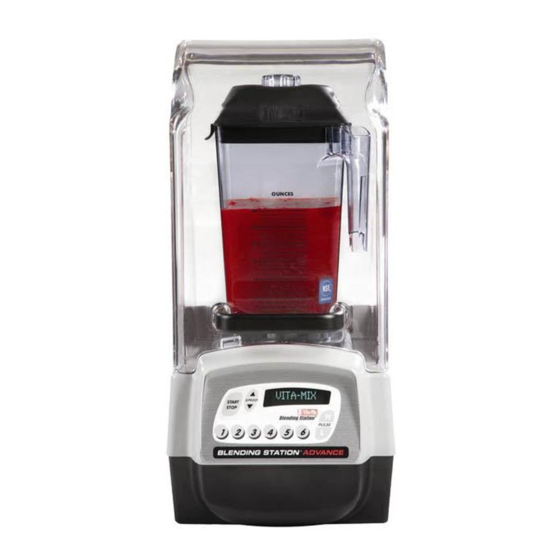
- Page 1 F O O D S E R V I C E Owner’s Manual Read And Save These Instructions Touch and Go Blending Station ® High Performance Commercial Blender 120 VAC Models...
-
Page 2: Important Safeguards
3. Close adult supervision is necessary when appliance is used by or near children. 4. Unplug the power cord from the wall outlet when the Touch and Go Blending Station ® is not in use, before putting on or taking off parts, and before cleaning other than washing the container. - Page 3 14. WARNING: When processing hot liquids: • The 2-part latching lid must be securely in place. This allows steam to escape naturally, and will prevent the lid from coming off when the machine is turned on. • Use caution with hot liquids. Spraying from under the lid plug can occur, or escaping steam may cause scalding.
-
Page 4: Control Panel
Start/Stop Six Factory Pre-Set Owner Controls High/Low Pulse Programs Touch and Go Blending Station ® ON/OFF switch - Located on the side of the Motor Base the ON/OFF switch controls the power to the machine. With the machine plugged in, switch the machine to ON to ready the machine for blending. - Page 5 READY message appears when there is power to the machine. OWNER CONTROLS - A control panel accessible by pressing the Vita-Mix logo. • Press once to reveal the mode message. Press button 1 then 6 within five seconds to continue. Once the correct...
-
Page 6: C Ustom Programming
® advanced electronic control can be custom programmed, requiring an optional programming chip, available from Vita-Mix for a nominal fee and with a minimum unit purchase. Contact your Vita-Mix representative for more information . Programming your Touch and Go Blending Station PRE-SET buttons 1. - Page 7 1. Enter the OWNER CONTROLS (press the Vita-Mix Logo) and press the PRE-SET buttons 1 and 6 when the DISPLAY WINDOW says ‘Mode’. 2. Press the Vita-Mix Logo two more times to reveal the instructions on resetting the PRE-SET buttons.
- Page 8 id Assembly Two-part Lid 48 oz. polycarbonate container The two part lid is easy to clean and easy to put on, take off & seal. • To remove fully latched lid, squeeze tabs together on both sides of the container, pull upward and off.
- Page 9 Tamper One Piece Lid (optional) 64 oz. polycarbonate container The one piece lid is easy to clean and easy to put on and take off. Figure C (Note: Brand new lids are a little stiff. This is temporary.) • There is no latch on this lid. •...
- Page 10 SIX PRE-SET Buttons. • If installing unit into a closed cabinet, use a 4” dia. (10.1 cm) flexible vinyl duct (dryer hose) to vent exhaust. Attach the vinyl duct to the bottom of your In-Counter Touch and Go Blending Station ®...
-
Page 11: Electrical Requirements
Electrical requirements: • 120 VAC • 50/60 Hz. • 11.2 amps • All Touch and Go Blending Stations are built using a U.S. 3 prong grounded cord and require a 20 amp outlet. Blending Station dimensions: • 17-1/2” (44.45 cm) high with lid closed •... - Page 12 5. Fold flap inside the hole down towards the ground. 6. Insert your Touch and Go Blending Station inside the hole, making sure the flap is down snug against the machine. 7. Do not secure the machine to counter with bonding materials.
-
Page 13: B Lending Tips
Tips 1. If your recipe freezes up, try reducing the amount of ice. Compared to other blenders, you do not need as much ice to make an equally frozen drink in a Touch and Go Blending Station. ® 2. Place liquids and soft foods in your container first. Hard items and ice should be placed last. - Page 14 nstructions How to operate your Blending Station using the ® six Pre-Set Programmed Buttons. The following is the basic factory settings of the six PRE-SET buttons (your machines PRE-SET buttons may differ due to program revisions or if your Blending Station was programmed specifically for your business). •...
- Page 15 4. Select desired programmed setting by pressing any of the Pre-Set Buttons one through six. The machine will begin immediately to cycle through the selected program, and turn off when the program is complete. Each button has a different pre-selected combination of speed and length for blending.
- Page 16 See page 25, “Cooling the motor,” for complete instructions. When overheating occurs, review your techniques and instructions. The motor may be getting hot when your recipes are too thick. Consider adding more liquid and consult Vita-Mix for further assistance.
-
Page 17: B Lade Agitator Assembly
lade Agitator Assembly Blade Agitator Assembly. Use caution when handling the blade; it is sharp. When inserting the blade assembly through the container bottom, grip the blades with a soft cloth, align the flat sides of the blade assembly with the flat sides of the container. Place the retainer nut back on the inserted blade assembly and tighten clockwise. - Page 18 arts List Item# Part #752 64 oz. - Container without lid assembly or blade assembly #755 64 oz. - Lid plug #756 64 oz. - Container, blade assembly & lid assembly #1191 64 oz. - 2-piece lid assembly #1192 64 oz. - Lid only (no plug) PLS145 64 oz.
- Page 19 #1159 #755 #15507 #1191 #1192 #15506 #15502 (container without #752 blade or lid) #756 #1151 PLS145 #836 #802 #791 #1222 #18003 #18004 KIT107 RBB161 #18002...
-
Page 20: Care And Cleaning
Cleaning Care Note To ensure that you get the longest possible life from your Vita-Mix product, we recommend the following products, when used as directed by the supplier: Cleaning Product Supplier Solid Supra, Solid Power, ... . .Ecolab, Inc. -
Page 21: Motor Base
CARE NOTE: Do not let mixtures, liquids and food products dry within the container. Rinse throughout use. Drying product may lock around the blade and weaken/tear the bearings seal when restarted. Do not place containers in the freezer. Extremely low temperature combined with hot ingredients and/or the immediate rapid action of the blade may crack the container. - Page 22 are and Cleaning CONTINUED FROM PAGE 21 Container 1. To clean: Fill pitcher 1/4 full with warm (110˚F) water and add a couple drops of dish soap.* Return container to motor base and firmly position the two part lid. Run machine for 30 seconds. Empty container. Repeat this step.
-
Page 23: Specifications
pecifications Blending Station ® On-Counter: Height of unit closed: 22” (54.56 cm) Shipping weight: 21 lbs. (9.534 kg) Dimensions 22” H x 9-1/4” W x 10-1/2” D (54.56 cm x 23.45 cm x 25.86 cm) Blending Station In-Counter: Height of unit above counter: 17-1/2” (44.45 cm) closed Depth of unit below counter: 5-2/3”... -
Page 24: Troubleshooting
Solution #1: • Display Panel reads Let the machine cool down for an hour then restart. MOTOR LOCKED PROGRAM Solution #2: TERMINATED Call Vita-Mix Customer Service if the machine does not work after sitting at room temperature for 24 hours... - Page 25 Try plugging the machine into a new outlet. Solution #4: • a specific program button is defective • machine was turned off for a day, Call Vita-Mix Customer Service. week or month and turned on, there was no power • machine did not work right out of the box •...
-
Page 26: Limited Warranty
Provisions of this limited warranty are void if your Touch and Go Blending Station ®... -
Page 27: Service Contract
A part will be considered defective if no abuse or neglect was involved with its break. Non-defective parts sent to Vita-Mix for inspection will not be returned if deemed unusable. Service Contract covers functionality of the machine but not abuse or lack of recommended maintenance. - Page 28 8615 Usher Road, Cleveland, Ohio 44138 USA ©2002 Vita-Mix Corporation. No part of this publication may be reproduced or transmitted in any form or by any means, electronic or mechanical, including photocopy, recording or any information storage and retrieval system without the written permission of the Vita-Mix Corporation.