Advertisement
Quick Links
Positioning and levelling
Technical data
Electrical connection
Connecting the water supply
To install in fully-fitted kitchens
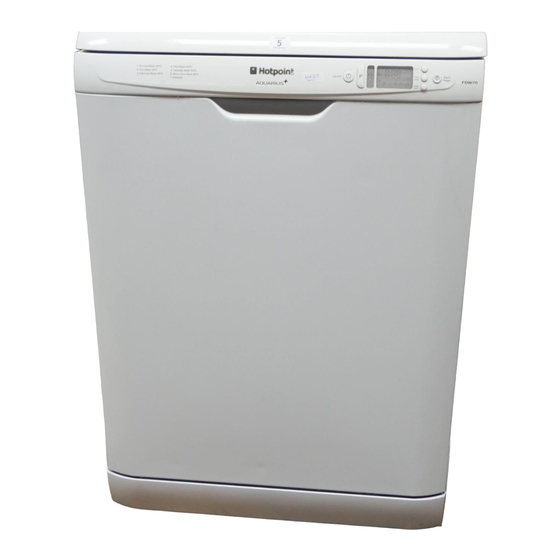
Overall view
Control panel
Lower rack
Cutlery basket
Upper rack
Starting the dishwasher
Loading the detergent
Washing options
Wash cycle table
Loading the rinse aid
Loading the refined salt
Shutting off the water and electricity supplies
Cleaning the dishwasher
Preventing unpleasant odours
Cleaning the sprayer arms
Cleaning the filters
Leaving the machine unused for extended periods
General safety
Disposal
Saving energy and respecting the environment
After Sales Service
Essential Contact Information
Parts and Accessories
Appliance Registration
Advertisement

Related Manuals for Hotpoint FDW 70


Summary of Contents for Hotpoint FDW 70
- Page 1 To install in fully-fitted kitchens Overall view Control panel Lower rack Cutlery basket Upper rack Starting the dishwasher Loading the detergent Washing options Wash cycle table Loading the rinse aid Loading the refined salt Shutting off the water and electricity supplies...
- Page 2 If it has been damaged, contact the retailer and do not proceed any further with the installation process. 2. Check the dishwasher by placing it so that its sides or back panel are in contact with the adjacent cabinets or even with the wall. This appliance can also be recessed under a single worktop ( see the Assembly instruction sheet ).
- Page 3 NEUTRAL ‘N’ LIVE ‘L’ A lead can be ordered from Hotpoint Service UK: 08709 066 066 or Republic of Ireland: 1850 302 220 - If you have damaged the existing lead or require a longer one a charge will be made. It is strongly advised that this work is carried out by a qualified electrician.
- Page 4 Connection to the water and electricity supplies should only be performed by a qualified technician. The dishwasher should not stand on top of the water hoses or the electricity supply cable. The water inlet (A) and outlet (B) hoses and the...
- Page 5 To ensure floods do not occur, the dishwasher: - is provided with a special system which blocks the water supply in the event of anomalies or leaks from inside the appliance.
- Page 6 ), checking that the inlet and outlet pipes do not get bent or squashed ( See Connecting the water inlet hose ). 8. Open the dishwasher door and glue on the two equal-sized adhesive spongy strips on the front edge of the appliance cabinet. Begin from the top without leaving out any spaces and make sure the strips adhere all along the length of the edge.
- Page 7 indicator light indicator light indicator light Upper rack Upper sprayer arm Tip-up compartments Rack height adjuster Lower rack Lower sprayer arm Cutlery basket Washing filter Salt dispenser Detergent and rinse aid dispensers Data plate Button button indicator lights indicator light indicator light indicator light * Only available in selected models.
- Page 8 When buying crockery and cutlery we recommend that you check whether it can be washed using the dishwasher. To wash the upper and lower rack handles: remove the two fastening plugs, lift out the handles and rinse them under running water, then fasten them to the rack using the same plugs.
- Page 9 Press the STANDBY button and open the door, taking care to avoid the escaping steam, and place the crockery inside the dishwasher. Press the STANDBY button again: the cycle starts from the point at which it was interrupted. If the door is opened during the wash cycle, or if there is a power cut, the cycle stops.
- Page 10 Ariston dishwashers are fitted with an automatic filter cleaning system that may increase the cycle duration. Normally soiled pans and dishes. Standard 2. Normal daily wash cycle. Environmentally-friendly wash cycle with low energy consumption 3. Eco levels, suitable for pans and dishes.
- Page 11 The salt dispenser is located in the lower part of the dishwasher ( see Description ) and should be filled: • when the green float* cannot be seen by simply looking at the cap of the salt dispenser;...
- Page 12 3. Reconstruct the filter assembly and replace it in the correct position, following movements 1 and 2 as shown in the figure, until it clicks into place. • Run a wash cycle when the dishwasher is empty. • Unplug the appliance and disconnect the water supply.
- Page 13 Consumers should contact their local authority or retailer for information concerning the correct disposal of their old appliance. • Only start a wash cycle when the dishwasher is full. While waiting for the dishwasher to be filled, prevent unpleasant odours with the Soak cycle ( see Wash Cycles ).
- Page 14 Even if they are biodegradable, detergents contain substances that may alter the balance of nature. As part of Hotpoint's continued commitment to helping the environment, Hotpoint reserves the right to use quality recycled components to keep down customer costs and minimise material wastage.
- Page 15 • Switch off the machine by pressing the ON-OFF button and clean the filters ( see Maintenance ), then switch the dishwasher back on by pressing the same button. Re-programme the machine and restart the wash cycle.
- Page 16 • This basket is equipped with two removable grids: insert the cutlery one by one into the slots, with the handles at the bottom. 5 5 5 5 5 5 • Position them so that they don't touch. 5 5 5 5 5 5 door side Lower basket...
- Page 17 UK: 08709 077 077 Republic of Ireland: 0818 313 413 www.hotpointservice.co.uk We want to give you additional benefits of Hotpoint ownership. To activate your free 5 year parts guarantee you must register your appliance with us. UK: 0870 6092094 Republic of Ireland: 01 230 0800 www.hotpointservice.co.uk...
- Page 18 - Replacement of any removable parts made of glass or plastic. Hotpoint also offers you a free 5 year parts guarantee. This additional guarantee is conditional on you registering your appliance with us and the parts being fitted by one of our authorised engineers.
- Page 20 195050059.00 05/2005- Xerox Business Services This Instruction Book must be kept handy for reference as it contains important details on the safe and proper use of the appliance. If you sell or pass the appliance to someone else, or move house and leave it behind, make sure this Book is also provided so the new owner can become familiar with the appliance and safety warnings.