Table of Contents

Related Manuals for Canon SELPHY CP810


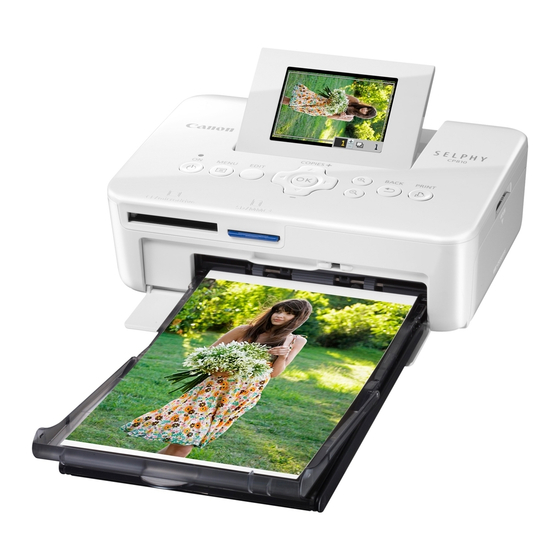
Summary of Contents for Canon SELPHY CP810
- Page 1 Printer User Guide ENGLISH O Make sure you read this guide including the “Safety Precautions” section before using the printer. O Read this guide carefully for the correct use of the printer. O Keep this guide handy for future reference.
-
Page 2: Package Contents
(Postcard Size (4 x 6 in.)) DPC-CP100* PCP-CP400 □ □ □ SELPHY CP810 Printer User Guide Warranty Card (This Guide) Solution Disk May not be included in some regions. May not be included in some regions. Purchase separately if required. -
Page 3: Table Of Contents
This product’s warranty is only effective in the country of sale. If there is a problem with the printer while abroad, please return it to the country of sale before proceeding with a warranty claim to a Canon Customer Support Help Desk. -
Page 4: Safety Precautions
Do not allow liquids or foreign objects to enter the printer. This could result in electrical shock or fire. If liquid comes into contact with the product, unplug it from the outlet and consult your retailer or a Canon Customer Support Help Desk. -
Page 5: Setting Up Selphy
If you have accidentally turned off the power, turn it on again and wait for the paper to be ejected. Consult your retailer or a Canon Customer Support Help Desk in the event of a paper jam. Do not remove jammed paper by force. -
Page 6: Component Guide
Component Guide Card Slots (p. 12) Ink Cassette Lock (p. 14) Paper Cassette Compartment (p. 10) Ink Cassette Compartment (p. 10) Paper Cassette Compartment Ink Cassette Compartment Cover (p. 10) Cover (p. 10) USB Terminal for Computer (p. 29) USB Terminal for Digital Camera/USB Flash Memory Connection (pp. -
Page 7: Information Displayed On The Screen
Information Displayed on the Screen File Number Shooting date of the displayed image Paper orientation Memory card slot (p. 12) currently in use (An SD card is used in this example) Print size (Postcard size in this example) Print settings (pp. -
Page 8: Preparing The Paper Cassette
Preparing the Paper Cassette Check the paper size. Check that the prepared ink cassette and the size shown on the paper cassette (POSTCARD (4x6in), CARD SIZE, etc.) match. Open the lid. There are two layers of lids. Open the outer lid first, then open the inner lid Set the paper. - Page 9 Use only dedicated paper included in the genuine Canon brand Color Ink Cassette/Paper Sets for use in SELPHY CP series printers. Regular printing paper, regular postcards, or dedicated paper for SELPHY ES series printers cannot be used. Never do the following, as it may result in failure or cause the printer to malfunction:...
-
Page 10: Connecting The Power
Inserting the Ink and Paper Cassettes Open the covers. Open the covers for the ink cassette and paper cassette compartments. Insert the ink cassette. Insert the ink cassette into the printer in the direction indicated by the arrow on the cassette until it clicks and locks into place. -
Page 11: Setting The Display Language
Setting the Display Language You can change the language displayed in the LCD monitor menus and messages. The default setting is English. Turn on SELPHY. Press and hold the q button until the screen shown at left displays. To turn the power off, press and hold the q button and release when the screen display changes. -
Page 12: Compatible Memory Cards And Memory Card Slots
Compatible Memory Cards and Memory Card Slots Memory Cards That Can be Used Memory Cards That Require an Adapter Card Slots Without an Adapter (commercially available) SD Memory Card miniSD Memory Card SDHC Memory Card miniSDHC Memory Card SDXC Memory Card microSD Memory Card MultiMediaCard microSDHC Memory Card... -
Page 13: Selecting And Printing Images
Selecting and Printing Images You can select an image and specify the number of copies for printing. In this section, an SD memory card will be used as an example, but you can print from other memory cards using the same steps. Turn on SELPHY. -
Page 14: Insert The Paper
Print. Press the p button to start printing. During printing, the paper will pass in and out from the back of SELPHY several times. Do not touch the paper until printing has finished and the printed sheets collect on the print output tray (on the outer lid of the paper cassette). -
Page 15: Selecting And Printing An Image
Printing From USB Flash Memory Just like images on memory cards, images on commercially available USB flash memory can also be printed. Insert a USB flash memory. Insert a USB flash memory as shown. All further steps are the same as those used for printing images from memory cards (pp. -
Page 16: Printing All Images
Printing All Images You can print all images on a memory card at once. Display the menu. Press the k button. Display the settings screen. Press the ud buttons to select [Print All Images], then press the o button. Select the number of copies. Press the ud buttons to set the number of copies. -
Page 17: Storing The Printed Photos
If you wish to mount prints in an album, select an album with photo covers made of nylon, polypropylene or cellophane. Color may change over time or depending on storage conditions. Canon assumes no liability for color changes. Cleaning Up After Printing Turn off SELPHY 11), then remove the memory card or USB flash memory. -
Page 18: Cropping And Printing Images
Cropping and Printing Images You can crop and print part of an image. Display the cropping screen. Select an image as described in Step 4 on 13, press button, and then press the o button. EDIT A cropping frame to indicate the range will be displayed. Determine the range. -
Page 19: Printing Id Photos
Printing ID Photos You can print your image as an ID photo. You can select the size from [Multi-size], [Standard]*, and [Custom]. Also, you can select 2 types of images to be printed on one sheet. * The Standard size conforms to the ICAO international standards. - Page 20 Crop the image for the passport. If you display the cropping range (p. 18) while the [Standard] size is selected for [ID Photo], 2 lines are displayed. Adjust so that one line is at the top of the head and the other line is under the chin to print a passport photo conforming to the passport standards.
-
Page 21: Printing A Variety Of Images
Printing a Variety of Images You can use various printing features, such as imprinting the shooting date or adjusting the color of an image. You do not need to make settings for each image because once the settings are made, they are applied for all images. - Page 22 Printing With the Date (Date) You can print the shooting date recorded by the digital camera. Off (Default setting) / 02/02/2012 Turning off SELPHY will return the setting to [ Off]. Since the date printed will be the date the image was recorded by the digital camera, it cannot be changed on SELPHY.
- Page 23 Selecting a Layout and Printing (Page Layout) You can set the number of images that you want to print on one sheet. The number of images that you specified (p. 13) will be printed in the selected layout. 1-up Prints one image using a full sheet 8-up* Prints eight images on one sheet (Default setting)
- Page 24 Making Skin Look Smooth in Prints (Smooth Skin) Makes skin look smooth and beautiful in prints. Off (Default setting) / This setting is reset to [ Off] when printing finishes, SELPHY is turned off, or the memory card is removed. Correction may be applied to areas other than skin, producing unexpected results.
- Page 25 Adjusting the Brightness (Brightness) You can adjust the brightness of an image within a range of ±3. The larger the + value, the brighter the image gets. The larger the - value, the darker the image gets. Turning off SELPHY will return the setting to [±0]. [Brightness] will not be applied if [ Index] is selected in [Page Layout] 23).
-
Page 26: Printing From Your Computer
Printing From Your Computer If you connect your computer to SELPHY and use the supplied software, you can view all images at once and take advantage of various printing functions that cannot be done with just SELPHY alone. Select favorite images from an index and print You can select images you wish to print from an index, and print them all at once. -
Page 27: System Requirements
System Requirements Windows Macintosh Windows 7 Service Pack 1 Windows Vista Service Pack 2 Mac OS X v10.6 – v10.7 Windows XP Service Pack 3 Configuration The above OSs should be pre-installed on computers with built-in USB ports. Mac OS X v10.7: Intel Core 2 Duo or higher Pentium 1.3 GHz or higher Mac OS X v10.6: Intel Processor Windows 7 (64-bit): 2 GB or more... -
Page 28: Installing And Starting The Software
Windows 7 and Mac OS X 10.7 are used for these explanations. Items to Prepare Computer Supplied CD-ROM (SELPHY CP810 Solution Disk) (p. 2) A commercially available USB cable shorter than 2.5 m (8.2 ft.) (SELPHY terminal requires a Mini-B connector) Install the software. - Page 29 Windows If the screen in Step 5 does not appear, open it from the [Start] menu r [All Programs] r [Canon Utilities] r [SELPHY Photo Print] r [SELPHY Photo Print]. Macintosh If the screen in Step 5 does not appear, follow the procedure below to register your printer.
-
Page 30: Printing Images With The Software
Printing Images with the Software You can print images saved on the computer using the installed software (SELPHY Photo Print). The [Simple print] feature will be explained in this section. Using this feature, you can view all your images at once and select which ones you want to print. - Page 31 Select the number of prints. Select the number of copies for each image. For Windows, click [Print] to start printing. For Macintosh, click [Print menu], then click [Print] in the screen that appears. Press the - or + button to set the number of copies.
-
Page 32: Printing From Your Digital Camera
You can select and print images from a digital camera that supports the PictBridge standard. A Canon brand compact digital camera will be used as an example to explain the print method. If operations are different for the digital camera you use, refer to the user guide included with your digital camera. -
Page 33: Printing Images Using Digital Camera Specified Settings (Dpof Print)
The date and file number are the DPOF settings made with the digital camera (these settings cannot be changed with SELPHY). If, on a Canon brand digital camera, the [Print Type] is set to [Standard], the settings made in “Printing a Variety of Images”... -
Page 34: Printing When A Power Outlet Is Not Available
You can print approximately 36 sheets* of postcard size paper with a fully charged battery. * The number of sheets is determined under Canon testing standards and may change depending on the printing conditions. -
Page 35: Troubleshooting
Troubleshooting If you think there is a problem with SELPHY, first, check the following. If the items below do not solve your problem, contact a Canon Customer Support Help Desk as listed on the included customer support list. Power O Power will not turn on •... -
Page 36: Paper Problems
Consult your retailer or a Canon Customer Support Help Desk in the event of a paper jam. Do not remove jammed paper by force. The printer could be damaged. -
Page 37: Specifications
Specifications SELPHY CP810 Printing Method Dye-sublimation thermal transfer (with overcoating) Resolution/Color Representation 300 x 300 dpi Gradation 256 shades per color (Resolution based on the “area intensity method” is equivalent to a 4800 x 4800 dpi color representation)* Dedicated color ink cassette (Y/M/C/overcoating) - Page 38 This product is designed to achieve excellent performance when used with genuine Canon accessories. Canon shall not be liable for any damage to this product and/or accidents such as fire, etc., caused by the malfunction of non-genuine Canon accessories (e.g., a leakage and/or explosion of a battery pack).
-
Page 39: Handling Selphy
Do not make any changes or modifications to the equipment unless otherwise specified in the manual. If such changes or modifications should be made, you could be required to stop operation of the equipment. Canon U.S.A., Inc. One Canon Plaza, Lake Success, NY 11042, U.S.A. Tel No. (516) 328-5600 Canadian Radio Interference Regulations... -
Page 40: Trademark Acknowledgments
Reprinting, transmitting, or storing in a retrieval system any part of this guide without the permission of Canon is prohibited. Canon reserves the right to change the contents of this guide at any time without prior notice. Illustrations and screenshots in this guide may differ slightly from the actual equipment.