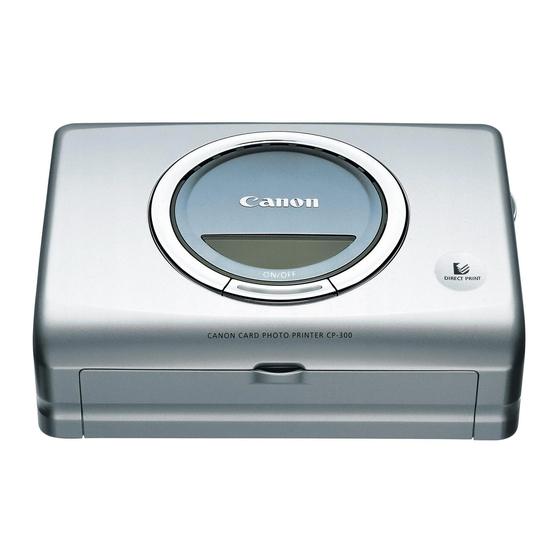
Canon CP-300 User Manual
Canon card photo printer user guide
Hide thumbs
Also See for CP-300:
- User manual (204 pages) ,
- Software manual (60 pages) ,
- Specifications (2 pages)
Table of Contents
Advertisement
Quick Links
- 1 Quick Start
- 2 What Can be Accomplished with this Printer
- 3 Preparing Your Ink Cassette/Paper Sets and Paper Cassette
- 4 Connecting a Power Source and the Camera to the Printer
- 5 Troubleshooting
- 6 Connecting the Printer to a Computer and Printing
- 7 Printing with Non-Canon Digital Cameras
- Download this manual
Advertisement
Chapters
Table of Contents
Troubleshooting

Related Manuals for Canon CP-300


Summary of Contents for Canon CP-300
-
Page 60: User Guide
Card Photo Printer CP-300/CP-200 Printer Driver User Guide Windows... - Page 61 Contents Safety Precautions ..................4 Read This First ..................5 About the Manuals ................5 Printing Flow Diagram ...............6 About the Connection Cable .............7 Installing the Software from the CP Printer Solution Disk ....8 Installing ....................8 Uninstalling ..................10 Installing the Printer Driver ..............11 Installing ..................11 Windows 98 ................12 Windows Me ................17...
- Page 62 Appendices ....................52 About the Print Area and Pixels ............52 Print Area ...................52 Number of Pixels ...............54 Troubleshooting ................55 Error Messages ................57...
-
Page 63: Safety Precautions
• While every effort has been made to ensure that the information contained in this guide is accurate and complete, no liability can be accepted for any errors or omissions. Canon reserves the right to change the specifications of the hardware and software described herein at any time without prior notice. -
Page 64: Read This First
Detailed explanations of operating procedures are given in the [Help] accompanying each software application. If a problem occurs, refer to the following: • Trouble with the printer itself: See the CP-300/CP-200 User Guide. • Printing problems: See this user guide. -
Page 65: Printing Flow Diagram
Follow the steps outlined below to prepare the printer and install the necessary software to enable printing. Prepare the printer. Insert paper cassette and ink cassette. See the CP-300/CP-200 User Guide. Install the necessary software. ➀ Install ZoomBrowser EX into your computer. -
Page 66: About The Connection Cable
Printing. Print on standard paper or full size labels. Selecting a Print Mode (➡ p.39), Setting the Printer Driver for Printing (➡ p.40) in this user guide. To print an 8-label sheet: Printing Duplicate Images on an 8-Label Sheet (➡ p.44), Printing Different Images on an 8-Label Sheet (➡... -
Page 67: Installing The Software From The Cp Printer Solution Disk
Installing the Software from the CP Printer Solution Disk Canon CP Printer Solution Disk contains software required for printing from your computer. With Windows 2000 or Windows XP Professional, be sure to log on with Administrator privileges when installing the software. - Page 68 Click [Application Software Installation]. Click [Next]. Read the software license agreement. If you agree to all of its conditions, click the [Yes] button. You must agree to the software license agreement before you can install the software. Verify the installation destination, and then click the [Next] button. Select the software to install, and then click the [Next] button.
-
Page 69: Uninstalling
Note that if you uninstall the software, you will not be able to use it anymore. Click the [Start] button and select [Programs] ([All Programs] for Windows XP), [Canon Utilities], [ZoomBrowser EX], and [ZoomBrowser EX Uninstall]. Uninstallation begins and ZoomBrowser EX is removed. -
Page 70: Installing The Printer Driver
For details on how to uninstall the printer driver, see Uninstalling (➡ p.30). The screen examples and descriptions given in this section are for the CP-300 connected to a computer. Install the printer driver for the CP-200 in the same way. -
Page 71: Windows 98
Windows 98 Close any programs that are running. Place the Canon CP Printer Solution Disk in the CD-ROM drive. When the installer panel appears, click [Exit] to close it. Turn the printer on. (➡ p.32) Connect the printer to your computer, using the USB cable. - Page 72 Select “Specify a location”. Click the [Browse] button to select the [\CP_DRV\ENGLISH\WIN9X\CP300] folder on the CD-ROM and click the [OK] button. Then click the [Next] button. For the CP-200, select the [\CP_DRV\ENGLISH\WIN9X\CP200] folder. Do not select “CD-ROM drive”. This displays the Browse for Folder dialog. Specify the [\CP_DRV\ENGLISH\WIN9X\CP300] folder or [\CP_DRV\ENGLISH\WIN9X\CP200] folder, and then click the [OK] button to enter the folder path at [Specify a location].
- Page 73 Click the [Next] button. The USB driver for the printer is installed. When the following message appears, click the [Finish] button. Now you can continue and install the printer driver. When the following message appears, click the [Next] button.
- Page 74 Select “Search for the best driver for your device (Recommended).” and then click the [Next] button. Because the folder specified in step 7 already appears here, simply click the [Next] button. Do not select “CD-ROM drive”. Click the [Next] button.
- Page 75 Adjust any necessary settings, and then click the [Finish] button. The printer driver is installed. When the following message appears, click the [Finish] button.
-
Page 76: Windows Me
Windows Me Close any programs that are running. Place the Canon CP Printer Solution Disk in the CD-ROM drive. When the installer panel appears, click [Exit] to close it. Turn the printer on. (➡ p.32) Connect the printer to your computer, using the USB cable. - Page 77 In the list of printer drivers, select [Canon CP-300] so that [\CP_DRV\ENGLISH\WIN9X\CP300\CNY300U.INF] appears in [Location], then click the [OK] button. For the CP-200, select [Canon CP-200] so that [\CP_DRV\ENGLISH\WIN9X\CP200\CNY200U.INF] appears. The USB driver for the printer is installed. When the following message appears, click the [Finish] button.
- Page 78 Select “Automatic search for a better driver (Recommended)” and then click the [Next] button. In the list of printer drivers, select [Canon CP-300] so that [\CP_DRV\ENGLISH\WIN9X\CP300\CNY300.INF] appears in [Location], then click the [OK] button. For the CP-200, select [Canon CP-200] so that...
- Page 79 Adjust any necessary settings, and then click the [Finish] button. The printer driver is installed. When the following message appears, click the [Finish] button.
-
Page 80: Windows 2000
Log on to Windows 2000 with administrator privileges before installing the software. Close any programs that are running. Place the Canon CP Printer Solution Disk in the CD-ROM drive. When the installer panel appears, click [Exit] to close it. Turn the printer on. (➡ p.32) Connect the printer to your computer, using the USB cable. - Page 81 Select “Search for a suitable driver for my device (recommended)” and then click the [Next] button. Select “Specify a location” and then click the [Next] button. Do not select “CD-ROM drives”.
- Page 82 Click the [Browse] button, select the [CNY300.inf] file in the [\CP_DRV\ENGLISH\WIN2K\CP300] folder on the CD-ROM, click the [OPEN] button, then click the [OK] button. For the CP-200, select the [CNY200.inf] file in the [\CP_DRV\ENGLISH\WIN2K\CP200] folder. This displays the Locate File dialog. Specify the [CNY300.inf] file in the [\CP_DRV\ENGLISH\WIN2K\CP300] folder or the [CNY200.inf] file in the [\CP_DRV\ENGLISH\WIN2K\CP200] folder, and then click the...
- Page 83 Click the [Next] button. The printer driver is installed. When the following message appears, click the [Finish] button.
-
Page 84: Windows Xp
Log on to Windows XP Professional with administrator privileges before installing the software. Close any programs that are running. Place the Canon CP Printer Solution Disk in the CD-ROM drive. When the installer panel appears, click [Exit] to close it. Turn the printer on. (➡ p.32) Connect the printer to your computer, using the USB cable. - Page 85 In the list of printer drivers, select [Canon CP-300] so that [\CP_DRV\ENGLISH\WIN2K\CP300\CNY300.INF] appears in [Location], then click the [Next] button. For the CP-200, select [Canon CP-200] so that [\CP_DRV\ENGLISH\WIN2K\CP200\CNY200.INF] appears. The printer driver is installed. When the following message appears, click the [Finish] button.
-
Page 86: Troubleshooting The Printer Driver Installation (Windows 98/Me)
Troubleshooting the Printer Driver Installation (Windows 98/Me) If you have problems with the printer driver installation (for example, the printer driver’s installation program stops during the installation), the USB driver may not be installed correctly. Use the following procedure to check the installation status of the USB driver, delete any unnecessary USB driver, and then install the printer driver again. - Page 87 Click the [Device Manager] tab. Following the examples shown below, select [Canon CP-300] or [Canon CP-200] under [Universal Serial Bus controllers] or [Other devices], and then click the [Remove] button. Use the following screen examples as a reference and make sure you select the correct device for deletion.
- Page 88 Example 2: When the confirmation message appears, click the [OK] button. Click the [OK] button to close the System Properties dialog. Close the Control Panel window. Disconnect the USB cable from your computer. Restart your computer. Follow the procedure described in Installing (➡...
-
Page 89: Uninstalling
Start your computer. If you are using Windows 2000 or Windows XP Professional, be sure to log on using Administrator privileges. Close any programs that are running. Place the Canon CP Printer Solution Disk in the CD-ROM drive. - Page 90 If you are using the CP-200, select [Canon CP-200]. For Windows 98 or Windows Me If [Canon CP-300] or [Canon CP-200] does not appear, it was probably not installed correctly. In this case, perform the procedure described in Troubleshooting the Printer Driver Installation (Windows 98/Me) (➡...
-
Page 91: Turning On The Printer
When the printer is turned on, the printer’s indicator lights green. To Turn the Printer Off • With CP-300: Press the ON/OFF button, releasing it when the indicator turns off. • With CP-200: Unplug the Compact Power Adapter from the printer (the indicator turns off). -
Page 92: Connecting The Printer To Your Computer
Connecting the Printer to Your Computer Notes about connection • Using the USB cable, be sure to connect the printer directly to your computer. If you connect it via a USB hub, the printer may not function properly. • Do not use the printer together with other USB devices (except a USB mouse or keyboard);... - Page 93 Connect one end of the USB cable to the USB port on the printer, and the other end to a USB port on your computer. • There is no need to turn off the printer or your computer. • When connecting the printer to your computer, make sure the connectors on the ends of the USB cable match the terminals on the printer and your computer.
-
Page 94: Printing
• Screen shots from Windows XP are used for illustration, but the procedure is the same with Windows 98/Me/2000. • The screens in this example appear when the CP-300 is connected, but the same operations are applicable to the CP-200. -
Page 95: Starting Zoombrowser Ex
Starting ZoomBrowser EX Double-click the [ZoomBrowser EX] icon on the desktop. Or, click the [Start] button and select [Programs] ([All Programs] for Windows XP), [Canon Utilities], [ZoomBrowser EX], and [ZoomBrowser EX] to start the program. Selecting an Image for Printing Perform printing from the task bar on the left side of ZoomBrowser EX. - Page 96 Click [Layout Print]. When you select [Index Print], use the following procedure to print. 1. Click [1 Select Images] and click an image you want to print. 2. Click [2 Select Captions for Printing] and select captions. 3. Click [3 Open Index Print], adjust thumbnail size and paper size in the Index Print Settings window.
- Page 97 Click [2 Select Captions for Printing] and select captions. Selecting this check mark enables you to add comments, a file name or date to printouts. Click [3 Open Layout Print]. PhotoRecord opens, then the PhotoRecord Print Modes window and the PhotoRecord layout window appear.
-
Page 98: Selecting A Print Mode
(➡ p.44) or Printing Different Images on an 8-Label Sheet (➡ p.46). The screens in this example appear when the CP-300 is connected, but the same operations are applicable to the CP-200. From the [Printer] drop-down list, select [Canon CP-300]. -
Page 99: Setting The Printer Driver For Printing
Select the paper size, and then click the [Finish] button. Close the PhotoRecord Print Modes window. The print mode settings are now reflected in the album page window. To open the PhotoRecord Print Modes window again, click (PRINT MODES) in the PhotoRecord layout window. Setting the Printer Driver for Printing This section describes printing with modified printer driver settings. - Page 100 Click the [Properties] button. At this point, do not change the printer. Click the [Print Settings] tab, and then set the print orientation and the number of copies. For details, click the [?] button or [Help] button to see the online help. When printing from PhotoRecord, this should be selected.
- Page 101 Click the [Image Adjustment] tab, and then adjust the brightness and color of prints. For details, click the [?] button or [Help] button to see the online help. Adjust the color of prints. Adjust the brightness and contrast of prints. If you do not want to see the messages relating to printer temperature increase, or messages telling you that printing has finished, click the [Utilities] tab, and clear the “Notification messages are displayed”...
- Page 102 Adjust other settings, and then click the [Print] button. Confirm to select your printer. Specify the number of copies to print of the same image. If multiple images are selected, use these settings to specify the pages (images) to print. Printing starts.
-
Page 103: Printing Duplicate Images On An 8-Label Sheet
PhotoRecord allows you to print duplicate images. This makes it possible to print multiple copies of the same image on an 8-label sheet. In the PhotoRecord Print Modes window, select “CP-300 multiple printing”, and then click the [Finish] button. With the CP-200, select “CP-200 multiple printing”. - Page 104 Right-click the image you want to print, and then select [Make Copies]. For [Number of copies], enter 7 and click the [OK] button. The images are laid out in replicate, with their positions adjusted for the eight labels on the 8-label sheet. Click the (PRINT) button to start printing.
-
Page 105: Printing Different Images On An 8-Label Sheet
Printing Different Images on an 8-Label Sheet You can also print a combination of different images on an 8-label sheet. In the PhotoRecord Print Modes window, select “CP-300 multiple printing”, and then click the [Finish] button. With the CP-200, select “CP-200 multiple printing”. -
Page 106: Printing Part Of An Image (Trimming)
• The length-to-width ratio cannot be modified if you select the settings below. “CP-300 (or CP-200) standard printing - Borderless” “CP-300 (or CP-200) multiple printing” • Also, because a 1 - 3 mm border is trimmed from the image during printing, we recommend that you select an area that is slightly larger than the part of the image you want to print. - Page 107 Select the area you want to print, and then click the (CLOSE) button. This determines the area to print. The area inside the frame is printed. You can drag the edge of the frame to change its size, or drag inside the frame to move it.
-
Page 108: Printing With Image Quality Correction
Printing with Image Quality Correction PhotoRecord has a function that supports Exif 2.2 (referred to as Exif Print), allowing you to automatically optimize print quality and print clearer, better- looking images. Click the image you want to print, and select [Clip/Correct Photo]. - Page 109 Select [Exif Print] or [PHOTO OPTIMIZER PRO] and then click the (CLOSE) button. After you select [Exif Print] or [PHOTO OPTIMIZER PRO], the corrected image is displayed. Images captured with Exif 2.2 compatible cameras Images captured with other cameras Click this button after making the settings.
-
Page 110: Other Printing Functions
Other Printing Functions By selecting [Artwork/Layout album] in the PhotoRecord Print Modes window, you can add text or decorative embellishments to an image when printing it. Also, you can combine the different functions and create your own original name card. Adding text Adding decorative embellishments Creating original name cards... -
Page 111: Appendices
Appendices About the Print Area and Pixels Print Area The shaded area ( ) in the following diagrams indicates the maximum printable area. Note that because the print area is larger than the actual paper size, a border is trimmed from the image when it is printed. (shown in millimeters) L size sheet 119.0... - Page 112 Postcard size sheet 148.0 Credit card size sheet/full-size label sheet 86.0...
-
Page 113: Number Of Pixels
Number of Pixels Total number of Effective number of Paper Type pixels (dots)* pixels (dots) × × Postcard size sheet 1232 1823 approx. 1180 1748 × × L size sheet 1100 1471 approx. 1050 1406 Credit card size sheet/ × ×... -
Page 114: Troubleshooting
“Use Printer Offline” is selected, clear it. <Windows XP> 1. Click the [Start] button and select [Control Panel], [Printers and Other Hardware], and [Printers and Faxes]. 2. If the [Canon CP-300] or [Canon CP-200] is offline, right-click the printer icon, and then click “Use Printer Online”. - Page 115 <Windows 98/Me/2000> 1. Click the [Start] button and select [Settings], and [Printers]. 2. Right-click the [Canon CP-300] or [Canon CP-200] icon and select [Properties]. 3. Click the [Details] tab. Click the [Spool Settings] button and then click the [Restore defaults] button.
-
Page 116: Error Messages
• If the error does not go away after you have tried the recommended solutions, consult your nearest Canon Customer Support Help Desk. • Use the information in this section in conjunction with the CP-300/CP-200 User Guide. Errors where printing can resume If any of the following messages appear, printing can still resume. - Page 117 Ink cassette is empty and must be replaced. Press [Resume] to resume, or [Cancel] to stop. Cause : There is no more ink in the ink cassette. Correction : Replace the ink cassette with a new one. Ink cassette not installed. You must insert an ink cassette before printing.
- Page 118 The paper cassette differs from the setup. Please check the paper cassette. Press [Resume] to resume, or [Cancel] to stop. Cause : The paper cassette in the printer is not suitable for the print settings. Correction : Insert the correct paper cassette. The specified Ink Cassette cannot be found.
- Page 119 Errors where printing is canceled If any of the following messages appear, printing is canceled. After using the recommended solution to clear the error, you need to start the print job over again. Paper jammed in printer. Clear the jam as follows, then try printing again. 1.
- Page 120 Correction : Remove paper from the paper cassette, and then make sure to load the correct amount of paper in the paper cassette. For messages caused by errors related to the operating environment of your computer, follow the messages on the screen. CDP-E © 2003 CANON INC.
- Page 121 Card Photo Printer CP-300/CP-200 Printer Driver User Guide Macintosh...
- Page 122 Contents Safety Precautions ..................4 Read This First ..................5 About the Manuals ................5 Printing Flow Diagram ...............6 About the Connection Cable .............7 Installing the Software from the CP Printer Solution Disk ....8 Installing ....................8 Uninstalling ..................9 Installing the Printer Driver ..............10 Installing ..................10 Uninstalling ..................13 Turning On the Printer ................16...
- Page 123 Appendices ....................53 About the Print Area and Pixels ............53 Print Area ...................53 Number of Pixels ...............55 Troubleshooting ................56 Error Messages ................57...
-
Page 124: Safety Precautions
• While every effort has been made to ensure that the information contained in this guide is accurate and complete, no liability can be accepted for any errors or omissions. Canon reserves the right to change the specifications of the hardware and software described herein at any time without prior notice. -
Page 125: Read This First
Detailed explanations of operating procedures are given in the [Help] accompanying each software application. If a problem occurs, refer to the following: • Trouble with the printer itself: See the CP-300/CP-200 User Guide. • Printing problems: See this user guide. -
Page 126: Printing Flow Diagram
Prepare the printer. Insert paper cassette and ink cassette. See the CP-300/CP-200 User Guide. Install the necessary software. Install the printer driver and ImageBrowser onto your computer. Installing the Software from the CP Printer Solution Disk (➡... -
Page 127: About The Connection Cable
Printing. Print on standard sheet or full-size labels. Selecting a Layout Type (Mac OS 9.0 - 9.2 ➡ p.22, Mac OS X ➡ p.38) Setting the Printer Driver for Printing (Mac OS 9.0 - 9.2 ➡ p.24, Mac OS X ➡ p.40) in this user guide. -
Page 128: Installing The Software From The Cp Printer Solution Disk
Close any programs that are running. Place the Canon CP Printer Solution Disk in the CD-ROM drive. With Mac OS 9.0 - 9.2, double-click the [Canon CP Printer Installer] icon in the [Mac OS 9] folder on the CD-ROM. With Mac OS X, double-click the [Canon CP Printer Installer] icon in the [Mac OS X] folder on the CD-ROM. -
Page 129: Uninstalling
Read the software license agreement. If you agree to all of its conditions, click the [Agree] button. You must agree to the software license agreement before you can install the software. Verify the installation destination by clicking the [Choose] button. Installation starts. -
Page 130: Installing The Printer Driver
Close any programs that are running. Place the Canon CP Printer Solution Disk in the CD-ROM drive. With Mac OS 9.0 - 9.2, double-click the [Canon CP Printer Installer] icon in the [Mac OS 9] folder on the CD-ROM. With Mac OS X, double-click the [Canon CP Printer Installer] icon in the [Mac OS X] folder on the CD-ROM. - Page 131 Select [Easy Install], and then click the [Install] button. Click the [Continue] button to automatically close any applications other than the installer. Follow the messages on the screen to proceed. When installation is completed, click the [Restart] button. Before the printer driver will operate, you must restart your computer.
- Page 132 With Mac OS X Continuing from the above procedure, do the following: Turn the printer’s power on. (➡ p.16) After your computer restarts, connect the printer to computer with the USB cable. For information on how to connect the printer, see Connecting the Printer to Your Computer (➡...
-
Page 133: Uninstalling
Close any programs that are running. Place the Canon CP Printer Solution Disk in the CD-ROM drive. With Mac OS 9.0 - 9.2, double-click the [Canon CP Printer Installer] icon in the [Mac OS 9] folder on the CD-ROM. With Mac OS X, double-click the [Canon CP Printer Installer] icon in the [Mac OS X] folder on the CD-ROM. - Page 134 Select [Uninstall], and then click the [Uninstall] button. Click the [Continue] button to automatically close any applications other than the uninstaller. After uninstallation has been completed, click the [OK] button.
- Page 135 With Mac OS X To continue, you must do the following: Double-click the hard disk icon where Mac OS X is installed. Double-click the [Applications] folder. Double-click the [Utilities] folder. Double-click the [Print Center] icon. The Printer List window appears. Select the printer you uninstalled, and then click the [Delete] button.
-
Page 136: Turning On The Printer
When the printer is turned on, the printer's indicator lights green. To Turn the Printer Off • With CP-300: Press the ON/OFF button, releasing it when the indicator turns off. • With CP-200: Unplug the Compact Power Adapter from the printer (the indicator turns off). -
Page 137: Connecting The Printer To Your Computer
Connecting the Printer to Your Computer Notes about connection • Using the USB cable, be sure to connect the printer directly to your computer. If you connect it via a USB hub, the printer may not function properly. • Do not use the printer together with other USB devices (except a USB mouse or keyboard);... - Page 138 Connect one end of the USB cable to the USB port on the printer, and the other end to a USB port on your computer. • There is no need to turn off the printer or your computer. • When connecting the printer to your computer, make sure the connectors on the ends of the USB cable match the terminals on the printer and your computer.
-
Page 139: Printing
This section describes how to use ImageBrowser to print images with the printer. ImageBrowser is an application included on the Canon CP Printer Solution Disk. This application makes it easy to print. Before printing, verify that the printer is on (the indicator on the printer is green), and that the printer is properly connected to your computer with a USB cable. -
Page 140: With Mac Os 9.0 - 9.2
Click the printer in the [Destination] list, then close the Chooser dialog by clicking in the upper left-hand corner. Starting ImageBrowser Double-click the [Canon ImageBrowser] icon on the desktop. If the [Canon ImageBrowser] icon does not appear on the desktop, double-click the [Canon Utilities] folder, [ImageBrowser] folder, and [ImageBrowser] icon. -
Page 141: Selecting An Image For Printing
(PRINT) button to display a menu. From the menu, select [Layout printing]. Browser area When the CP-200 or CP-300 is selected, you cannot select [Index printing]. The Print window and Layout Options window appear. Print window You can check the layout of the image. -
Page 142: Selecting A Layout Type
Selecting a Layout Type This section describes how to select a layout type, and then print on standard sheets or full-size label sheets. For information on how to print on 8-label sheets, see Printing Duplicate Images on an 8-Label Sheet (➡... - Page 143 After returning to the Layout Options window, select “Bordered” or “Borderless”, then click the [OK] button. If you select “Bordered”, the image is automatically resized to fit within the print. The layout settings are reflected in the Print window. [LAYOUT OPTIONS] button Redisplays the Layout Options window, where you can change the settings.
-
Page 144: Setting The Printer Driver For Printing
Setting the Printer Driver for Printing This section describes printing with modified printer driver settings. Click the (PRINT) button. Select [Color]. To adjust image quality, select [Custom]. The default is [Non adjustment]. Custom Click the [Adjust] button to adjust image quality freely. - Page 145 After selecting [Custom] and clicking the [Adjust] button, adjust the brightness and color of the print result, then click the [OK] button. For details, check the balloon help. Adjust the color of prints. Adjust the brightness and contrast of prints. Select [Background Printing] and select a printing method.
- Page 146 Select [General], set the various options, and then click the [Print] button. Verify that the CP-300 or CP-200 is selected in [Printer]. For [Destination], you can select the following types of output. - Printer: Output is directed to the printer.
- Page 147 Registering Profiles You can save [Color] and [Background Printing] settings as [Profiles]. To register a profile Make [Color] and [Background Printing] settings. Select [Add Profile]. In the Add Profile window, type in a name and a comment for the profile, and then click the [OK] button.
-
Page 148: Printing Duplicate Images On An 8-Label Sheet
Printing Duplicate Images on an 8-Label Sheet ImageBrowser allows you to print duplicate images. This makes it possible to print multiple copies of the same image on an 8-label sheet. In the Layout Options window, select “Photo printer multiple printing”, and then click the [Next] button. Click the [Page setup] button. - Page 149 After returning to the Layout Options window, click the [OK] button. Images are resized to fit the label dimensions and are displayed in the Print window. Click the image and select [Copy Image] on the ImageBrowser [Edit] menu. Enter 7 and click the [OK] button. The images are laid out in replicate, with their positions adjusted for the eight labels on the 8-label sheet.
-
Page 150: Printing Different Images On An 8-Label Sheet
Click the (PRINT) button to start printing. Printing Different Images on an 8-Label Sheet You can also print a combination of different images on an 8-label sheet. In the Layout Options window, select “Photo printer multiple printing”, and then click the [Next] button. Click the [Page setup] button. - Page 151 For [Paper Size], select [CP_C size(L)], select the orientation, and then click the [OK] button. After returning to the Layout Options window, click the [OK] button. From the browser area, drag and drop the images to be printed onto the Print window. The different images are laid out with their positions adjusted for the eight labels on the 8-label sheet.
-
Page 152: Printing Part Of An Image (Trimming)
Printing Part of an Image (Trimming) You can select and then print a portion of an image (trimming). This is useful when you only want to print part of an image, or if the part you are most interested in is not at the center of the image. •... - Page 153 Select the portion of the image to be printed, then close the Clipping window. After selecting the portion to be printed, this closes the window. The area inside the dotted line is the portion of the image to be printed. Changes the size of the window.
-
Page 154: Printing With Image Quality Correction
Printing with Image Quality Correction ImageBrowser has a function that supports Exif 2.2 (referred to as Exif Print) allowing you to automatically optimize print quality and print clearer, better- looking images. The image quality correction is adopted for all images printed from ImageBrowser. - Page 155 Select [Print] in the Preferences window, set image quality correction, and then click the [OK] button. Be sure to select the check box Closes the window after when using image quality correction. you make the settings. Automatically corrects images captured with Exif 2.2 compatible cameras and other images.
-
Page 156: With Mac Os X
With Mac OS X Starting ImageBrowser Double-click the [Canon ImageBrowser] icon on the desktop. If the [Canon ImageBrowser] icon does not appear on the desktop, double-click the [Canon Utilities] folder, [ImageBrowser] folder, and [ImageBrowser] icon. Selecting an Image for Printing Select an image you want to print from the browser area. - Page 157 The Print window and Layout Options window appear. Print window You can check the layout of the image. Layout Options window You can adjust the settings for printing. When [Print on Canon Card Photo Printer] is not displayed, install the CP-300 or CP-200 printer driver (➡ p.10).
-
Page 158: Selecting A Layout Type
Printer”, select “Photo printer standard printing”, and then click the [Next] button. Click the [Page Setup] button. In [Format for] select [CP-300] or [CP-200], make [Paper Size] and [Orientation] selections, and then click the [OK] button. Select [CP-300] or [CP-200]. - Page 159 After returning to the Layout Options window, select “Bordered” or “Borderless”, then click the [OK] button. If you select “Bordered”, the image is automatically resized to fit within the print. The layout settings are reflected in the Print window. [LAYOUT OPTIONS] button Redisplays the Layout Options window, where you can change the settings.
-
Page 160: Setting The Printer Driver For Printing
Setting the Printer Driver for Printing This section describes printing with modified printer driver settings. Click the (PRINT) button. In [Printer] select [CP-300] or [CP-200]. Select [Color]. This pop-up menu contains various settings. (Do not change the [Layout] setting.) - Page 161 To adjust image quality, select [Custom]. The default is [Non adjustment]. Custom Click the [Adjust] button to adjust image quality freely. After selecting [Custom] and clicking the [Adjust] button, adjust the brightness and color of the print result, then click the [OK] button.
- Page 162 Select [Copies & Pages], and set the various options. When printing in the background, printing cannot be resumed if the printer runs out of paper while printing. To avoid this, load more sheets of paper than required for the number of images to be printed. To print multiple copies of images, enter the number of...
- Page 163 To use a registered setting, select [Custom]. For Mac OS X v10.2, select the name you entered after selecting [Save As] in [Presets]. Click the [Print] button. Printing starts. You can save data as a PDF file by selecting [Output Options], selecting “Save as File”...
-
Page 164: Printing Duplicate Images On An 8-Label Sheet
ImageBrowser allows you to print duplicate images. This makes it possible to print multiple copies of the same image on an 8-label sheet. In the Layout Options window, select “Print on Canon Card Photo Printer”, select “Photo printer multiple printing”, and then click the... - Page 165 Click the [Page Setup] button. In [Format for] select [CP-300] or [CP-200]. For [Paper Size], select [CP_C size(L)], select the orientation, and then click the [OK] button. Images are resized to fit the label dimensions and are displayed in the Print window.
- Page 166 Enter 7 and click the [OK] button. The images are laid out in replicate, with their positions adjusted for the eight labels on the 8-label sheet. Click the (PRINT) button to start printing.
-
Page 167: Printing Different Images On An 8-Label Sheet
Printing Different Images on an 8-Label Sheet You can also print a combination of different images on an 8-label sheet. In the Layout Options window, select “Print on Canon Card Photo Printer”, select “Photo printer multiple printing”, and then click the [Next] button. - Page 168 For [Paper Size], select [CP_C size(L)], select the orientation, and then click the [OK] button. After returning to the Layout Options window, click the [OK] button. From the browser area, drag and drop the images to be printed onto the Print window. The different images are laid out with their positions adjusted for the eight labels on the 8-label sheet.
-
Page 169: Printing Part Of An Image (Trimming)
Printing Part of an Image (Trimming) You can select and then print a portion of an image (trimming). This is useful when you only want to print part of an image, or if the part you are most interested in is not at the center of the image. •... - Page 170 Select the portion of the image to be printed, then close the Clipping window. After selecting the portion to be printed, this closes the window. The area inside the dotted line is the portion of the image to be printed. Changes the size of the window.
-
Page 171: Printing With Image Quality Correction
Printing with Image Quality Correction ImageBrowser has a function that supports Exif 2.2 (referred to as Exif Print) allowing you to automatically optimize print quality and print clearer, better- looking images. The image quality correction is adopted for all images printed from ImageBrowser. - Page 172 Click the (PRINT) button to start printing. Camera information such as scene and photographic conditions are embedded in images captured with cameras compatible with Exif 2.2 (referred to as Exif Print). This information can be passed on to the printer through ImageBrowser (Exif Print-compatible software) so that prints match the conditions at the time of capture more faithfully.
-
Page 173: Appendices
Appendices About the Print Area and Pixels Print Area The shaded area ( ) in the following diagrams indicates the maximum printable area. Note that because the print area is larger than the actual paper size, a border is trimmed from the image when it is printed. (shown in millimeters) L size sheet 119.0... - Page 174 Postcard size sheet 148.0 Credit card size sheet/full-size label sheet 86.0...
-
Page 175: Number Of Pixels
Number of Pixels Total number of Effective number of Paper Type pixels (dots)* pixels (dots) × × Postcard size sheet 1232 1808 approx. 1180 1748 × × L size sheet 1100 1456 approx. 1050 1406 Credit card size sheet/ × ×... -
Page 176: Troubleshooting
Troubleshooting This section describes how to troubleshoot problems. If the problem still exists after trying these solutions, restart your computer. If the problem still persists, uninstall the printer driver and then install it again. Printing does not start. Cause : No power is supplied to the printer. -
Page 177: Error Messages
• If the error does not go away after you have tried the recommended solutions, consult your nearest Canon Customer Support Help Desk. • Use the information in this section in conjunction with the CP-300/CP-200 User Guide. Errors where printing can resume If any of the following messages appear, printing can still resume. - Page 178 No paper. Check that paper is correctly loaded in the paper cassette, and that the paper cassette is correctly installed. Cause : The paper cassette is not inserted correctly. Correction : Remove the paper cassette, and then insert it back into the printer correctly.
- Page 179 Wrong type of paper. Replace the Paper. Cause : The paper is not suitable for the print settings. Correction : Replace the paper with the correct size. Wrong type of Paper Cassette. Check the Paper Cassette. Cause : The paper cassette in the printer is not suitable for the print settings.
- Page 180 Errors where printing is canceled If any of the following messages appear, printing is canceled. After using the recommended solution to clear the error, you need to start the print job over again. Paper jammed in printer. Clear the jam as follows, then try printing again. 1.
- Page 181 In other cases, such as when you specify output for a file or other errors related to your system occur, follow the error messages displayed to proceed. CDP-E © 2003 CANON INC.