Canon SELPHY CP400 User Manual
Compact photo printer
Hide thumbs
Also See for SELPHY CP400:
- User manual (82 pages) ,
- Software manual (60 pages) ,
- Supplementary manual (6 pages)
Table of Contents
Advertisement
Quick Links
Canon
SELPHV
CP400
COMPACT PHOTO PRINTER
IMPRESORA FOTOGRAFICA COMPACTA
IMPRIMANTE PHOTO COMPACTE
1111111111111111111111111111111111
CDI-M168
User Guide
I
Guia del usuario
I
Guide
d'uti/isation
Connecting
the Printer
to a Camera and
Printing
Conexion de /a
impresora
a
la
camara e
impresion
Connexion de
I'imprimante
a
I'appareil photo
Connecting
the
Printer to a Computer and
Printing
Conexion de
la impresora
a un ordenador e
impresi6n
Connexion
de
I'imprimante
a
un ordinateur et
impression
t(
PictBridge
~~
DPOF
DIREG
PRINT
Advertisement
Chapters
Table of Contents
Troubleshooting

Related Manuals for Canon SELPHY CP400


Summary of Contents for Canon SELPHY CP400
- Page 1 Canon CP400 SELPHV COMPACT PHOTO PRINTER IMPRESORA FOTOGRAFICA COMPACTA IMPRIMANTE PHOTO COMPACTE Connecting the Printer Conexion de /a impresora Connexion de I'imprimante Connecting Printer to a Computer and Conexion de la impresora Connexion I'imprimante 1111111111111111111111111111111111 User Guide Guia del usuario...
-
Page 2: Table Of Contents
Macintosh Connecting the Printer to Your Computer Viewing the PDF Manuals Printer Software Guide ZoomBrowser EX Software User Guide /lmageBrowser Software User Guide Uninstalling the Software Windows Macintosh Uninstalling the Printer Driver Windows Macintosh Printing with Non-Canon Digital Cameras English... -
Page 3: Enjoy Various Kinds Of Printing
"' :'E,lIiav' lIinlis .f ',RlinliQ9 ," .' Va,liDUS ~~~ ,,~'! ~!; ~ ~" P </1 l" <+ + . ; \ 0 , . Enjoy Printing Images from 'lour Digital Camera or Digital CamcorCle --------------------_.~... - Page 4 L size paper cassette (sold separately) Credit card size paper cassette (sold separately) Postcard size paper cassette Wide size paper cassette (sold separately) Print easily at home. Make label stickers. (8 per sheet) Make original large size postcards. Make original greeting cards.
-
Page 5: Printing Procedure And Reference Guides
~onnecting a digital camera or digital video camera to the printer Basic Detailed operations instructions User Guide User Guide Direct Print User Guide (This Guide) p. 25 (This Guide) p. 29 User Guide (This GUide) p. 39... - Page 6 ~Jjinting Print ,?eUings are '.made uslngthe"camera. Camera User Guide Printer Software Guide (PDF Format) fError Messages-~f Troubleshooting ",--","""""~_"",,,,,,,_,,,,,_,,,,,_,,,_~,",,,"._,,, Using the Non-Canon Digital cameras, refer to the user guide that came with your camera. • ...,d' : Included with the printer...
-
Page 7: Package Contents
5 sheets) Power Cord ~=*dffl&P- rJ0l • User Guide (This Guide) • Warranty Card*1 • Canon Ctlstomer Support Leaflet*1 *1 Not included in some regions. L size Credit card size (4 x Wide size (100 x 200 mm Postcard size, 36 standard sheets... -
Page 8: Quick Start
This section explains the procedures required to print with the paper and the ink cassette (trial kit) included with your printer. General camera descriptions in this guide refer to digital cameras or digital camcorders compatible with the compact photo printer (CP400). However, in ~~camera" detailed instructions, adapter"... - Page 9 '~~'::'~~' • • i~J( ~ta~1 I,OGntinuedt ~,.;. ~,;.; ltl""*!. "f<' » Placing the Paper into tile Paper Cassette (p. 26) Open the paper cassette's top and middle covers. Place the middle cover back to its original position, and leave the top cover open . .
- Page 10 Connecting the Printer to a Power Source (p. 29) Connect the compact power adapter to the printer's DC IN terminal. • At this point, the power will turn on and the printer's display window will light blue. Connecting the Camera to the Printer (p. 29) Connect the interface cable (included with the camera) to the camera's DIGITAL terminal.
- Page 11 , .lIill. BIIIII __lIlIlillliell Turn the camera's power on and display the images. • The (Canon Direct Print) mark or the upper left corner of the LCD monitor. Press the camera's • The button to be pressed differs depending on the camera.
-
Page 12: Before You Begin
This product is designed to achieve excellent performance when used with genuine Canon accessories. Canon shall not be liable for any damage to this product and/or accidents such as fire, etc., caused by the malfunction of non-genuine Canon accessories (e.g., a leakage and/or explosion of a battery pack). -
Page 13: What Can Be Accomplished With This Printer
Canon website, for information or to download compatible firmware. Since this printer complies with an industry standard for direct printing (PictBridge), you can print with non-Canon cameras that are also compatible with this standard. For details, refer to page 57. Symbols Used : This mark denotes issues that may affect the printer's operation. -
Page 14: Read This First
Continued operation under these conditions poses risk of fire or electric shock. Be sure that smoke or burning odor subsides, and then contact your dealer or the nearest Canon Customer Support help desk. - Page 15 • Power Do not exceed the cable and power outlet ratings when operating this product. Do not operate this product outside of the specified voltage rating. Connecting too many devices to the same outlet may result in fire. Check that the voltage of the outlet is compatible with the devices before plugging them in.
- Page 16 • Devices Do not block the air vents on the printer. Blocking the vents may cause the inside of the printer to overheat, resulting in damage to internal components and risk of equipment failure or fire. Use the devices in a well-ventilated area. Do not rest heavy objects on the devices.
- Page 17 • Usage Location Do not use the devices in locations that are smoky, humid, dusty, or subject to strong vibration. Entry of water or dust into the devices, or internal damage caused by strong vibration, may pose risk of fire or electric shock. Have the devices checked approximately once a year (contact your dealer), preferably before the onset of your area's humid season.
-
Page 18: Proper Usage And Handling
Proper Usage and Handling • Usage Location Do not use near strong magnets or near devices that produce strong electromagnetic fields. Electromagnetic radiation from devices such as TVs and game machines, and strong magnetic fields from devices such as speakers and large motors, may cause distortion in printed images. - Page 19 . • Proper Handling of Ink Cassettes Please use only the ink cassettes specified for use by Canon. Do not open the ink cassette cover while printing is in progress, and do not pull the ink cassette out.
- Page 20 • Proper Handling of Paper Please use only the paper types specified for use by Canon. Paper must be printed on the glossy side (the side without any printed markings). Always load paper into the cassette with the glossy side up. Loading the paper the wrong way may result in poor print quality, and in some cases may cause damage to the printer.
- Page 21 Other types of sleeves may cause color loss or color bleeding. Color change may occur over time in accordance with conditions of storage. Canon assumes no liability for color changes. To avoid print quality deterioration, do not store your prints in the following types of locations.
-
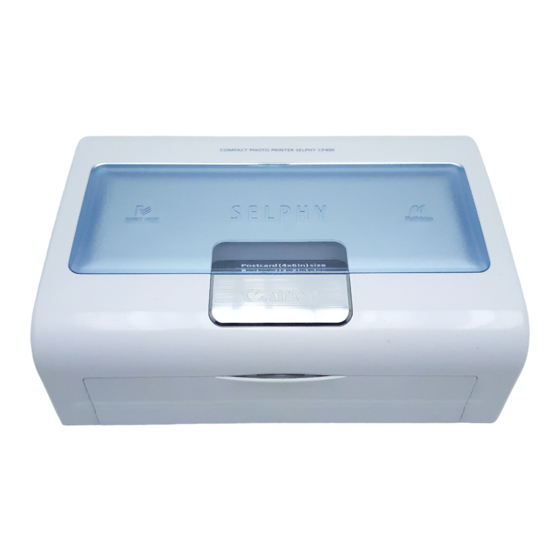
Page 22: Components Guide
Components Guide Compact Photo Printer SELPHY CP400 Front View Paper Cassette Slot The paper cassette loads into this compartment. The display window is covered with a thin plastic film for protection against scratches during shipment. Remove it before using the printer. - Page 23 Back View Air Vents Paper-handling Slot Paper extends out from this slot while printing is in progress. DC IN Terminal Connects to the Compact Power Adapter. ~----I USB Port Connects commercially available USB cables to a computer. Direct Print Port Connects the interface cable (included with the camera) to the camera.
-
Page 24: Let's Print
The design of the seal on your ink cassette Name may slightly differ from the examples below. L size 36 Pri ntouts " .:- : : ; , " Ink Cassette Name Canon Made in Japan/Japan 4.7 in.» Ink Cassette Name Canon Japa~ Made in Japan/... - Page 25 • The paper cassette PCW-CP100 (sold separately) is required when printing on Wide size paper (100 200 mm (4 Separately Sold Ink and Paper Products You can use the following color ink/paper sets (sold separately) with the Canon Compact Photo Printer SELPHY CP400. Paper Size Postcard size...
-
Page 26: Loading The Ink Cassette
Loading the Ink Cassette 7· \-:-j iJ -'\,\~- I~/rvn~ ,,-::9/ \1·1 1110= Ink sheet Sprocket .-----Clip •. . . Do not reuse.emptyinkcassettes..Attempting . • to. reliseanempty cassette<may ·resultinmalfunctionor·damage to the printer. • please also refer to the properHandling oUnk Cassettes section andHahdfing (p.·1 Open the ink cassette... -
Page 27: Placing The Paper Into The Paper Cassette
Placing the Paper into the Paper Cassette ~TOP 'x..• . • . • . Paper (Glossy side up) (Address/stamp side next to the middle cover) • Insert the wide size paper (100 200 mm (4 separately) as shown in the figure below. - Page 28 • Insert the L size paper (sold separately) as shown in the figure below Paper (Glossy side up) 1 ( ' ••..··.PI8as8·• • us·.e. • sp~ciljed • • • paper• . • types not.in$~rt • . •••. Do• • m ore.. th8 n .
-
Page 29: Loading The Paper Cassette
Loading the Paper Cassette • The printer outputs the finished prints into the receptacle onto the top of the printer cassette (top of the middle cover or inside of the top cover). Be sure to close the middle cover and open the top cover so that output can proceed normally. Open the paper cassette compartment cover. -
Page 30: Connecting A Power Source And The Camera To The Printer
(4 in.) on both sides or adapter more of open space Canon cameras compatible with CP400, and non-Canon cameras compatible with PictBridge can also be connected. The numbered steps in the following instructions refer to the numbers in the above illustration. - Page 31 Connect the Compact Power Adapter cable to the printer. • The power turns on and the printer's display window lights blue. Connect the interface cable to the camera. • Use the interface cable that came with your camera. Connect the interface cable to the printer. •...
-
Page 32: Printing
This section explains the flow of printing operations with Canon cameras*. For more details, refer to your Camera User Guide or Direct Print User Guide. In other cases, please refer to the Printing with Non-Canon Digital Cameras (p. 57). Display the images to be printed and press the SET or SELECT button. - Page 33 • Printing on the Separately Sold Wide Size (100 200 mm (4 You can make your own message cards' and greeting cards. The cards are printed as explained below. When the Camera is Connected to the Printer Printed on the 100 x 150 mm (4 x 6 in.) portion of the card.
-
Page 34: Troubleshooting
If the printer does not seem to be working properly, run through the checks below to see if you can identify and correct the problem. If you are not able to solve the problem, please call your dealer or contact a Canon Customer Support help desk for assistance. - Page 35 The printer's display window lights red without the camera's LCD monitor displaying any error message. Print quality is not good. Faint stripes appear in the print. Printed images are distorted. Nothing happens when the ~¢VI camera's or SET button is pressed.
-
Page 36: Error Messages
Check the ink/paper sets. Turn the power off and turn it on again. If the printer fails to eject the paper, contact a Canon Customer Support help desk for assistance. size or change the print settings. power off and turn it on again. - Page 37 Cannot Print! Could not print xx images The ima'ge was taken with a different camera, recorded in a different format, or has been altered by a computer. You have selected a number of images for DPOF printing, but some of these images cannot be printed because they were taken with a different camera, recorded in adifferent format, or have been...
-
Page 38: Specifications
Wide size (100 8 in.)) print The above printing speeds are applicable when Canon compact digital camera equipped with the DIGIC II is connected to the printer. Printing speeds may vary with other cameras. Based on Canon's standard testing conditions. Variations may occur depending on printing. - Page 39 Interface Signal Transfer Proprietary protocol for' Canon cameras, PictBridge Connection Method Camera/Printer connection Computer/Printer connection Device Specifications Operating 5 - 40°C (41 -104 OF) Temperatures 20% to 80% (when running) Operating Humidity Power Source AC 100 - 240 V (50/60 Hz)
-
Page 40: Connecting The Printer To A Computer And Printing
In consideration of the right to use the SOFTWARE, you agree to abide by the terms and conditions of this Agreement. 1. LICENSE: Canon grants you the personal, non-exclusive right to use the SOFTWARE only on a single computer. You may physically transfer the SOFTWARE from one computer to another provided that the SOFTWARE is used on only one computer at a time. - Page 41 SOFTWARE is subject to the laws of the United States, and Canada, and other applicable copyright and trademark laws, and nothing in this Agreement constitutes a waiver of the rights of Canon, its affiliated corporations and third party licensors under such laws. You only own the CD-ROM media in which the Software is stored.
-
Page 42: System Requirements
Space (including the PhotoRecord printing program) - PhotoStitch: 40 MB or more • Canon SELPHY CP400 Printer Driver: 3 MB or more (the amount of free space required for installation) Display 1,024 x 768 pixels/High Color (16 bit) or better •... -
Page 43: Printing Operations Overview
Printing Operations Overview Follow the steps outlined below to prepare the printer and install the necessary software to enable printing: Prepare the printer. Load the paper and ink cassette <.=:-;:J... ~...~ into the printer and turn the printer ~ power on. Install the software and the printer driver onto the computer. -
Page 44: Installing The Software And The Printer Driver
Installing the Software and the Printer Driver The CP Printer Solution Disk contains software that your computer will require for printing. Install the software and the printer driver according to the following steps. -Windows • The instructions in this section are intended for Windows XP. If you are using another version of Windows, actual screen contents and procedures may differ slightly from those indicated here. - Page 45 Select [Easy Installation] as the setup type and click [Next]. • Select [Custom Installation] to select programs for individual installation. Click [Yes] if you consent to all the conditions of the software license agreement. Review the installation settings and click [Next]. •...
- Page 46 When the screen below appears, connect the printer to the computer with' a USB cable. i.Check the cable connection between the printer and the computer. 2.Turn the printer on. 3.Printer port will be detected. Please wait. Detection can take ...hen detection is completed. •...
-
Page 47: Macintosh
Quit any programs that are running. Place the CP Printer Solution Disk in the CD-ROM drive, and double-click the [Canon CP Printer Installer] icon in the CO- RaM. • The installer panel automatically appears. Click the Application Software [Install] button. - Page 48 Next, install the printer driver to your computer. Click the CP Printer Driver [Install] button. Click the printer you are using. Click [Agree] if you consent to all the conditions of the software license agreement. • The installer starts. Select [Easy Install], and then click the [Install] button. Clicking the Install button installs the following items: SELPHY CPxxx...
- Page 49 Next, register your printer on the Printer List Turn the printer power on, then connect the printer to the computer with the USB cable. • For directions on connecting the printer, see Connecting the Printer to Your Computer (p. 49). Double-click the hard disk icon where Mac Double-click the [Print Center] or [Printer Setup Utility] icon in [Applications]...
-
Page 50: Connecting The Printer To Your Computer
Connecting the .Printer to Your Computer • Notes about connection In using the USB cable, be sure to connect the printer directly to your computer. If you connect the USB cable via a USB hub, the printer may not function properly. Do not use other USB devices (with the exception of a USB mouse or keyboard) with the printer. - Page 51 Connect one end of a commercially available USB cable (sold separately) to the USB port on the printer, and the other end to a USB port on your computer. • There is no need to turn off the printer or your computer. •...
-
Page 52: Viewing The Pdf Manuals
• ZoomBrowser EX Software User Guide IlmageBrowser Software User Guide To view the ZoomBrowser EX Software User Guide (Windows) and the ImageBrowser Software User Guide (Macintosh), access the following site and download. http://web.canon.jp/lmaging/information-e.html Manuals [CP Printer Guide]. on the CD-ROM, then double-click [CP Printer User Guide.pdf]. -
Page 53: Uninstalling The Software
The instructions in this section are intended for uninstallation of Zoom Browser EX. Click the [Start] button and select [Programs] or [All Programs], [Canon Utilities], [ZoomBrowser EX], and [ZoomBrowser EX Uninstall]. • Uninstallation begins and ZoomBrowser EX is removed. • You can use the same procedure to uninstall PhotoStitch. -
Page 54: Macintosh
• Macintosh Uninstall the programs by dragging the application's folder (the folder in which it was installed) into the Trash, and then empty the Trash. ·.PI~~$ebecarefulnottoaGcidentallYdelete. ••. anyJolders· with <downloaded. • images that maybecontainedwitnin the application folder. -
Page 55: Uninstalling The Printer Driver
Be sure to follow the procedures described in this section to uninstall the printer. -Windows Click the [Start] and select [Programs] or [All Programs], [Canon SELPHY CPXXX], [Uninstall]. Select the printer you will uninstall and click [Next]. • Follow the screen messages to proceed. -
Page 56: Macintosh
-Macintosh Place the CP Printer Solution Disk in the CD-ROM drive, and double-click the [Canon CP Printer Installer] icon. • The installer panel appears. Click the CP Printer Driver [Install] button. Click the printer you wish to uninstall. Click [Agree] if you consent to all the conditions of the software license agreement. - Page 57 Click the [Continue] button to automatically close any applications other than the uninstaller. When the uninstallation is complete, click [Quit], and then remove the CP Printer Solution Disk from the CD-ROM drive. Next, delete the printer from the Printer List. Double-click the hard disk icon where Mac OS X is installed.
-
Page 58: Printing With Non-Canon Digital Cameras
• Printing different selected images on an 8-label sheet. • If you connect a camera which has an automatic image enhancement function to the printer, the image is automatically adjusted for even more beautiful prints. (With Canon Cameras, the image is adjusted without using this function.) - Page 59 Functions Not Available with Non-Canon Cameras • Printing indexes with the file name. • Printing speed may differ according to your camera model and the image's number of recorded pixels. (The value written on page 37 is a printing speed obtained...
- Page 60 Trademark Acknowledgments • Canon and SELPHY are trademarks of Canon Inc. • Adobe is a trademark of Adobe Systems Incorporated. • CompactFlash is a trademark of San Disk Corporation. • Macintosh, Mac and QuickTime are trademarks of Apple Computer Inc., registered in the United States and other countries.
- Page 61 If such changes or modifications should be made, you could be required to stop operation of the equipment. Canon U.S.A. Inc. One Canon Plaza, Lake Success, NY 11042, U.S.A. Tel No. (516) 328-5600 Canadian Radio Interference Regulations This Class B digital apparatus complies with Canadian ICES-003.
- Page 62 Canon © CDI-M168-01 D 1004Ni24 2004 CANON INC. PRINTED IN JAPAN IMPRIME AU JAPON...
- Page 63 You will be among the first ones to receive the notifications. Protect your product We will keep the model number and date of purchase of your new Canon product on file to help you refer to this information in the event of an insurance claim such as loss or theft.
- Page 64 /Canon Customer Support ca~7C(1){*~iI~Ii:8cl£ L,tc±tt!~fi:~lUE~ttLL,' .. jetJJIi:{*g L,",( f!!~*i*(1)lUlmmB.F.I~c C::fiI~ productos es valida solo en el pais que aparece prodotti) valida solo nel paese indicato sui © 2004 CANON INC. < tc~L < tc~L, PRINTED IN JAPAN IMPRIME AU JAPON...
- Page 65 Manuals available for download: http://www.powershoLcom/powershot2/customer/manual.html Canon Canada Inc. Phone (Canada): 1-800-0K-CANON (1-800-652-2666) (24 hours/day, 7 days/week) Manuals available for download: http://www.canon.ca (Go to "Customer Support") EU~gPE Europe, Africa & Middle East Canon Europa N.V. PO Box 2262,1180 EG Amstelveen, The Netherlands Canon (UK) Ltd.
-
Page 66: Printer Software Guide
Printer Software Guide (For Canon CP Printer Solution Disk Version 3) Windows... - Page 67 Contents Safety Precautions ...3 Read This First ...4 About the Manuals ...4 Printing Flow Diagram ...5 Printing ...6 Starting ZoomBrowser EX and PhotoRecord ...7 Printing with Standard Sheets or Full Size Label Sheets ...10 Printing on 8-Label Sheets ...14 Merging Images to Print a Panorama ...15 Printing Part of an Image (Trimming) ...17 Adjusting Color and Brightness (Image Quality Adjustment) ...19...
-
Page 68: Safety Precautions
• While every effort has been made to ensure that the information contained in this guide is accurate and complete, no liability can be accepted for any errors or omissions. Canon reserves the right to change the specifications of the hardware and software described herein at any time without prior notice. -
Page 69: Read This First
Please read before using the printer. Describes how to print using the software provided on the supplied CD-ROM (Canon CP Printer Solution Disk). This user guide Screen shots from Windows XP are used for illustration, but the procedure is the same with Windows 98 Second Edition (SE)/Windows Me/Windows 2000. -
Page 70: Printing Flow Diagram
Printing Flow Diagram Follow the steps outlined below to prepare the printer and install the necessary software on your computer to enable printing. Prepare the printer. Insert paper cassette and ink cassette. See the Printer User Guide. Install the necessary software and printer driver on your computer. -
Page 71: Printing
Printing ZoomBrowser EX and PhotoRecord are applications included on the Canon CP Printer Solution Disk. These applications make it easy to print. This section describes how to use PhotoRecord to print images displayed in ZoomBrowser EX. Before printing, verify that the printer is on, and that the printer is properly connected to your computer with a USB cable. -
Page 72: Starting Zoombrowser Ex And Photorecord
Double-click the [ZoomBrowser EX] icon on the desktop to start the program. If the [ZoomBrowser EX] icon does not appear on the desktop, click the [Start] menu and select [Programs] or [All Programs], followed by [Canon Utilities], [ZoomBrowser EX] and [ZoomBrowser EX]. Click [Print]. - Page 73 Click [Layout Print]. Select an image to print and click the [Next] button at the window’s bottom right.
- Page 74 Place a check mark beside the data you wish to include with the print (multiple selections are possible) and click [Finish]. Selecting this check mark enables you to add comments, a file name or date to printouts. To add a comment to an image, select it in ZoomBrowser EX and click [Properties].
-
Page 75: Printing With Standard Sheets Or Full Size Label Sheets
Printing with Standard Sheets or Full Size Label Sheets Click [2 Select Printer & Album Type] and then select your printer model name from [Printer]. Next, select [Album Type] to check the print image. When you select this check box, the image is automatically adjusted to fit the album type. - Page 76 Click [3 Select Paper], and select the paper size and print orientation. • Clicking [Decorate Album] allows you to change image design features such as the border or background. To change the design, click the border or background you want to change. •...
- Page 77 Click [4 Print], check print settings such as the number of copies, and then click [Print]. If you stop printing while printing is in progress, paper is ejected to the paper handling slot and a printing error may occur. This is not a malfunction, but a mechanism for protecting the print head.
- Page 78 When printing is finished, click the window to close PhotoRecord. To save the album, click [Yes]. If you don’t want to save it, click [No]. The ZoomBrowser EX screen returns after the album is saved. • Camera information such as scene and photographic conditions are embedded in images captured with cameras compatible with Exif 2.2 (referred to as Exif Print).
-
Page 79: Printing On 8-Label Sheets
Printing on 8-Label Sheets In [2 Select Printer & Album Type], select “8-Sticker Label” from [Album Type]. Select an image. To make copies of an image, right-click over the screen and select [Make Copies]. Then, input the number of copies you want to make and click [OK] to create the specified number of image copies. -
Page 80: Merging Images To Print A Panorama
This operation is performed using the PhotoStitch software. When you use images captured with a Canon digital camera in Stitch Assist mode, PhotoStitch determines the order and direction of the composition automatically, facilitating the composition process. - Page 81 Merge the images following the instructions in the guidance panel at the top of the PhotoStitch window. Save your panoramic image, and then click the PhotoStitch. Print the panoramic image. To print the merged images, see step 2 in and PhotoRecord Starting ZoomBrowser EX (➡...
-
Page 82: Printing Part Of An Image (Trimming)
Printing Part of an Image (Trimming) You can select and then print a portion of an image. This is useful when you only want to print part of an image, or if the part you are most interested in is not at the center of the image. - Page 83 Select the area you want to print. • In [2 Select Printer & Album Type], when [8-Sticker Label] is selected for [Album Type], or the [Automatic Clipping] check box is selected The trimming area is set automatically, and the area aspect ratio cannot be modified or the trimming frame removed.
-
Page 84: Adjusting Color And Brightness (Image Quality Adjustment)
Adjusting Color and Brightness (Image Quality Adjustment) After selecting the printer in [2 Select Printer & Album Type], click [Properties]. Click the [Image Adjustment] tab and adjust the color and brightness for printing. For more details, click [?] or [Help] to display [Help]. When you have made the settings, click [OK] to close the [Properties] dialog. -
Page 85: Appendices
Appendices About the Print Area and Pixels Print Area The shaded area ( ) in the following diagrams indicates the maximum printable area. Note that because the print area is larger than the actual paper size, a border is trimmed from the image when it is printed. (shown in millimeters) Postcard size sheet 148.0... - Page 86 L size sheet 119.0 Credit card size sheet/full-size label sheet 86.0...
-
Page 87: Number Of Pixels
Wide size sheet Number of Pixels Paper Type Postcard size sheet L size sheet Credit card size sheet/ full-size label sheet Wide size sheet * Number of pixels of print area for borderless printing. This also includes the border that is trimmed from around an image during printing. 200.0 Total number of Effective number of... -
Page 88: Troubleshooting
Troubleshooting This section describes how to troubleshoot problems. If the problem still exists after trying these solutions, restart your computer. If the problem still persists, uninstall the printer driver and then install it again. The printer cannot be selected. Cause : The printer driver is not installed. - Page 89 Printing stops while it is in progress. Cause : Power to the printer goes off while printing is in progress. Correction : Turn the printer on. Cause : The USB cable is not connected correctly. Correction : Check the USB cable to make sure it is connected correctly. Cause : A USB hub is being used for the connection.
- Page 90 The color of an image seen on the screen is different from that seen in prints. Correction : Printers and computer displays use different color reproduction methods, and lighting conditions and display settings affect the appearance of colors on your computer’s display. However, you can adjust color using [Image Adjustment] (➡...
-
Page 91: Error Messages
• If the error does not go away after you have tried the recommended solutions, consult your nearest Canon Customer Support Help Desk. • Use the information in this section in conjunction with the Printer User Guide. - Page 92 Ink cassette is empty and must be replaced. Press [Resume] to resume, or [Cancel] to stop. Cause : There is no more ink in the ink cassette. Correction : Replace the ink cassette with a new one. Ink cassette not installed. You must insert an ink cassette before printing.
- Page 93 The paper cassette differs from the setup. Please check the paper cassette. Press [Resume] to resume, or [Cancel] to stop. Cause : The paper cassette in the printer is not suitable for the print settings. Correction : Insert the correct paper cassette. The specified Ink Cassette cannot be found.
- Page 94 Errors where printing is canceled If any of the following messages appear, printing is canceled. After using the recommended solution to clear the error, you need to start the print job over again. Paper jammed in printer. Clear the jam as follows, then try printing again. 1.
- Page 95 Correction : Remove paper from the paper cassette, and then make sure to load the correct amount of paper in the paper cassette. For messages caused by errors related to the operating environment of your computer, follow the messages on the screen. CDP-E © 2004 CANON INC.
- Page 96 The limited warranty set forth below is given by Canon U.S.A., Inc. in the United States and Canon Canada Inc. in Canada with respect to the Canon-brand Card Photo Printer (the "Product") purchased with this limited warranty, when purchased and used in the United States or Canada. This limited warranty only applies to the Product packaged with this limited warranty. Canon U.S.A., Inc.
- Page 97 *Technical support program specifics subject to change without notice. MAIL-IN SERVICE is a program under which your Product is repaired by a Canon U.S.A. or a Canon Canada Authorized Service Center. You will be given the name, address and phone number of an Authorized Service Center, by contacting the Canon U.S.A.