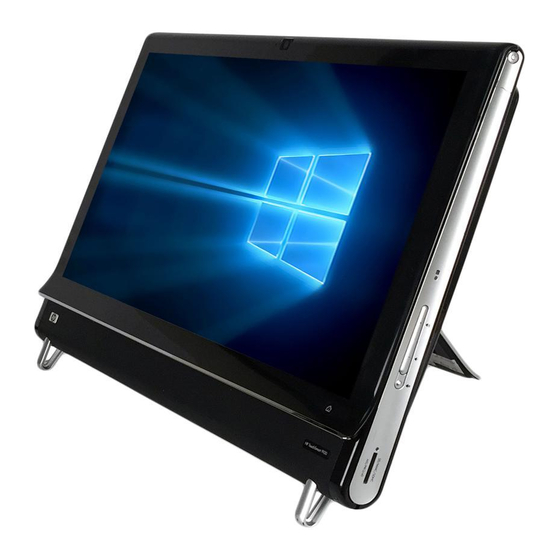
HP TouchSmart 9100 User Manual
Hide thumbs
Also See for TouchSmart 9100:
- Maintenance and service manual (76 pages) ,
- Quickspecs (14 pages) ,
- Application manual (37 pages)
Table of Contents
Advertisement
Advertisement
Table of Contents
Troubleshooting

Related Manuals for HP TouchSmart 9100


Summary of Contents for HP TouchSmart 9100
- Page 1 User Guide...
- Page 2 802.11n WLAN devices. HP supports lawful use of technology and does not endorse or encourage the use of our products for purposes other than those permitted by copyright law.
-
Page 3: Table Of Contents
Cables and accessories ......................2 Front and right side of the HP TouchSmart 9100 Business PC ..........................4 Lower-left side of the HP TouchSmart 9100 Business PC ............... 6 Connector cover ........................7 Back of the HP TouchSmart 9100 Business PC ................8 Activity LED indicator lights .................... - Page 4 HP TouchSmart Canvas ......................38 HP TouchSmart Music ........................ 38 Moving music files into HP TouchSmart Music ................38 Moving songs from iTunes into HP TouchSmart Music ..............39 Album art ..........................39 Creating and editing playlists ....................40 Deleting songs ........................40 Music Store ..........................
- Page 5 HP TouchSmart Netflix ....................... 47 Live TV ............................. 47 HP TouchSmartLink ........................47 Updating Software ........................47 Software Quick Reference Table ....................48 Remote Control ......................49 Using the Remote Control ......................49 Software Troubleshooting and System Recovery ............55 Software Troubleshooting ......................
-
Page 6: Finding Hp Touchsmart Pc Information
Where to find Set up your HP TouchSmart PC. Setup poster How-to videos about using HP TouchSmart On the HP TouchSmart home page, tap the features. Tutorials tile to open it, and then tap a tutorial to view it. Or, visit www.hp.com/supportvideos... -
Page 7: Welcome
BrightView display, Wireless 802.11n networking, and high-quality speakers. The interactive screen makes wall mounting a good choice for the HP TouchSmart 9100. The hardware to adapt the computer for wall mounting (not the actual wall mount) is included in select models and can be purchased. -
Page 8: Cables And Accessories
Cables and accessories What’s in the box Power cable (two pieces) Use to connect computer to power source. Keyboard and mouse Use to interact with the system. Wireless keyboard and mouse, Use to interact with the system. and receiver (select models only) Cleaning cloth Use to clean the touch screen. - Page 9 Computers with wall-mounting option VESA plate adapter assembly Mounted on the back of the computer, this system adapts your computer for separate wall- mounting hardware (not included). Cables and adapters not included, but may be required Ethernet (LAN) cable For a wired network. Coaxial cable For an Internet connection with a cable modem, or to connect the...
-
Page 10: Front And Right Side Of The Hp Touchsmart 9100 Business Pc
Front and right side of the HP TouchSmart 9100 Business PC Features and configurations vary by model Item Description LCD display State-of-the-art 58.4-cm (23-in) diagonal widescreen high-definition optimized for touch display with HP BrightView technology.* HP BrightView technology improves the contrast and clarity of your display. In addition, it boasts a high resolution of 1920 x 1080 and a fast response time of 5 ms.**... - Page 11 Read and play CD-ROM, DVD-ROM, CD Audio, DVD+/-R dual layer (DL), DVD-Video, and Video CD. * HP supports the lawful use of technology and does not endorse or encourage the use of our products for purposes other than those permitted by copyright law.
-
Page 12: Lower-Left Side Of The Hp Touchsmart 9100 Business Pc
Item Description (continued) B-CAS card slot Insert your B-CAS card (provided by HP), to decrypt high-definition (select models only) television signals. Lower-left side of the HP TouchSmart 9100 Business PC Features and configurations vary by model Connector Function USB 2.0 Connect USB devices (USB 2.0) such as a mouse, keyboard, printers,... -
Page 13: Connector Cover
Connector cover To remove the connector cover on the back of the computer, insert your finger under the gap on the bottom-left side of the cover (A), and pull straight out (B). Replace the connector cover by aligning the hooks on the right edge of the cover with the slots on the computer, and then pressing it until it snaps into place. -
Page 14: Back Of The Hp Touchsmart 9100 Business Pc
Back of the HP TouchSmart 9100 Business PC Features and configurations vary by model Connector Function DVI Video Out Provides digital video output for use with a second monitor or projector. IEEE 1394 port Provides connectivity to data storage devices and DV (digital video) cameras. - Page 15 Connector Function (continued) S-Video In Capture analog video from a video camera, or connect to a set-top box (TV tuner models for TV input. only) Stereo Audio In (TV Connect audio for A/V input from a set-top box, digital video camera, or tuner models only) other video device.
-
Page 16: Activity Led Indicator Lights
Activity LED indicator lights The following are the activity indicator light-emitting diodes (LEDs) on your HP TouchSmart 9100 Business What it Does Webcam Indicates webcam activity. Power Indicates the power state: blue indicates power on, and amber indicates Sleep mode. -
Page 17: Connecting The Power Source
AC power source through a surge protector/uninterruptible power supply (UPS). Cable Management The HP TouchSmart 9100 Business PC includes a cable-management feature located behind the back connector cover. To use the cable-management feature: Remove the connector cover on the back of the computer by inserting your finger under the gap on the bottom-left side of the cover (A), and then pulling straight out gently (B). - Page 18 Route your cables through the cable routing clip (C), and out from the back of the computer. Replace the connector cover by aligning the hooks on the right edge of the cover with the slots on the computer, and then pressing it until it snaps into place. Then, route the cables through the open area between the plastic plate and the bottom of the stand (D).
-
Page 19: Computer Stand
To assure that the computer is in a stable position on your desktop, pull the computer stand open until it snaps into place. Then, if you want to change the angle of the HP TouchSmart 9100, hold each side of the computer, and tilt it (the monitor moves forward; the stand stays in place) to an angle of between 5 degrees and 40 degrees from the vertical. -
Page 20: Keyboard And Mouse
Your keyboard and mouse can be connected to any USB connector on the lower left side or back side of HP TouchSmart 9100 Business PC. See “Back Side of the HP TouchSmart 9100 Business PC” in this chapter for illustration. -
Page 21: Adding Hardware
Adding Hardware HP TouchSmart 9100 Business PCs may not be compatible with all of the hardware you add. Make sure your hardware is compatible with the operating system. Determining Whether Your System Is 64-bit or 32-bit Tap the Start button, and then tap Help and Support. -
Page 22: Optical Disc Drive
Connecting to the Internet Your HP TouchSmart 9100 Business PC is designed to support a wireless (select models only) or wired LAN that connects your computer to other devices, such as printers and other PCs. The network connection to the Internet is usually through a broadband modem (digital subscriber line [DSL] or cable), which requires a separate subscription. -
Page 23: Wired Home Network
NOTE: A DSL wall connection is shown here. If you have a cable modem, the modem will be connected to the wall using a coaxial cable. Configure the HP TouchSmart 9100 to connect to the wireless network. Turn on your HP TouchSmart 9100. - Page 24 The Ethernet port on the HP TouchSmart 9100 is located on the back of the computer, behind the connector cover. Add other computers or devices to your wired network: Disconnect power from the broadband modem and the router, and then shut down your HP TouchSmart 9100 and the computers you want to add to your network.
-
Page 25: Bluetooth Devices
See “Windows Media Center setup wizard” on page 22. Point the remote control at the IR receiver on the lower-right side of the HP TouchSmart 9100 Business PC to start Windows Media Center, and use this program to watch and record TV shows. For more information about setting up and using Windows Media Center, go to: www.microsoft.com, or... -
Page 26: Using A Set-Top Box With Windows Media Center (Optional Step)
Connect the coaxial cable from your TV antenna or TV cable provider to the TV In connector (A) located on the back of the computer behind the connector cover. See “Back of the HP TouchSmart 9100 Business PC” on page 8. - Page 27 You may need a composite video to S-Video adapter (sold separately) to connect the set-top box Video Out to the S-Video In connector (A). 2 For S-Video, connect audio cable from your set-top box to the Audio Line In connector (B) on the back of the computer.
-
Page 28: Windows Media Center Setup Wizard
3 When you use the remote control, point it at the front of the HP TouchSmart 9100 (E), not at the set-top box. Windows Media Center setup wizard Select models only Tap the Start button, tap All Programs, and then tap Windows Media Center. -
Page 29: Connecting Analog Speakers
Headphones NOTES: The HP TouchSmart 9100 Business PC supports powered speaker systems only. Powered speakers require a separate power supply. When the Audio Line In connector is being used, the following are affected: the output to the internal speakers, the Audio Line Out connector, and the headphones connector. For example, if you are playing sound through your internal speakers and then you connect an MP3 device through your Audio Line In connector, you will hear both sounds. -
Page 30: Speaker Volume
Press and hold (or with the mouse, right-click) the Volume icon, and then select Open Volume Mixer. The Volume Mixer window opens. To adjust the volume for HP TouchSmart programs (Notes, Music, and Video), be sure to adjust both the speaker volume, and the HP TouchSmart program volume. Scroll to the right in the Applications area to see all choices. -
Page 31: Headsets
Connecting a Printer You can connect a printer by using the USB connectors on the sides or back of the HP TouchSmart 9100, or you can use a wireless printer. -
Page 32: Adjusting Screen Display
Tap the Start button, tap the Arrow button next to the Shut Down button, and then select Sleep or Hibernate. To change power settings: Tap the Start button, and then tap Control Panel. Tap Hardware and Sound. Tap Power Options. Choose a power option. -
Page 33: Installing A Security Lock
The touch screen has a glass surface that can be cleaned by using the cleaning cloth that came with your HP TouchSmart 9100. You can also use a soft cloth or paper towel dampened with a typical household glass cleaner to clean the touch screen. -
Page 34: Using The Hp Touchsmart With Safety And Comfort
Using the HP TouchSmart with Safety and Comfort Before you begin using the computer, arrange the computer and your work area to maintain your comfort and productivity. Refer to the Safety & Comfort Guide for important ergonomic information: Visit www.hp.com/ergo on the Web. -
Page 35: Recycling Your Old Computer Hardware
Recycling Your Old Computer Hardware Disposing of electronic waste responsibly has been an HP priority for more than 20 years. If this computer is a replacement for an older PC you no longer need, go to www.hp.com/go/recycle to find out how HP can help you dispose of your old computer with minimum impact on the planet. - Page 36 User Guide (Features may vary by model)
-
Page 37: Software Overview
Double-tap the HP TouchSmart shortcut icon on the desktop. Navigating HP TouchSmart Use touch or the wireless keyboard and mouse to select and deselect items in HP TouchSmart. Within HP TouchSmart, additional ways to access and navigate programs are shown here. - Page 38 Then use the onscreen keyboard to enter text. CAUTION: Because the HP TouchSmart touch screen uses a sensitive touch technology, to avoid damaging the touch screen, do not apply pressure on the front of the display bezel or around the screen borders.
-
Page 39: Touch Techniques Outside Hp Touchsmart Software
HP TouchSmart Tiles When you open HP TouchSmart software, you see a row of large tiles and a row of small tiles below that. Tiles are shortcuts to software programs, features in HP TouchSmart, or links to Web sites. Use the large tile area for programs you use often, and use the small tiles for the rest of your program shortcuts. -
Page 40: Creating New Tiles
Place a check mark in the Icon check box to display the program icon in the tile, and then tap OK. Your program shortcut appears as a small tile on the bottom of the HP TouchSmart homepage. Tap OK to return to the HP TouchSmart homepage. -
Page 41: Deleting Tiles
To choose a tile color, or to change a tile icon, tap the Change button and choose an icon. Tap Done. HP TouchSmart Tutorials Tap this tile to watch new HP TouchSmart tutorials. Get the basics, or browse through the menu to find a subject you want to learn more about. HP TouchSmart Browser Not available in all countries/regions HP TouchSmart Browser is a simple viewer for displaying live content in your HP TouchSmart homepage. -
Page 42: Hp Touchsmart Photo
HP TouchSmart Photo supports the .jpg file format. Photo library You can view any photos you have on your hard drive with HP TouchSmart Photos. To get photos from your camera: Remove the memory card from your camera, and insert it into the memory card reader on the lower-right side of the computer. -
Page 43: Slideshows
Tap Save. Hiding photos You can hide some of your photos so they do not show up in HP TouchSmart Photo. From your Windows desktop, browse to the photo or folder you do not want to show in the Photos tile in HP TouchSmart Photo. -
Page 44: Hp Touchsmart Canvas
You can also play CDs, view song titles and album art, and create editable playlists. Unlike other HP TouchSmart tiles, if you have music playing and drag the music tile to the lower tile row, your music still plays, and control buttons are still visible. -
Page 45: Moving Songs From Itunes Into Hp Touchsmart Music
Moving songs from iTunes into HP TouchSmart Music HP TouchSmart can play music from only one music library at a time. HP TouchSmart Media Library is the default library. To access songs from iTunes (not preinstalled, downloaded separately) and add them to your music library: Download iTunes to your hard drive from www.apple.com/downloads (Internet access... -
Page 46: Creating And Editing Playlists
Power2Go or Windows Media Player, which you access through your Windows desktop. * HP supports the lawful use of technology and does not endorse or encourage the use of our products for purposes other than those permitted by copyright law. -
Page 47: Hp Touchsmart Video
YouTube (not available in some countries/regions). YouTube requires an Internet connection. HP TouchSmart Video also allows you to play videos from your own video camera, and upload them to YouTube or burn them onto a CD or DVD to share. You can access videos stored anywhere on your hard drive. -
Page 48: Webcam And Microphone
HP TouchSmart computer. Capturing webcam video and snapshots Use HP TouchSmart to record video and take snapshots. Use the YouTube button to upload videos. NOTE: The YouTube Web site is not available in all countries/regions. YouTube requires Internet connection, and you must set up an account. -
Page 49: Video Playlists
Find your new video. The file name reflects the date and time of recording. You can rename the file either in Windows 7 or in HP TouchSmart Video. Video playlists You can organize your videos by creating video playlists, much like you might with music. -
Page 50: Recording Home Movies
Download and set up an account with an Internet messenger or video phone call program (or set up an account with Windows Live Messenger—MSN Hotmail, MSN Messenger, or Passport will work— which is included in select models of HP TouchSmart). The person you are calling must have the same video calling software. -
Page 51: Hp Touchsmart Calendar
HP TouchSmart Notes With HP TouchSmart Notes, you can create text notes and voice notes using touch, the keyboard, a video, photos, or by recording your own voice. This is a fun way to make notes to yourself or others who use the computer. -
Page 52: Hp Touchsmart Weather
Tap the information guide to enable voice commands. The information guide recites all ingredients and then the procedures. You do not need to refer to a recipe; you get it all by the HP TouchSmart voice instruction. The instructions stop after each line, so you can complete the procedure at your own pace. -
Page 53: Hp Touchsmart Twitter
HP TouchSmart Twitter Not available in all countries/regions Twitter requires an Internet connection and a Twitter account. Join the twittering crowd with the HP, touch- friendly version of Twitter. Send short text messages to your friends and followers. Find out what they’re talking about. -
Page 54: Software Quick Reference Table
Software Quick Reference Table In addition to the HP TouchSmart software suite, you may have the following programs installed. Some of the software listed in the following table is included with select models only. This is not a complete list of all the software included with your computer. - Page 55 Quickly organize the Web links you want to keep available to you on your desktop. Comparison-shop by using the convenient shopping search engine. Get HP software and driver updates. Get important messages from HP. Access PC Health and Security and PC Help tools.
- Page 56 User Guide (Features may vary by model)
-
Page 57: Remote Control
Remote Control Using the Remote Control Select models only The remote control works with Windows Media Center and other software. This remote control helps you navigate around and control the computer, just as a TV remote control helps you navigate cable TV options or control the playback of a movie in a DVD player. -
Page 58: Remote Control Buttons
Remote control buttons On/Off — Puts the computer into and out of a power-reduced Sleep mode. It does not turn the computer off. Visualization — Displays visual imagery synchronized to the sound of the music tracks. Music — (Windows Media Center only) Opens the Music Library window in Windows Media Center. - Page 59 A/V source button — Toggles through three sources: PC, HDMI, and composite video when the system is connected to the upper-left display-only ports. Picture — (Windows Media Center only) Opens the Pictures Library window. Video — (Windows Media Center only) Opens the Videos Library window. Live TV —...
- Page 60 User Guide (Features may vary by model)
-
Page 61: Software Troubleshooting And System Recovery
Click the plus sign (+) to expand the type of device you want to update or rollback. (For example, DVD/CD-ROM drives). Double-click the specific item (for example, HP DVD Writer 640b). Click the Driver tab. To update a driver, click Update Driver, and then follow the onscreen instructions. -
Page 62: Microsoft System Restore
Microsoft System Restore Microsoft Windows 7 includes a feature that enables you to restore your computer configuration to a configuration that was in use before the current software problem existed. The feature does this by creating a restore point where it records the computer settings at that time and date. When a new program is installed, the operating system automatically creates a restore point before it adds the new software. -
Page 63: Creating Data Backup Discs
To uninstall a program: Close all software programs and folders. Uninstall the damaged program: Click the Start button, and then click Control Panel. Under Programs, click Uninstall a program. Select the program you want to remove, and then click Uninstall. Click Yes if you want to continue with the uninstall process. -
Page 64: Creating Recovery Discs
You must choose one of the following methods to perform a system recovery: Recovery Image — Run the system recovery from a recovery image stored on your hard disk drive. The recovery image is a file that contains a copy of the original factory-shipped software. To perform a system recovery from a recovery image, see “System recovery from the Windows 7 Start menu”... -
Page 65: System Recovery From The Windows 7 Start Menu
Through recovery discs that you create. Through recovery discs purchased from HP Support. To purchase recovery discs, go to www.hp.com/support and visit the Software & Driver downloads page for your computer model. System recovery from the Windows 7 Start menu If the computer is working, and Windows 7 is responding, use these steps to perform a system recovery. -
Page 66: Additional Troubleshooting
HP Support Assistant helps you maintain your PC performance and resolve problems faster with automated updates, onboard diagnostics, and guided assistance. To open HP Support Assistant, tap the Start button, All Programs, HP, and then tap HP Support Assistant. Windows 7 Troubleshooting Tools... - Page 67 Windows 7 provides troubleshooting tools that can automatically troubleshoot and fix common computer problems. To access the Windows 7 Troubleshooting Tools: Tap the Start button, and then tap Control Panel. Tap System and Security. Under Action Center, tap Find and fix problems (troubleshooting). Software Troubleshooting and System Recovery...
- Page 68 User Guide (Features may vary by model)
-
Page 69: Index
Power2Go using PowerDirector Blu-ray drive location YouCam brightness, screen Browser tile button deleting tiles computer Power/Sleep digital audio connector HP TouchSmart driver reinstalling drivers, update cable connection management DVD drive location DVD Play router clip routing clip Calendar tile camera... - Page 70 MovieThemes tile MP3 players headsets Music Store Hibernate mode Music tile how-to videos HP Advisor album art HP TouchSmart deleting songs cleaning the touch screen file formats finding information moving files to library navigating playlists opening...
- Page 71 HP TouchSmart features with game console TouchSmartLink tile tutorials repairing software Tutorials tile repetitive strain injury (RSI), see Safety & Comfort Guide resolution, monitor restoring your computer configuration connecting Rhapsody tuner router installation TV In connector RSS Feeds tile Twitter tile Safety &...
- Page 72 YouTube User Guide (Features may vary by model)