
Related Manuals for Cannon Langdale C50GLB


Summary of Contents for Cannon Langdale C50GLB
- Page 1 Instructions for Installation and Use Langdale C50GLB C50GLK C50GLW C50GLS C50GLX C50LCIK C50LCIW C50GCIK C50GCIW C50LCIS/1 C50LCIK/1 C50GCIK/1 C50GCIW/1 C50LCIW/1 C50GCIS/1 C50GCIX/1...
- Page 2 Correcting Errata Correcting Errata Correcting Errata Operating Instructions: 19508240301; 19506068209; 19507127104; 19506068008; 19508240501 The following information DO NOT apply to the models listed in the instruction booklet: MAIN OVEN: "Each shelf has a safety stop to prevent it from being pulled out too far when attending to food. Shelves are removed from the oven by pulling them out to the stop and then lifting them at the front to withdraw."...
-
Page 3: Table Of Contents
Contents Introduction Installation Electrical connection Burner and Nozzle Specifications Safety Information Features Control Panel Use of hotplates Use of Grill Use of Top Oven Oven cooking charts Using the Main Oven for Other Functions Care and Cleaning Cooking Results Not Satisfactory? Something Wrong With Your Cooker? Technical Characteristics Electronic timer... -
Page 4: Introduction
Introduction Your new appliance is guaranteed* and will give lasting service. This guarantee is only applicable if the appliance has been installed in accordance with the installation instructions detailed in this booklet. To help make best use of your cooking equipment, please read this booklet carefully. The cooker is designed specifically for domestic use and responsibility will not be accepted for use in any other installation. -
Page 5: Installation
Installation The appliance must only be installed by a competent person. In the UK, CORGI registered installers undertake to work to safe and satisfactory standards. Before moving your cooker check that it is cool, and switch off at the cooker control unit. Movement of your cooker is most easily achieved by lifting the front as follows: Open the grill door sufficiently to allow a comfortable grip on the underside front edge of the oven roof, avoiding any grill elements. - Page 6 Gas connection The cooker should be connected to the gas suppl b a corgi registered installer. uring installation of this product it is essential to fit an approved gas tap to isolate the suppl from the appliance for the convenience of an subse uent removal or servicing.
- Page 7 inimum regulation of the hob burners turn the tap to minimum remove the knob and ad ust the regulation scre hich is positioned in or ne t to the tap pin until the flame is small but stead . N.B.: in the case of li uid gas the regulation scre must be scre ed in to the bottom. check that the flame does not turn off hen ou turn the tap uickl from high to lo .
- Page 8 check that the burner does not turn off when you turn the knob from Max to Min and and hen ou open and close the oven door uickl . Adapting the gas grill to different types of gas eplacing the no le of the grill burner remove the scre and then slide out the grill burner V see Fig.
-
Page 9: Electrical Connection
Electrical connection o er suppl voltage and fre uenc 0 a.c. 50 Note: the suppl cable must be positioned so that it never reaches at an point a temperature 50 C higher than the room temperature. The cable must be routed a a from the rear vents. Should ou re uire it ou ma use a longer cable ho ever ou must ensure that the cable supplied ith the appliance is replaced b one of the same specifications in accordance ith current standards and legislation. -
Page 10: Burner And Nozzle Specifications
Burner and Nozzle Specifications Table 1 Liquid Gas Natural Gas At 5 C and 0 mbar dr gas ropane .C.S. 50 Butane .C.S. atural .C.S. C50GLB C50GLK C50GLW C50GLS C50GLX C50LCIK C50LCIW C50GCIK C50GCIW C50LCIS/1 C50LCIK/1 C50GCIK/1 C50GCIW/1 C50LCIW/1 C50GCIS/1 C50GCIX/1... -
Page 11: Safety Information
Safety Information When used properly your appliance is completely safe but as with any electrical product there are certain precautions that must be observed. PLEASE READ THE PRECAUTIONS BELOW BEFORE USING YOUR APPLIANCE. Always Remove all packing from inside the oven and grill compartments before switching on for the first time. Understand the controls prior to using the appliance. - Page 12 Safety Information Never Never line the interior of the oven with foil as this may cause the appliance to overheat. Never leave children unsupervised where a cooking appliance is installed as all surfaces will be hot during and after its use. Do not allow children or persons who are not familiar with the appliance to use it, without supervision.
-
Page 13: Features
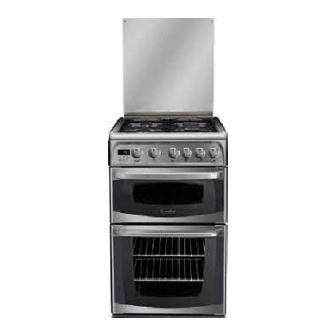
Features GLASS COVER HOB VENTILATION SLOTS 1900W 1900W 2600W 1000W CONTROL PANEL GRILL/MEAT PAN WITH REMOVABLE HANDLE AND WIRE FOOD SUPPORT MODEL & SERIAL NUMBER GRILL GRILL DOOR MAIN OVEN REMOVABLE W I R E W O R K INNER GLASS SHELF DOOR SUPPORTS... -
Page 14: Control Panel
Control Panel ELECTRONIC RIGHT RIGHT MAIN GRILL LEFT LEFT TIMER FRONT REAR REAR FRONT OVEN BURNER BURNER BURNER BURNER Electronic To light a specific burner push the corresponding knob all the way in and turn it counter-clockwise to Ignition maximum keeping it pressed down until the burner lights. for the Gas Hob* Important: Should the burner flames accidentally go out, turn off the control knob and wait at least 1 minute before trying to relight. -
Page 15: Use Of Hotplates
Use of Hotplates Practical Advice on Using the Burners To use the burners as efficientl as possible some basic guidelines should be follo ed • Use cook are that is the right si e for each burner see table in order to prevent the flame from spreading be ond the bottom of the cook are. -
Page 16: Use Of Grill
Use of Grill GRILLING MUST BE DONE WITH THE GRILL DOOR OPEN. CONTROL KNOBS MAY BECOME HOT DURING GRILLING. CAUTION: ACCESSIBLE PARTS WILL BECOME HOT WHEN THE GRILL IS USED - CHILDREN SHOULD BE KEPT AWAY. To operate the grill proceed as follows: Open the grill door and remove the grill pan. -
Page 17: Use Of Top Oven
Use of Main Oven The oven has different heat zones - the thermostat settings refer to the temperature on the middle shelf; above this shelf it is hotter and below it is cooler. Two shelves enable full use of the temperatures inside the oven. The grill pan without the handle can be used in the oven. -
Page 18: Oven Cooking Charts
Oven Cooking Chart The following times and setting are for guidance only. You may wish to alter the setting to give a result more to your satisfaction. When a different setting to that shown below is given in a recipe, the recipe instructions should be followed. -
Page 19: Using The Main Oven For Other Functions
Using the Main Oven for Other Functions ‘SLOWCOOK’ SLOW Setting This is used for slow cooking, keeping food warm and warming plates for short periods. Extra care should be taken when warming bone china, as it may be damaged in a hot oven. DO NOT place food or plates directly on the oven floor as this could damage both the oven lining and the plates which are being warmed. -
Page 20: Care And Cleaning
Care and Cleaning Grill Remove the grill pan and the wire grid food support, it is best to wash these items immediately after use to prevent stains from being burnt on when used again. Wipe out the Grill compartment, use a fine steel wool soap pad to remove stubborn stains from the grill runners and the floor of the compartment. -
Page 21: Cooking Results Not Satisfactory
Cooking Results Not Satisfactory? Problem Check Grilling Oven Baking... -
Page 22: Something Wrong With Your Cooker
Something Wrong with your Cooker? Before contacting your nearest Service Centre/Installer, check the problem guide below; there may be nothing wrong with your cooker. PROBLEM CHECK Burner will not light: If all burners fail to ignite: Check that sparks appear at the burners; a clicking noise should be heard. -
Page 23: Technical Characteristics
Technical Characteristics Oven imensions olume itres Voltage and Frequency Burners: Adaptable for use ith all the t pes of gas indicated on the data plate. This appliance conforms with the following European Economic Community directives: 5 EC of oltage and subse uent modifications 0 EC of 5 lectromagnetic Compatibilit and subse uent modifications EEC of... -
Page 24: Electronic Timer
Electronic timer The electronic timer displays the time and the timer function with countdown. To set Note: This may be set while the oven is switched off or while it is switched on. the clock 1. Press the button several times until the icon and the first two numerical digits on the display start to flash. - Page 28 OR NON-DOMESTIC PREMISES. 5 Year Parts Guarantee Cannon also offers you a FREE 5 year parts guarantee. This additional guarantee is conditional on you registering your appliance with us and the parts being fitted by one of our authorised engineers. There will be a charge for our engineer's time. To activate the extra parts warranty on...
-
Page 29: After Sales Service
After Sales Service o one is better placed to care for your Cannon appliance during the course of its working life than us - the manufacturer. Essential Contact Information Cannon Service We are the largest service team in the country offering you access to 400 skilled telephone advisors and 1000 fully qualified engineers on call to ensure you receive fast, reliable, local service.