
Related Manuals for Motorola ASTRO W3


Summary of Contents for Motorola ASTRO W3
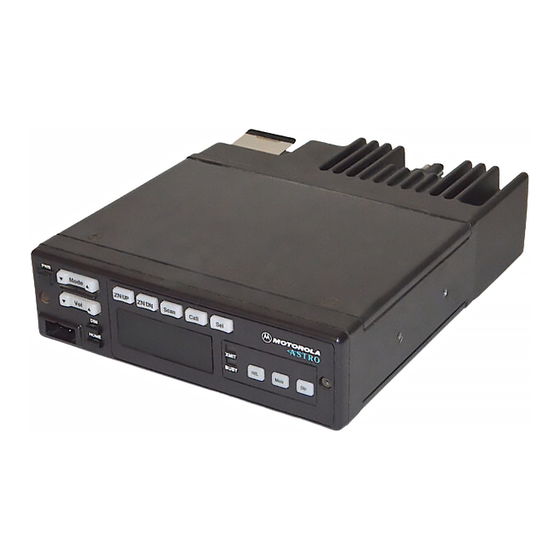
- Page 1 ® ASTRO ® Digital Spectra and Digital Spectra Plus Mobile Radios W3 / W4 / W5 / W7/ W9 Control Head Models Service Manual...
- Page 3 ® ® ASTRO Digital Spectra Title Page and Digital Spectra Plus Mobile Radios W3/W4/W5/W7/W9 Control Head Models Service Manual Motorola, Inc. 8000 West Sunrise Boulevard 6881096C77-O Fort Lauderdale, Florida 33322...
-
Page 4: Foreword
No duplication or distribution of this document or any portion thereof shall take place without the express written permission of Motorola. No part of this manual may be reproduced, distributed, or transmitted in any form or by any means, electronic or mechanical, for any purpose without the express written permission of Motorola. -
Page 5: Table Of Contents
Disclaimer..............................ii Trademarks ..............................ii Commercial Warranty ...................xi Limited Warranty ............................xi MOTOROLA COMMUNICATION PRODUCTS ................xi I. What This Warranty Covers And For How Long ..............xi II. General Provisions .........................xi III. State Law Rights ........................xii IV. How To Get Warranty Service ..................... xii V. - Page 6 Table of Contents 3.1.5 On-/Off-Hook Control ......................3-3 3.1.6 Backlight Circuit ........................ 3-3 3.1.7 Power Supply........................3-3 3.1.8 Status LEDs ........................3-3 3.1.9 Jumper Selection ......................3-3 3.1.10 Power On/Off ........................3-4 3.1.11 Miscellaneous Functions....................3-4 W4, W5, and W7 Control Heads....................3-4 3.2.1 Power Switch/Ignition......................
- Page 7 Chapter 8 Schematics, Overlays, and Parts Lists ......8-1 List of Schematics, Component Location Diagrams, and Parts Lists ..........8-1 Appendix A Replacement Parts Ordering..........A-1 Basic Ordering Information ......................A-1 Motorola Online ..........................A-1 Mail Orders ............................A-1 Telephone Orders..........................A-2 6881096C77-O September 26, 2003...
- Page 8 Table of Contents Fax Orders .............................A-2 Parts Identification .........................A-2 Product Customer Service ......................A-2 Index..................... Index-1 September 26, 2003 6881096C77-O...
- Page 9 List of Figures List of Figures Figure 1-1. Typical W3 Hand-Held Control Head ..................1-3 Figure 1-2. Typical W4 Rotary Control Head................... 1-4 Figure 1-3. Typical W5 Pushbutton Control Head ................... 1-4 Figure 1-4. Typical W7 Pushbutton Control Head ................... 1-5 Figure 1-5.
- Page 10 Table 3-7. VIP Output Connections ..................... 3-14 Table 3-8. VIP Input Connections ......................3-14 Table 4-1. Recommended Motorola Test Equipment and Service Aids ..........4-1 Table 5-1. Required Tools and Supplies ....................5-1 Table 7-1. Exploded Views........................7-1 Table 7-2.
- Page 11 List of Tables Related Publications ASTRO Digital Spectra and Digital Spectra Plus Model W3 User’s Guide ........6881090C61 ASTRO Digital Spectra and Digital Spectra Plus Models W4, W5, W7, and W9 User’s Guide ..6881090C62 ASTRO Digital Spectra Hand-Held Control Head User’s Guide (Model W3) ......6881073C25 ASTRO Digital Spectra (Model W4, W5, W7, and W9) User’s Guide..........6881074C80 ASTRO Digital Spectra and Digital Spectra Plus Mobile Radios Detailed Service Manual ..6881076C25 ASTRO Digital Spectra Mobile Radios Dual Control Head Radio System Service Manual..6881091C78...
- Page 12 List of Tables Notes September 26, 2003 6881096C77-O...
-
Page 13: Commercial Warranty
Product Accessories One (1) Year Motorola, at its option, will at no charge either repair the Product (with new or reconditioned parts), replace it (with a new or reconditioned Product), or refund the purchase price of the Product during the warranty period provided it is returned in accordance with the terms of this warranty. Replaced parts or boards are warranted for the balance of the original applicable warranty period. -
Page 14: State Law Rights
Warranty service will be provided by Motorola through one of its authorized warranty service locations. If you first contact the company which sold you the Product, it can facilitate your obtaining warranty service. You can also call Motorola at 1-888-567-7347 US/Canada. -
Page 15: Patent And Software Provisions
A. that MOTOROLA will be notified promptly in writing by such purchaser of any notice of such claim; B. that MOTOROLA will have sole control of the defense of such suit and all negotiations for its settlement or compromise; and C. - Page 16 Commercial Warranty Notes September 26, 2003 6881096C77-O...
-
Page 17: Chapter 1 Introduction
Chapter 1 Introduction ASTRO Digital Spectra and Digital Spectra Plus control heads are available in five radio models: W3, W4, W5, W7, and W9. This chapter describes the control heads used with these radios. Notations Used in This Manual Throughout the text in this publication, you will notice the use of note, caution, warning, and danger notations. -
Page 18: Control Head Features
Introduction: Control Head Features Control Head Features The table below outlines the basic features of the five control heads covered in this manual. Table 1-1. ASTRO Digital Spectra/Spectra Plus Basic Features Feature Display 2 line/ 1 line/ 1 line/ 1 line/ 1 line/ 14 characters 8 characters... -
Page 19: W3 Controls
Introduction: Control Heads On/Off Orange Programmable Programmable Button Button Button (T1) (T2) (T3) Indicator Display Push-To-Talk Button (PTT) Switch Side Button 1 (S1) H O M E Side Button 2 (S2) Side Button 3 (S3) Volume V O L M O D E Mode Control Control A B C... -
Page 20: W4, W5, W7, And W9 Control Heads
Introduction: Control Heads 1.3.2 W4, W5, W7, and W9 Control Heads PAGE Page SECURE Emer EMERGENCY SCAN SELECT MONITOR PHONE CALL DIRECT HOME Phon Scan Call Home HORN/ Mode Volume LIGHTS XMIT BUSY PRIORITY/ MODE POWER ON/OFF/ DIRECT KNOB VOLUME KNOB NON-PRIORITY INDICATORS INDICATOR... -
Page 21: Figure 1-4. Typical W7 Pushbutton Control Head
Introduction: Control Heads EMERGENCY Emer SECURE 2Pge POWER PHONE CALL PAGE SITE ON/OFF MODE SCAN SELECT LOCK Mode Phon Scan Call REPROGRAM MESSAGE XMIT HORN/LIGHTS BUSY DIRECT HOME DIRECT HOME RECALL DELETE INDICATOR VOLUME PRIORITY/ MONITOR NON-PRIORITY STATUS INDICATORS Figure 1-4. Typical W7 Pushbutton Control Head FUNCTION PRIORITY DIMMER... -
Page 22: W4, W5, W7, And W9 Controls
Introduction: Control Heads 1.3.2.1 W4, W5, W7, and W9 Controls Power Switch (PWR): Turns the radio and its accessories on or off. The Power switch is part of the rotary volume knob on the W4 model, a push-type switch on the W5 and W7 models, and a slide switch on the right-hand bottom surface of the W9 model. -
Page 23: Table 1-2. 12-Button Keypad (W7 And W9)
Introduction: Control Heads Table 1-2. 12-Button Keypad (W7 and W9) Description #1 key Forces the radio to scan for a new site when the automatic multiple-site select (AMSS) feature for wide-area coverage is in use. Site (STE) #2 Key Initiates a Call Alert page or enters Call ID list programming. Page (2 or 2Pge) #3 key Locks the radio onto the current site when the AMSS feature is in use. - Page 24 Introduction: Control Heads Notes September 26, 2003 6881096C77-O...
-
Page 25: Chapter 2 Basic Maintenance
Chapter 2 Basic Maintenance This chapter describes inspection, cleaning, and handling precautions for the control heads. Each of these topics provides information vital to the successful operation and maintenance of your radio. Inspection Check that the external surfaces of the control head are clean, and that all external controls and switches are functional. -
Page 26: Handling Precautions
• Disconnect all power from the unit before ESD-sensitive components are removed or inserted unless otherwise noted. • Use a static-safeguarded workstation through the use of an anti-static kit (Motorola part number 01-80386A82). This kit includes a wrist strap, two ground cords, a static-control table mat and a static-control floor mat. -
Page 27: Chapter 3 Theory Of Operation
Chapter 3 Theory of Operation This chapter describes the operational theory of the control heads for the W3, W4, W5, W7, and W9 radio models. It includes vehicular interface port (VIP) information. W3 Control Head The W3 Hand-Held Control Head (HHCH) contains the U3 microcomputer, which runs on a 4 MHz clock and performs the following basic functions: •... -
Page 28: Keypad Side Keys And Top Keys
Theory of Operation: W3 Control Head Operation of the circuit is complex; a brief description is detailed below: • Display data exits U3-5/12 as eight bits of parallel data. This data addresses a character look-up table in LCD driver/controller U4. This provides the relevant segment output data from U4, as well as LCD drivers U5, U6, and U7, to activate the relevant display dots that form the characters as defined in the look-up table. -
Page 29: On-/Off-Hook Control
Theory of Operation: W3 Control Head Microphone cartridge M1 contains a capacitive transducer coupled to a FET amplifier. Microphone audio is obtained from the output of MI and fed to Q6-b via C28, which provides either 0dB of gain in portable mode or 20dB in mobile mode, during transmit. -
Page 30: Power On/Off
Theory of Operation: W4, W5, and W7 Control Heads 3.1.10 Power On/Off The HHCH has the ability to turn a host radio on or off by activating S6, which then places a momentary logic low on the Mic Hi line. This is detected by appropriate circuitry in the host radio, which then reverses the power on/off state of the radio. -
Page 31: Voltage Regulator
Theory of Operation: W4, W5, and W7 Control Heads Table 3-2. Types of Operations (Continued) Control Head Type How it Operates Ignition Wiring Jumper/Status RECEIVE enabled by control head JU1 IN; JU2 OUT Connect ignition cable to ON/OFF switch; TRANSIT enabled “ignition”... -
Page 32: Reset
Theory of Operation: W4, W5, and W7 Control Heads 3.2.5 Reset On initial power-up, the RESET line to U1-1 is held low by U4 for approximately 120 milliseconds before going high. This resets U1 and starts it operating properly. Then, a pulse train generated at U1-38 sends tickle pulses to the watchdog timer circuitry in U4 and sends a STROBE signal to the VF display driver, U101. -
Page 33: Push-To-Talk (Ptt)
Theory of Operation: W4, W5, and W7 Control Heads 3.2.8 Push-To-Talk (PTT) The PTT line from the microphone keys the transmitter. This line (U4-37) is normally biased at 5 volts, but goes to DIG GND when the microphone PTT button is pressed. This causes the PTT line (U1-21) to go high. -
Page 34: Vacuum Fluorescent Display Driver Ic
Theory of Operation: W9 Control Head U1-6 controls the entire voltage converter. During startup, U1-6 pulls to ground, biasing U3-2 to about 1.85 volts via R51 and R52. U3-1 and R61 then begin to switch Q50 on and off at a 210 kHz rate. -
Page 35: W9 Controls And Indicators
Theory of Operation: W9 Control Head • Volume level • Status codes • Message codes • Telephone numbers • Identification numbers • Alarm displays • Option status 3.3.2 W9 Controls and Indicators The W9 control head 12-button keypad contains traditional alphanumeric keys. These keys double as function keys for options. -
Page 36: Bus Transceiver
3-10 Theory of Operation: W9 Control Head 3.3.3.3 Bus Transceiver The serial bus transceiver is on SIOIC U4. The timer on SIOIC U4, pins 10, 16, and 17, connects to the external bus. Pins 11, 13, 19, and 20 connect to MPO 2. These pins act as a serial- communication buffer. -
Page 37: Eeprom Write-Protect Circuit
Theory of Operation: W9 Control Head 3-11 3.3.3.8 EEPROM Write-Protect Circuit Transistors Q161, Q162, and associated circuitry guard against inadvertently writing into the EEPROM U5 by inhibiting the Write Enable input. The circuitry guarantees the EEPROM is protected during reset and when shift register U6 is not in the proper programming state. 3.3.4 Display Board The display board contains the main operator interface points of the system, including the vacuum... -
Page 38: Vehicle Interface Port (Vip)
3-12 Theory of Operation: Vehicle Interface Port (VIP) Table 3-6. Standard Jumper Configurations (Continued) Jumper Number Normally JU10 JU11 JU12 JU13 JU16 JU17 JU18 JU19 JU20 JU21 JU22 Vehicle Interface Port (VIP) The vehicle interface port (VIP) allows the control head to control outside circuits in the vehicle and to receive inputs from outside the control head. -
Page 39: Remote-Mount Installations
Connecting both green and orange cables to the battery allows the control head to turn the receiver and transmitter on or off. Connecting both green and orange cables to the ignition switch allows the ignition switch to turn the receiver and transmitter on or off. (Alternator whine and other noise problems may occur. Isolate the green cable with a Motorola relay, part #59-00813674.) MAEPF-27616-O Figure 3-3. -
Page 40: W9 Control Heads
3-14 Theory of Operation: Vehicle Interface Port (VIP) 3.4.2 W9 Control Heads The VIPs allow the W9 control head to operate outside circuits and to receive inputs from outside the control head. There are three VIP outputs that are used for relay control. There are also three VIP inputs that accept inputs from switches. -
Page 41: Chapter 4 Test Equipment And Service Aids
Motorola control heads. The Characteristics column is included so that equivalent equipment can be substituted; however, when no information is provided in this column, the specific Motorola model listed is either a unique item or no substitution is recommended. Table 4-1. Recommended Motorola Test Equipment and Service Aids... - Page 42 Test Equipment and Service Aids: Recommended Test Equipment and Service Aids Notes September 26, 2003 6881096C77-O...
-
Page 43: Chapter 5 Troubleshooting
5-8 . (Refer to the chapter, “Recommended Test Equipment and Service Aids” on page 4-1 for the appropriate Motorola test equipment and service aids part numbers.) Required Tools and Supplies Table 5-1 lists the tools and supplies needed for basic troubleshooting. -
Page 44: Troubleshooting Waveforms
Troubleshooting: Troubleshooting Waveforms Troubleshooting Waveforms This section contains images of waveforms that might be useful in verifying operation of certain parts of the circuitry. These waveforms are for reference only; the actual data depicted will vary depending upon the operating conditions. 5.2.1 ASTRO Digital Spectra Waveforms Waveform W1: Oscillator Out, U4 Pin 42... - Page 45 Troubleshooting: Troubleshooting Waveforms Waveform W3: U3 Output: U3 pin 1 (output to Q50) Waveform W4: Q50 Drain 6881096C77-O September 26, 2003...
- Page 46 Troubleshooting: Troubleshooting Waveforms Waveform W5: Transmit / Receive Data: U4 pins 19 and 20 Waveform W6: Serial Bus lines: U1 pins 17, 16, 10 NOTE: Serial bus data can be seen during power up and button presses. September 26, 2003 6881096C77-O...
-
Page 47: Replacing The Vacuum Fluorescent Display (W4, W5, And W7 Control Heads)
Troubleshooting: Replacing the Vacuum Fluorescent Display (W4, W5, and W7 Control Heads) Replacing the Vacuum Fluorescent Display (W4, W5, and W7 Control Heads) 5.3.1 Removing the Display Figure 5-1 below, Detail A, shows the removal procedure. Cut through the shock pad located opposite the side of the display with the soldered leads. -
Page 48: Replacing The Remote Interconnect Board
Troubleshooting: Replacing the Remote Interconnect Board 7. Before installing a new Interface PC board (P/N 0105950T92), check to ensure that all gaskets are in place. Gasket (P/N 3205197X01) fits the perimeter of the plastic housing on the bottom surface, and is placed against the sealing rim in back housing. Gasket (P/N 3205198X01) fits inside the pin-out area on bottom of plastic housing. -
Page 49: Replacing The Control-Head Board
Troubleshooting: Replacing the Control-Head Board 7. Pull the retaining wire up into position so that the interconnect board can be slid back away from the front of the radio, and then up and out from the radio chassis. 8. Remove the rubber gasket from the front of the interconnect board by pulling it up and over the D-connectors. -
Page 50: W4, W5, And W7 Control Heads
Troubleshooting: Replacing the Control-Head Board 11. Remove the circuit-board assembly from the housing. 12. Remove the keypad [6] from the housing assembly [7]. 5.6.2 W4, W5, and W7 Control Heads NOTE: For the following procedure, refer to Chapter 7: Exploded Views and Parts Lists , beginning page 7-1 , for the exploded view and associated parts list applicable to the model being... - Page 51 Troubleshooting: Replacing the Control-Head Board 7. Carefully separate the PC board, internal spacer, and elastomer keypad assembly from the front panel. - On rotary control-head models, care must be taken not to damage the flex circuit when separating the printed circuit board from the front housing. Do not disturb the buttons in the front panel.
-
Page 52: W9 Control Heads
5-10 Troubleshooting: Replacing the Control-Head Board 5.6.3 W9 Control Heads NOTE: Before disassembling the W9 control head, note the location of the labeled buttons. NOTE: Refer to Figure 7-4, “W9 Pushbutton Control Head Exploded View,” on page 7-5 Table 7-5, “W9 Pushbutton Control Head Parts List,” on page 7-5 for the callout numbers in this section. -
Page 53: Final Reassembly-W3 Control Head
C a u t i o n parts, use extreme caution when heating. Never reuse a chip or SOT part; always replace with the correct Motorola part. 6. Install the new PC board with the elastomer keypad, the ON/OFF switch gasket, the “D”... -
Page 54: Troubleshooting Charts
5-12 Troubleshooting: Troubleshooting Charts 4. Install the circuit board [5] into the housing assembly [7] as follows: A. Hold the housing assembly so that its key openings face downward and its top faces away from you. B. Pivot the circuit board’s display down under the retention features in the housing and rotate the board downward, ensuring that the board is positioned between the snap features. - Page 75 A+/IGN GND2 +5V_REG GND1...
- Page 76 BUS3(32:1) VDISP U101 VCC1 UCQ5818EPF...
- Page 77 CR131 R200 CR132 R176 VR50 R123 CR51 CR133 VR10 JU18 R177 VR26 VR23 R112 CR55 R114 R116 JU13 R176 CR134 R174 JU15 CR135 R111 R113 R115 CR136 VR25 CR71 VR30 CR73 Q131 CR137 JU16 CR138 CR139 CR140 JU20 VR32 VR31 VR33...
- Page 84 A+/IGN GND2 +5V_REG GND1...
- Page 85 BUS3(32:1) VDISP VCC1...
- Page 86 CR54 CR52 CR133 CR132 CR134 CR131 VR11 CR90 R111 R182 CR135 R113 JU13 CR55 VR50 R200 R115 JU12 CR136 R174 R116 CR137 C39R R131 JU17 JU15 CR72 CR71 CR138 R120 R121 R124 R122 R101 R123 CR139 CR140...
- Page 87 JU1* JU7* VR11 CR90 R176 R111 JU13* R113 R182 R115 JU12* Q112 R174 JU6* JU15* R175 R124 R122 R121 R120 JU17* R98* Q131 R131 VR24 R178 C44* C14* C15* C19* C18* C16*...
- Page 94 DATA(7:0) ADDRESS(8:12) PD2_MISO TX_DATA RX_DATA 27 DEK_DATA-OUT 28 BUSY_OUT* LATCH STROBE PB7_A15 31 DEK_CLOCK PB6_A14 BUSY_IN* PB5_A13 33 VIP_IN_3 PB4_A12 34 PTT PB3_A11 PB2_A10 STRA_AS PB1_A9 PB0_A8 EXTAL PC7_A7_D7 XTAL PC6_A6_D6 PC5_A5_D5 14 26 VDD GROUND DATA VF-CONTROL LATCH CLOCK STROBE FIL_2 FIL_1...
- Page 95 +43V...
- Page 96 C274 C275 C271 RT133 CR90 VR50 R200 C206 C207 C165 R173...
- Page 97 R159 R158 R166 C141 R148 R115 R149 R165 R164 C171 R171 R150 R113 R170 R140 R111 R161 R116 R152 R114 R142 R112 R154 R144 R156 R183 R146 R138 R155 R145 R182 R181 R157 R147 R151 R141 JU19 JU18 JU17 JU23 JU20 R139 R143...
- Page 101 MIC SECTION VIP SECTION RADIO SECTION...
- Page 102 MIC SECTION VIP SECTION RADIO SECTION...
- Page 103 SECTION RADIO SECTION SECTION...
- Page 104 JU1008 JU1007 JU1001 JU1004 JU1005 JU1002 JU1003 JU1006...
- Page 114 C792...
- Page 119 C1305 R1305 R1303 C1306 C1302 C1301...
-
Page 121: A.1 Basic Ordering Information
Crystal orders should specify the crystal type number, crystal and carrier frequency, and the model number in which the part is used. The ASTRO Digital Spectra/Digital Spectra Plus Mobile Radios Control Head Manual (Motorola publication part number 6881096C77) includes complete parts lists and parts numbers. -
Page 122: A.4 Telephone Orders
Replacement Parts Ordering: Telephone Orders Telephone Orders Radio Products Services Division* (United States and Canada) 7:00 AM to 7:00 PM (Central Standard Time) Monday through Friday (Chicago, U.S.A.) 1-800-422-4210 1-847-538-8023 (International Orders) U.S. Federal Government Markets Division (USFGMD) 1-800-826-1913 Federal Government Parts - Credit Cards Only 8:30 AM to 5:00 PM (Eastern Standard Time) Fax Orders Radio Products Services Division*... -
Page 123: Figure 5-1. Replacing The Vacuum Fluorescent Display
Index-1 Index Index On/0ff hook control 3-3 operation 3-1 parts list 7-2 power On/Off 3-4 power supply 3-3 replacing the control head 5-7 SB9600 Serial Bus Interface 3-1 cable, P501 extender 6-4 status LEDs 3-3 cautions 1-1 Model W9 charts, troubleshooting 5-12 control board 3-9 cleaning bus transceiver 3-10... -
Page 124: Table 3-7. Vip Output Connections
Index-2 parts list 8-1 test equipment and service aids 4-1 large pushbutton parts 7-7 trademark information ii Microphone 7-6 troubleshooting 5-1 Model W3 7-2 charts 5-12 Model W4 7-3 final reassembly 5-11 Model W5 7-4 replacing the control head 5-7 Model W7 7-4 replacing the remote back housing Model W9 7-5... - Page 126 Motorola, Inc. 8000 West Sunrise Boulevard Ft. Lauderdale, FL 33322 MOTOROLA, the Stylized M Logo, ASTRO, and Spectra are registered in the U.S. Patent and Trademark Office. All other product or service names are the property of their respective owners.