Motorola GM140 Service Information
Gm series professional radio
Hide thumbs
Also See for GM140:
- Service information (34 pages) ,
- Basic service manual (46 pages) ,
- Service information (32 pages)

Related Manuals for Motorola GM140


Summary of Contents for Motorola GM140
- Page 1 Professional Radio GM Series Controlhead Service Information Issue: September 2000...
-
Page 2: Computer Software Copyrights
Accordingly, any copyrighted Motorola computer programs contained in the Motorola products described in this manual may not be copied or reproduced in any manner without the express written permission of Motorola. Furthermore, the purchase of Motorola... -
Page 3: Table Of Contents
2.0 GM160/GM360/GM660 Models ................1-1 3.0 GM380/GM1280 Models..................1-2 Chapter 2 THEORY OF OPERATION 1.0 Introduction ......................2-1 2.0 Controlhead Model for GM140, GM340 and GM640 ...........2-1 2.1 Power Supplies....................2-1 2.2 Power On / Off ....................2-1 2.3 Microprocessor Circuit..................2-1 2.4 SBEP Serial Interface..................2-1 2.5 Keypad Keys....................2-1... - Page 4 CONTROLHEAD PCB/SCHEMATICS/PARTS LISTS 1.0 Allocation of Schematics and Circuit Boards ............4-1 2.0 Controlhead GM140/340/640 - PCB 8486146B07 / Schematics......4-3 2.1 Controlhead PCB 8486146B07 - Parts List ............4-6 3.0 Controlhead GM160/360/660 - PCB 8486155B06 / Schematics ......4-7 3.1 Controlhead PCB 8486155B06 - Parts List ............
-
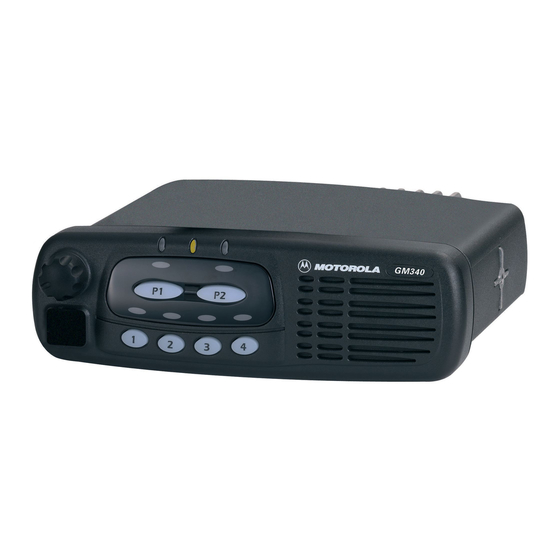
Page 5: Gm140/Gm340/Gm640 Models
14 character Liquid Crystal Display (LCD) for alpha - numerical information e.g. channel number or call address name. To control the LED’s and the LCD, and to communicate with the host radio the control head uses the Motorola 68HC11E9 microprocessor... -
Page 6: Gm380/Gm1280 Models
Liquid Crystal Display (LCD) with 21 pre - defined symbols and a 32*96 dot matrix for graphical or alpha - numerical information e.g. channel number, select code, call address name. To control the LED’s and the LCD, and to communicate with the host radio the control head uses the Motorola 68HC11K4 microprocessor. -
Page 7: Theory Of Operation
µP will switch the radio off. Microprocessor Circuit The controlhead uses the Motorola 68HC11E9 microprocessor (µP) (U0831) to control the LED’s and to communicate with the host radio. RAM and ROM are contained within the microprocessor itself. -
Page 8: Sbep Serial Interface
THEORY OF OPERATION The microprocessor’s RAM is always powered to maintain parameters such as the last operating mode. This is achieved by maintaining 5V at µP pin 25. Under normal conditions, when the radio is off, USW 5V is formed by FLT A+ running to D0822. C0822 allows the battery voltage to be disconnected for a couple of seconds without losing RAM parameters. -
Page 9: Status Led And Back Light Circuit
Controlhead Model for GM140, GM340 and GM640 An additional pair of analogue lines and A/D µP ports (PE 3 – 2) is available to support a keypad microphone, connected to the microphone connector J0811. Any microphone key press is processed the same way as a key press on the controlhead. -
Page 10: Speaker
14 character Liquid Crystal Display (LCD) for alpha - numerical information e.g. channel number or call address name. To control the LED’s and the LCD, and to communicate with the host radio the controlhead uses the Motorola 68HC11E9 microprocessor. Power Supplies The power supply to the controlhead is taken from the host radio’s FLT A+ voltage via connector... -
Page 11: Microprocessor Circuit
Controlhead Model for GM160, GM360 and GM660 Microprocessor Circuit The controlhead uses the Motorola 68HC11E9 microprocessor (µP) (U0831) to control the LED’s and the LCD and to communicate with the host radio. RAM and ROM are contained within the microprocessor itself. -
Page 12: Keypad Keys
THEORY OF OPERATION Keypad Keys The controlhead keypad is a 6-key kepad (Model B) or a 10- key keypad (model C). All keys are configured as 2 analogue lines read by µP pins 13 and 15. The voltage on the analogue lines varies between 0 volts and +5 volts depending on which key has been pressed. -
Page 13: Microphone Connector Signals
Controlhead Model for GM160, GM360 and GM660 includes the RAM start address for the following display data. With input A0 set to logic „1" the µP then writes the display data to the display RAM. When data transfer is complete the µP terminates the chip select, RD and WD activities. -
Page 14: Speaker
- numerical information e.g. channel number, select code, call address name. To control the LED’s and the LCD, and to communicate with the host radio the controlhead uses the Motorola 68HC11K4 microprocessor. Power Supplies The power supply to the controlhead is taken from the host radio’s FLT A+ voltage via connector J0801 pin 3. -
Page 15: Power On / Off
U0861 via line 5 SOURCE and transistor Q0866 and the controlhead’s microprocessor starts execution. Microprocessor Circuit The controlheadcontrolhead uses the Motorola 68HC11K4 microprocessor (uP) (U0871) to control the LED’s and the LCD and to communicate with the host radio. RAM and ROM are contained within the microprocessor itself. -
Page 16: Keypad Keys
2-10 THEORY OF OPERATION controlhead µP can drive the line. The microprocessor sends serial data via pin 79 and D0872 and it reads serial data via pin 78. Whenever the microprocessor detects activity on the BUS+ line, it starts communication. When the host radio needs to communicate to the controlhead µP, it sends data via line BUS+. -
Page 17: Liquid Crystal Display (Lcd)
Controlhead Model for GM380, and GM1280 2-11 output of the op-amp to rise and to reduce the base to emitter voltage of Q0943. This decreases the current of Q0941 until the loop has settled. The back light for the LCD module uses a similar circuitry. The only differences are that µP port PH2 controls the back light brightness and that the LED’s are located on the LCD module which is connected via J0821. -
Page 18: Speaker
2-12 THEORY OF OPERATION informs the µP about the pressed PTT button. The µP will inform the host radio about any status change on the PTT IRDEC line via SBEP bus. When line PTT IRDEC is connected to FLT A+ level, transistor Q0851 is switched on through diode VR0851 and thereby pulls the level on line ON OFF CONTROL to FLT A+ level. -
Page 19: Troubleshooting Charts
Chapter 3 TROUBLESHOOTING CHARTS Controlhead GM140/340/640 Troubleshooting Chart On/Off Radio can not be switched on via ON/OFF Volume Check / Replace R0823 Pin TAB R0822 / VR0822 / = 5V ? D0822 Press and hold On/Off Volume Knob R0823 Pin TAB1... -
Page 20: Microprocessor
TROUBLESHOOTING CHARTS Microprocessor Power Up Alert Tone is OK but volume knob does not operate and no indicator is on EXTAL Check / Replace U0831 Pin 31 R0831 / U0833 / U0831 = 8.00 MHz ? RESET Check / Replace TP0833 C0833 / R0832 / U0831 = HIGH ? - Page 21 Controlhead GM160/360/660 Troubleshooting Flow Chart Controlhead GM160/360/660 Troubleshooting Flow Chart On/Off Radio can not be switched on via ON/OFF Volume Knob Check / Replace R0823 Pin TAB R0822 / VR0822 / = 5V ? D0822 / C0822 Press and hold On/Off Volume Knob R0823 Pin TAB1 Check / Replace...
- Page 22 TROUBLESHOOTING CHARTS Microprocessor Power Up Alert Tone is OK but volume knob does not operate and no indicator is on EXTAL Check / Replace U0831 Pin 31 R0831 / U0833 / U0831 = 8.00 MHz ? RESET Check / Replace TP0833 C0833 / R0832 / = HIGH ?
-
Page 23: Display
Controlhead GM160/360/660 Troubleshooting Flow Chart Display Power Up Alert Tone is OK, volume knob does operate, indicator/backlight is on but nothing on display V5 (against 5V) TP0973 between Check LCD Assembly -6V and -7V ? Activity on Check for shortage Address &... -
Page 24: Backlight
TROUBLESHOOTING CHARTS Backlight Power Up Alert Tone is OK, volume knob does operate, indicator/display is on but no backlight U0831 Pin 58 Check for shortage is toggling ? U0831 Base of Check / Replace Q0934 R0847 / C0843 / R0943 >... -
Page 25: On/Off
Controlhead GM380/1280 Troubleshooting Flow Chart Controlhead GM380/1280 Troubleshooting Flow Chart On/Off Radio can not be switched on via ON/OFF Volume Knob R0854 Check / Replace Pin TAB R0855 / VR0855 / D0855 = 5V? C0856 Press and hold On / Off Volume Knob R0854 Pin TAB1... -
Page 26: Microprocessor
TROUBLESHOOTING CHARTS Microprocessor Power Up Alert Tone is audible on external speaker but volume knob does not operate and no indicators are on TP0876 =5V ? U0871 TP0866 Pin 73 EXTAL = 8 MHz = 0V Check / Replace Check / Replace R0866 / C0866 / R0873 / U0873 / Q0866 / R0863... - Page 27 Controlhead GM380/1280 Troubleshooting Flow Chart Microprocessor Measure with scope while rotating Volume Pot Data Signal Check on J0801 Radio Controller Pin 5 BUS+ Data Signal Check / Replace on TP0877 R0888 / R0889 SCI_RX Data Signal Check / Replace on TP0878 U0871 SCI_TX Check / Replace...
-
Page 28: Display
3-10 TROUBLESHOOTING CHARTS Display Power Up Alert Tone is audible, volume knob does operate, indicator/backlight is on but nothing is seen on the display. TP0973 Voltage Sense Check / Replace between LCD Module 2V and 2.4V Activity on Check for shortage Address &... -
Page 29: Keypad Backlight
Controlhead GM380/1280 Troubleshooting Flow Chart 3-11 Keypad Backlight Power Up Alert Tone is audible, volume knob does operate, display is on but no keypad backlight. Check for shortage U0871 Pin 25 U0871 is toggling ? Check / Replace Base of Q0943 R0945 / C0943 / R0947 >... -
Page 30: Display Backlight
3-12 TROUBLESHOOTING CHARTS Display Backlight Power Up Alert Tone is audible, volume knob does operate, display is on but no display backlight. Check for shortage U0871 Pin 24 U0871 is toggling ? Check / Replace Base of Q0963 R0965 / C0963 / R0967 >... -
Page 31: Allocation Of Schematics And Circuit Boards
Chapter 4 CONTROLHEAD PCB / SCHEMATICS / PARTS LISTS Allocation of Schematics and Circuit Boards Table 4-1 Controlhead Diagrams and Parts Lists PCB : Controlhead GM140/340/640 Page 4-3 8486146B07 Main Board Top Side Page 4-3 8486146B07 Main Board Bottom Side... - Page 32 controlhead PCB / Schematics / Parts lists...