Table of Contents
Advertisement
www.touchboards.com 205 Westwood Ave.Long Branch, NJ 07740 1-866-942-6273 Sales@touchboards.com
Liquid Crystal Projector
CP-S225/CP-X275
(CP-S225WA/CP-X275WA)
USER'S MANUAL
Vol.1 Basic
Please read this user's manual thoroughly to ensure correct usage through understanding.
BEDIENUNGSANLEITUNG
Teil 1 Grundlagen
Bitte lessen Sie diese Benutzerhandbuch zugunsten der korrekten Bedienung aufmerksam.
MANUEL D'UTILISATION
Vol.1 Fondements
Nous vous recommandons de lire attentivement ce manuel pour bien assimiler le fonctionnement de l'appareil.
MANUALE D'ISTRUZIONI
Vol.1 Informazioni di base
Vi preghiamo voler leggere attentamente il manuale d'istruzioni in modo tale da poter comprendere quanto riportato
ai fini di un corretto utilizzo del proiettore.
MANUAL DE USUARIO
Vol.1 Básico
Lea cuidadosamente este manual del usuario para poder utilizar corretamente el producto.
GEBRUIKSAANWIJZING
Vol.1 Basis
Lees voor het qebruik alstublieft deze handleiding aandachtig door, om volledig profijt te hebben van de
uitgebreide mogelijkheden.
BRUKERHÅNDBOK
Vol.1 Grunnleggende
Vennligst les denne bruksanvisningen grundig for å være garantert driftssikker bruk.
NSTRUÇÕES DO PROPRIETÁRIO
Vol.1 Básico
Para assegurar o uso correto do equipamento, por favor leia atentamente este manual do utilizador.
Advertisement
Table of Contents

Related Manuals for Hitachi CP-S225


Summary of Contents for Hitachi CP-S225
- Page 1 205 Westwood Ave.Long Branch, NJ 07740 1-866-942-6273 Sales@touchboards.com Liquid Crystal Projector CP-S225/CP-X275 (CP-S225WA/CP-X275WA) USER'S MANUAL Vol.1 Basic Please read this user's manual thoroughly to ensure correct usage through understanding. BEDIENUNGSANLEITUNG Teil 1 Grundlagen Bitte lessen Sie diese Benutzerhandbuch zugunsten der korrekten Bedienung aufmerksam.
-
Page 2: Table Of Contents
LCD Projector CP-S225/CP-X275 USER'S MANUAL USER'S MANUAL Thank you for purchasing this projector. WARNING • Please read the accompanying manual “SAFETY INSTRUCTIONS” and this “USER'S MANUAL” thoroughly to ensure correct usage through understanding. After reading, store this instruction manual in a safe place for future reference. -
Page 3: Projector Features
(Vol.1/Vol.2) Safety Instructions Soft carrying case This liquid crystal projector is used to project various computer signals as well as NTSC / PAL / SECAM video signals onto a screen. Little space is required for installation and large images can easily be realized. - Page 4 • NEVER ATTEMPT TO DEFEAT THE GROUND CONNECTION OF THE THREE- PRONGED PLUG! • Make sure that you firmly connect the power cord to the projector and wall outlet. Connect your devices to the projector Connect your computer, VCR and/or other devices you will be using to the projector.
-
Page 5: Part Names
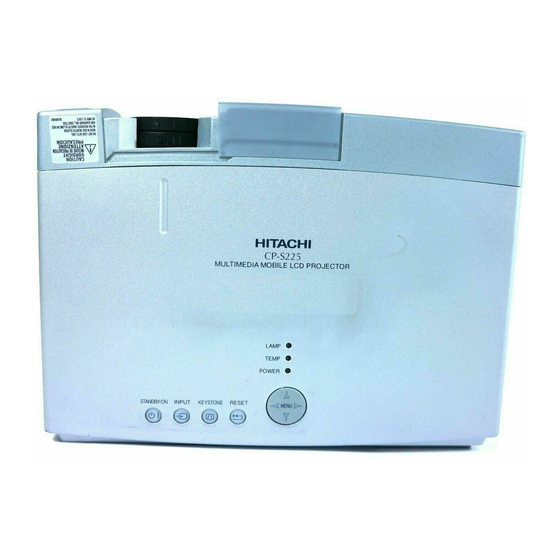
(Intake) Vol.2 RESET button KEYSTONE button INPUT button STANDBY/ON button Foot Adjuster button Air filter Speaker Rear Foot Adjuster THE PROJECTOR Indicates the corresponding reference page Zoom ring Focus ring Remote sensor Lens Slide Lens Door Foot Adjuster LAMP indicator... -
Page 6: The Remote Control
THE TERMINAL PANEL Remote sensor COMPONENT Y port port port S-VIDEO port THE REMOTE CONTROL RGB button VIDEO button ASPECT button MAGNIFY buttons FREEZE button POSITION button Cursor buttons ESC button Vol.2 TECHNICAL STANDBY/ON VIDEO SEARCH ASPECT AUTO BLANK MAGNIFY VOLUME MUTE FREEZE... -
Page 7: Setting Up The Projector
CAUTION • Install the projector in a suitable environment according to instructions of the accompanying manual “SAFETY INSTRUCTIONS” and this manual. • If you press the elevator buttons without holding the projector, the projector might crash down, overturn, smash your fingers and possibly result in malfunction. To prevent damaging the projector and injuring yourself, ALWAYS HOLD THE PROJECTOR whenever using the elevator buttons to adjust the elevator feet. -
Page 8: Adjusting The Screen Size And Projection Distance
The values shown in the table are calculated for a full size screen (CP-S225: 800x600 pixels/CP-X275: 1024x768 pixels). a:Distance from the projector to the screen (±10%) b:Distance from the lens center to the bottom of the screen (±10%) -
Page 9: Connecting Your Devices
• Whenever attempting to connect other devices to the projector, please thoroughly read the manual of each device to be connected. • TURN OFF ALL DEVICES prior to connecting them to the projector. Attempting to connect a live device to the projector may generate extremely loud noises or other abnormalities that may result in malfunction and/or damage to the device and/or projector. -
Page 10: Ports And Cables
Ports and Cables Refer to the table below to find out which projector port and cable to use for connecting a given device. Use this table for determining which cables to prepare. Function RGB input RGB IN AUDIO input AUDIO IN... -
Page 11: Connecting To A Computer
CONNECTING YOUR DEVICES (continued) Connecting to a Computer ATTENTION Whenever attempting to connect a laptop computer to the projector, be sure to activate the laptop's RGB external image output (set the laptop to CRT display or to simultaneous LCD and CRT display). For details on how this is done, please refer to the instruction manual of the corresponding laptop computer. -
Page 12: Connecting To A Dvd Player
Connecting to a DVD Player If using a component video connection DVD player Connecting to a VCR S-VIDEO cable If using a S-video connection If using an audio/video connection A A A S-VIDEO cable If using a S-video connection... -
Page 13: Using The Remote Control
Insert the batteries Align and insert the two AA batteries (that came with the projector) according to their plus and minus terminals (as indicated in the remote control). Close the battery cover Replace the battery cover in the direction of the arrow and... -
Page 14: Operating The Remote Control
• When strong light, such as direct sunlight or light from an extremely close range (such as from an inverter fluorescent lamp), hits the projector's remote sensor, the remote control may cease to function. Adjust the direction of the projector to keep light from directly hitting the projector's remote sensor. -
Page 15: Turning On The Power
TURNING ON THE POWER Precautions Connect all devices to be used to the projector prior to turning on the power. WARNING When the power is ON, a strong light is emitted. Do not look into the lens. STANDBY/ON VIDEO SEARCH... -
Page 16: Selecting An Input Signal
Use the focus ring to focus the picture Using the projector's control panel Press the INPUT button As illustrated below, each time you press the INPUT button, the projector switches between its input signal ports. Select the signal you wish to project. INPUT... -
Page 17: Turning Off The Power
(control panel or remote control) Press the STANDBY/ON button again while the "Power off?" message is visible. The projector lamp goes off and starts cooling down. The POWER indicator blinks orange while the lamp cools down. (Pressing the STANDBY/ON button while the POWER indicator is blinking orange has no effect.) -
Page 18: Adjusting The Volume
ADJUSTING THE VOLUME STANDBY/ON VIDEO SEARCH ASPECT AUTO BLANK VOLUME MAGNIFY MUTE FREEZE KEYSTONE POSITION MENU ENTER RESET TEMPORARILY MUTING THE SOUND STANDBY/ON VIDEO SEARCH ASPECT AUTO BLANK MAGNIFY VOLUME MUTE FREEZE KEYSTONE POSITION MENU ENTER RESET Press the VOLUME button As illustrated on the right, a dialog will appear on the screen to aid you in adjusting the volume. -
Page 19: Adjusting The Position
ADJUSTING THE POSITION STANDBY/ON VIDEO SEARCH ASPECT AUTO BLANK MAGNIFY VOLUME MUTE FREEZE KEYSTONE POSITION MENU ENTER RESET Press the POSITION button As illustrated on the right, a dialog will appear on the screen to aid you in adjusting the position. POSITION Use the the position... -
Page 20: Using The Automatic Adjustment Feature
USING THE AUTOMATIC ADJUSTMENT FEATURE STANDBY/ON VIDEO SEARCH ASPECT AUTO BLANK MAGNIFY VOLUME MUTE FREEZE KEYSTONE POSITION MENU ENTER RESET NOTE The automatic adjustment operation requires approximately 10 seconds. Also, please note that it may not function correctly with some input signals. Press the AUTO button AUTO Automatic Adjustment for RGB Input... -
Page 21: Correcting Keystone Distortions
CORRECTING KEYSTONE DISTORTIONS STANDBY/ON VIDEO SEARCH ASPECT AUTO BLANK MAGNIFY VOLUME MUTE FREEZE KEYSTONE POSITION MENU ENTER RESET NOTE • This function may not be work well with some types of input signals. • The adjustable range for correcting keystone distortions will vary with the type of input signal. -
Page 22: Using The Magnify Feature
BLANK ON/OFF or MENU ON/OFF feature is used, or, if there is a change in the input signal's state. • If the projector continues projecting the same image for a long time (i.e. you forget to exit FREEZE mode), the image might possibly remain as an afterimage. Do not leave the projector in FREEZE mode for too long. -
Page 23: Signal Searching
If it detects an input signal, the search will cease and the projector will project the detected signal. If the projector is unable to find an input signal at any of its ports, it will return to the state it was in prior to the search. -
Page 24: Using The Menu Functions
SHARPNESS. Press the MENU button The menu display appears on the screen. The projector has the following menus: MAIN, PICTURE-1, PICTURE-2, INPUT, SCREEN, and OPTION. Select a menu using the current settings of the items that can be manipulated via the selected menu appear. -
Page 25: The Lamp
• If the lamp should break (it will make a loud bang when it does), ventilate the room well, and make sure not to breathe the gas that comes out of the projector vents, or get it in your eyes or mouth. -
Page 26: Replacing The Lamp
Replacing the lamp All projector lamps will wear out eventually. If used for long periods of time, the image could become darkened, and the color contrast could be impacted as well. We recommend that you replace your lamps early. If the LAMP indicator turns red, or a message prompts you to replace the lamp when you power up the projector, the lamp needs to be replaced. -
Page 27: The Air Filter
Turn on the projector, and use the menu to reset the filter timer • To reset the air filter timer, from the OPTION menu, select FILTER TIME. (See “OPTION menu”... -
Page 28: Replacing The Air Filter
• Make sure to turn off the power and unplug the power cord before caring for the unit. Please carefully read "Safety Instructions", in order to care for your projector correctly. • Do not use with air filter cover removed. -
Page 29: Other Care
Caring for the inside of the projector : In order to ensure the safe use of your projector, please have it cleaned and inspected by your local dealer about once every 2 years. Never try to care for the inside of the unit yourself. -
Page 30: Regulatory Notices
FCC (Federal Communication Commission) equipment provided that the following conditions are met. The cables may have to be used with the core set to the projector side. Use the cables which are included with the projector or specified. CAUTION: Changes or modifications not expressly approved by the party responsible for compliance could void the user’s authority to operate the... - Page 31 LCD Projector CP-S225/CP-X275 USER'S MANUAL USER'S MANUAL Thank you for purchasing this projector. WARNING • Please read the accompanying manual “SAFETY INSTRUCTIONS” and this “USER'S MANUAL” thoroughly to ensure correct usage through understanding. After reading, store this instruction manual in a safe place for future reference.
-
Page 32: Multifunctional Settings
MULTIFUNCTIONAL SETTINGS This device has 6 separate menus: MAIN, PICTURE-1, PICTURE-2, INPUT, SCREEN, OPTION. Each of these menus is operated using the same methods. The basic operations of these menus are as follows. Menu screen display : Press the "MENU" button. Menu selection : Choose a menu name using the Item selection... - Page 33 PICTURE-1 Menu With the PICTURE-1 menu, the five items shown in the Table below can be performed. Perform each operation in accordance with the instructions in the Table. PICTURE-1 Menu Item COLOR BAL R Adjust Red Color Balance: Dark COLOR BAL B Adjust Blue Color Balance: Dark SHARPNESS Adjust Sharpness (for VIDEO/S-VIDEO): Clear...
-
Page 34: Input Menu
MULTIFUNCTIONAL SETTINGS (continued) INPUT Menu With the INPUT menu, the four items shown in the Table below can be performed. With inputting of RGB IN signal, the horizontal and vertical frequencies of the signal will be displayed on the initial screen of the INPUT menu. -
Page 35: Screen Menu
SCREEN Menu With the SCREEN menu, the two items shown in the Table below can be performed. Please perform each operation in accordance with the instructions in the Table. SCREEN Menu Item Selection of BLANK Screen: The BLANK Screen may be voluntarily selected. The BLANK Screen is displayed when the screen has been erased (i.e., made to vanish) by BLANK manipulating the BLANK button (please refer to the “Temporarily Blanking the... -
Page 36: Option Menu
Refer to LAMP TIME: When set, this function displays the total time the projector lamp has been used since new. Reset LAMP TIME [Use this function only when the lamp has been replaced!]: Depress the RESET button for at least 3 seconds while lamp time is being displayed. -
Page 37: What To Do When You Think A Machine Defect Has Occurred
WHAT TO DO WHEN YOU THINK A MACHINE DEFECT HAS OCCURRED Related Messages When the unit's power is ON, messages such as those shown below may be displayed. When any such message is displayed on the screen, please respond as described below. Message CHANGE THE LAMP AFTER REPLACING LAMP,... -
Page 38: Regarding The Indicator Lamps
WHAT TO DO WHEN YOU THINK A MACHINE DEFECT HAS OCCURRED (continued) Regarding the Indicator Lamps Lighting and flashing of the POWER indicator, the LAMP indicator, and the TEMP indicator have the meanings as described in the Table below. Please respond in accordance with the instructions within the Table. POWER LAMP TEMP... -
Page 39: Phenomena That May Easily Be Mistaken For Machine Defects
Phenomena That May Easily Be Mistaken for Machine Defects Before requesting repair, check in accordance with the following chart. If the situation cannot be corrected, then contact your dealer. Phenomenon Cases not involving a machine defect The main power source is not ON. The electrical power cord is not plugged in. -
Page 40: Specifications
Optional Parts Dimension Diagram Liquid crystal projector 1.8 cm (0.7 type) TFT active matrix CP-S225:480,000 pixels (800 horizontal x600 vertical) CP-X275:786,432 pixels (1024 horizontal x 768 vertical) Zoom lens F=2.0 ~ 2.3 f=18 ~ 21 mm 150 W UHB 1.0W AC100 ~ 120V, 2.7A / AC220 ~ 240V, 1.3A... - Page 41 WARRANTY AND AFTER-SERVICE If a problem occurs with the equipment, first refer to the “WHAT TO DO WHEN YOU THINK A MACHINE DEFECT HAS OCCURRED” section and run through the suggested checks. If this does not resolve the problem contact your dealer or service company. They will tell you what warranty condition is applied.
- Page 42 TECHNICAL TECHNICAL SIGNAL CONNECTOR PIN ASSIGNMENT RGB IN [1]/[2] RGB OUT D-sub 15-pin Shrink Pin No Signal Pin No Video input Red Video input Green Video input Blue Ground Ground Red Ground Green Ground Blue signal Terminal RGB signal RGB IN input AUDIO input (from the...
-
Page 43: Example Of Computer Signal
• Depending on the input signal, full-size display may not be possible in some cases. Refer to the number of display pixels above. • This projector will display up to UXGA (1600X1200) resolution signals but the image will be rescaled to the native resolution of the projector. Best display performance is achieved when the signal input resolution is the same as the native resolution of the projector. - Page 44 INITIAL SET SIGNALS The following signals are used for the initial settings. The signal timing of some computer models may be different. In such case, refer to adjust the V.POSIT and H.POSIT of the menu. Back porch b Display interval c Sync a Computer / Horizontal signal timing (µs)
-
Page 45: Communications Setting
RS-232C COMMUNICATION (1) Turn off the projector and computer power supplies and connect with the RS-232C cable. (2) Turn on the computer power supply and after the computer has started up, turn on the projector power supply. Control jack D-sub 15-pin shrink jack... - Page 46 When the command sent by the projector cannot be practiced, the the error code ‘1cH’ +‘xxxxH’ is returned. When the data length is greater than indicated by the data length code, the projector will ignore the excess data code. Conversely, when the data length is shorter than indicated by the data length code, an error code will be returned to the projector.
-
Page 47: Command Data Chart
RS-232C COMMUNICATION (continued) Command data chart Names Operation type Blue White Blank Color Black Normal H Inverse Mirror V lnverse H&V Inverse Normal Freeze Freeze TURN ON Startup TURN OFF English Français Deutsch Español Italiano Norsk Language Nederlands Português 日本語 中文... - Page 48 Names Operation type H.Position Reset Execute H.Size Reset Execute Color Balance Execute R Reset Color Balance Execute B Reset Sharpness Reset Execute Color Reset Execute Tint Reset Execute Keystone_V Reset Execute Auto Adjust Execute Lamp Time Reset Execute Filter Time Reset Execute Blank on/off Error Status...
- Page 49 Command data chart (continued) Names Operation type Contrast Increment Decrement Color Balance R Increment Decrement Color Balance B Increment Decrement Increment Keystone_V Decrement Aspect Picture Position at 16 : 9 or Small V.Position Increment Decrement H.Position Increment Decrement H.Size Increment Decrement H.Phase Increment...
- Page 50 Names Operation type Tint Increment Decrement Auto NTSC SECAM Video Format NTSC 4.43 M-PAL N-PAL 1080i HDTV 1035i Sync on G NORMAL WHISPER WHISPER NORMAL CINEMA GAMMA DYNAMIC Lamp Time Filter Time Header BE EF 06 00 49 73 BE EF 06 00 2F 73 BE EF...
- Page 51 Hitachi Sales Iberica S A Gran Via Carlos 111, 101, 1-1, 08028 Barcelona, Spain Tel: +34-3-330-8652 Fax: +34-3-339-7839 Hitachi Home Electronics Asia, (S) Pte Ltd. 16 Collyer Quay #20-00 Hitachi Tower Singapore 049318, Singapore Tel: +65-536-2520 Fax: +65-536-2521 Hitachi Sales (Malaysia) Sdn. Bhd.