Sign In
Upload
Download
Table of Contents
Contents
Add to my manuals
Delete from my manuals
Share
URL of this page:
HTML Link:
Bookmark this page
Add
Manual will be automatically added to "My Manuals"
Print this page
×
Bookmark added
×
Added to my manuals
Manuals
Brands
Roland Manuals
Desktop
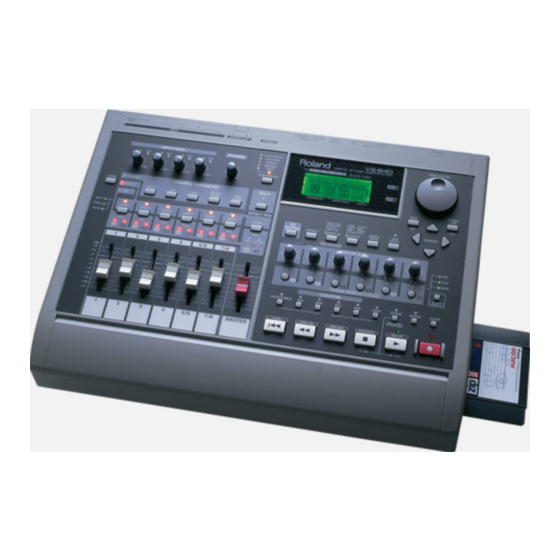
V-Sudio VS-840
Owner's manual
Roland V-Sudio VS-840 Owner's Manual
Digital studio workstation
Hide thumbs
Also See for V-Sudio VS-840
:
Service notes
(19 pages)
,
Supplemental notes
(5 pages)
1
2
3
4
5
6
7
8
9
10
11
12
13
14
15
16
17
18
19
20
21
22
23
24
25
26
27
28
29
30
31
32
33
34
35
36
37
38
39
40
41
42
43
44
45
46
47
48
49
50
51
52
53
54
55
56
57
58
59
60
61
62
63
64
65
66
67
68
69
70
71
72
73
74
75
76
77
78
79
80
81
82
83
84
85
86
87
88
89
90
91
92
93
94
95
96
97
98
99
100
101
102
103
104
105
106
107
108
109
110
111
112
113
114
115
116
117
118
119
120
121
122
123
124
125
126
127
128
129
130
131
132
133
134
135
136
137
138
139
140
141
142
143
144
145
146
147
148
149
150
151
152
153
154
155
156
157
158
159
160
161
162
163
164
165
166
167
168
169
170
171
172
173
174
175
176
177
178
179
180
181
182
183
184
185
186
187
188
Table Of Contents
189
page
of
189
Go
/
189
Contents
Table of Contents
Troubleshooting
Bookmarks
Table of Contents
Important Safety Instructions
Using the Unit Safely
Always Observe the Following
Package Contents
Using an External Zip Drive with the VS-840S
Contents
Power Supply
Placement
Before Using Zip Disks Handling the Zip Disk Drive
Handing Zip Disks
About SCMS
Disclaimer of Liability
Additional Precautions
Introducing the VS-840
Main Features
Digital Audio Workstation
Easy Operation
Disks that Can be Used by the VS-840 (Zip Disks)
Disk Formatting
Front and Rear Panels
Mixer Section
Recorder Section
Display Section
Rear Panel
Disk Drive
Before You Start (VS-840 Terminology)
Sources, Tracks, and Channels
Doing Everything in the Digital Domain (Digital Studio Workstation)
Signal Flow (Buses)
About Songs
How the Mixer Is Organized
Input
Recording the Currect Condition of the Mixer (Scene)
Differences with a Tape-Type MTR
Number of Tracks Provided for each Track (V-Tracks)
Virtual Tracks Provided for each Track (V-Tracks)
Effects Section
Effect Connections (Insert/Loop)
Basic Operation of the VS-840
Turning on the Power
Inserting the Disk
Initializing a Disk (Disk Initialize)
Listening to the Demo Song
Before You Finish Operations
Saving the Performance to Disk (Song Store)
To Protect a Song (Song Protect)
Turning the Power off (Shut Down)
Removing Protection from a Performance
If the Display Asks "Store Current?"
Re-Starting the VS-840
Basic Operations in the Display Screen
Selecting the Operating Menu
Executing an Operation
Selecting a Song (Song Select)
Changing the Current Time
Moving to the Beginning of the Performance (Song Top)
Moving to the End of the Performance (Song End)
Changing the Input of a Channel
Moving in Measure/Beat Units
Using Mark Point Numbers
Switching the Input Source
Monitoring the Track Playback
Setting the Channel Pan
Changing the Track Status (Track Status)
Switching the Monitor Output (Monitor Select)
Registering the Current Mixer Settings (Scene)
Recalling a Scene
Scene Mode
Clearing the Settings of a Scene
Storing a Time Location Method 1 (Locate Point)
Storing a Time Location Method 2 (Mark Points)
Modifying a Stored Time Location
Deleting a Stored Time Location
Moving to a Marked Time Location
Modifying a Marked Time Location
Clearing a Mark Point
Clearing All Mark Points
Using the EZ Routing Function (Easy Routing)
About the Easy Routing Function
Using the Easy Routing Function
Recording Icon
Effect Send Switch
Track Bouncing Icon
Mixdown Icon
User Routing Icon
Procedure for Saving the Current Mixer Settings as a User Routing
Aux Routing Icon
Procedure for Recalling Mixer Settings that Were Stored
Deleting Mixer Settings that Were Saved as a User Routing
An Example of Using Easy Routing
Recording to Track 1
Recording in Stereo to Tracks 5/6
Recording Additional Tracks While Listening to Playback (Overdubbing)
Bouncing Tracks While Applying Reverb (Loop)
Mixing down to 2-Channel
About the Default Values Set by Easy Routing
Parameter Which Are Automatically Set
Default Values Which Are Set When You Select the Recording Icon
Default Values Which Are Set When You Select the Track Bouncing Icon
Default Values Which Are Set When You Select the Aux Routing Icon
Multitrack Recording Techniques
Making a New Recording
Creating a New Song (Song New)
Naming the Song (Song Name)
Connect the Instruments
Record a Performance Onto a Track
Switching V-Tracks
Recording Additional Tracks While Listening to the Performance
Re-Recording Only Your Mistakes (Punch-In/Out)
Punch-In/Out Using the Record Button
Punch-In/Out Using a Foot Switch
What Is Manual Punch-In?
Recording a Previously-Specified Section (Auto Punch-In)
Specify the Location for Recording
Recording Procedure
Repeatedly Recording the same Location (Loop Recording)
Specify the Area to be Repeated
Combining the Performances of Two or more Tracks into Another Track
Creating a Master Tape
Adjusting the Tone (Equalizer)
Adjusting the Volume and Pan (Level/Pan)
Pan Setting Procedure
Low Gain
Hi Gain (High Gain)
Mixing down to 2-Channel Stereo (MIX Down)
If You Are Using a Cassette Tape
If You Are Using a DAT (MD)
Editing a Recorded Performance (Track Editing)
What Is Editing?
Finding a Desired Location (Preview)
Using to and from
Scrub Playback (Scrub)
Adjusting the Preview Length
Finding the Location Where Sound Begins
Adjusting the Scrub Length
Basic Procedure
Scrub Length
Re-Using Part of the Performance (Copy)
Modifying the Organization of the Performance (Move)
Exchanging Performance Data between Tracks (Exchange)
Inserting Blank Space into a Performance (Insert)
Deleting a Portion of a Performance (Cut)
Erasing Part of a Performance (Erase)
Using the Internal Effects
Effect Connections
Inserting the Effect between the Equalizer and Fader
Connecting the Effect to the Effect Bus (Loop Connection)
Inserting the Effect before the Master Fader (Insert Connection)
Switching Effects (Patch Change)
Using Effects
Creating a New Effect Sound
Creating an Effect Sound
Saving Effect Settings
Saving to a User Patch
Saving to a Scene
Examples of How the Effects Can be Used
Applying Reverb to a Recorded Performance (Loop)
Applying Reverb as You Record (Loop)
Applying Reverb While Bouncing Tracks (Loop)
During Recording, Apply Effects Only to the Monitor Sound (Loop)
Applying Chorus to the Lch, Reverb to the Rch, and Mixing Them (Loop)
Recording with an Effect Inserted (Insert)
Recording While You Apply Vocoder (Insert)
If the Effect Does Not Function as You Expect
Other Convenient Functions
Sounding the Metronome
Using an External MIDI Sound Source to Play the Metronome
Using a Foot Switch to Playback/Stop
Stopping Automatically (Marker Stop)
Changing the Pitch During Playback (Vari-Pitch)
Listening Only to a Specific Channel (Solo)
Switching the Source for Output to the Phones Jack
Undoing a Recording Or/Editing Operation
Recording/Editing Operations Which Can be Undone (Undo)
Canceling the Last-Performed Undo (Redo)
Canceling Only the Last-Performed Operation
When the Disk Has Little Remaining Space
Deleting Only Unneeded Performance Data (Song Optimize)
Deleting One Song of Performance (Song Erase)
Copying Performance Data (Song Copy)
Duplicating a Disk (Disk Copy)
Exchanging Data between the VS-840 and VS-880 (Song Convert)
Creating a Master Tape Which Disables Digital Copying
Use with MIDI Devices
About MIDI
MIDI Connectors
MIDI Channels
Synchronizing with a MIDI Sequencer
Using MTC
Synchronizing to the VS-840 (Master)
Gen. (Sync Generator)
Using the Tempo Map
MTC Type
Timedisp (Time Display Format)
Offset
Creating a Tempo Map
Synchronized Operation
What Is the Tempo Map?
Using the Sync Track
Changing the Tempo During the Performance
Recording MIDI Clock Messages
Assigning an Offset to the Sync Track/Tempo Map
When You Experience Problems with Synchronization
Overall Settings and Status Checking
If the Display Area Is Difficult to Read (Contrast)
Switching the Contents of the Display (Display)
Displaying Song-Related Information
Mixer Level
Track Level
Play List
Restoring the VS-840 Settings to the Initial State
Taking Advantage of the VS-840 (Ideas and Examples)
Recording Multiple Sources to One Track
Bringing Together the Desired Sections
If Noise between Segments Is Obtrusive
Using Mark Points to Rearrange Song Data (Song Arrange)
Fade Length
Operating the VS-840 from Another Device (MMC)
Operating the VS-840 from an MMC-Compatible Device
Setting for the Master VS-840
Make Settingsfor the Sequencer Program
Using External Effect Units
Applying an Effect During Playback
If You Have Problems with Synchronization
Applying an Effect While Bouncing Tracks
Aux Send Switch
Algorithm List
Reverb 1
Reverb 2
Tap Delay
Stereo Delay Chorus
Stereo Pitch Shifter Delay
2 Ch RSS
Panner
Delay RSS
Chorus RSS
Guitar Multi 1
Guitar Multi 2
Vocal Multi 1
Vocal Multi 2
Keyboard Multi
Rotary
Stereo Phaser
Stereo Flanger
Tremolo Pan
Stereo Multi
Lo-Fi Box
Vocoder
Space Chorus
Reverb + Reverb
Delay + Reverb
Chorus + Reverb
Delay + Chorus
Functions of each Parameter
Acoustic Guitar Simulator
Chorus
Compressor/Limiter
De-Esser
Delay
Enhancer
Equalizer
Flanger
Noise Suppressor
Overdrive
Phaser
Pitch Shifter
Preamp
Reverb
Ring Modulator
Gate
RSS (2Ch)
RSS (Panner)
Speaker Simulator
Tremolo/Pan
Wah
Before Using RSS
Product Package Notice for When RSS Is Used
Cautions When Using RSS
Troubleshooting
Problems with Sound
Problems with the Disk Drive
Other Problems
Error Messages
Special Key Operations
Parameter List
MIDI Implementation
Transmitted Data and Recognized Receive Data
Channel Voice Message
System Common Messages
MIDI Machine Control Command Reference
Universal System Exclusive Message
MIDI Machine Control Command, Information Field/Response Reference
Roland Exclusive Messages
Data Format for Exclusive Messages
Address-Mapped Data Transfer
One-Wat Transfer Procedure
MIDI Implementation Chart
Blok Diagram
Glossary
Specifications
Advertisement
Quick Links
1
Front and Rear Panels
2
Rear Panel
Download this manual
See also:
Service Notes
Table of
Contents
Previous
Page
Next
Page
1
2
3
4
5
Advertisement
Table of Contents
Related Manuals for Roland V-Sudio VS-840
Musical Instrument Roland VS-840 Service Notes
Digital studio workstation (19 pages)
Musical Instrument Roland VS-840 Supplemental Notes
Digital studio workstation (5 pages)
Desktop Roland VS-1824 Owner's Manual
24-bit digital studio workstation (295 pages)
Desktop Roland CompuRhythm CR-8000 Owner's Manual
Micro computer controlled rhythm machine (24 pages)
Desktop Roland SP-505 Service Notes
Groove samlong workstation (48 pages)
Related Products for Roland V-Sudio VS-840
Roland VS-1824
Roland V-studio VS-2480
Roland VS-2000
Roland V-Synth GT
Roland SONAR V-STUDIO VS-100
Roland Sonar V-Studio VS-700
Roland V-Studio VS-20
Roland VS-890
Roland VSR-880
Roland VXpanded VS-880
Roland VS-540
Roland VS-640
Roland VS-300
Roland VS-640i
Roland VS-540i
Roland VS20-VGA
This manual is also suitable for:
V-sudio vs-840s
Table of Contents
Print
Rename the bookmark
Delete bookmark?
Delete from my manuals?
Login
Sign In
OR
Sign in with Facebook
Sign in with Google
Upload manual
Upload from disk
Upload from URL