Sign In
Upload
Manuals
Brands
Roland Manuals
Musical Instrument
VS-890
Roland VS-890 Manuals
Manuals and User Guides for Roland VS-890. We have
2
Roland VS-890 manuals available for free PDF download: Owner's Manual, Appendices
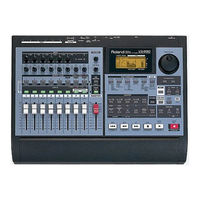
Roland VS-890 Owner's Manual (221 pages)
24-bit Digital Music Workstation
Brand:
Roland
| Category:
Musical Instrument
| Size: 14.19 MB
Table of Contents
Important Safety Instructions
2
Grounding Instructions
2
Using the Unit Safely
3
Contents
5
Power Supply
11
Placement
11
Maintenance
11
Additional Precautions
11
Handling the Internal Hard Disk Drive
12
Preparations
13
About the Package Contents
13
Main Features
13
Disk Recorder Section
13
Effects Section
14
Simple Operation
14
Connectivity
14
Substantial Options
14
Front and Rear Panels
15
Mixer Section
15
Recorder Section
17
Display Section
19
Rear Panel
20
Before You Start
22
Saving and Managing Data
22
Managing Disk Contents
22
The Location Where a Performance Is Recorded (Song)
23
Regarding Hard Disk Partition Size
23
Demo Songs
23
Sources, Tracks and Channels
24
About Events
24
Signal Flow (Buses)
25
Input Mixer
27
Track Mixer
28
Effect Return Mixer
29
Switching the Fader Functions
29
Master Block
30
Differences with a Tape-Type MTR
31
Track Minutes and Recording Time
31
Auxiliary Tracks for each Track
32
Insert
33
Send/Return
33
Basic Operation
34
Before You Begin
34
Turning on the Power
34
Adjusting the Display Contrast
34
Before You Finish Operations
35
Resetting Mixer and System Settings to Their Original State
35
Saving the Performance to Disk (Song Store)
35
If "STORE Current?" Is Displayed
36
Turning off the Power
36
Restarting
36
Basic Operations on the VS-890
37
Display each of the Condition Menus
37
Selecting Pages Contained in Functions and Settings
37
When System Condition Is Selected
37
Switching Track Conditions
38
Select the Setting You Want to Change
38
Change the Settings Values
38
Execute the Operation
38
Changing the Current Time
39
Moving the Frame Units
39
Moving in Measure/Beat Units
39
Moving to the Beginning or End of the Performance
39
Storing a Time Location
40
Recalling a Specific Location (Jump)
40
Using the Locator
40
Storing Locators
40
Moving to a Stored Time Location
41
Changing the Locator Bank
41
Making Fine Adjustments to Stored Locators
41
Deleting a Stored Time Location
41
Marking a Time Location
42
Moving the Location of Markers 1
42
Moving the Location of Markers 2
42
Making Fine Adjustments to Marked Locations
43
Deleting a Marked Location
43
To Delete All Markers Simultaneously
43
Previewing Techniques
44
Finding the Location Where the Sound Begins
44
Adjusting the Preview Length
44
Using Scrub
45
Recording the Current Condition of the Mixer (Scene)
46
Adjusting the Scrub Length
46
Storing a Scene
46
Recalling a Scene
46
Recalling a Scene Without Affecting the Current Fader Values
47
Deleting a Scene
47
Multi-Track Recording
48
Creating a New Song (Song New)
48
About Recording Time
49
If "Drive Busy!" Is Displayed
49
Song Numbers
49
General Course of the Recording Process
50
Selecting a Song (Song Select)
50
Connecting Instruments
51
Recording to the Tracks
51
Source for Recording to Tracks
52
When You Are Recording in Stereo
52
Saving a Recorded Performance (Song Store)
53
Recording over a Portion of a Performance (Punch-In/Punch-Out)
53
Using the Foot Switch
54
Specifying Beforehand the Location for Rerecording (Auto Punch-In)
55
Using Locators
55
Using Markers
55
Specifying the Points While the Song Plays Back
55
Repeatedly Recording over the same Area (Loop Recording)
56
Making Fine Adjustments to the Loop
57
Recording Procedure
57
Recording to Other Tracks (Overdubbing)
58
Recording on V-Track 2
58
Switching V-Tracks
58
Switching V-Track Bank
58
Using Effects
59
Applying Effects to the Playback
59
Specify the Tracks for Playback
59
Applying Effects While Recording (Send/Return)
60
Specify the Input to Which the Effect Is to be Applied
60
Select Source and Effect to be Recorded to the Track
61
Applying Effects While Recording (Insert)
63
Using External Effects Devices
65
Outputting Track 1 to an External Effect
65
Recording Digital Signals
66
Inputting the Return from an External Effect to the VS-890
66
Items Necessary for Digital Recording
66
Make the Digital Connections
67
Match the Sample Rates
67
In Order to Make a Digital Connection with Your CD Player
67
To Prevent Digital Connections with CD Players
67
Select the Master Clock
68
Select an Input Source
68
If "Digital in Lock" Is Displayed
68
If "Digital in Unlock" Is Displayed
68
Adjusting the Tone (Equalizer)
69
Using the 3-Band Equalizer
69
Adjusting the Equalizer
70
Combining the Contents of Tracks (Track Bouncing)
72
Specify the Tracks for Playback and Recording
72
Adjusting the Pan for each Track
72
Applying Reverb While Track Bouncing
73
Undoing Recordings and Edits (Undo)
75
Canceling the Last-Performed Undo (Redo)
76
Canceling Only the very Last-Performed Operation
76
Protecting Songs (Song Protect)
77
Protecting Performances
77
To Remove Song Protect
77
Editing a Recorded Performance (Track Editing)
78
About Editing Operations
78
Track Edit Range
78
About the Bar Display
78
Repeating Performance Data (Track Copy)
79
Using "Frm" Effectively
80
Moving Performance Data (Track Move)
81
Exchanging Performance Data between Tracks
83
Inserting a Blank Space into Performance Data (Track Insert)
84
Deleting Performance Data
85
Erasing Performance Data (Track Erase)
86
Calling up Stored Connections
90
Recalling a Setup (Template)
91
Recalling Recording Settings
91
Recalling Track Bouncing Settings
93
Recalling Mixdown Settings
94
Recalling Mastering Settings
95
Modifying Internal Connections in Logical Sequence (Step Edit)
96
Storing Track Bouncing Settings
99
Storing Mixdown Settings
102
Storing Mastering Settings
104
Saving the Current Routing (User Routing)
106
Recalling User Routing
106
Deleting User Routings
106
Recording Mixer Settings (Auto MIX)
107
Auto MIX Status of each Channel
107
Recording the Mixer Settings
108
Recording Fader Operations (Realtime)
109
If You Don't Want to Record Fader Settings (Mask Fader)
110
Playing Back the Auto MIX
110
Disabling Auto MIX on All Channels
111
Using the Internal Effects
112
Composition of the Effects
112
Connecting the Effects
112
Changing the Source Sound Itself
112
Inserting with Input and Track Channels
113
Inserting an Effect into the Master Block
114
Selecting Effects (Patch)
117
Creating New Effects Sounds
118
Saving to a User Patch
119
Saving to a Scene
119
Creating a Master Tape (Cassette, MD or DAT)
120
Prepare for Mixdown
120
To Record to a Cassette Tape (Analog Connection)
120
Recording with DAT or MD Recorders (Digital Connection)
120
To Prohibit Digital Copying
121
Song and Disk Management (Song or Disk Drive)
122
Changing the Name of Performance Data (Song Name)
122
When the Disk Has Little Remaining Space
122
Deleting Only Unneeded Performance Data (Song Optimize)
122
Deleting One Song of Performance Data (Song Erase)
123
Duplicating the Performance Data (Song Copy)
124
Before Using Zip Disks
124
Connecting the Zip Drive
125
Initializing a Zip Disk
125
Song Copy Procedure
125
Saving a Song to a Single Disk (Playable)
126
To Load Data from Zip Disks
127
When You Cannot Save a Song to a Single Disk (Archives)
128
Loading Data from Disks (Extract)
129
Confirming that a Drive Is Not Damaged (Drive Check)
131
To Erase the Disk Error
132
Clusters
132
Cross Link
132
Loose Areas
132
Change Partitions (Drive Select)
133
Initializing the Disk (Drive Initialize)
134
Checking Disk Reliability (Surface Scan)
135
Creating an Original Audio CD (CD-R Write)
136
Create Master Data (Mastering)
136
About Mastering Tracks
137
Mixdown to Mastering Tracks (Mastering Room)
137
Masteringsw (Mastering Switch)
138
Recording to Mastering Tracks
139
Playing Back the Mastering Tracks
140
Joining more than One Set of Master Data
141
Adding Track Number Markers
141
Before Using CD-R/RW Drives
142
To Delete Track Number Markers
142
Assigning Track Numbers
142
Creating an Audio CD
143
Connecting the CD-RW Drive
143
Auditioning (Test Listening) Song Written to Cds (CD Player Function)
146
Saving Songs to CD-RW Discs (CD-R Backup)
147
Writing Additional Songs to the Disc
147
Backup the Song to CD-R Discs
148
Loading Songs from CD-R Discs
149
How to Erase the Data in the CD-RW Disc
150
Compatibility
151
Use with MIDI Devices
160
Synchronizing with MIDI Sequences
160
Master and Slave
160
Using MTC
160
Synchronization with the VS-890 as the Reference (Master)
161
MIDI Thr (MIDI through Switch)
161
Synchronization with the MIDI Sequencer as the Reference (Slave)
162
Synchronizing with an External MIDI Device
163
Using the Sync Track (Master)
164
What Is the Sync Track?
164
Recording MIDI Clock Messages
164
Synchronized Operation
165
Using the Tempo Map (Master)
166
What Is a Tempo Map?
166
Creating a Tempo Map
166
Various Operations Related to Synchronized Operation
168
Setting Markers Along with the Tempo
168
Creating a Sync Track from the Marker
168
Creating a Tempo Map from a Sync Track
169
Creating a Sync Track Automatically
170
Use with a MIDI Controller
171
Delaying Sync Track and Tempo Map Start Times
171
Switching Track Status
171
Switching Scenes
172
Switching Effects
173
Adjusting Effects
173
Other Convenient Functions
174
Listening Only to a Specific Channel (Solo/Mute)
174
Simultaneously Adjusting a Stereo Source (Channel Link)
174
Adjusting the Faders
175
Adjusting the Pan
176
Linking Only the Faders (Fader Link)
177
Mixing in a Stereo Source (Stereo In)
178
Changing the Pitch During Playback (Vari-Pitch)
178
Directly Inputting Numeric Characters
179
Selecting the Method for Numeric Input
179
Sounding the Metronome
180
Using an External MIDI Sound Source to Play the Metronome
181
Adjusting the Levels for each Track
182
To Invert the Phase of Audio Signal
183
Determining Output
183
MASTER Jacks
183
AUX Jacks
184
Digital out Connectors
184
Direct out
185
Making Global Settings and Checking Conditions
186
Switching the Display Content
186
Checking the Size of a Recorded Performance
186
Pre Level
186
Overall System Settings
187
Stopping Automatically
187
Constantly Monitoring the Input Source
187
If Noise between Segments Is Obtrusive
188
Checking the Remaining Disk Space
189
Displaying Measures and Beats
189
Holding the Function of Shift (Shift Lock)
190
Having the Volume Change as Soon as the Faders Are Moved
190
Holding Level Meter Peaks
191
Creating a Song Which Maintains the Current System Settings
191
Adjusting the Button Sensitivity
192
Changing at the Level at Which the Peak Indicator Lights
192
MIDI Settings (MIDI)
193
Removing Direct Current Offset from the MIX Bus
193
Switching the Model ID
193
Disk Settings (DISK)
194
When There Is no Hard Disk Installed
194
Changing the VS-890'S SCSI ID Number
194
Take Advantages of the VS-890
195
Synchronizing the Operations of Two VS-890 Units
195
Settings for the Master VS-890
196
Setting for the Slave VS-890
197
If You Want to Make Digital Connection
199
Digital Connection Can NOT be Used
199
Synchronizing with MIDI Sequence Software (MMC)
200
VS-890 Settings
201
Making Digital Connections with MIDI Sequence Software
202
MIDI Sequence Software Settings
202
About Sound Cards
202
Recording to MIDI Sequence Software
203
Recording to the VS-890
204
Using an External MIDI Device to Adjust the Mixer (Compu MIX)
205
The Correspondence between MIDI Channels and Controller Numbers
205
Preparations for Compu MIX
206
Recording with Compu MIX
207
To Have the Fader Movements Ignored
207
Synchronizing with Video Equipment
208
Index
210
Advertisement
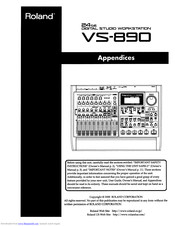
Roland VS-890 Appendices (140 pages)
24-bit Digital Studio Workstation
Brand:
Roland
| Category:
Musical Instrument
| Size: 9.71 MB
Advertisement
Related Products
Roland VS-1680 V-XPANDED
Roland VS-880EX
Roland VS-2400CD
Roland VS-2480CD
Roland V-Studio VS-840EX
Roland VXpanded VS-880
Roland V-Accordion FR-3xb
Roland V-Accordion FR-7xb
Roland V-Accordion FR-18d
Roland V-Accordion FR-1x
Roland Categories
Musical Instrument
Synthesizer
Recording Equipment
Drums
Electronic Keyboard
More Roland Manuals
Login
Sign In
OR
Sign in with Facebook
Sign in with Google
Upload manual
Upload from disk
Upload from URL