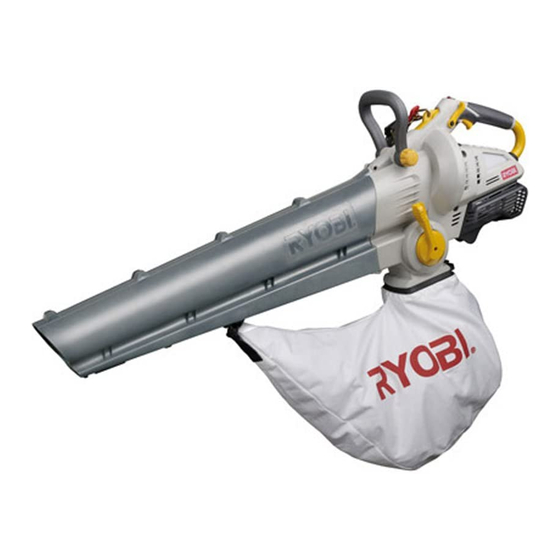
Ryobi RGBV3100 Operator's Manual
2-cycle mulching blower vacuum
Hide thumbs
Also See for RGBV3100:
- Operator's manual (88 pages) ,
- Operator's manual (25 pages) ,
- Operator's manual (72 pages)

Related Manuals for Ryobi RGBV3100


Summary of Contents for Ryobi RGBV3100
- Page 1 RGBV3100 2-Cycle Mulching Blower Vacuum OPERATOR’S MANUAL FOR QUESTIONS, CALL 1-800-345-8746 in U.S. or 1-800-265-6778 in CANADA www.ryobi.com IMPORTANT MANUAL DO NOT THROW AWAY...
-
Page 2: Table Of Contents
VIII. Cleaning and Storage ......20 • 1-800-345-8746 or www.ryobi.com on the world wide A. Accessories/Replacement parts ... . . 20 web for authorized service dealers in the United States IX. -
Page 3: California Emission Regulations
CALIFORNIA EMISSION REGULATIONS This unit meets the 1995 to 1999 California emissions regulations for small off-road engines. These units are identified by the label on the engine of your product. A typical identification label is shown. To ensure that your unit continues to meet these regulations, refer to the following information and instructions in this operator’s manual. -
Page 4: Rules For Safe Operation
RULES FOR SAFE OPERATION The purpose of safety symbols is to attract your DANGER: Failure to obey a safety warning attention to possible dangers. The safety symbols, and will result in serious injury to yourself or to their explanations, deserve your careful attention and others. -
Page 5: Save These Instructions
Ryobi® for this unit. Doing so could lead to serious • Wear a face or dust mask if the operation is dusty. injury to the user, or damage to the unit, and void Long sleeve shirts are recommended. -
Page 6: Safety And International Symbols
RULES FOR SAFE OPERATION SAFETY AND INTERNATIONAL SYMBOLS This operator's manual describes safety and international symbols and pictographs that may appear on this product. Read the operator's manual for complete safety, assembly, operating and maintenance and repair information. SYMBOL MEANING •... - Page 7 RULES FOR SAFE OPERATION SYMBOL MEANING • THROWN OBJECTS CAN CAUSE SEVERE INJURY WARNING: Keep clear of blower outlet. Never point the blower at yourself or others. Objects can be thrown from blower. Do not operate unit without proper attachments and guards in place.
-
Page 8: Know Your Unit
RULES FOR SAFE OPERATION KNOW YOUR UNIT APPLICATION Throttle Control As a blower; • Cleaning of yards, garages, driveways, porches, patios, around walls, fences, etc. As a vacuum; • Picking up leaves, light debris, etc. Fuel Cap Starter Rope Grip On/Off Stop Control Harness Blower/Vacuum Tube... -
Page 9: Assembly Instructions
ASSEMBLY INSTRUCTIONS ATTACHING AND REMOVING THE Removing BLOWER/VACUUM TUBE NOTE: It may be necessary to remove the Blower/Vacuum Tube to clear a blocked tube WARNING: To avoid serious personal injury, or impeller. the blower/vacuum tube and vacuum bag must be used when operating this unit WARNING: To prevent serious personal injury, stop the engine and allow the impeller Attaching... -
Page 10: Attaching And Removing The Vacuum Bag
ASSEMBLY INSTRUCTIONS ATTACHING AND REMOVING THE VACUUM Attaching 1. Attach the vacuum bag to the vacuum bag hook on the blower/vacuum tube (Fig. 3) Latching Tabs Debris Exhaust Tube Vacuum Bag Tube Vacuum Bag Zipper Fig. 4 Vacuum Bag Hook Removing 1. -
Page 11: Installing And Adjusting The Shoulder Harness
ASSEMBLY INSTRUCTIONS INSTALLING AND ADJUSTING THE SHOULDER 5. Place the harness over your head and onto your HARNESS shoulder (Fig. 8). WARNING: Always use the shoulder harness when using the unit to avoid serious personal injury. NOTE: Have the shoulder harness on and adjusted, but not clipped to the support fitting prior to starting unit. -
Page 12: Oil And Fuel Information
NOTE: One gallon (3.8 liters) of unleaded gasoline mixed Definition of Blended Fuels with one 4 oz. (120 ml.) bottle of RYOBI 2 CYCLE Today's fuels are often a blend of gasoline and oxy- OIL makes a 32:1 fuel/oil ratio. -
Page 13: Starting/Stopping Instructions
STARTING/STOPPING INSTRUCTIONS STARTING INSTRUCTIONS WARNING: Avoid accidental starting. Be in the starting position whenever pulling the Run Position (C) starter rope. The operator and unit must be Partial Position (B) in a stable position while starting. Full Choke Position (A) Also, Do not set unit on any surface except a clean, hard area while starting. -
Page 14: Operating Instructions
STARTING/STOPPING INSTRUCTIONS NOTE: If the engine floods while trying to start, place the STOPPING INSTRUCTIONS choke control in the RUN (C ) position. Move 1. Move the throttle control to the idle position ( the throttle control to the fast position ( (Fig. -
Page 15: Operating As A Blower
OPERATING INSTRUCTIONS OPERATING AS A BLOWER Use the blower around buildings and for other normal cleaning (Fig. 16). 1. Start engine. See Starting/Stopping Instructions Pg. 13. 2. Set the blower/vacuum mode change-over lever to the up position (Blower Mode) (Fig. 14). NOTE: Never use the unit with the lever in the halfway position. -
Page 16: Operating As A Vacuum
OPERATING INSTRUCTIONS OPERATING AS A VACUUM WARNING: As a vacuum, the unit is designed to pick up dry material such as 1. Start engine. See Starting/Stopping Instructions leaves, grass, small twigs and bits of paper. Pg. 12. To avoid serious personal injury, do not 2. -
Page 17: Empty The Vacuum Bag
OPERATING INSTRUCTIONS EMPTY THE VACUUM BAG Latching tabs WARNING: To avoid serious personal injury, never unzip or remove the vacuum bag without first turning the unit off. PRESS IN PRESS IN NOTE: Empty the bag after each use to avoid deterioration and obstructing air flow, which will reduce the performance of the vacuum. - Page 18 MAINTENANCE AND REPAIR INSTRUCTIONS Cleaning the Air Filter WARNING: To avoid serious personal injury, always turn the unit off and allow it to cool before you clean or perform any maintenance on it. Clean and re-oil the air filter every 10 hours of operation. It is an important item to maintain.
-
Page 19: Carburetor Setting
MAINTENANCE AND REPAIR INSTRUCTIONS CARBURETOR SETTING Idle Speed Adjuster The idle speed adjuster of the engine is adjustable though the Air filter/muffler cover (Fig 26). NOTE: Careless adjustments can seriously damage your unit. An authorized service dealer should make carburetor adjustments. Check Fuel Mixture Old and/or improperly mixed fuel is usually the reason for the unit not running properly. -
Page 20: Cleaning And Storage
CLEANING AND STORAGE CLEANING THE UNIT STORAGE • Store the unit indoors, away from moisture and WARNING: To avoid serious personal harmful substances such as fertilizers and solvents. injury, always turn the unit off and allow it to cool before you clean or perform any •... -
Page 21: Troubleshooting Chart
TROUBLESHOOTING ENGINE WILL NOT START C A U S E A C T I O N Empty fuel tank Fill fuel tank Primer bulb wasn't pressed enough Press primer bulb fully and slowly 5-7 times Engine flooded Use starting procedure with choke control in the RUN position, Pg. -
Page 22: Specifications
SPECIFICATIONS ENGINE Engine Type ..............Air-Cooled, 2-Cycle Displacement . - Page 23 • In order to file a claim, go to your nearest or unapproved modifications. Authorized Ryobi Service Center. Warranty services or repairs will be provided at all Authorized Ryobi • You are responsible for presenting your small Service Centers. off-road engine to a Ryobi Authorized Service Center as soon as a problem exists.
-
Page 24: Warranty
This warranty gives you specific legal rights, and you the RYOBI Operator’s Manual. This warranty does not may also have other rights which vary from state to apply to any damage to the RYOBI Product that is the state. result of improper maintenance or to any RYOBI...