Table of Contents
Advertisement
Quick Links
Advertisement
Table of Contents

Related Manuals for Samsung FQV313T003


Summary of Contents for Samsung FQV313T003
- Page 1 FQV137U FQV137ST FQV137UST FQV313T003 Steam Combi Built-in Oven user manual imagine the possibilities Thank you for purchasing this Samsung product. To receive more complete service, please register your product at www.samsung.com/global/register...
-
Page 2: Using This Manual
If you have any questions or concerns, contact your nearest service center or find help and information online at www.samsung.com. Important safety symbols and precautions. - Page 3 Do NOT attempt. Do NOT disassemble. Do NOT touch. Follow directions explicitly. Unplug the power plug from the wall socket. Make sure the machine is grounded to prevent electric shock. Call the service center for help. Note Important Severe warning signs for installation The installation of this appliance must be performed by a qualified microwave service technician steam oven trained by the manufacturer.
- Page 4 Caution signs for installation This appliance should be positioned in such a way that it is accessible to the power plug. - Failure to do so may result in electric shock or fire due to electric leakage. Install your appliance on a level and hard floor that can support its weight. - Failure to do so may result in abnormal vibrations, noise, or problems with the product.
- Page 5 During use the appliance becomes hot. Care should be taken to avoid touching heating elements inside the oven. When moving heating elements, make sure to use the equipment designed to move heating element while wearing safety gloves provided with the product, and see if temperature drops sufficiently (at least 10 minutes after grill or combination cooking operation) after operation.
- Page 6 Do not touch the inside of the appliance immediately after cooking, because the inside of the appliance is hot after being heated for a long time or heating a small amount of food. - Failure to do so may result in burns. Never heat plastic or paper containers and do not use them with the oven function.
- Page 7 If any foreign substance such as water has entered the appliance, unplug the power plug and contact your nearest service centre. - Failure to do so may result in electric shock or fire. If smoke is observed, switch off or unplug the appliance and keep the door closed in order to stifle any flames;...
- Page 8 Take care when removing the wrapping from food that has just been taken out of the appliance. - If the food is hot, hot steam may be emitted abruptly when removing the wrapping and you may burn yourself. Do not unplug the appliance by pulling at the power cord, always grip plug firmly and pull straight out from the outlet.
-
Page 9: Table Of Contents
contents oven featureS Oven Oven controls Accessories before you beGin Setting the clock Filling the water tank Setting the water hardness Default settings oven uSe Setting the cooking function mode Using the steam mode Using the steam combi mode Using the regeneration/reheat mode Using the fan oven mode Using the grill mode Start time delay function... -
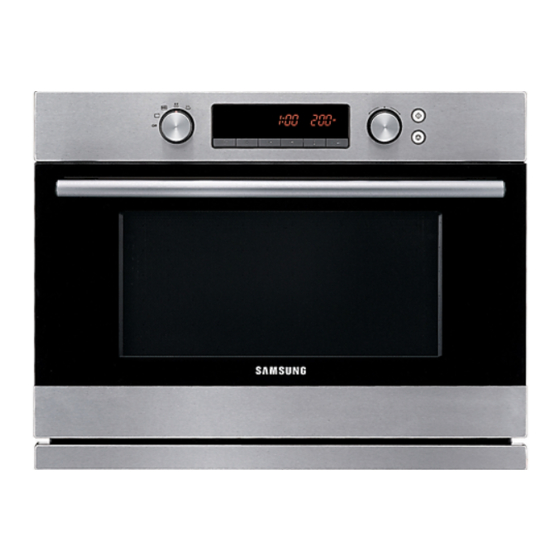
Page 10: Oven Features
oven features OVeN Control PanelDoor Top Heating Elements Oven Light Level 6 Steam Outlet Level 5 Level 4 Water Tank Level 3 Level 2 Bottom Heating elements Level 1 Door Door Handle Drip Tray note • Shelf levels are numbered from the bottom up. • The levels 4, 5 and 6 are mainly used for the grill function. • Levels 1 is mainly used for baking and roasting. • Please refer to the Cooking Guides provided throughout this booklet to determine the appropriate shelf level for your dishes. -
Page 11: Oven Controls
OVeN CONTROlS 10 11 12 13 14 15 1. OFF 12. START TIME 2. AUTO PROGRAMMES 13. KEEP WARM MODE 3. REHEAT MODE 14. MEMORY 4. STEAM COMBI MODE 15. SELECT 5. STEAM MODE 16. DISPLAY 6. FAN OVEN MODE 17. -
Page 12: Accessories
ACCeSSORIeS The following accessories are provided with your Steam Oven: Multi pan. Oven Rack. Steam rack (always use it with a steam Steam container, perforated, 40 mm deep, GN 2/3 (useful for steam mode, container). always use it with the Steam rack). 12_ oven features... -
Page 13: Before You Begin
before you begin SeTTING The ClOCk When the appliance is first plugged in, the display lights up. (example 15:15) When connecting the power for the first time, please use the product after setting the time. Turn the FUNCTION KNOB to the Press SELECT. The “12” starts blink- “OFF” position. ing. Turn the SELECTION KNOB to set the Press SELECT again. -
Page 14: Filling The Water Tank
FIllING The WATeR TANk When you open the cooking compartment door, you will see the water tank on the right- hand side. Only fill the tank with fresh tap water or with still bottled water. If your water is very hard, we recommend that you use softened water (see also “Water hardness). caution Do not fill the water tank with distilled water or any other liquids. -
Page 15: Setting The Water Hardness
SeTTING The WATeR hARdNeSS It is necessary to descale your appliance at regular intervals. This is the only way to prevent damage. Your appliance has a system that automatically displays when it needs descaling. It is preset to a water hardness 4. Change the value if your water is softer. Checking the water hardness Information on the hardness of the water in your area can be obtained from the local water board. -
Page 16: Default Settings
deFAUlT SeTTINGS During blinking of the default cook time or default temperature (after you have choosen a setting with the FUNCTION KNOB), you can change the time or temperature by turning the SELECTION KNOB. Turn the FUNCTION KNOB to choose The default time or default temperature the function you want to use. -
Page 17: Oven Use 17 Setting The Cooking Function Mode
oven use SeTTING The COOkING FUNCTION MOde Turn the Cooking Function Select Knob to select the desired oven function. Oven Modes The following table represents the various oven modes and settings of your oven. Use the cooking guide tables for those modes as guidelines for cooking. mode description Steam mode... -
Page 18: Automatic Functions
mode description Fan Oven mode Food is heated by two heating elements on top of cavity and one bottom heating element, while the fan from side distributes the hot air evenly. This setting is suitable for roasting meat, baking gratins and cake. -
Page 19: Using The Steam Mode
USING The STeAM MOde Fill the water tank up to the maximum Turn the FUNCTION KNOB to Steam line and place it back. Then place your mode position (default cook time food into the cooking cavity. 20 min. temperature 100 °C). The time is blinking. - Page 20 If there is too little water while cooking, you will see the symbol in the display along with a beep being played. Add water into the tank and press START to continue with the steaming. • You can add water into the tank at any time while cooking. note 1) During cooking, COOk TIMe and TeMPeRATURe can be changed. • Cooking time: press the TIMeR button and then turn the SeleCTION kNOB.
-
Page 21: Cooking Guide
Steam Mode Setting Food is cooked by steam provided by the steam generators and injected into the cavity by two jet nozzles. Steam container + Steam rack are usually placed on level Insert the multi pan on level Cooking Guide Use settings and times in this table as guide lines for steaming. - Page 22 Steam Time helf Food Item accessory mode (°C) (min.) level 2-level cooking: Dual meal Steam rack + Steam container 4 / 1 100 °C 15-20 / multi pan (fish fillets/sliced vegetables) White Parboiled rice (use a pyrex bowl, 100 °C Oven rack 25-30 add 375 ml hot...
-
Page 23: Using The Steam Combi Mode
USING The STeAM COMBI MOde Fill the water tank up to the maximum Turn the FUNCTION KNOB to Steam line and place it back. Then place your Combi mode position (default: 180 food into the cooking cavity. °C). The temperature is blinking. During blinking, turn the SELECTION If the blinking has already stopped KNOB and set the desired... - Page 24 note 1) During cooking, COOk TIMe and TeMPeRATURe can be changed. • Cooking time: press the TIMeR button and then turn the SeleCTION kNOB. • Temperature: press the SeleCT button and then turn the SeleCTION kNOB. 2) In Steam Combi Mode settings, the top bottom and steam heating elements switch off and on throughout cooking to regulate the temperature.
- Page 25 Combi Steam Setting Food is cooked by Fan Oven Mode and the help of steam. The steam is provided by the steam generators and injected into the cavity by interval. Place the multi pan on level Cooking Guide Use settings and times in this table as guide lines for baking and roasting. You do not need to pre-heat the oven.
-
Page 26: Using The Regeneration/Reheat Mode
USING The ReGeNeRATION/ReheAT MOde Fill the water tank up to the maximum Turn the FUNCTION KNOB to line and place it back. Then place your Regeneration/Reheat Mode position food into the cooking cavity. (default: 20 min.). The time is blinking. During blinking, turn the SELECTION If the blinking has already stopped KNOB and set the desired cooking... - Page 27 Regeneration/Reheat Setting Use settings and times in this table as guide lines for reheating by gentle steaming. We recommend to always fill-up the water tank with fresh water to the maximum level. This mode is suitable to reheat and keep warm meals. Shelf Time Food Item...
-
Page 28: Using The Fan Oven Mode
USING The FAN OVeN MOde Turn the FUNCTION KNOB to Fan During blinking, turn the SELECTION Oven Mode position (default: 180 KNOB and set the desired °C). The temperature is blinking. temperature. If the blinking has already stopped Press the TImEr button to set the before you have set the temperature, desired cooking time. - Page 29 Fan Oven Mode Setting Food is heated by two heating elements on top of the cavity and one bottom heating element, while the fan on the side distributes the hot air evenly. Place the multi pan or Oven rack on level Cooking Guide Use settings and times in this table as guide lines for baking and roasting.
-
Page 30: Using The Grill Mode
USING The GRIll MOde Turn the FUNCTION KNOB to Grill During blinking, turn the SELECTION mode position (default: 1:00 min.). KNOB and set the desired cooking time The time is blinking. (the maximum cooking time is 1:30 h). If the blinking has already stopped Press the STarT button. - Page 31 Grill Mode Setting Food is heated by the top heating elements (horizontal position). For grilling, the grill insert with multi pan is usually placed on level Cooking Guide Use settings and times in this table as guide lines for grilling. We recommend to preheat the oven with Grill Mode for 2-3 minutes.
-
Page 32: Start Time Delay Function
START TIMe delAY FUNCTION Example by using the Fan Oven Mode : C urrent time: 12:05 Cook time: 2:00 Start time: you wish to start cooking at 16:00. Turn the FUNCTION KNOB to Fan Press the TImEr button to set the desired cooking time. The time is Oven Mode position blinking. Turn the SELECTION KNOB and set Press the button STarT TImE. -
Page 33: Using The Auto Cook Mode
USING The AUTO COOk MOde The 40 Auto Cook features include/provide pre-programmed cooking times. You do not need to set either the cooking times or the temperature. Turn the FUNCTION KNOB to “aUTO” If you see the symbol in the display, position. fill the water tank up to the maximum line and place it back. Place your food into the cooking cavity. -
Page 34: Using The Auto Cook Features
USING The AUTO COOk FeATUReS The following table presents 40 Auto Programmes for Steam cooking, Baking, Grilling, Roasting, Defrost & Cook and Defrosting. It contains its quantities and appropriate recommendations. Before using those programmes always fill water tank up to maximum level with fresh water. Programme number S-1 to S-12, b-6, d-1 to d-3 and d5 are running with steam only mode. Programmes number b-5, b-7, r-1 to r-4 and d-4 are running with a combination of steam and fan oven mode. The other programmes are running with fan oven mode or grill mode. - Page 35 Serving Code Food recommendations Size (kg) Fill water tank with fresh water up to maximum level. Pour the S-10 Flan 0.4-0.6 flan mixture into 6 dessert dishes, each 100 ml. Put dishes side by sides on oven rack, shelf level 3. Cook uncovered. Fill water tank with fresh water up to maximum level.
- Page 36 Serving Code Food recommendations Size (kg) Grilling Put beef steaks side by side in the middle of oven rack. Insert oven rack in shelf level 5, multi pan in shelf level 1. Turn over as soon as the oven beeps. 0.3-0.6 Beef Steak 0.6-0.8...
- Page 37 Serving Code Food recommendations Size (kg) Slice vegetables, such as courgettes, pepper, egg plants and onions. Add cherry tomatoes and mushrooms. Brush with a roast Vegetables 0.2-0.5 mixture of olive oil, herbs, salt and pepper. Put vegetables on multi pan, shelf level 4. Use middle sized potatoes.
-
Page 38: Using The Defrost Mode
USING The deFROST MOde Fill the water tank up to the maximum Turn the FUNCTION KNOB to the line and place it back. Then place your Defrost mode position (default: food into the cooking cavity. 20:00 min.). The time is blinking. During blinking, turn the SELECTION If the blinking has already stopped KNOB and set the desired defrosting... - Page 39 defrosting Setting Use settings and times in this table as guide lines for defrosting by gentle steaming. We recommend to always fill-up the water tank with fresh water to the maximum level. This mode is suitable to defrost food such as small pieces of meat, fish poultry and fruits.
-
Page 40: Using The Keep Warm Mode
USING The keeP WARM MOde Turn the FUNCTION KNOB to the Press the KEEPING Warm button (default: 1:00 h). The time is blinking. “OFF” position. During blinking, turn the SELECTION If the blinking has already stopped KNOB and set the desired cooking time before you have set the time, press the (the maximum cooking time is 10:00 h). -
Page 41: Using The Memory Mode
USING The MeMORY MOde You can store 3 individual programmes in the memory and call them up at any time. The memory is useful if you prepare one dish particularly frequently. You can also store one dish from the automatic programmes. Example: Steam 20 min., 100 °C Turn the FUNCTION KNOB to “Steam”... -
Page 42: Starting The Memory Function
Starting The Memory Function It is very easy to start the stored programme at any time. Example in the picture: Memory location 1 (steam 20 min., 100 °C) Place the dish in the steam oven. Turn the FUNCTION KNOB to Press the mEmOrY button (one time for code 1). -
Page 43: Test Dishes
TeST dISheS According to standard EN 60350 and DIN44547 1. Baking The recommendations for baking refer to preheated oven. Shelf Cooking Temp. Cooking Type of Food Dish & Notes level mode (°C) time (min.) Shortbread Multi pan Fan oven 160-170 20-30 Small Cakes Multi pan Fan oven 150-170 20-30 Oven rack +... -
Page 44: Descaling And Cleaning
descaling and cleaning deSCAlING When you see the message on the control panel, the machine needs to be descaled. Dilute and uses according to descrip- Close the lid of water tank before tion of bying citric acid. installing into main unit close the lid before installing it into the main unit. - Page 45 When done, the machine will make a Open the door and wipe inside the beep. Empty both the tank and the drip cooking cavity with a dry cloth. tray and clean the tank with water. note • We advise to use Citric acid when you descale the machine. Citric acid is a highly effective descaler made exclusively from natural, totally biodegradable substances.
-
Page 46: Using The Steam Clean Feature
USING The STeAM CleAN FeATURe The Steam Clean feature allows you to sanitize your oven in just 10 minutes. The STEAM CLEAN process takes 7 minutes, and the standby time for the process is 3 minutes. In these 3 minutes the steam will soak all the leftovers and you can wipe them from the ceiling or walls with a soft cloth. Fill the water tank up to the maximum Turn the FUNCTION KNOB to “OFF”... -
Page 47: Cleaning
CleANING Cleaning the top grill. ► Opening the top grill to the left or right, as shown in the figure, will facilitate cleaning. (When cleaning is finished, make sure to close the grill). Cleaning inside the cavity. ► Remove both left and right shelves (loosen the shelf screw by turning it to the left) and wipe any leftovers Loose... - Page 48 Cleaning the oven surface, control panel and window. ► The surface of the oven can be wiped with a wet dish towel, fol- lowed by a dry cloth to remove the water completely. ► Do not use force when cleaning the control panel as it can be damaged while cleaning.
-
Page 49: Switching Off The Beeper / Reading Out The Temperature
SWITChING OFF The BeePeR / ReAdING OUT The TeMPeRATURe Turn the FUNCTION KNOB to “OFF” To switch the beeper off, press STOP and STarT at the same time and hold position. for one second. “OFF” appears in the display. To switch the beeper back on, press STOP and STarT again at the same time and hold for one second. -
Page 50: Child Safety Lock
ChIld SAFeTY lOCk The oven’s Child Safety Lock allows you to lock the control panel to protect the oven against unintended use. To lock the Oven Turn the FUNCTION KNOB to Press the mEmOrY and SELECT “OFF” position. button at the same time and hold for 3 seconds. -
Page 51: Cleaning And Care
CleANING ANd CARe Removing the Cooking Compartment You can remove the oven door for easier cleaning. Do not reach into the door hinges. There is a risk of injury. 1. Open the cooking compartment door fully. 2. Move the two locking levers up on the left and right- hand sides. -
Page 52: Changing The Lamp
ChANGING The lAMP Replacing the rear oven lamp and cleaning the glass cap 1. Take off the cap by turning counterclockwise. 2. Remove the metal ring and the sheet ring and clean the glass cap. 3. If necessary, replace the bulb with a 25 watt, 230 V, 300 °C heat - resistant oven light bulb. -
Page 53: Error Codes
STEAM SENSOR SHORT DESCALE MAX. TIME OVER (or STEAM USE MAX TIME OVER) In case the steam operating time after the descaling message has been passed. If any of these errors occur, please contact SAMSUNG Customer Service. error codes _53... -
Page 54: Technical Data
TeChNICAl dATA model FQV137U / FQV137ST / FQV137UST / FQV313T003 Power Source 230 V ~ 50 Hz Power consumption Maximum Power 3200 W Grill 1530 W Convection 2050 W Steam 1700 W - 2200 W cooling method Cooling fan motor... - Page 55 note...
- Page 56 Code No.: DE68-03643H...