Table of Contents
Advertisement
Available languages
Available languages
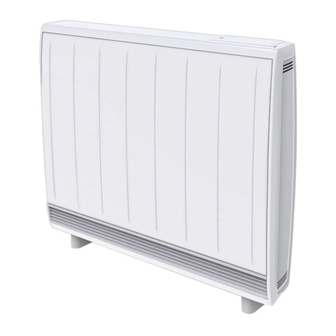
Models:
Boost Output
208/240V~
Rated Input
208/240V~
Rated Output for 8hr
Charge Period
# of Bricks
(3 Bricks per Package)
Installed Weight
kWh
IMPORTANT SAFETY INFORMATION: Always read this manual first before attempting to install or use this
Heating System. For your safety, always comply with all warnings and safety instructions contained in this
manual to prevent personal injury or property damage.
To view the full line of Dimplex products, please visit www.dimplex.com
Owner's Manual
Quantum Storage Heater
QSH-70
473/630W
1170/1560W
1665/2220W
700W
18
91 kg
(200 lbs)
10.9 kWh
QSH-100
QSH-125
660/880W
848/1130W
2070/2760W
1000W
24
115 kg
(254 lbs)
15.4 kWh
QSH-150
1035/1380W
2478/3300W
1250W
30
142 kg
(313 lbs)
19.3 kWh
23.1 kWh
1500W
36
165 kg
(364 lbs)
7212670100R02
Advertisement
Chapters
Table of Contents

Related Manuals for Dimplex QSH-70


Summary of Contents for Dimplex QSH-70
- Page 1 IMPORTANT SAFETY INFORMATION: Always read this manual first before attempting to install or use this Heating System. For your safety, always comply with all warnings and safety instructions contained in this manual to prevent personal injury or property damage. To view the full line of Dimplex products, please visit www.dimplex.com 7212670100R02...
-
Page 2: Table Of Contents
CAUTION: Procedures and techniques which, if not carefully followed, will result in damage to the equipment. WARNING: Procedures and techniques which, if not carefully followed, will expose the user to the risk of fire, serious injury, or death. www.renewables.dimplex.com... -
Page 3: Welcome & Congratulations
Welcome & Congratulations Thank you and congratulations for choosing to purchase a Quantum Storage Heating System from Dimplex. Please carefully read and save these instructions. CAUTION: Read all instructions and warnings carefully before starting installation. Failure to follow these instructions may result in a possible electric shock, fire hazard and will void the warranty. -
Page 4: Important Instructions
11. HIGH TEMPERATURES: Keep electrical cords, furniture, draperies or any other blocking material away from the heater. See Installation Section for specific distances. 12. The heater is very heavy and must be secured to a wall to ensure that it cannot move. SAVE THESE INSTRUCTIONS www.renewables.dimplex.com... -
Page 5: Quick Reference Guide
When heat is required throughout the day, the heater releases its stored heat by a silent ther- mostatically controlled fan. The Dimplex control 100 mm system automatically stores more energy as it (3.9”) gets colder, keeping you warm and comfortable no matter the outdoor conditions. -
Page 6: Site Selection And Preparation
2. Secure the feet to the heater, using the screws provided in the hardware kit. NOTE: For models QSH-70 and QSH-100 two locations are possible for mounting each foot. They are indicated by an “X” and “Y”... -
Page 7: Installation Instructions
Installation Instructions WARNING: This appliance is heavy. The floor Figure 7 must be checked to ensure that it is capable of bearing the weight of the unit up to 177 kg (390 lbs). WARNING: Do not under any circumstances attempt to move or reposition this heater without seeking expert advice. -
Page 8: Building The Center Core
208/240V Installations 6. Position the second row of bricks so that they Terminal are facing down and the element sits within the Block grooves. (Figure 11) Figure 10 Cable Clamp Wire Entrance www.renewables.dimplex.com... -
Page 9: Reassembly
Installation Instructions Reassembly 7. The third row of brick is positioned in a manner similar to the first row. 1. Replace all the panels of the outer casing CAUTION: Be careful not to damage or reverse steps 5-8 of Site Selection and dislodge the element. -
Page 10: Operation
Service Menu (See the “Service Menu” section of this document for more details). This Advance provides the ability to activate a supplemental heating (boost) element, controlled by the electronic thermostat for a maximum of 240 minutes (4 hours), or until www.renewables.dimplex.com... -
Page 11: Setting The Date And Time
Operation press the centre of the dial to select. • Rotate the dial to select the correct ‘Day of the Month’ and press the centre of the dial to select. Repeat this operation until date and time have been sent and the display returns to the Main Menu. -
Page 12: Options
5 seconds. Child Lock will appear at the bottom of the screen. To unlock the control repeat the action of pressing back and selector dial for 3 seconds. NOTE: The controls cannot be adjusted when the child lock is active. www.renewables.dimplex.com... -
Page 13: User Information
Operation User Information charge of 0% or 100% is needed. Fan Speed - Adjustment of fan speed between Press and hold the selector dial for 5 seconds to 75% and 100% mainly used to reduce noise display the user information menu, three choices control. -
Page 14: Warranty
• Dimplex will not be responsible for, and the limited warranty services shall not include, any expense incurred for installation or removal of the product or part (or any replacement product or part) or any labour or transportation costs. Such costs shall be the purchaser’s responsibility. - Page 15 Pour votre sécurité, toujours respecter tous les avertissements et suivre les consignes de sécurité comprises dans le présent manuel afin de prévenir les blessures ou les dommages matériels. Pour découvrir la gamme complète de produits Dimplex, visitez www.dimplex.com 7212670100R02...
- Page 16 MISE EN GARDE: Marches à suivre et techniques dont le non-respect pourrait causer des dommages matériels. AVERTISSEMENT: Marches à suivre et techniques qui, si elles ne sont pas bien respectées, exposeront l’utilisateur à des risques d’incendie, de blessure grave ou de décès. www.renewables.dimplex.com...
-
Page 17: Bienvenue Et Félicitations
Bienvenue et félicitations Merci et félicitations d’avoir acheté un radiateur à accumulation Quantum de Dimplex. Lire ces consignes attentivement et les conserver. MISE EN GARDE: Lire attentivement toutes les consignes et tous les avertissements avant de procéder à l’installation. Le non-respect de ces consignes pourrait entraîner un risque de choc électrique ou d’incendie et annulera la garantie. -
Page 18: Instructions Importantes
11. HAUTES TEMPÉRATURES: Tenir éloignés les câbles électriques, les meubles, les tentures ou tout objet pouvant obstruer le radiateur. Consulter la section Installation pour obtenir les distances précises. 12. Le radiateur est très lourd et doit être fixé au mur pour l’immobiliser. CONSERVER CES INSTRUCTIONS www.renewables.dimplex.com... -
Page 19: Guide De Référence Rapide
à l’aide d’un ventilateur silencieux à 100 mm commande thermostatique. Le système de commande (3,9 po) de Dimplex emmagasine automatiquement plus d’éner- gie lorsqu’il refroidit, de sorte qu’il vous tient au chaud et à une température confortable peu importe les condi- 100 mm tions météorologiques. -
Page 20: Choix Et Préparation De L'emplacement
2. Fixer les pieds au radiateur à l’aide des vis fournies dans la trousse de quincaillerie. NOTA: Dans le cas des modèles QSH-70 et QSH-100, il est possible de placer les pieds à deux endroits. Ils sont indiqués par un « X » et un « Y »... -
Page 21: Instructions D'installation
Instructions d’installation AVERTISSEMENT: L’appareil est lourd. Le plancher Figure 7 doit être inspecté pour s’assurer qu’il peut supporter le poids de l’appareil, soit jusqu’à 177 kg (390 lb). AVERTISSEMENT: En aucune circonstance ne tenter de déplacer ou de repositionner le radiateur sans obtenir les conseils d’un expert. -
Page 22: Montage De L'unité Centrale
7. Installer la troisième rangée de briques de façon similaire à la première. MISE EN GARDE: Veiller à ne pas endommager ou déloger l’élément. 8. Répéter l’opération pour les autres rangées. 9. S’assurer que les briques sont bien fixées et www.renewables.dimplex.com... -
Page 23: Réassemblage
Instructions d’installation disposées uniformément. Figure 11 10. Fermer l’unité centrale en remettant en place le panneau intérieur et le matériau isolant. 11. S’assurer que le bord inférieur est inséré dans le boîtier et que les vis sont bien vissées de chaque côté. -
Page 24: Utilisation
La fonction « Advance » permettra d’activer un élément de chauffage d’appoint, contrôlé par le thermo- stat électronique, pour une durée maximale de 240 minutes (4 heures), ou jusqu’à ce que la température cible (température indiquée à l’afficheur soit atteinte. www.renewables.dimplex.com... -
Page 25: Réglage De La Date Et De L'heure
Utilisation confirmer votre choix. Répéter cette opération jusqu’à ce que la date et l’heure soient réglées, et que l’afficheur présente le menu principal. NOTA: À l’installation initiale de l’appareil, un mes- sage d’avertissement peut s’afficher. Cela signifie que l’horloge n’a pas été initialisée. Appuyer sur la touche Menu et suivre les étapes ci-dessus pour régler l’heure. -
Page 26: Options
Back et le cadran de sélection pendant 3 secondes. NOTA: Les paramètres ne peuvent pas être modi- fiés lorsque le verrouillage protège-enfants est activé. Renseignements pour l’utilisateur Presser et maintenir enfoncé le cadran de sélection www.renewables.dimplex.com... -
Page 27: Entretien
Utilisation pendant 5 secondes pour afficher le menu des rensei- de 0 % ou 100 % est requise. gnements pour l’utilisateur. Trois options sont of- Fan Speed - Règle la vitesse du ventilateur entre fertes : 75 % et 100 % (principalement pour réduire le SP Range - Règle la plage de températures. -
Page 28: Garantie
Les produits couverts par la présente garantie limitée ont été testés et inspectés avant l’envoi. Conformément aux dispositions de la présente garantie, Dimplex garantit que ces produits sont exempts de tout vice de matériau et de fabrication pour une période de 2 ans à partir de la date d’achat desdits produits.