
Related Manuals for RCA 1113


Summary of Contents for RCA 1113
- Page 1 Call Waiting / Caller ID Speakerphone User’s Guide Please read this manual before operating product for the first time. Visit the RCA web site at www.rca4phones.com Model 1113...
-
Page 2: Equipment Approval Information
Equipment Approval Information Your telephone equipment is approved for connection to the Public Switched Telephone Network and is in compliance with parts 15 and 68, FCC Rules and Regulations and the Technical Requirements for Telephone Terminal Equipment published by ACTA. 1 Notification to the Local Telephone Company On the bottom of this equipment is a label indicating, among other information, the US number and Ringer Equivalence Number (REN) for... -
Page 3: Interference Information
2 Rights of the Telephone Company Should your equipment cause trouble on your line which may harm the telephone network, the telephone company shall, where practicable, notify you that temporary discontinuance of service may be required. Where prior notice is not practicable and the circumstances warrant such action, the telephone company may temporarily discontinue service immediately. -
Page 4: Hearing Aid Compatibility (Hac)
• R e o r i e n t o r r e l o c a t e a n d i n c r e a s e t h e s e p a r a t i o n b e t w e e n t h e telecommunications equipment and receiving antenna. -
Page 5: Table Of Contents
Table of Contents Equipment Approval Information..2 Caller ID (CID) Features......13 Interference Information......3 CID Summary Screen......13 Hearing Aid Compatibility (HAC)..4 Receiving and Storing CID Calls……14 FCC RF Radiation Exposure Reviewing CID Records.......14 Statement … …….........4 Deleting CID Records......14 Introduction..........6 Dialing Back..........14 Before You Begin........6 Setting Up the Caller ID Menu....15 Telephone Jack Requirements....6... -
Page 6: Introduction
Industry Canada (I.C.) Notice This product meets the applicable Industry Canada technical specifications. Le présent materiel est conforme aux specifications techniques applicables d'Industrie Canada.” The Ringer Equivalence Number is an indication of the maximum number of terminals allowed to be connected to a telephone interface. The termination on an interface may consist of any combination of devices subject only to the requirement that the sum of the Ringer Equivalence Numbers of all the devices does not exceed five. -
Page 7: Before You Begin
Before You Begin Parts Checklist Make sure your package includes the following items: 2-wire telephone Handset cord Base line cord Desktop Handset pedestal Telephone Jack Requirements Wall plate To use this phone, you need an RJ11C type modular telephone jack, which might look like the one pictured here, installed in your home. -
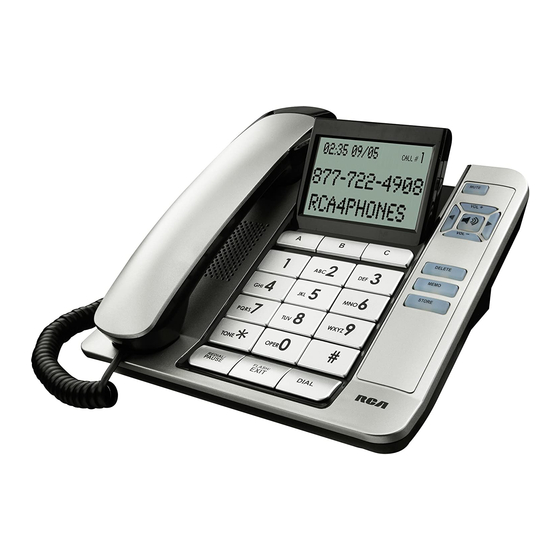
Page 8: Base Layout
Base Layout display review memory buttons store buttons mute button speaker button VOL (+/-) buttons ringer volume switch delete button menu button store button redial/ *tone flash/ dial pause button button button exit button button... -
Page 9: Installing And Replacing The Batteries
Installing and Replacing the Batteries Your Caller ID phone uses 4 AA-size alkaline batteries for receiving and storing Caller ID records and for storing the numbers y o u use for memory dialing, pulse dialing, and redial. IMPORTANT: You will have approximately 90 seconds t o replace the batteries before the memories stored are lost. -
Page 10: Connecting The Telephone Line
Connecting the Telephone Line 1. Connect one end of the straight telephone line cord to the jack on the back of the base. 2. Connect the other end to a wall phone jack. 3. Set the ringer volume switch located at the back of the base to the desired loudness. -
Page 11: Receiving A Phone Call
3. Plug one end of straight telephone line cord into the jack on the bottom of the base. 4. Feed the line code through the groove and plug the end into the modular telephone jack. Excess telephone line can be stuffed into the recess area on the bottom of the Base Unit . -
Page 12: Mute
you hear a dial tone. NOTE: The redial feature holds the last number (up to 32 digits) that you dialed in memory. If you pressed any other numbers after dialing the phone number (for example, when accessing a voice- menu system) then those numbers are also dialed. Mute Use the mute button to interrupt a phone conversation to talk privately with someone else in the room. -
Page 13: Speakerphone Use
sounds and prevent the speakerphone from going into the receiving when you finish talking.) • Surfaces affected by vibration. • Recessed areas such as in a corner, under a cupboard, or next to a cabinet , which can generate an echo effect . Speakerphone Use Note the following guidelines when using the speakerphone: •... -
Page 14: Receiving And Storing Cid Calls
Receiving and Storing CID Calls This unit receives and displays information transmitted by your local company. This information can include the phone number, date, and time; or the name, phone number, date, and time. The unit can store up to 75 calls for later review. -
Page 15: Setting Up The Caller Id Menu
NOTE: A timer (10 seconds on-hook and 3 seconds off-hook) located in the upper right side of the display will start , letting you know how much time is left until the unit returns to the Summary Screen. 3. If you are at on-hook and the screen displays PICKUP OR ADJ, you can adjust the phone number format by pressing the dial button. -
Page 16: Display Language
NOTE: You have 20 seconds f o l l o w i n g an entry before the phone returns to the Summary Screen. Display Language This adjustment allows you to display the Caller ID prompts in English, French, or Spanish. 1. -
Page 17: Memory
NOTE: The phone will exit Set Up after 20 seconds if no buttons are pressed. REMINDER: The time and date are programmed automatically when the first Caller ID record is successfully received after set up. Memory You may store information in any of the following memory locations: 0 to 9, A, B, and C . -
Page 18: Changing A Stored Number
Changing a Stored Number Repeat the storage sequence under “Storing a Name and Number in Memory”, and use the delete button to delete the old number before entering the new number. Erasing a Stored Number 1. Press the store button. 2. -
Page 19: Dialing A Number Stored In Memory While On-Hook
Dialing a Number Stored in Memory While On-hook 1. Press the dial button. 2. To select a memory, press any number key (0-9, A, B, C). The number in that memory location displays. NOTE: You may select a different memory location by pressing review buttons to scroll through the memories or press a ... -
Page 20: Pre-Dialing
Pre-Dialing 1. With the handset on the cradle, enter the telephone number you wish to call. The telephone number shows in the display. 2. Lift the handset or press the speaker button and the number automatically dials. NOTE: Use the delete butt on to delete an incorrectly entered number. -
Page 21: General Product Care
No Information is shown after the Phone Rings • Are you subscribed to Caller ID ser vice from your local telephone company? • Be sure to wait until the second ring before answering. Phone Dials in Pulse with Tone Service •... -
Page 22: Limited Warranty
If this product was received as a gift, it is suggested you jot down the date of gift receipt, as this information will be valuable should service be required during the warranty period. If the equipment is causing harm to the telephone network, the telephone company may require that you disconnect the equipment until the problem is resolved. - Page 23 If you are within your limited warranty period and it is determined t h a t service is required: • We will ask that you properly pack your product to avoid shipping damage. We recommend that you use the original carton and packing materials.
-
Page 24: Product Registration
Product registration is not required for warranty coverage but does allow us to contact you should it be necessary. Visit the RCA web site at www.rca4phones.com Please do not send any products to the Indianapolis address listed in this manual or on the carton. This will only add delays in service for your product.