Table of Contents
Advertisement
Advertisement
Table of Contents

Related Manuals for TP-Link TL-WPS510U


Summary of Contents for TP-Link TL-WPS510U
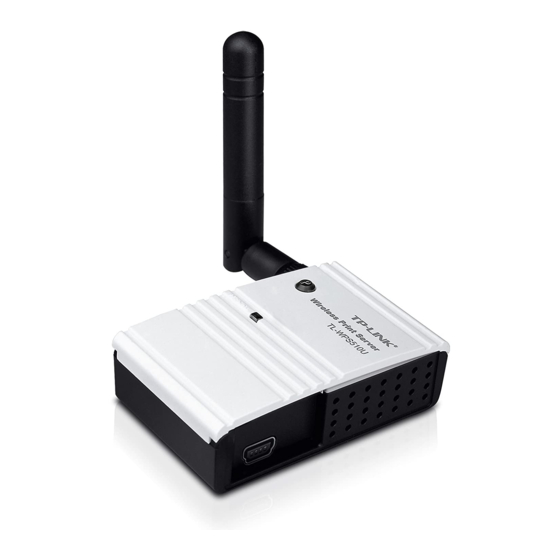
- Page 1 TL-WPS510U Pocket-Sized Wireless N Print Server Rev: 3.0.0 1910010608...
- Page 2 COPYRIGHT & TRADEMARKS Specifications are subject to change without notice. is a registered trademark of TP-LINK TECHNOLOGIES CO., LTD. Other brands and product names are trademarks or registered trademarks of their respective holders. No part of the specifications may be reproduced in any form or by any means or used to make any derivative such as translation, transformation, or adaptation without permission from TP-LINK TECHNOLOGIES CO., LTD.
-
Page 3: Fcc Statement
FCC STATEMENT This equipment has been tested and found to comply with the limits for a Class B digital device, pursuant to part 15 of the FCC Rules. These limits are designed to provide reasonable protection against harmful interference in a residential installation. This equipment generates, uses and can radiate radio frequency energy and, if not installed and used in accordance with the instructions, may cause harmful interference to radio communications. -
Page 4: Ce Mark Warning
CE Mark Warning This is a class B product. In a domestic environment, this product may cause radio interference, in which case the user may be required to take adequate measures. National Restrictions 2400.0-2483.5 MHz Country Restriction Reason/remark General authorization required for outdoor use Bulgaria and public service Outdoor use limited to... -
Page 5: Declaration Of Conformity
DECLARATION OF CONFORMITY For the following equipment: Product Description: Pocket-Sized Wireless N Print Server Model No.: TL-WPS510U Trademark: TP-LINK We declare under our own responsibility that the above products satisfy all the technical regulations applicable to the product within the scope of Council Directives:... -
Page 6: Table Of Contents
CONTENTS Package Contents ....................1 Chapter 1. Introduction..................2 Product Overview ...................... 2 Features ........................2 LED Indicator......................2 Factory Defaults ......................3 Chapter 2. Hardware Installation .................4 Preparation........................ 4 Typology........................4 Connection ........................ 4 Chapter 3. How to Configure the Print Server ............6 Using Utility in Windows XP/Vista/7 ................ - Page 7 4.4.1 Factory Default ......................48 4.4.2 Firmware Upgrade....................49 Restart........................50 Appendix A: How to Reset the Print Server ............51 Appendix B: Frequently Asked Questions ............52 Appendix C: Printer Installation in Windows OS ..........54 C-1 If You Have Installed A Printer Before ............... 54 C-2 If You Never Install A Printer Before ................
-
Page 8: Package Contents
TL-WPS510U Pocket-Sized Wireless N Print Server Package Contents One TL-WPS510U Pocket-Sized Wireless N Print Server One external AC power adapter One USB cable One Quick Installation Guide One Resource CD containing Utility and User Guide... -
Page 9: Chapter 1. Introduction
TL-WPS510U Pocket-Sized Wireless N Print Server Chapter 1. Introduction 1.1 Product Overview The external print servers enhance capability by letting you place your printers at convenient locations directly on the Ethernet network, and by increasing network printer performance and management. Please note that the print server does not support printing with host-based printers, e.g. -
Page 10: Factory Defaults
TL-WPS510U Pocket-Sized Wireless N Print Server 1.4 Factory Defaults Username: admin Password: admin Wireless Mode: Ad-Hoc (Peer-to-Peer) Channel: 1 SSID: WLAN-PS Encryption: None IP Address: 192.168.0.10 Subnet Mask: 255.255.255.0 DHCP Client: off... -
Page 11: Chapter 2. Hardware Installation
2.2 Typology In this topology, the wireless router is the center of the wireless network. Every host and TL-WPS510U will communicate with the wireless router. The hosts communicate with TL-WPS510U via the wireless router. Figure 2-1 Topology 2.3 Connection... - Page 12 TL-WPS510U Pocket-Sized Wireless N Print Server Power on print server. Wait 40 seconds for the print server’s Power On Self Test (POST).
-
Page 13: Chapter 3. How To Configure The Print Server
Windows 7 are similar. Here take Windows 7 for example. Insert the setup CD into your CD-drive. The autorun program will be started as shown in Figure 3-1. Select the model (TL-WPS510U) of your print sever. Figure 3-1 Note: If you don’t have a CD-ROM, you can log onto our website... - Page 14 TL-WPS510U Pocket-Sized Wireless N Print Server Choose Easy Setup Wizard. Figure 3-2 Then a prompt will appear as shown in Figure 3-3. Make sure you have installed the printer driver, and click Continue. Figure 3-3...
- Page 15 TL-WPS510U Pocket-Sized Wireless N Print Server Then the Wireless Print Server Setup Wizard will appear as shown in Figure 3-4. Select the wireless router to connect to the print server and click “Next”. Figure 3-4 Note: Please make sure your router’s DHCP feature is enabled.
- Page 16 TL-WPS510U Pocket-Sized Wireless N Print Server On the Select a Print Server screen as shown in Figure 3-6, select the print server and click “Next”. Figure 3-6 Note: If you can’t find the print server in the list, please check whether its power LED is on (red). If the power LED is on and the print server still doesn’t appear, please reset it.
- Page 17 TL-WPS510U Pocket-Sized Wireless N Print Server On the TCP/IP Settings page as shown in Figure 3-7, select “Obtain an IP address automatically (use DHCP)” and then click “Next”. Figure 3-7 Then a prompt will appear to ask whether you have installed printer driver before. Click “YES”.
- Page 18 TL-WPS510U Pocket-Sized Wireless N Print Server Then the Select a Printer page will appear. Select the printer you’ve installed the printer driver, and click “Next”. Figure 3-9 10. Click “Finish” to complete the configuration. Now the computer can use the printer via the print server.
-
Page 19: Joining The Print Server Network
Connect the computer to your router or access point. For details, please refer to your router’s installation guide. Insert the setup CD into your CD-drive. The autorun program will be started as shown in Figure 3-11. Select the model (TL-WPS510U) of your print sever. Figure 3-11 Note: If you don’t have a CD-ROM, you can log onto our website... - Page 20 TL-WPS510U Pocket-Sized Wireless N Print Server Choose Setup Wizard. Figure 3-12 The Welcome page will appear. Click “Next”. Figure 3-13...
- Page 21 TL-WPS510U Pocket-Sized Wireless N Print Server On the Select A Print server page, select your print server and click “Next”. Figure 3-14 On the Change Settings page, select “No, I don’t want to change settings. (O)” and click “Next”. Figure 3-15...
- Page 22 TL-WPS510U Pocket-Sized Wireless N Print Server On the Summery page, click “Next”. Figure 3-16 Click “Finish” on the Installation Complete page. Figure 3-17 Now, the computer has successfully joined the infrastructure network, and it can also use the printer via the print server.
-
Page 23: Using Web Management Page In Windows Xp/Vista/7
TL-WPS510U Pocket-Sized Wireless N Print Server 3.2 Using Web Management Page in Windows XP/Vista/7 3.2.1 Setting up a Print Server Network To connect to the print server using the web management page, the configuration for Windows XP, Windows Vista and Windows 7 are similar. Here take Windows 7 for example. - Page 24 TL-WPS510U Pocket-Sized Wireless N Print Server Click Change adapter settings. Figure 3-20 Right click Wireless Network Connection, and select Properties. Figure 3-21...
- Page 25 TL-WPS510U Pocket-Sized Wireless N Print Server Double click Internet Protocol Version 4 (TCP/IPv4), or select it and then click Properties. Figure 3-22 Select “Use the following IP address” and input a static IP address 192.168.0.X (1<X<10 or 10<X<255, for 192.168.0.10 is the default IP address of the print server), Subnet mask 255.255.255.0.
- Page 26 TL-WPS510U Pocket-Sized Wireless N Print Server Figure 3-23 Left-click the icon at the right bottom on your desktop and the wireless network list wil appear. Select the SSID WLAN-PS of wireless print server and then click Connect. (Here we use Windows Zero Configuration as an example. You can also use vendor utility of wireless adapter.
- Page 27 TL-WPS510U Pocket-Sized Wireless N Print Server Once the connection is successful, you will see the following screen shown in Figure 3-25. Figure 3-25 Open a web-browser and type in the IP address of the print server (the default is 192.168.0.10) in the address field of the browser to login to the web management of the print server.
- Page 28 TL-WPS510U Pocket-Sized Wireless N Print Server Figure 3-28 12. Click “Setup” and then choose “TCP/IP”. Check “Use the following TCP/IP Settings” radio button and then fill in the following parameters. IP Address: Specify an IP address for your print server. The IP address must be within the same subnet as your wireless router or access point.
- Page 29 TL-WPS510U Pocket-Sized Wireless N Print Server Figure 3-29 13. Click Save & Restart and then wait the print server to save the changes and restart. Figure 3-30...
- Page 30 TL-WPS510U Pocket-Sized Wireless N Print Server 14. Enter the “Internet Protocol (TCP/IP) Properties” page as shown in Figure 3-31. Fill in the following parameters. IP Address: Specify an IP address for your adapter. The IP address must be within the same subnet as your wireless router or access point.
- Page 31 TL-WPS510U Pocket-Sized Wireless N Print Server Figure 3-32...
- Page 32 TL-WPS510U Pocket-Sized Wireless N Print Server 16. Click Save & Restart button and then wait the print server to restart. Figure 3-33 17. Connect your computer to the wireless router. We take TP-LINK_A4161E for example. The password is 0123456789. Figure 3-34...
-
Page 33: Joining The Print Server Network
TL-WPS510U Pocket-Sized Wireless N Print Server Figure 3-35 18. Install a printer. If you’ve already installed the printer on your computer, please refer to C-1 If You Have Installed A Printer Before to add a Standard TCP/IP port for it. -
Page 34: Using Web Management Page In Mac Os
TL-WPS510U Pocket-Sized Wireless N Print Server 3.3 Using Web Management Page in MAC OS 3.3.1 Setting up a Print Server Network Click the Apple Icon on the left side of the top-bar, and then choose System Preferences…. Figure 3-36 On the new window, please choose Network. - Page 35 TL-WPS510U Pocket-Sized Wireless N Print Server Follow the steps as shown in Figure 3-38 and Figure 3-39 to set the IP address. Figure 3-38 Figure 3-39...
- Page 36 Connect your MAC computer to the TL-WPS510U. In default, the print server will work on Ad-Hoc mode with the SSID WLAN-PS, so please select the wireless network WLAN-PS to connect. If you need to reset the TL-WPS510U but don’t know how to do, please refer to the Appendix A: How to Reset the Print Server.
- Page 37 TL-WPS510U Pocket-Sized Wireless N Print Server Open the Safari and log into the TL-WPS510U (default Name: admin, default Password: admin). Go to “Setup -> TCP/IP”, and then select “Use the following TCP/IP settings”. Change its IP Address and Subnet Mask to 192.168.1.10 and 255.255.255.0; enter your router’s IP address in the Default Router blank (e.g.
- Page 38 Figure 3-43 Log into the TL-WPS510U and go to “Setup -> Wireless”. Configure the wireless parameters according to your wireless router. After the configuration, click Save & Restart. Network Type/ SSID /Channel: select the network (Take TP-LINK_A4161E for example) from the “Site Survey”...
- Page 39 TL-WPS510U Pocket-Sized Wireless N Print Server Figure 3-44 Figure 3-45...
- Page 40 TL-WPS510U Pocket-Sized Wireless N Print Server Connect your MAC computer to the wireless router. We take TP-LINK_61BB7A for example. The password is 0123456789. Figure 3-46 Figure 3-47...
- Page 41 TL-WPS510U Pocket-Sized Wireless N Print Server Try to access the TL-WPS510U and you can see Wireless status. The TL-WPS510U is working on Infrastructure mode and can communicate with the wireless router and your MAC computer. Figure 3-48...
-
Page 42: Printer Installation In Mac Os
TL-WPS510U Pocket-Sized Wireless N Print Server 3.3.2 Printer Installation in MAC OS Click the Apple icon -> System Performances -> Print & Scan to add a Standard TCP/IP port for the printer. Figure 3-49... - Page 43 TL-WPS510U Pocket-Sized Wireless N Print Server Click Figure 3-50 Select “IP”, and then configure the following parameters as shown in Figure 3-51 and Figure 3-52. Select “Line Printer Daemon - LPD” for Protocol and enter the print server’s IP 192.168.1.10 for Address and lp1 for Queue. Give a name to your printer. For Print Using, go to “Select Printer Software…”...
- Page 44 TL-WPS510U Pocket-Sized Wireless N Print Server Figure 3-51 Figure 3-52...
-
Page 45: Joining The Print Server Network
TL-WPS510U Pocket-Sized Wireless N Print Server Till now you've successfully installed the print server and can print via the TL-WPS510U. Figure 3-53 3.3.3 Joining the Print Server Network If another computer wants to join the print server network to share the printer, please follow the steps bellow. -
Page 46: Chapter 4. More Configuration For The Print Server
TL-WPS510U Pocket-Sized Wireless N Print Server Chapter 4. More Configuration for the Print Server The Print Server contains an embedded web server that can be accessed through a supported web browser on a WLAN, for example, IE6, Firefox or above is recommended. The embedded web server provides access to configuration and management pages for the print server and the connected peripheral device. - Page 47 TL-WPS510U Pocket-Sized Wireless N Print Server Figure 4-3...
-
Page 48: Status
TL-WPS510U Pocket-Sized Wireless N Print Server 4.2 Status The Status page shows the current information about the print server as shown in Figure 4-3. By clicking the corresponding tab, you can view the following information, including System, Printer, Wireless, and TCP/IP. -
Page 49: Printer
TL-WPS510U Pocket-Sized Wireless N Print Server 4.2.2 Printer Figure 4-5 Manufacturer: This option allows you to view manufacturer of the printer. When the printer connected with the print server, it will be show in the manufacture box. Model Number: This option allows you to view model of the printer. When the printer connected with the print server, it will be show in the model box. -
Page 50: Wireless
TL-WPS510U Pocket-Sized Wireless N Print Server 4.2.3 Wireless The Wireless Status page shows the current wireless information of the print server. Figure 4-6 4.2.4 TCP/IP The TCP/IP Status page shows the current TCP/IP settings of the print server. Figure 4-7... -
Page 51: Setup
TL-WPS510U Pocket-Sized Wireless N Print Server Use DHCP/BOOTP: This option allows you to view DHCP/ BOOTP status. If there is a DHCP/BOOTP server on your network, this option allows the print server to obtain IP-related settings automatically from your DHCP server. - Page 52 TL-WPS510U Pocket-Sized Wireless N Print Server E-mail Alert: This option allows you to receive alert of the device. SMTP Server IP Address: Enter the IP Address of the SMTP Server. Administrator E-mail Address: Enter the e-mail address used to receive alert.
-
Page 53: Wireless Setup
TL-WPS510U Pocket-Sized Wireless N Print Server 4.3.2 Wireless Setup Click Wireless, the following screen will appear. Figure 4-9... -
Page 54: Tcp/Ip Setup
TL-WPS510U Pocket-Sized Wireless N Print Server Basic Settings: Network Type: To change the WLAN type to Ad-Hoc (default) or Infrastructure. SSID: To change the SSID to connect an existing wireless network.(default: WLAN-PS) Channel: Indicates the channel setting for this print server. -
Page 55: Misc
TL-WPS510U Pocket-Sized Wireless N Print Server settings automatically from your DHCP server. IP Address: This option allows you to input IP address from the print server. The IP address must meet the IP addressing requirements of the network segment. Note: On the TCP/IP Setup screen, specify a fixed IP address is highly recommended. -
Page 56: Firmware Upgrade
TL-WPS510U Pocket-Sized Wireless N Print Server 4.4.2 Firmware Upgrade Click Browse… to select the firmware file and then click Firmware Upgrade to upgrade the firmware of the print server. Figure 4-12... -
Page 57: Restart
TL-WPS510U Pocket-Sized Wireless N Print Server 4.5 Restart Click OK to reboot the print server. Figure 4-13... -
Page 58: Appendix A: How To Reset The Print Server
Pocket-Sized Wireless N Print Server Appendix A: How to Reset the Print Server If you lose the connection with TL-WPS510U because of wrong configuration, you need to reset it to factory defaults and configure it again. Follow the steps below to reset TL-WPS510U: Unplug the power adapter of TL-WPS510U;... -
Page 59: Appendix B: Frequently Asked Questions
TL-WPS510U Pocket-Sized Wireless N Print Server Appendix B: Frequently Asked Questions Print jobs are sent to the print queue successfully, but fail to be sent to the printer. Check all the information of the print server by running PSAdmin. Check to see that if the power adapters are properly connected. - Page 60 TL-WPS510U Pocket-Sized Wireless N Print Server TCP/IP Problems A. The print server's Node ID you specified in the "arp" command is not correct. If this is the case, please ensure the Node ID field in the corresponding entry of the print server's IP address in NT's ARP cache table is correct by typing the following command at NT's DOS prompt.
-
Page 61: Appendix C: Printer Installation In Windows Os
TL-WPS510U Pocket-Sized Wireless N Print Server Appendix C: Printer Installation in Windows OS Other computers in the same local network that need to share the printing should add the Standard TCP/IP port on their system. There’re two conditions. Please choose one according to your system. - Page 62 TL-WPS510U Pocket-Sized Wireless N Print Server Find your installed printer icon, right-click on it, and select Properties. Figure C-2 Click Ports > Add Port > Standard TCP/IP Port > New Port > Next. Figure C-3...
- Page 63 TL-WPS510U Pocket-Sized Wireless N Print Server Input the exact IP address of print server. Click Next. (You can log into the print server, and go to Status -> TCP/IP to find the IP address of print server. Here we take 192.168.1.10 for example.)
- Page 64 TL-WPS510U Pocket-Sized Wireless N Print Server Choose LPR, and input the queue name as lp1. Click OK. Figure C-6 Click Next and then Finish, to complete the wizard. Figure C-7...
- Page 65 TL-WPS510U Pocket-Sized Wireless N Print Server Figure C-8 Click Close and Apply. Figure C-9...
-
Page 66: If You Never Install A Printer Before
TL-WPS510U Pocket-Sized Wireless N Print Server Figure C-10 Now, the printer port has been created. C-2 If You Never Install A Printer Before Click Star > Control Panel, and select Devices and Printers. Figure C-11... - Page 67 TL-WPS510U Pocket-Sized Wireless N Print Server Click Add a printer. Figure C-12 Select Add a local printer. Figure C-13...
- Page 68 TL-WPS510U Pocket-Sized Wireless N Print Server Select “Create a new port”, and the type of port is “Standard TCP/IP Port”. Figure C-14 Input the IP address of the print server and click Next. (You can log into the print server, and go to Status ->...
- Page 69 TL-WPS510U Pocket-Sized Wireless N Print Server Figure C-16 On the following page, select Custom and click Settings. And then on the next page, please select LPR as the Protocol and the Queue Name is lp1. Figure C-17...
- Page 70 TL-WPS510U Pocket-Sized Wireless N Print Server The windows will ask you to install the driver of the printer. You can select one in the list or click Have Disk to install other drivers. Please follow the steps to finish the installation.
- Page 71 TL-WPS510U Pocket-Sized Wireless N Print Server Figure C-20 After that, the new printer is in the list. And you can enjoy the sharing. Figure C-21...
-
Page 72: Appendix D: Additional Installation Instructions
TL-WPS510U Pocket-Sized Wireless N Print Server Appendix D: Additional Installation Instructions Panasonic KX-P6100/6300/6500 If you are using a Panasonic KX-P6100/6300/6500 laser printer with the print server through the Network Print Port under Windows 95/98, please redirect the printer named “Panasonic KX-P6100 PCL”...