Table of Contents
Advertisement
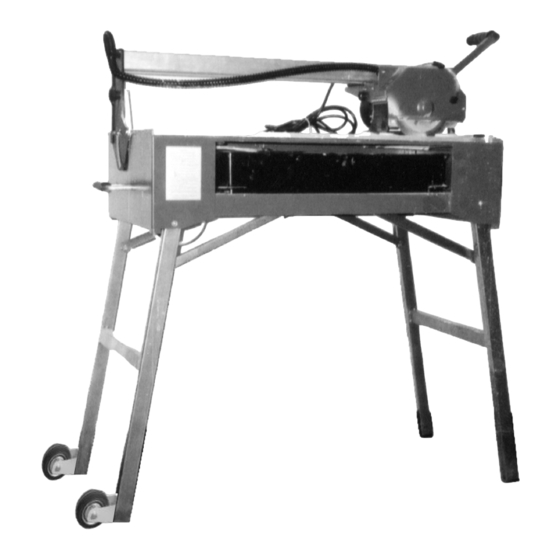
7" 1.5 HP TILE SAW
ASSembly AND OperATION INSTrucTIONS
Due to continuing improvements, actual product may differ slightly from the product described herein.
Visit our website at: http://www.harborfreight.com
TO preVeNT SerIOuS INjury, reAD AND uNDerSTAND
All WArNINgS AND INSTrucTIONS befOre uSe.
Copyright
2005 by Harbor Freight Tools
©
manual or any artwork contained herein may be reproduced in any shape or form
without the express written consent of Harbor Freight Tools.
for technical questions or replacement parts, please call 1-800-444-3353.
WITH STAND
3491 Mission Oaks Blvd., Camarillo, CA 93011
92386
. All rights reserved. No portion of this
®
®
Advertisement
Chapters
Table of Contents

Related Manuals for Chicago Electric 92386


Summary of Contents for Chicago Electric 92386
- Page 1 2005 by Harbor Freight Tools © manual or any artwork contained herein may be reproduced in any shape or form without the express written consent of Harbor Freight Tools. for technical questions or replacement parts, please call 1-800-444-3353. WITH STAND 92386 .
-
Page 2: Product Specifications
When unpacking, check to make sure all the parts shown on the parts lists on page 23 are included. If any parts are missing or broken, please call Harbor Freight Tools at the number shown on the cover of this manual as soon as possible. -
Page 3: Work Area
Dress properly. Do not wear loose clothing or jewelry. contain long hair. Keep your hair, clothing, and gloves away from moving parts. Loose clothes, jewelry, or long hair can be caught in moving parts. for technical questions, please call 1-800-444-3353. SKU 92386 WOrK AreA elecTrIcAl SAfeTy perSONAl SAfeTy... -
Page 4: Tool Use And Care
Accessories that may be suitable for one tool may become hazardous when used on another tool. for technical questions, please call 1-800-444-3353. SKU 92386 TOOl uSe AND cAre Page 4... - Page 5 (GFCI) protection should be provided on the circuit(s) or outlet)s) to be used for the tile saw (GFCI is not included in this machinery). Receptacles are available having built-in GFCI protection and may be used for this measure of safety.
-
Page 6: Extension Cords
Always replace a damaged extension cord or have it repaired by a qualified electri- cian before using it. Protect your extension cords from sharp objects, excessive heat, and damp or wet areas. for technical questions, please call 1-800-444-3353. SKU 92386 fIgure A exTeNSION cOrDS reV 03/05 Page 6... - Page 7 * based on limiting the line voltage drop to five volts at 150% of the rated amperes. n 0 xxxx/min. for technical questions, please call 1-800-444-3353. SKU 92386 (120 Or 240 VOlT) exTeNSION cOrD leNgTH 50 feet 75 feet...
-
Page 8: Specific Safety Rules
Tile Saw. These carry important informa- tion. If unreadable or missing, contact Harbor Freight Tools for a replacement. use the right product for the right job. There are certain applications for which this product was designed. Do not use small equipment, tools, or attach-ments to do the work of larger industrial equipment, tools, or attachments. - Page 9 Never run the Tile Saw without a water supply. Running the unit without a water supply will cause irreparable damage to the Pump. make sure the water supply used for the Tile Saw is not dirty, sandy, and does not contain any corrosive chemical products.
- Page 10 Allow the Saw blade to spin up to full speed before feeding a workpiece into it. When turning off the Tile Saw, allow the Saw Blade to spin down and stop on its own. Do not press against the Saw Blade to stop it.
-
Page 11: Assembly Instructions
Unpack the Tile Saw, and with assistance, carefully lay the tool on its side on a flat, level floor surface. (See figure D, next page.) for technical questions, please call 1-800-444-3353. - Page 12 With assistance, set the Tile Saw upright. (See figure f.) The Adjusting Knob (59) is located at the bottom of Stand II (64). Turn the Adjust- ing Knob clockwise or counterclockwise to keep the Tile Saw balanced on the floor. (See figure f.) Attach the Handle I (38) to the Motor Bracket (111), using the Bolts (98), Spring Washers (95), and Washers (94).
- Page 13 The Wheels (126) are connected to the Stand II (64) using Bolts (120), Lock Nuts (123) and Washers (121). (See Fig. 1, 2, 3.) Stand II (64) Lift the saw stand with the front handle to move it. (as shown in figure 5) for technical questions, please call 1-800-444-3353. SKU 92386...
-
Page 14: Operating Instructions
Note: The Rail Stand (41) of the Tile Saw is held in place by the packaging during shipment. Always tighten the butterfly Knob to lock the rail Stand prior to performing maintenance or moving the Tile Saw to another location. - Page 15 Water Pump (7) should be about 3/4 submerged in water). Turn the Flow Control Knob on the Water Pump (7) all the way down. Then close the Water Tray com- pletely. (See figure I.) for technical questions, please call 1-800-444-3353. SKU 92386 WATer pump DrAIN plug WATer TrAy...
- Page 16 “drip loop” with the Power Cord. (See figure D, page 9.) Turn the Power Switch (37) to its “ON” position, and allow the Saw Blade (4) to spin up to full speed. (See figure K.)
- Page 17 To Make A Bevel Cut; Loosen the Knob I (22) on each end of the Tile Saw. Tilt the Slide Rail (26) to the desired angle as indicated on the Angle Scale (43). Then, retighten the two Knobs I.
-
Page 18: Bolt
To Change The Saw Blade: WArNINg! Make sure the Power Switch (37) of the Tile Saw is in its “OFF” position and that the unit is unplugged from its electrical outlet before performing this procedure. Remove the Bolts (91), Spring Washers (89), and Washers (88) from the Blade Guard (12). - Page 19 With one Wrench (70), hold the Motor Arbor firmly in place while, with the other Wrench (71) provided, unscrew and remove the Nut (6). Next, remove the Outside Flange (5). Then, remove the old Saw Blade (4). (See figures p and Q.)
- Page 20 (See figure p, previous page.) ImpOrTANT: When installing a Saw blade (4), make sure the “ArrOW” de- picted on the side of the Saw blade points in the same direction as that of the blade guard (12). (See figure r.) Once the Saw Blade (4) is installed, refasten the Outside Flange (5) and Nut (6).
-
Page 21: Spring Washer
To clean the exterior parts: Use only a clean cloth and mild detergent to clean the body of the Tile Saw. Use a vacuum or compressed air to clean the Motor (1) ventilation slots. Do not immerse any electrical part of the tool in liquid. - Page 22 BY THE BUYER. THE BUYER ASSUMES ALL RISK AND LIABILITY ARISING OUT OF HIS OR HER REPAIRS TO THE ORIGINAL PRODUCT OR REPLACEMENT PARTS THERETO, OR ARISING OUT OF HIS OR HER INSTALLATION OF REPLACEMENT PARTS THERETO. for technical questions, please call 1-800-444-3353. SKU 92386 Page 22...
-
Page 23: Saw Blade
Flat Nut Rail Stand Support Rail Stand Spacer Switch Cover * pump consists of: Outer cover (7A), filter (7b), Inner cover (7c), motor (7D). for technical questions, please call 1-800-444-3353. SKU 92386 pArTS lIST part Circuit Breaker Capacitor Fixture I Capacitor... - Page 24 Square Bolt Lock Washer Screw Counter Bolt Washer Spring Washer Bolt Bolt Bolt Washer Spring Washer for technical questions, please call 1-800-444-3353. SKU 92386 pArTS lIST cONT. part Description Bolt Bolt Bolt Bolt Bolt Washer Washer Flat Nut Lock Nut...
-
Page 25: Assembly Diagram
ASSembly DIAgrAm NOTe: Some parts are listed and shown for illustration purposes only, and are not available individually as replacement parts. reV 04/06 for technical questions, please call 1-800-444-3353. SKU 92386 Page 25...