Table of Contents
Advertisement
Available languages
Available languages
Quick Links
Advertisement
Chapters
Table of Contents

Related Manuals for Pioneer DEH-P8450MP


Summary of Contents for Pioneer DEH-P8450MP
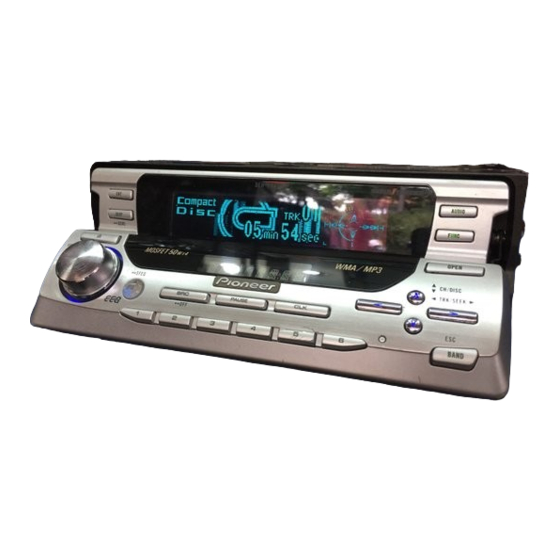
- Page 1 Multi-CD control High power CD/MP3/WMA player with FM/AM tuner Reproductor de CD/MP3/WMA de alta potencia con control de múltiples CD con sintonizador FM/AM Operation Manual DEH-P8450MP Manual de Operación...
-
Page 2: Table Of Contents
Section Contents Thank you for buying this Pioneer product. Please read through these operating instructions so you will know how to oper- ate your model properly. After you have finished reading the instructions, put them away in a safe place for future reference. - Page 3 Section Contents Multi-CD Player Audio Adjustments Playing a CD 28 Introduction of audio adjustments 36 50-disc multi-CD player 28 Setting the sound focus equalizer 37 Introduction of advanced multi-CD player Using balance adjustment 37 operation 29 Using the equalizer 37 Repeating play 29 •...
- Page 4 Section Contents Other Functions Setting the time display on or off 47 Using different entertainment displays 47 Using the AUX source 47 • Selecting AUX as the source 47 • Setting the AUX title 48 Using the telephone muting/attenuation 48 Additional Information CD player and care 49 CD-R/CD-RW discs 49...
-
Page 5: Before You Start
• Protect this product from moisture. • If the battery is disconnected or discharged, the preset memory will be erased and must be reprogrammed. • Should this product fail to operate properly, contact your dealer or nearest authorized Pioneer Service Station. -
Page 6: What's What
Section Before You Start What’s what button OPEN Press to open the front panel. When you want to operate buttons inside the front panel, press to open the front panel. OPEN Front panel (close) 7 5/∞/2/3 buttons Press to do manual seek tuning, fast for- button EJECT ward, reverse and track search controls. -
Page 7: Front Panel (Open)
Section Before You Start Front panel (open) • These buttons listed below can be operated only when the front panel opened. button ENTERTAINMENT Press to change to the entertainment dis- play. button AUDIO Press to select various sound quality con- trols. -
Page 8: Steering Remote Control
Section Before You Start Steering remote control A steering remote control that enables remote operation of the head unit is supplied. See the explanation of the head unit about the operation of each button with the exception of , which is explained below. -
Page 9: Protecting Your Unit From Theft
Section Before You Start Protecting your unit from theft 2 Slide and remove the front panel toward you. The front panel can be detached from the head Take care not to grip it tightly or drop it. unit and stored in the protective case provided to discourage theft. -
Page 10: Remote Control And Care
Section Before You Start Remote control and care Precautions • Replace the battery with a CR2032 lithium battery. Installing the lithium battery • Replace the battery in the unit using a non metallic tapered instrument. • Remove the cover on the back of the steering remote control and insert the battery with the (+) and (–) poles pointing in the proper direc- WARNING... -
Page 11: About The Demo Mode
Section Before You Start About the demo mode Motion DEMO Pressing 6 numbered button when power to this This product features three demonstration product is switched off while the ignition switch modes: Reverse mode Feature DEMO is set to ACC or ON starts the . -
Page 12: Display Indication
Section Before You Start Display indication Resetting the microprocessor This unit is equipped two types of display indica- The microprocessor must be reset under the tions such as LCD display and OEL display. following conditions: LCD display contains basic information about •... -
Page 13: Features
Section Before You Start Features About WMA CD playback Music CD/CD-R/CD-RW playback is possible. MP3 file playback The Windows Media logo printed on the box indicates that this product can playback the This product allows playback of MP3 files on WMA data. -
Page 14: Power On/Off
Section Power ON/OFF Turning the unit on • External unit refers to a Pioneer product (such as one available in the future) that, although incompatible as a source, enables control of Press to turn the unit on. basic functions by this unit. Two external units SOURCE When you select a source the unit is turned on. -
Page 15: Tuner
Section Tuner 4 To perform manual tuning, press 2 or 3 Listening to the radio with quick presses. The frequencies move up or down step by step. 5 To perform seek tuning, press and hold 2 or 3 for about one second and release. The tuner will scan the frequencies until a broadcast strong enough for good reception is found. -
Page 16: Introduction Of Advanced Tuner Operation
Section Tuner Introduction of advanced tuner Storing and recalling broadcast operation frequencies If you press any of the buttons PRESET TUNING you can easily store up to six broadcast frequen- cies for later recall with the touch of a button. When you find a frequency that you want to store in memory press a but-... -
Page 17: Tuning In Strong Signals
Section Tuner Tuning in strong signals Storing the strongest broadcast frequencies Local seek tuning lets you tune in only those radio stations with sufficiently strong signals for BSM (best stations memory) lets you automati- good reception. cally store the six strongest broadcast frequen- cies under buttons PRESET TUNING... -
Page 18: Built-In Cd Player
Section Built-in CD Player Playing a CD 4 Use to adjust the sound level. VOLUME Rotate to increase or decrease the volume. 5 To perform fast forward or reverse, press and hold 2 or 3 . 6 To skip back or forward to another track, press 2 or 3 . -
Page 19: Introduction Of Advanced Built-In Cd Player Operation
Section Built-in CD Player Introduction of advanced built-in Repeating play CD player operation Repeat play lets you hear the same track over again. 1 Press to open the front panel. OPEN 2 Press to select FUNCTION Press until appears in the dis- FUNCTION play. -
Page 20: Playing Tracks In A Random Order
Section Built-in CD Player Playing tracks in a random order Note Random play lets you play back tracks on the • After scanning of a CD is finished, normal CD in a random order. playback of the tracks will begin again. 1 Press to open the front panel. -
Page 21: Using Disc Title Functions
Section Built-in CD Player 6 Press 3 to move the cursor to the next Using disc title functions character position. When the letter you want is displayed, press 3 You can input CD titles and display the title. The next time you insert a CD for which you have to move the cursor to the next position and then select the next letter. -
Page 22: Displaying Disc Titles
Section Built-in CD Player Displaying disc titles Displaying titles on CD TEXT discs You can display the title of any disc that has had a disc title entered. 1 Press to open the front panel. OPEN 1 Press to open the front panel. 2 Press when playing a CD TEXT OPEN... -
Page 23: Mp3/Wma Player
Section MP3/WMA Player Playing a MP3/WMA 3 After a CD-ROM has been inserted, press to select the built-in CD player. SOURCE Press until you see dis- SOURCE Compact Disc played. 4 Use to adjust the sound level. VOLUME Rotate to increase or decrease the volume. 5 Press 5 or ∞... - Page 24 Section MP3/WMA Player • Do not insert anything other than a CD into the CD loading slot. • There is sometimes a delay between starting up playback and the sound being issued. This is particularly the case when playing back multi-session and many folders.
-
Page 25: Introduction Of Advanced Built-Cd Player (Mp3/Wma) Operation
Section MP3/WMA Player Introduction of advanced built-in Repeating play CD player (MP3/WMA) operation For MP3/WMA playback, there are three repeat play ranges: (folder repeat), (one- FOLDER track repeat), and (repeat all tracks). DISC 1 Press to open the front panel. OPEN 2 Press to select... -
Page 26: Playing Tracks In A Random Order
Section MP3/WMA Player Playing tracks in a random order Scanning folders and tracks Random play lets you play back tracks in a ran- While you are using (folder repeat), the T.SCAN dom order within the repeat range, beginning of each track in the selected folder F.RANDOM (folder repeat) and (all repeat). -
Page 27: Pausing Mp3/Wma Playback
Section MP3/WMA Player Pausing MP3/WMA playback Displaying titles on MP3/WMA Pause lets you temporarily stop playback of the MP3/WMA. 1 Press to open the front panel. OPEN 1 Press to open the front panel. 2 Press when playing a MP3/WMA OPEN DISPLAY disc. -
Page 28: Multi-Cd Player
Section Multi-CD Player Playing a CD 4 To perform fast forward or reverse, press and hold 2 or 3 . 5 To skip back or forward to another track, press 2 or 3 . Pressing 3 skips to the start of the next track. Pressing 2 once skips to the start of the current track. -
Page 29: Introduction Of Advanced Multi-Cd Player Operation
Section Multi-CD Player Introduction of advanced multi- Repeating play CD player operation There are three repeat play ranges for the multi- CD player: (multi-CD player repeat), (one-track repeat), and (disc repeat). DISC 1 Press to open the front panel. OPEN 2 Press to select FUNCTION... -
Page 30: Playing Tracks In A Random Order
Section Multi-CD Player Playing tracks in a random order 3 Press to select FUNCTION SCAN Press until appears in the FUNCTION SCAN Random play lets you play back tracks in a ran- display. dom order within the repeat range, RANDOM 4 Press 5 to turn scan play on. -
Page 31: Using Its Playlists
Section Multi-CD Player Using ITS playlists Note ITS (instant track selection) lets you make a • After data for 100 discs has been stored in playlist of favorite tracks from those in the multi- memory, data for a new disc will overwrite the CD player magazine. -
Page 32: Erasing A Track From Your Its Playlist
Section Multi-CD Player Erasing a track from your ITS playlist 3 Press and hold until FUNCTION TITLE appears in the display, then press FUNCTION When you want to delete a track from your ITS to select playlist, you can if ITS play is on. After is displayed, press until... -
Page 33: Displaying Disc Titles
Section Multi-CD Player 3 Press and hold until 7 Move the cursor to the last position by FUNCTION TITLE pressing 3 after entering the title. appears in the display. When you press 3 one more time, the entered After is displayed, press TITLE FUNCTION repeatedly, the following functions appear in the... -
Page 34: Selecting Discs From The Disc Title List
Section Multi-CD Player Selecting discs from the disc title list Displaying titles on CD TEXT discs Disc title list lets you see the list of disc titles that have been entered into the multi-CD player 1 Press to open the front panel. OPEN and select one of them to playback. -
Page 35: Using Compression And Bass Emphasis
Section Multi-CD Player Using compression and bass emphasis You can use these functions only with a multi-CD player that supports them. Using COMP (compression) and DBE (dynamic bass emphasis) functions let you adjust the sound playback quality of the multi-CD player. Each of the functions have a two-step adjust- ment. -
Page 36: Audio Adjustments
Section Audio Adjustments Introduction of audio 1 Press to open the front panel. OPEN adjustments 2 Press to display the audio function AUDIO names. Press repeatedly to switch between the AUDIO following audio functions: (balance adjustment)— (equalizer curve adjustment)— (bass)— (treble)—... -
Page 37: Setting The Sound Focus Equalizer
Section Audio Adjustments Setting the sound focus equal- Using balance adjustment izer You can select a fader/balance setting that pro- vides an ideal listening environment in all occu- Clarifying the sound image of vocals and instru- pied seats. ments allows the simple staging of a natural, pleasant sound environment. -
Page 38: Recalling Equalizer Curves
Section Audio Adjustments Recalling equalizer curves Adjusting equalizer curves There are seven stored equalizer curves which You can adjust the currently selected equalizer you can easily recall at any time. Here is a list of curve setting as desired. Adjusted equalizer the equalizer curves: curve settings are memorized in CUSTOM1... -
Page 39: Fine Adjusting Equalizer Curve
Section Audio Adjustments Fine adjusting equalizer curve Adjusting bass You can adjust the center frequency and the Q You can adjust the cut-off frequency and the factor (curve characteristics) of each currently bass level. selected curve band ( EQ-Low/EQ-Mid/EQ-High • In mode, bass adjustment affects only FRT1 the rear output: front output cannot be... -
Page 40: Adjusting Loudness
Section Audio Adjustments 4 Press 5 or ∞ to adjust the treble level. 3 Press 5 to turn subwoofer output on. Each press of 5 or ∞ increases or decreases appears in the display. Sub-W1 Normal the treble level. – is displayed as the level Subwoofer output is now on. -
Page 41: Using No Fading Output
Section Audio Adjustments Using no fading output Using the high pass filter When the non fading output setting is on, the When you do not want low sounds from the audio signal does not pass through this unit’s subwoofer output frequency range to play from low pass filter (for the subwoofer), but is output the front or rear speakers, switch the HPF (high through the RCA output. -
Page 42: Adjusting Source Levels
Section Audio Adjustments Adjusting source levels Using automatic sound levelizer SLA (Source level adjustment) lets you adjust During driving, noise in the car changes accord- the volume level of each source to prevent radi- ing to the driving speed and road conditions. cal changes in volume when switching between The automatic sound levelizer (ASL) monitors sources. -
Page 43: Initial Settings
Section Initial Settings Adjusting initial settings Setting the time This is used to set the time on the unit’s clock display. 1 Press to open the front panel. OPEN 2 Press to select FUNCTION CLOCK Press until the time appears in the FUNCTION Initial settings lets you perform initial set up of display. -
Page 44: Setting The Am Tuning Step
Section Initial Settings 3 Select the FM tuning step with 2/3. Switching the warning tone Pressing 2/3 will switch the FM tuning step If the front panel is not detached from the head between 100 kHz and 50 kHz. The selected FM unit within five seconds of turning off the igni- tuning step will appear in the display. -
Page 45: Switching The Auxiliary Setting
Section Initial Settings Switching the auxiliary setting Selecting the brightness It is possible to use auxiliary equipment with You can select the display brightness. Initially this unit. Activate the auxiliary setting when this mode is set to 12. using auxiliary equipment connected to this unit. -
Page 46: Switching The Telephone Muting/Attenuation
Section Initial Settings Switching the Telephone Notes Muting/Attenuation • Even if you change this setting, there is no output unless you switch the non fading out- Sound from this system is muted or attenuated put (refer to page 41) or subwoofer output automatically when a call is mode or received (refer to page 40) in the Audio Menu on. -
Page 47: Other Functions
Section Other Functions Setting the time display on or off Using the AUX source You can turn the time display on even when the An IP-BUS-RCA Interconnector such as the sources are off. CD-RB20 or CD-RB10 (sold separately) lets you connect this unit to auxiliary equipment featur- Press to select the time display. -
Page 48: Setting The Aux Title
Section Other Functions 5 Press 3 to move the cursor to the next Setting the AUX title character position. The title displayed for the source can be When the letter you want is displayed, press 3 changed. to move the cursor to the next position and then select the next letter. -
Page 49: Additional Information
Section Additional Information CD player and care CD-R/CD-RW discs • Use only CDs that have either of the two • Playback with this product of CD-R/CD-RW Compact Disc Digital Audio marks as show discs recorded with a music CD recorder or below. -
Page 50: Understanding Built-In Cd Player Error Messages
If the error cannot be corrected, contact your dealer or your nearest Pioneer Service Center. Message Cause Action... -
Page 51: Mp3 Files
Section Additional Information MP3 files • The folder selection sequence for playback and other operations becomes the writing • MP3 is short for MPEG Audio Layer 3 and sequence used by the writing software. refers to an audio compression technology For this reason, the expected sequence at the standard. -
Page 52: About Folders And Wma Files
Section Additional Information About folders and WMA files WMA files • An outline of a CD-ROM with WMA files on it • WMA is short for Windows Media Audio and is shown below. Subfolders are shown as refers to an audio compression technology folders in the folder currently selected. -
Page 53: Terms
Section Additional Information However, there also is some writing software Terms which permits setting of the playback order. • The sound quality of WMA files generally becomes better with increasing bit rate. This Bit rate unit can play recordings with bit rates from 48 kbps to 192 kbps, but in order to be able to This expresses data volume per second, or bps enjoy a certain sound quality, it is... - Page 54 Section Additional Information Extended formats VBR is short for Variable Bit Rate. Generally Joliet: speaking CBR (Constant Bit Rate) is more File names can have up to 64 characters. widely used. But to flexibly adjust the bit rate according to the needs of audio compression, it Romeo: is possible to achieve compression prioritizes File names can have up to 128 characters.
-
Page 55: Specifications
Section Additional Information Specifications (Treble) Frequency .... 2.5 k/4 k/6.3 k/10 k Hz Gain ..... ±12 dB General HPF: Frequency .... 50/80/125 Hz Power source ...... 14.4 V DC Slope ....–12 dB/oct (10.8 – 15.1 V allowable) Subwoofer: Grounding system ....Negative type Frequency .... - Page 56 Sección Sección Contenido Gracias por haber comprado este producto Pioneer. Sírvase leer con detención estas instrucciones sobre la operación de modo que aprenda el modo de operar correctamente su modelo. Una vez que haya leído las instrucciones, consérvelas en un lugar seguro para consultarlas en el futuro.
- Page 57 Sección Sección Contenido Lector de Multi-CD Ajustes de audio Reproducción de un CD 28 Introducción a los ajustes de audio 36 Lector de Multi-CD de 50 discos 28 Ajuste del ecualizador de enfoque de sonido 37 Introducción a las operaciones avanzadas Uso del ajuste del equilibrio 37 de lector de Multi-CD 29 Uso del ecualizador 38...
- Page 58 Sección Contenido Otras funciones Activación o desactivación de la visualización de la hora 47 Uso de diferentes visualizaciones de entretenimiento 47 Uso de la fuente AUX 47 • Selección de AUX como la fuente 47 • Ajuste del título del componente auxiliar 48 Uso de la función de enmudecimiento/ atenuación del teléfono 48...
-
Page 59: Antes De Empezar
Es especialmente mente, comuníquese con su concesionario o importante leer y observar las precauciones en centro de servicio Pioneer autorizado. esta página y en otras secciones. Este manual explica la operación de la unidad principal. Las mismas operaciones se pueden realizar en el control remoto de volante de dirección. -
Page 60: Qué Es Cada Cosa
Sección Antes de empezar Qué es cada cosa 6 Botón OPEN Presione para abrir el panel delantero. Cuando desee operar los botones en el inte- rior del panel delantero, presione para OPEN Panel delantero (cerrado) abrir el panel delantero. 1 Botón 7 Botones 5/∞/2/3 EJECT Presione para expulsar un CD desde el lector... -
Page 61: Panel Delantero (Abierto)
Sección Antes de empezar Panel delantero (abierto) • Los botones a continuación pueden operarse solamente cuando el panel delantero está abierto. = Botón ENTERTAINMENT Presione para cambiar a la pantalla visualizadora. ~ Botón AUDIO Presione para seleccionar los diversos controles de calidad del sonido. ! Botón FUNCTION Presione para seleccionar las funciones. -
Page 62: Control Remoto De Volante
Sección Antes de empezar Control remoto de volante • Si presiona del control remoto FUNCTION mientras está presionando del mismo, BAND Se suministra un control remoto de volante que puede suceder que el control remoto no fun- permite la operación a distancia de la unidad cione correctamente. -
Page 63: Protección Del Producto Contra Robo
Sección Antes de empezar Protección del producto contra 2 Deslice y retire el panel delantero hacia su posición. robo Tenga cuidado de no agarrarlo con mucha fuerza y de no dejarlo caer. El panel delantero se puede extraer de la unidad principal y almacenar en su caja protectora provista como una medida antirrobo. -
Page 64: Control Remoto Y Cuidados
Sección Antes de empezar Control remoto y cuidados Precauciones • Cambie la pila con una pila de litio CR2032. • Cambie la pila en la unidad utilizando una Instale la pila de litio barra puntiaguda no metálica. • Retire la cubierta en la parte trasera del con- trol remoto de volante e inserte la pila con los ADVERTENCIA polos (+) y (–) orientados en la dirección... -
Page 65: Acerca Del Modo De Demostración
Sección Antes de empezar Acerca del modo de demostración Demostración de película Presionar el botón numérico 6 mientras este Este producto presenta tres modos de producto esté apagado y mientras el interruptor demostración: retroceso (Reverse mode) carac- de encendido esté en la posición ACC u ON terísticas (Feature DEMO) película (Motion empieza la... -
Page 66: Indicaciones En La Pantalla
Sección Antes de empezar Indicaciones en la pantalla Reinicialización del microprocesador Esta unidad se equipa con dos tipos de indica- ciones en la pantalla tales como la pantalla LCD El microprocesador se debe reposicionar en las y la pantalla OEL. La pantalla LCD contiene siguientes condiciones: informaciones básicas acerca de cada fuente y •... -
Page 67: Características
Sección Antes de empezar Características Acerca de WMA Reprocucción de CD Es posible la reproducción de Music CD/CD- R/CD-RW. El logotipo Windows Media impreso en la caja Reproducción de archivos MP3 indica que este producto puede reproducir datos WMA. Este producto permite la reproducción de archivos MP3 en los discos CD-ROM, CD-R y WMA es abreviatura de Windows Media Audio y CD-RW. -
Page 68: Encendido Y Apagado
Sección Encendido y Apagado Encendido del sistema • Unidad externa se refiere a un producto Pioneer (tal como un producto disponible en el futuro) que, mientras sea incompatible Presione para encender el sistema. como una fuente, permite el control de... -
Page 69: Sintonizador
Sección Sintonizador Audición de radio 3 Presione para seleccionar una BAND banda. Presione hasta que se visualice la banda BAND deseada: para FM o 4 Para realizar la sintonía manual, presione 2 o 3 rápidamente. Las frecuencias se desplazan hacia arriba o hacia abajo paso por paso. -
Page 70: Introducción A Las Operaciones Avanzadas Del Sintonizador
Sección Sintonizador Introducción a las operaciones Almacenaje y llamada de avanzadas del sintonizador frecuencias Si se presiona uno de los botones PRESET , se puede fácilmente almacenar hasta TUNING seis frecuencias de emisoras para una llamada subsiguiente con la presión de un botón. Cuando encuentre una frecuencia que desea almacenar en la memoria, presione un botón hasta que el número... -
Page 71: Sintonía De Señales Fuertes
Sección Sintonizador Sintonía de señales fuertes Almacenaje de las frecuencias de radio más fuertes La sintonía por búsqueda local le permite sintonizar solamente las emisoras con señales La función BSM (memoria de las mejores suficientemente fuertes para una buena emisoras) le permite almacenar recepción. -
Page 72: Lector De Cd Incorporado
Sección Lector de CD incorporado Reproducción de un CD 4 Utilice para ajustar el nivel de VOLUME sonido. Gire para aumentar o disminuir el volumen. 5 Para realizar el avance rápido o retroceso, mantenga presionado 2 o 3 . 6 Para saltar hacia atrás o hacia adelante para otra pista, presione 2 o 3 . -
Page 73: Introducción A Las Operaciones Avanzadas Del Lector De Cd Incorporado
Sección Lector de CD incorporado Introducción a las operaciones Repetición de reproducción avanzadas del lector de CD La reproducción repetida le permite escuchar la incorporado misma pista de nuevo. 1 Presione para abrir el panel OPEN delantero. 2 Presione para seleccionar FUNCTION Presione hasta que... -
Page 74: Reproducción De Pistas En Un Orden Aleatorio
Sección Lector de CD incorporado Reproducción de pistas en un 4 Cuando encuentre la pista deseada, presione ∞ para desactivar la reproducción orden aleatorio con exploración. aparece en la pantalla. La Track Scan :OFF La reproducción aleatoria le permite reproducir reproducción de la pista continuará. -
Page 75: Uso De Las Funciones De Título De Disco
Sección Lector de CD incorporado 5 Presione 5 o ∞ para seleccionar una letra Uso de las funciones de título de del alfabeto. disco Cada presión de 5 visualiza una letra del Se pueden introducir títulos de CD y visualizarlos. alfabeto en el orden de , números y A B C ... -
Page 76: Visualización De Los Títulos
Sección Lector de CD incorporado Visualización de los títulos Visualización de títulos en discos CD TEXT Se puede visualizar el título de cualquier disco que tenga almacenado un título. 1 Presione para abrir el panel OPEN 1 Presione para abrir el panel OPEN delantero. -
Page 77: Lector De Mp3/Wma
Sección Lector de MP3/WMA Cómo reproducir un MP3/WMA • Si el panel delantero estuviera en la posición EJECT (como se muestra arriba), los botones que no sean EJECT VOLUME OPEN el control remoto) pueden no funcionar. 3 Después colocar un CD-ROM, presione para seleccionar el lector de CD SOURCE incorporado. - Page 78 Sección Lector de MP3/WMA • Cuando reproduce discos con archivos MP3 • Si el lector de CD incorporado no funciona y/o WMA y datos de audio (CD-DA) tales apropiadamente, un mensaje de error como como CD-EXTRA y MIXED-MODE CD, ambos puede aparecer.
-
Page 79: Repetición De Reproducción
Sección Lector de MP3/WMA Introducción a las operaciones Repetición de reproducción avanzadas del lector de CD Para la reproducción de MP3/MWA, se dispo- incorporado (MP3/MWA) nen de tres márgenes de reproducción repetida: (repetición de carpeta), FOLDER (repetición de una pista), y (repetición de DISC todas las pistas). -
Page 80: Reproducción De Las Pistas En Un Orden Aleatorio
Sección Lector de MP3/WMA Reproducción de las pistas en un Exploración de carpetas y pistas orden aleatorio Mientras usa la gama de repetición T.SCAN (repetición de carpeta), el comienzo de cada La reproducción aleatoria le permite reproducir pista en la carpeta seleccionado se reproduce las pistas en un orden aleatorio dentro da gama cerca de 10 segundos. -
Page 81: Pausa De La Reproducción De Mp3/Wma
Sección Lector de MP3/WMA Pausa de la reproducción de • Cuando se reproducen archivos grabados como archivos VBR (velocidad de bitios variable), MP3/WMA el valor no se visualizará, incluso BIT RATE después de cambiar a BIT RATE La pausa le permite parar temporalmente la •... -
Page 82: Lector De Multi-Cd
Sección Lector de Multi-CD Reproducción de un CD 4 Para realizar el avance rápido o retroceso, mantenga presionado 2 o 3 . 5 Para saltar hacia atrás o hacia adelante para otra pista, presione 2 o 3 . Presionar 3 salta al inicio de la próxima pista. Presionar 2 una vez salta al inicio de la pista actual. -
Page 83: Introducción A Las Operaciones Avanzadas De Lector De Multi-Cd
Sección Lector de Multi-CD Introducción a las operaciones Repetición de reproducción avanzadas de lector de Multi-CD Hay tres gamas de repetición para el lector de Multi-CD: (repetición de todos los discos en el lector de Multi-CD), (repetición de una pista), y (repetición de disco). -
Page 84: Reproducción De Las Pistas En Un Orden Aleatorio
Sección Lector de Multi-CD Reproducción de las pistas en un 1 Seleccione la gama de repetición. Consulte Repetición de reproducción en la orden aleatorio página 29. La reproducción aleatoria le permite reproducir 2 Presione para abrir el panel OPEN las pistas en un orden aleatorio dentro da gama delantero. -
Page 85: Uso De Listas De Reproducción Its
Sección Lector de Multi-CD Presione hasta que aparezca (introducción de título de disco)— FUNCTION PAUSE TITLE en la pantalla. (programación ITS) 3 Presione 5 para activar la pausa. 4 Seleccione la pista deseada presionando 2 o 3. aparece en la pantalla. La Pause :ON reproducción de la pista actual se detiene. -
Page 86: Borrado De Una Pista De La Lista De
Sección Lector de Multi-CD 4 Presione 5 para activar la reproducción 5 Presione ∞ para borrar una pista de la lista de reproducción aparece en la pantalla. La La pista que está siendo reproducida actualmente ITS Play :ON reproducción de las pistas en la lista de se borra de la lista de reproducción ITS y la reproducción comienza dentro de la gama de reproducción de la próxima pista de la lista... -
Page 87: Uso De Las Funciones De Título De Disco
Sección Lector de Multi-CD 5 Presione 5 o ∞ para seleccionar una letra Uso de las funciones de título de del alfabeto. disco Cada presión de 5 visualiza una letra del alfabeto en el orden de , números y A B C ... X Y Z Se puede introducir títulos de CD y visualizarlos. -
Page 88: Selección De Disco De La Lista De Títulos De Disco
Sección Lector de Multi-CD 2 Presione Uso de las funciones CD TEXT DISPLAY Presione repetidamente para cambiar DISPLAY Estas funciones se pueden usar solamente con entre las siguientes visualizaciones: un lector de Multi-CD compatible con CD TEXT. (Tiempo de reproducción)— PLAYBACK MODE Algunos discos contienen ciertas informaciones (Título de disco) -
Page 89: Desplazamiento De Títulos En La Pantalla
Sección Lector de Multi-CD Desplazamiento de títulos en la pantalla Uso de la compresión y énfasis de los graves Este sistema puede visualizar solamente las primeras 16 letras de las visualizaciones Disc Estas funciones se pueden usar solamente con Title DiscArtist Name Track Title TrackArtist... -
Page 90: Ajustes De Audio
Sección Ajustes de audio Introducción a los ajustes de 1 Presione para abrir el panel OPEN delantero. audio 2 Presione para visualizar los nom- AUDIO bres de las funciones de audio. Presione repetidamente para cambiar AUDIO entre las siguientes funciones de audio: (ajuste de equilibrio)—... -
Page 91: Ajuste Del Ecualizador De Enfoque De Sonido
Sección Ajustes de audio Ajuste del ecualizador de Uso del ajuste del equilibrio enfoque de sonido Se puede seleccionar el ajuste de potenciómetro/equilibrio que proporciona un Aclarando la imagen de sonido de los vocales e entorno de audición ideal en todos os asientos instrumentos permitirá... -
Page 92: Uso Del Ecualizador
Sección Ajustes de audio Uso del ecualizador Presione para seleccionar el ecualizador. • Presione repetidamente para cambiar El ecualizador gráfico le permite ajustar la entre los siguientes ecualizadores. ecualización de acuerdo a las características — — — SUPER BASS POWERFUL NATURAL del interior del coche. -
Page 93: Ajuste Fino De La Curva De Ecualización
Sección Ajustes de audio Ajuste fino de la curva de ecualización Ajuste de los graves Se puede ajustar la frecuencia central y el factor Usted puede ajustar la frecuencia de corte y el Q (características de curva) de cada banda de nivel de los graves. -
Page 94: Ajuste De La Sonoridad
Sección Ajustes de audio 4 Presione 5 o ∞ para ajustar el nivel de los 3 Presione 5 para activar la salida de agudos. subgraves. Cada vez que presiona 5 o ∞, el nivel de los aparece en la pantalla. La salida Sub-W1 Normal agudos aumenta o disminuye. -
Page 95: Uso De La Salida Sin Extinción
Sección Ajustes de audio Cada presión de 5 o ∞ aumenta o disminuye el 2 Presione para seleccionar el modo AUDIO de ajuste de salida sin extinción. nivel de la salida de subgraves. – –6 Presione hasta que aparezca visualiza mientras se aumenta o se disminuye el AUDIO NonFad 0 en la pantalla. -
Page 96: Ajuste De Los Niveles De La Fuente
Sección Ajustes de audio • Solamente las frecuencias más altas de Notas aquellas en la gama seleccionada se generan a • Como el volumen del sintonizador FM es el través de los altavoces delanteros o traseros. control, no es posible aplicar los ajustes de nivel de fuente al sintonizador FM. -
Page 97: Ajustes Iniciales
Sección Ajustes iniciales Configuración de los ajustes Puesta en hora iniciales Se utiliza para ajustar la hora en la presentación del reloj de la unidad. 1 Presione para abrir el panel OPEN delantero. 2 Presione para seleccionar FUNCTION CLOCK Presione hasta que la hora aparezca FUNCTION Los ajustes iniciales le permiten realizar una... -
Page 98: Ajuste Del Paso De Sintonía De Am
Sección Ajustes iniciales 2 Presione para seleccionar Cambio del tono de advertencia FUNCTION Presione hasta que aparezca FUNCTION Si el panel delantero se extrae de la unidad la pantalla. principal dentro de cinco segundos después de desconectar la llave de encendido, un tono de 3 Seleccione el paso de sintonía de 2/3. -
Page 99: Cambio Del Ajuste De Componente Auxiliar
Sección Ajustes iniciales Cambio del ajuste de Selección del brillo componente auxiliar Puede seleccionarse el brillo de la presentación visual. Inicialmente este modo se ajusta a 12. Es posible usar un componente auxiliar con este sistema. Active el ajuste de componente 1 Presione para abrir el panel OPEN... -
Page 100: Conmutación Del Enmudecimiento/ Atenuación Del Teléfono
Sección Ajustes iniciales Conmutación del enmudecimiento/ Notas atenuación del teléfono • Aun si cambia este ajuste, no habrá salida a El sonido de este sistema se enmudece o menos que active (ON) la salida sin extinción atenúa automáticamente cuando se realiza o se (refiérase a la página 41), o salida de altavoz recibe una llamada con el teléfono celular de subgraves (refiérase a la página 40) en el... -
Page 101: Otras Funciones
Sección Otras funciones Activación o desactivación de la Uso de la fuente AUX visualización de la hora Un interconector IP-BUS-RCA tal como el Es posible presentar el reloj junto con cada CD-RB20 o CD-RB10 (vendido separadamente) visualización de la fuente de sonido. le permite conectar este sistema a un componente auxiliar con salida RCA. -
Page 102: Ajuste Del Título Del Componente Auxiliar
Sección Otras funciones 5 Presione 3 para mover el cursor a la Ajuste del título del componente auxiliar próxima posición de carácter. Cuando se visualice la letra deseada, presione El título que se visualiza para la fuente 3 para mover el cursor a la próxima posición y puede cambiar. -
Page 103: Informaciones Adicionales
Sección Informaciones adicionales Lector de CD y cuidados • Vibraciones en la calle pueden interrumpir la reproducción de CD. • Utilice solamente CDs que levan una de las marcas Compact Disc Digital Audio que se muestran a continuación. Discos CD-R/CD-RW •... -
Page 104: Comprensión De Los Mensajes De Error Del Lector De Cd Incorporado
Si no es posible corregir el error, póngase en contacto con su revendedor o centro de servicios autorizado de PIONEER más cercano. Mensaje Causa Acción... -
Page 105: Archivos Mp3
Sección Informaciones adicionales Archivos MP3 • Cuando se usan discos CD-R/CD-RW, la reproducción sólo será posible con los discos • MP3 es abreviatura de MPEG Audio Layer 3 y que han sido finalizados. se refiere a la norma de tecnología de •... -
Page 106: Acerca De Las Carpetas Y Archivos Wma
Sección Informaciones adicionales Acerca de las carpetas y archivos • Es posible reproducir archivos WMA en hasta 8 hileras de carpetas. Sin embargo, hay un retardo en el inicio de la reproducción de los • Abajo se muestra un esquema de un CD-ROM discos que tienen numerosas hileras. -
Page 107: Términos
Sección Informaciones adicionales • En el caso de archivos grabados de acuerdo Términos con el sistema de archivos Romeo y Joliet, sólo se visualizarán los primeros 32 caracteres. • Cuando reproduce discos con archivos WMA Formato ISO9660 y datos de audio (CD-DA) tales como CD- Esta es una norma internacional para la lógica EXTRA y MIXED-MODE CD, ambos los tipos de formato de carpetas y archivos CD-ROM. - Page 108 Sección Informaciones adicionales Las listas de reproducción (playlists) creadas VBR son las siglas de Variable Bit Rate. En usando el software “WINAMP” disponen de la términos generales, la CBR (Constant Bit Rate) extensión de archivo playlist (.m3u). es de uso más amplio. Pero para ajustar con flexibilidad la velocidad de bitios de acuerdo con las necesidades de compresión de audio, se consigue maximizar la calidad reduciendo el...
-
Page 109: Especificaciones
Sección Informaciones adicionales Especificaciones Contorno de tono: (Graves) Frecuencia ... 40/63/100/160 Hz General Ganancia ..... ±12 dB Fuente de alimentación ..14,4 V CC (Agudos) (10,8 – 15,1 V permisible) Frecuencia ... 2,5 k/4 k/6,3 k/10 k Hz Sistema de conexión a tierra Ganancia ..... - Page 112 300 Allstate Parkway, Markham, Ontario L3R OP2, Canada Copyright © 2001 by Pioneer Corporation. TEL: (905) 479-4411 All rights reserved. PIONEER ELECTRONICS DE MEXICO, S.A. de C.V. Publication de Pioneer Corporation. San Lorenzo 1009 3er. Piso Desp. 302 Copyright © 2001 Pioneer Corporation.