
Related Manuals for LG RCT699H


Summary of Contents for LG RCT699H
- Page 1 OWNER’S MANUAL Digital & Analog DVD recorder/VCR player combi Please read this manual carefully before operating your set and retain it for future reference. RCT699H www.lg.com...
-
Page 3: Getting Started
Getting Started Getting Started Safety Information CAUTION CAUTION: This product employs a Laser System. RISK OF ELECTRIC SHOCK To ensure proper use of this product, please read DO NOT OPEN this owner’s manual carefully and retain it for future CAUTION: TO REDUCE THE RISK OF ELECTRIC reference. - Page 4 For more detailed information LG Electronics hereby declares that this/these about disposal of your old product(s) is/are in compliance with the essential appliance, please contact your requirements and other relevant provisions of...
-
Page 5: Notes On Copyrights
Getting Started Notes on Copyrights y Recording equipment should be used only for lawful copying and you are advised to check carefully what is lawful copying in the area in which you are making a copy. Copying of copyright material such as films or music is unlawful unless permitted by a legal exception or consented to by the rights owner. -
Page 6: Table Of Contents
Table of Contents Table of Contents System Setting Auto Set Up Home Menu Overview General Settings Getting Started – Adjust the Setup Settings – Auto Programming Safety Information – Manual Channel Add Introduction – Program Edit – About the “7” Symbol Display –... - Page 7 Table of Contents Dubbing – Dubbing from VCR to DVD – Recording from DV Input – Recording from a Digital Camcorder Troubleshooting Troubleshooting – General – Resetting the unit – Playback – Recording – HDMI Appendix Controlling a TV with the Supplied Remote Control –...
-
Page 8: Introduction
Refer to the TV owner’s manual for the details of DVD-RW with Video SIMPLINK function. Video reocording mode y LG TV with SIMPLINK function has the logo as shown above. DVD+RW disc DVD-R disc DVD+R (DL) disc DVD-Video disc... -
Page 9: Recordable Discs
Getting Started Recordable Discs DVD+R: - These Discs can be recorded only DVD-RW: once. After you finalize a DVD+R, you cannot record on it or edit it - DVD-RW discs can be formatted any more. for VR mode recording or Video - Playable on DVD+R compatible mode recording. -
Page 10: Recommended Recordable Dvd Discs
Getting Started Note Recommended recordable y Depending on the conditions of the recording DVD discs equipment or the CD-R/RW (or DVD±R/RW) disc itself, some CD-R/RW (or DVD±R/RW) discs cannot be played on the unit. Mitsubishi (8x, 16x), Verbatim DVD-R y Do not attach any seal or label to either side (the (8x, 16x) labeled side or the recorded side) of a disc. -
Page 11: File Compatibility
Getting Started File compatibility Audio Files Sampling frequency: within 8 - 48 kHz (MP3), Overall within 32 - 48kHz (WMA) Bit rate: within 8 - 320kbps (MP3), 32 - 192kbps Available File extensions: “.jpg”, “.jpeg”, “.avi”, “.divx”, (WMA) “.mpg”, “.mpeg”, “.mp4”, “.mp3”, “.wma”” Note y Some wav files are not supported on this player. -
Page 12: Remote Control
Getting Started Remote control PR/TRK (+/-): Select channel • • • • • • a • • • • • programme of the recorder. To 1(POWER): Switches the unit ON adjust tracking. To control vertical or OFF. tremble during picture still. DVD: Selects the unit’s mode to ENTER (b): Acknowledges menu DVD. -
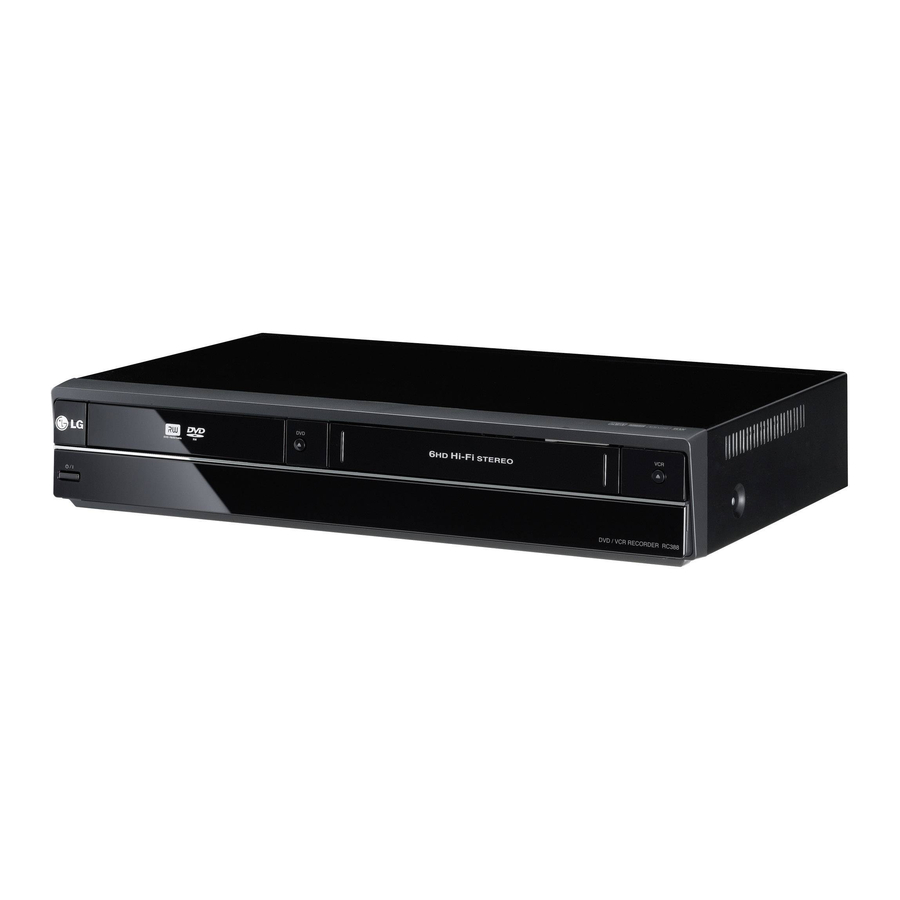
Page 13: Front Panel
Getting Started Front panel 1/I (Power) VCR/B Disc Tray N (PLAY/PAUSE) DVD/B Z (STOP) Display window X (Recording) Remote Sensor PROG. (s/w) Cassette Compartment (VCR deck) DUBBING USB Port DVD/VCR DV IN RES. AV IN 2 (VIDEO/AUDIO (Left/Right)) Rear panel ANTENNA IN (FROM ANT.) AC Power Cord OPTICAL (DIGITAL AUDIO OUTPUT) -
Page 14: Connecting
Connecting Connecting to Your TV Antenna connection to your TV and this unit Make one of the following connections, depending Remove the antenna cable plug from your TV set on the capabilities of your existing equipment. and insert it into the antenna socket at the back of the recorder. -
Page 15: Hdmi Connection
Connecting Note HDMI Connection y When you use the HDMI connection, you If you have a HDMI TV or monitor, you can connect can change the resolution (576i, 576p, 720p, it to this player using a HDMI cable (Type A). or 1080i) for the HDMI output using RES. -
Page 16: Component Video Connection
Connecting Component Video Connection Scart connection Connect the COMPONENT VIDEO OUT jacks on the Connect one end of the scart cable into the player to the corresponding input jacks on the TV AV1 scart jack on the unit and other end to the using component video cable. -
Page 17: Connecting To An Amplifier
Connecting Connecting to an 1. Connect one of the Recorder’s DIGITAL AUDIO OUTPUT jacks (OPTICAL or COAXIAL) to the Amplifier corresponding in jack on your amplifier. Use an optional digital (Optical or Coaxial) audio cable. 2. You will need to activate the Recorder ’s digital output. -
Page 18: Channel Audio Output
Connecting Connecting to an Amplifier via 2 Channel Audio Output Connect the Left and Right 2CH AUDIO OUT jacks on the player to the audio left and right in jacks on your amplifier, receiver, or stereo system using audio cables. Amplifier/Receiver AUDIO INPUT Audio cable... -
Page 19: Connection To Another Device
Connecting Connection to Another Connecting a Digital Camcorder device Using the front panel DV IN jack, it is possible to connect a DV digital camcorder or video deck or DVD-R/RW recorder and digitally transfer DV tapes Accessory Audio/Video (A/V) or DVD-R/RW discs to DVD-R/RW. Connections to Recorder Use a DV cable (not supplied) to connect the DV in/ out jack of your DV camcorder/video deck to the... -
Page 20: Usb Device Connection
Connecting USB device connection Compatible USB Flash Drive 1. USB Flash Drive which require additional program installation when you have connected This unit can play movie, music and photo files it to a computer, is not supported. contained on a USB device. 2. -
Page 21: System Setting
System Setting System Setting Auto Set Up [Manual] Enter the necessary information for year, date and time. After the POWER is pressed for the first time to turn a/d (left/right): Moves the cursor to the on the unit or after resetting the unit, the Initial previous or next column. -
Page 22: Home Menu Overview
System Setting Home Menu Overview General Settings From the Home Menu screen you can access all the Adjust the Setup Settings Media for playback and recording of the unit. 1. Press HOME (n).The Home menu appears. You can change the settings of the unit in the The unit will be in tuner mode always when the [SETUP] menu. -
Page 23: Auto Programming
System Setting Auto Programming Switching the program list to DIGITAL TV, ANALOG TV, or RADIO This recorder is equipped with a frequency synthesized tuner capable of receiving the analog 1. Press w to move the highlight position to top of and digital channels. -
Page 24: Station Rename
System Setting Station Rename [Program Edit] (Analog channel only) You can name stations independently. Names can Edits the selected program. be up to 5 characters long. 6. Press RETURN (x) repeatedly to exit Program 1. Use s/w to select a program on the Program List menu List menu then press ENTER (b). -
Page 25: Auto Clock Set
System Setting Note Sort TV channels manually y There are cases where the TV station does You can sort the program’s position on the Program not send, or sends wrong date and/or List menu. time information and the recorder sets the 1. -
Page 26: Antenna Feed 5V
System Setting VCR Play Aspect Antenna Feed 5V You can choose: If you are using indoor antenna with a signal amplifier rated at DC 5V, 100mA, the recorder can [AUTO] supply power through ANTENNA IN jack. Automatically plays back Wide-Screen 1. -
Page 27: Language Settings
System Setting Language Settings DTV Subtitle Digital channels sometimes provide subtitle, often in a different language. You can set a default subtitle language with this setting. Display Menu y If available, you can also select a subtitle Select a language for the [Setup] menu and on- language while viewing digital TV viewing, press screen display. -
Page 28: Audio Settings
System Setting Audio Settings Sampling Freq. If your receiver or amplifier is NOT capable of handling 96 kHz signals, select 48 kHz. When this Each DVD disc has a variety of audio output choice is made, this unit will automatically convert options. -
Page 29: Lock Settings
System Setting Lock Settings DTV Rating Viewing of some digital TV programmes can be limited according to the age limit you set. Lock System 1. Display [Setup] menu. 2. Use s/w to select [LOCK] and press ENTER Allows you to set up specific programs and ratings (b). -
Page 30: Set Password
System Setting Set Password DivX Reg. Code 1. Select [Set Password] option then press d. We provide you the DivX® VOD (Video On Demand) registration code that allows you to rent and 2. Follow step 2 as shown in [Lock System] above. purchase videos using the DivX®... -
Page 31: Recording Settings
System Setting Recording Settings DV Rec Audio You need to set this if you have a camcorder using 32kHz/12-bit sound connected to the front panel DV IN jack. Some digital camcorders have two Rec Mode Set stereo tracks for audio. One is recorded at the time You can set the picture quality for recording;... -
Page 32: Disc Settings
System Setting Disc Settings Finalize Finalizing [fixes] the recordings in place so that the disc can be played on a regular DVD player or computer equipped with a suitable DVD-ROM Disc Format drive. If you load a completely blank disc, the recorder will Finalizing a disc creates a menu screen for initialize the disc. -
Page 33: Disc Label
System Setting Disc Label [MENU/LIST, DISPLAY] Use this to enter a name for the disc. This name Switches the keyboard type (English/Latin appears when you display disc information on- Capital, English/Latin Lowercase, Symbols) 6 screen. Choose OK then press ENTER (b) to fix the name and return to the Setup menu. -
Page 34: Operating
Operating Operating General Explanation of 2. You can select an item by pressing s/w and change or select the setting by pressing a/d. On-Screen Display For details about each item, see the pages in parenthesis. [TITLE] This manual gives basic instructions for operating the Recorder. -
Page 35: Tv Viewing
Operating TV Viewing To navigate through programs on the Guides Use a/d/s/w on your remote control to navigate the guide screen. Viewing the EPG (Electronic You can move faster through programs by scrolling Programme Guide) page-by-page with the C or V buttons on Electronic Programme Guide the remote control. -
Page 36: Program Selection
Operating Timer Recording with Program Displaying Channel List and Guide Changing Channel You can set a timer record using program guide You can display channel list using the ENTER (b) with 8 days. button and switch into other channel on the channel list. -
Page 37: Page Selection
Operating Teletext Operation Teletext on/off 1. Press TEXT to switch to teletext. Teletext is an optional function, therefore only The initial page or last page appears on the those with the teletext system can receive the screen. teletext broadcast. Two page numbers, TV station name, date and Teletext is a free service broadcast by some TV time are displayed on the screen headline. -
Page 38: Playing A Dvd
Operating Playing a DVD General Features Note Unless stated otherwise, all operations Playback Setup described use the remote control. Some features may also be available on the Setup Before using the remote control, press the DVD menu. button to select the device to be operated. Turn the TV on and select the video input source connected to the Recorder. -
Page 39: Title Menu
Operating Still Picture and Frame-by-Frame 4. Within 7 seconds, press ENTER (b) to confirm the start time. Playback Playback starts from the selected time on the 1. Press PAUSE/STEP (M) during playback. disc. The recorder will now go into PAUSE mode. 2. -
Page 40: Changing The Audio Soundtrack
Operating Changing the Audio Soundtrack Last Condition Memory Press AUDIO then press a/d repeatedly during This Recorder memorizes last scene from the playback to hear a different audio language or last disc that is viewed. The last scene remains in audio soundtrack if available. -
Page 41: Playing A Vcr
Operating Playing a VCR Tracking Control Auto Tracking The automatic tracking function adjusts the picture Preparation to remove snow or streaks. The AUTO TRACKING function works in the y Before using the remote control, press the VCR following cases: button to select the device to be operated. y A tape is played back for the first time. -
Page 42: Playing A Divx Movie Disc
Operating Playing a DivX Movie Disc Still Picture and Frame-by-Frame Playback 1. Press M (PAUSE/STEP) during playback. Using this unit you can play DivX disc. Before A still picture appears on the TV screen. playing DivX files, read “About DivX movie files” on y If a still picture vibrates vertically, stabilize it by right. -
Page 43: About Divx Movie Files
Operating Movie menu options Playable Audio format “AC3”, “PCM”, “MP2”, “MP3”, “WMA” 1. Press s/w to select a folder/file on the Movie menu then press ENTER (b). y Sampling frequency: within 8 - 48 kHz (MP3), Movie menu options appear. within 32 - 48kHz (WMA) 2. -
Page 44: Playing An Audio Cd Or Mp3/Wma Disc
Operating Playing an Audio CD or MP3/ Music menu options WMA Disc 1. To display menu options, select a track (or folder) on the menu then press ENTER (b). The Recorder can play audio CDs. Also, the Recorder 2. Use s/w to select an option then press ENTER can play MP3/WMA formatted recordings on CD- (b) to confirm your selection. -
Page 45: Viewing A Jpeg File
Operating Viewing a JPEG File Search (Audio CD only) 1. Press SCAN (c or v) during playback. The recorder can play discs with JPEG files. The recorder will now go into SEARCH mode. Before playing JPEG recordings, read “Notes on JPEG Recordings”... -
Page 46: Notes On Jpeg Recordings
Operating Notes on JPEG Recordings 5. Use s/w to select [Full Screen] option then press ENTER (b). y Depending on the size and number of the JPEG files, it may take several minutes to read the contents of the media. If you don’t see an on- screen display after several minutes, some of the files are too big —... -
Page 47: Dvd Recording
Operating DVD Recording y The Delete Title option in the Title List (Original) menu only hides the title, it does not actually erase the title from the disc and increase the recording time available (except for the last DVD Recording recorded title on a DVD-RW disc in Video mode). -
Page 48: Basic Recording From A Tv
Operating Restrictions on video recording Selected Broadcast Audio Monitor Broadcast Audio Audio y You cannot record copy-protected video using L Ch R Ch this recorder. Copy-protected video includes MONO MONO MONO MONO MONO DVD-Video discs and some satellite broadcasts. STEREO STEREO STEREO If copy-protected material is encountered... -
Page 49: Instant Timer Recording
Operating Instant Timer Recording Timer Recording Instant Timer Recording allows you to make a 1. Press HOME (n) and the Home menu appears. recording easily of a preset length without using 2. Select [RECORD] > [Timer Record] and press the program timer. ENTER (b). -
Page 50: Checking Timer Recording Details
Operating Checking Timer Recording Details 6. The [Rec. OK] on the [Check] field on the [Timer Record List] menu indicates the timer recording Programming can be checked whenever the is programmed correctly. Recorder is turned on. [Rec. OK] – Indicates the Timer Record is in 1. -
Page 51: Recording From External Components
Operating Recording from External Components You can record from an external component, such as a camcorder or VCR, connected to any of the Recorder’s external inputs. 1. Make sure that the component you want to record from is connected properly to the Recorder. -
Page 52: Dvd Editing
Operating DVD Editing a Current media. b Indicates the record mode, free space, and elapsed time progress bar. Title List and Chapter List c Menu options: To display menu option, select a title or chapter then press ENTER (b). The Menu Overview options displayed differ depending on the disc type. -
Page 53: Vr Mode: Original And Playlist Editing
Operating VR Mode: Original and Playlist Making a New Playlist Editing Use this function to add an Original title or chapter Titles, Chapters and Parts to the Playlist. When you do this, the whole title or chapter are put into the Playlist (you can delete bits Titles in the disc’s original content contain one or you don’t need later - see [Deleting an Original or more chapters. - Page 54 Operating Note Adding Additional Title / Chapters It may not be possible to delete chapters that to the Playlist are less than 3 seconds long. 1. Use a/d/s/w to choose a chapter or title You can add an Original title or chapter to add to a you want to delete on the [Title List] or [Chapter Playlist title even if it is already registered.
-
Page 55: Deleting A Part
Operating Deleting a Part Naming a Title Video You can delete a part which you do not want in the You can name the titles. title. 1. Choose the title you want to name on the Title 1. Use a/d/s/w to choose a title you want to List menu, then press ENTER (b). -
Page 56: Moving A Playlist Chapter
Operating Moving a Playlist Chapter 4. Choose [OK] then press ENTER (b) to fix the name and return to the previous menu screen. 5. Press RETURN (x) repeatedly to exit the menu. Use this function to re-arrange the playing order of Note Playlist chapters on the Chapter List-Playlist menu. -
Page 57: Divide One Title Into Two
Operating Divide One Title Into Two 3. Press ENTER (b) to confirm. The chapter’s or title’s thumbnail will dim. Note Use this command to split a title up into two new y If you select a hidden chapter or title on titles. -
Page 58: Combining Two Chapters Into One
Operating Combining Two Chapters Into One Overwriting Recording Use this function to combine two adjacent chapters To overwrite a new video recording on a previously into one. recorded title, follow these steps. This feature is not available for DVD+Rs, that always record at the end 1. -
Page 59: Viewing Title List Menu Displayed On Other Dvd Recorders Or Players
Operating Note Viewing Title List menu displayed on y Unfinalized DVD+RW is playable on regular other DVD Recorders or Players units. y The edited contents of a DVD+R (DL) disc You can view the Title List menu displayed on are compatible on regular DVD players only the other DVD player that is capable of playing after finalization. -
Page 60: Dubbing
Operating Dubbing Recording from DV Input Before DV dubbing Dubbing from VCR to DVD You can connect a DV-equipped camcorder to this recorder using a single DV cable for input and You can copy the contents of a Video tape to a output of audio, video, data and control signals. -
Page 61: Recording From A Digital Camcorder
Operating Recording from a Digital DV-Related Messages Camcorder You may see the following messages appear on your TV screen when using the DV IN jack. You can record from a digital camcorder connected y Not connected to Camcorder. to the DV IN jack on the front panel of this recorder. The camcorder is not connected properly, or the Using the recorder’s remote, you can control both camcorder is switched off. -
Page 62: Troubleshooting
Troubleshooting Troubleshooting Troubleshooting General Symptom Cause & Solution The Power does not turned on. y Plug the power cord into the wall outlet securely. The unit does not start y Insert a playable disc. (Check the disc type, color system, and regional playback. -
Page 63: Playback
Troubleshooting Playback Symptom Cause & Solution Cannot play a disc recorded y Finalize the disc (see page 32). using this unit on other player. y Check the disc compatibility of the player. y Place the disc on the disc tray correctly inside the guide. y Discs recorded with copy-once material cannot be played on other players. -
Page 64: Hdmi
Troubleshooting Stereo Audio Record and/ y TV is not Stereo-compatible. Playback is not present. y Broadcast programme is not in stereo format. y The A/V Output jacks on the unit are not connected to TV A/V In jacks. Even though the timer is set, y There is no disc loaded. -
Page 65: Appendix
Appendix Appendix Controlling a TV with Setting up the remote to control your TV the Supplied Remote You can operate your TV with the supplied remote Control control. If your TV is listed in the table below, set the appropriate manufacturer code. You can control your TV using the buttons below. -
Page 66: Area Code List
Appendix Area Code List Choose an area code from this list. Area Code Area Code Area Code Area Code Afghanistan Fiji Monaco Singapore Argentina Finland Mongolia Slovak Republic Australia France Morocco Slovenia Austria Germany Nepal South Africa Belgium Great Britain Netherlands South Korea Bhutan... -
Page 67: Language Code List
Appendix Language code List Use this list to input your desired language for the following initial settings: [Disc Audio], [Disc Subtitle] and [Disc Menu]. Language Code Language Code Language Code Language Code Afar 6565 French 7082 Lithuanian 7684 Sindhi 8368 Afrikaans 6570 Frisian... -
Page 68: Trademarks And Licenses
Appendix Trademarks and Licenses Manufactured under license from Dolby Laboratories. Dolby and the double-D symbol are trademarks of Dolby Laboratories. HDMI, the HDMI logo and High-Definition Multimedia Interface are trademarks or registered trademarks of HDMI licensing LLC. “DVD Logo” is a trademark of DVD Format/Logo Licensing Corporation. -
Page 69: Specifications
Appendix Specifications General Power requirements AC 200-240 V, 50/60 Hz Power consumption 23 W Dimensions (W x H x D) Approx. 430 x 78.5 x 260 mm (w x h x d) Net Weight (Approx.) 4.2 kg Operating temperature 5 °C to 35 °C (41 °F to 95 °F) Analog: PAL B/G, PAL I/I, SECAM D/K colour system Television system Digital: DVB-T Standard Compliant... - Page 70 Appendix System Signal system Standard PAL color TV system Frequency response 20 Hz to 20 kHz (48 kHz, 96 kHz, 192 kHz sampling) Signal-to-noise ratio More than 100 dB (ANALOG OUT connectors only) Harmonic distortion Less than 0.008% Dynamic range More than 95 dB Bus Power Supply (USB) DC 5 V 0 500 mA...
-
Page 71: Maintenance
Appendix Maintenance Notes on Discs Handling Discs Handling the Unit Do not touch the playback side of the disc. Hold the disc by the edges so that fingerprints do not get on the surface. Never stick paper or tape on the When shipping the unit disc.