Table of Contents
Advertisement
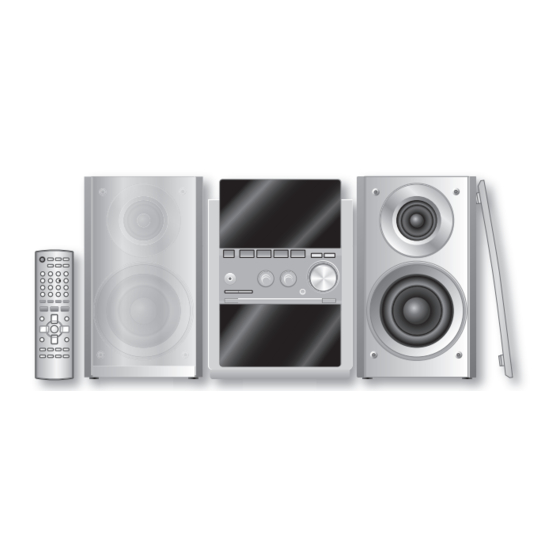
The illustrations show SC-PM53
Table of contents
Caution for AC Mains Lead ................ 2
Safety precautions ............................. 3
Disc information ................................. 3
Placement of speakers ....................... 3
Getting started .................................... 4
Overview of controls .......................... 6
Discs .................................................... 7
Cassette tape ...................................... 9
Radio .................................................... 10
Timer .................................................... 11
Sound adjustment .............................. 12
External unit ........................................ 13
Troubleshooting guide ....................... 14
Specifi cations ..................................... 15
Maintenance ........................................ 15
When moving the unit ........................ 15
Before connecting, operating or adjusting this product,
please read the instructions completely.
Please keep this manual for future reference.
Note:
"EB" on the packaging indicates the United Kingdom.
Operations in these instructions are described using
remote control, but you can do the operations with
the main unit if the controls are the same.
Unless otherwise indicated, illustrations in these
operating instructions are of SC-PM53 for the
United Kingdom and Continental Europe.
Your unit may not look exactly as illustrated.
E
EB GN
RQTV0102_2B.indd 1
RQTV0102_2B.indd 1
Operating Instructions
CD Stereo System
Model No.
SC-PM54 is available in Australia and New Zealand only.
SUPPLIED ACCESSORIES
SUPPLIED ACCESSORIES
Please check and identify the supplied accessories.
Use numbers indicated in parentheses when asking for
replacement parts. (As of December 2005)
1 x Remote control
(N2QAYB000008)
1 x FM indoor antenna
(RSA0007-L)
1 x Antenna plug adaptor
(For United Kingdom:
K1YZ02000013)
2 x Remote control
batteries
SC-PM53
SC-PM54
1 x AC mains lead
(For United Kingdom:
K2CT3CA00004)
(For Australia and N.Z.:
K2CJ2DA00010)
(For others:
K2CQ2CA00002)
1 x AM loop antenna
(N1DAAAA00001)
RQTV0102-3B
2/9/07 11:14:00 AM
2/9/07 11:14:00 AM
Advertisement
Table of Contents

Related Manuals for Panasonic SC-PM54


Summary of Contents for Panasonic SC-PM54
-
Page 1: Table Of Contents
Operating Instructions CD Stereo System SC-PM53 Model No. SC-PM54 SC-PM54 is available in Australia and New Zealand only. SUPPLIED ACCESSORIES SUPPLIED ACCESSORIES Please check and identify the supplied accessories. Use numbers indicated in parentheses when asking for replacement parts. (As of December 2005) -
Page 2: Caution For Ac Mains Lead
If you wish to discard this product, please contact your local authorities or dealer and ask for the correct method of disposal. RQTV0102_2B.indd 2 RQTV0102_2B.indd 2 Caution for AC Mains Lead SC-PM54 SA-PM54 SB-PM54 Inside of product Tuotten sisällä Produktets... -
Page 3: Safety Precautions
SC-PM53 Speakers are designed identically so that no left or right channel orientation is necessary. SC-PM54 Place the speakers so that the tweeter is on the inside. Use only the supplied speakers. The combination of the main unit and speakers provide the best sound. -
Page 4: Getting Started
Getting started Step 1 Step 1 - Making the connections - Making the connections Connect the AC mains lead cord only after all other connections have been made. Connect the AM loop antenna. AM loop antenna Stand the antenna up on its base. Keep the loose antenna cord away from other wires and cords. - Page 5 Optional antenna connections Optional antenna connections FM outdoor antenna FM outdoor antenna (not included) F M A N (Only for the U.K.) Use the antenna plug adaptor (included). • Never use an outdoor antenna during a lightning storm. • You can connect the FM outdoor antenna for better reception. Please consult your dealer for installation. •...
-
Page 6: Overview Of Controls
Overview of controls Main unit Main unit Refer to numbers in parentheses for page reference. Cassette lid (9) AC supply indicator (AC IN) This indicator lights when the unit is connected to the AC mains supply. 1 Standby/on switch (y/l) (15) Press to switch the unit from on to standby mode or vice versa. -
Page 7: Discs
Discs Basic play Basic play Press [y] to turn the unit on. Press [1 3~ 5 3] to select your desired tray. Press [OPEN/CLOSE 0] to open the disc tray and then load the disc. Press [OPEN/CLOSE 0] again to close the tray. - Page 8 Discs (continued) Checking which discs are in the trays (CD CHECK) Checking which discs are in the trays (CD CHECK) Press [CD CHECK]. CD CHECK Press the button again to close the trays. Note • The tray with a disc being played will not open. •...
-
Page 9: Cassette Tape
Cassette tape Top of unit Cassette lid The buttons described for “Cassette tape” are mainly for the main unit unless indicated otherwise. Basic play Basic play Press [0] and insert the cassette. Forward side Close the lid by hand. Press [TAPE 3] to start play. To play the other side of the cassette, turn the cassette over. -
Page 10: Radio
Radio Manual tuning Manual tuning Press [TUNER/BAND] to select “FM” or “AM”. Press [PLAY MODE] to select “MANUAL”. Press [4/REW/4] or [3/FF/¢] to select the frequency of the required station. “ST” is displayed when a stereo FM broadcast is being received. -
Page 11: Timer
Timer Setting the clock Setting the clock This is a 24-hour clock. Press [CLOCK/TIMER] to select “CLOCK”. Each time you press the button: CLOCK ˚ PLAY Original display Within 5 seconds, press [4/REW/4] or [3/FF/¢] to set the time. Press [CLOCK/TIMER] again to confi rm. Displaying the clock Press [CLOCK/TIMER] to display the clock for a few seconds. -
Page 12: Sound Adjustment
Timer (Continued) Other basic operations Other basic operations Action change the settings Repeat steps 1 to 4 and 6 on page 11. ˚ change the source 1) Press [ or volume indicator from the display. 2) Make changes to the source or volume. 3) Perform steps 5 and 6 on page 11. -
Page 13: External Unit
Enjoying surround sound Enjoying surround sound Enable you to add natural width and depth to the stereo sound. To activate Press [SURROUND] to display “ To cancel Press [SURROUND] again to clear “ Note • Surround sound is less discernible when listening through headphones. -
Page 14: Troubleshooting Guide
Troubleshooting guide Before requesting service, make the below checks. If you can’t fi x the system as described below, or if something not listed here occurs, refer to the enclosed directory to locate an Authorized Service Center convenient to you or contact your dealer. Common problems No sound. -
Page 15: Specifi Cations
Digital fi lter 8 fs D/A converter MASH (1 bit DAC) SPEAKER SECTION SC-PM53 Type 2 way, 2 speaker system SC-PM54 Type 3 way, 3 speaker system SC-PM53 Speaker(s) 10 cm cone type (6 Ω) Woofer 6 cm cone type (6 Ω) - Page 16 SUOMI Laite tulee asettaa lähelle verkkopistorasiaa ja pistokkeen täytyy olla sellaisessa asennossa, että siihen on helppo tarttua ongelman sattuessa. NORSK Matsushita Electric Industrial Co., Ltd. Web Site: http://www.panasonic.co.jp/global/ RQTV0102_2B.indd 16 RQTV0102_2B.indd 16 RQTV0102-3B L0106CH3017 2/9/07 11:14:38 AM 2/9/07 11:14:38 AM...