Table of Contents
Advertisement
Thank you for purchasing this product.
For optimum performance and safety, please read
these instructions carefully.
Please keep this manual for future reference.
GA
GS
GN
Operating Instructions
DVD Stereo System
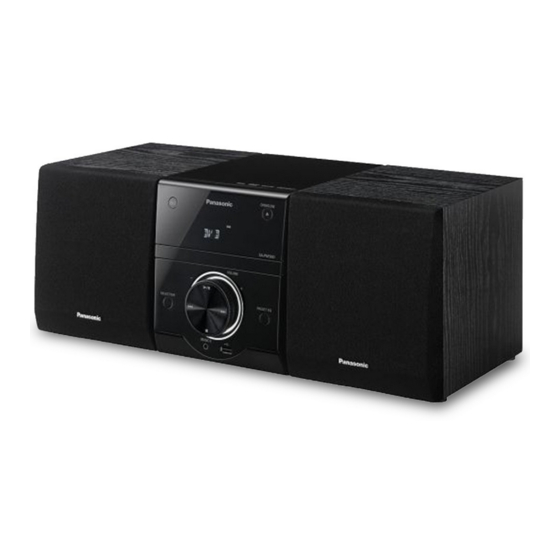
Model No. SC-PM50D
Table of contents
Safety precautions ................................. 2
Caution for AC mains lead ..................... 3
Accessories ............................................ 4
About Discs/Files ................................... 4
Control reference guide ......................... 6
Preparation.............................................. 8
System setup ........................................ 10
Discs/USB operation ............................ 12
DVD/VCD operation .............................. 17
Picture operation (JPEG) ..................... 18
Listening to the radio ........................... 19
Clock setting ......................................... 20
Sleep timer setting ............................... 20
Timer setting ......................................... 21
External equipment operation ............. 22
control mode ......................................... 23
About USB device ................................ 23
Reference information ......................... 24
Troubleshooting guide ......................... 25
Specifi cations ....................................... 27
VQT4L45-2
Advertisement
Table of Contents

Related Manuals for Panasonic SC-PM50D


Summary of Contents for Panasonic SC-PM50D
-
Page 1: Table Of Contents
Operating Instructions DVD Stereo System Model No. SC-PM50D Table of contents Safety precautions ......... 2 Caution for AC mains lead ..... 3 Accessories ..........4 About Discs/Files ........4 Control reference guide ......6 Preparation..........8 System setup ........10 Discs/USB operation ...... -
Page 2: Safety Precautions
System SC-PM50D Main unit SA-PM50D Speakers SB-PM50D Safety precautions Warning! Battery • Do not break open or short-circuit the battery. Unit • Do not charge the alkaline or manganese • To reduce the risk of fire, electric shock or battery. -
Page 3: Caution For Ac Mains Lead
Caution! • CLASS 1 IEC60825-1:2001 LASER PRODUCT CAUTION This product contains a laser diode of higher class than 1. To ensure continued safety, do not remove any covers or attempt to gain access to the inside of the product. Refer all servicing to qualifi ed personnel. Bottom of product Caution for AC mains lead Before use... -
Page 4: Accessories
Accessories About Discs/Files Check the supplied accessories before using this Playable Discs/Files unit. Commercial discs 1 Remote control Type Icon Details N2QAYB000810 • High quality video DVD-Video DVD-V and audio discs 2 Batteries for remote control • Video discs Video CD •... - Page 5 Playable Discs/Files • Before playback, finalize the disc on the (Extension: “.DIVX”, “.divx”, “.AVI”, “.avi”) DivX equipment it was recorded on. • DivX fi les that are more than 2 GB or have • It is not possible to play all the above-mentioned no index may be fail to play correctly on this discs in some conditions because of: system.
-
Page 6: Control Reference Guide
Control reference guide Main unit Front panel 1. Standby/on switch (z/I) Press to switch the unit from on to standby mode or vice versa. In standby mode, the unit is still consuming a small amount of power. 2. FL display 3. - Page 7 Control buttons of remote control 11 12 1. Standby/on switch [z] Press to switch the unit from on to standby mode or vice versa. In standby mode, the unit is still consuming a small amount of power. 2. Numeric buttons [1 to 9, 0, 10] 3.
-
Page 8: Preparation
Preparation Install and replace the Speaker connections batteries of remote control Use only the supplied speakers The combination of the main unit and speakers Risk of explosion! Keep battery(ies) away from give the best sound. If you use other speakers, heat, sunshine or fi... - Page 9 Connecting to a TV Connecting AC mains lead Connect audio and video cable to output terminals Install this unit near the AC outlet where the AC of this unit and related input terminals of TV. mains plug can be easily reached. Select the best video connection that your TV Connect the AC mains lead only after all the supports.
-
Page 10: System Setup
System setup Please follow below steps to select the appropri- 4. Press the o or p button to select an ate setting. item to set up. • The yellow cursor shows the selected 1. Press the DVD/CD or USB button. item. - Page 11 "LANGUAGE" menu For Southeast Asia, Thailand OSD LANGUAGE ENGLISH CHINESE AUDIO LANG ENGLISH CHINESE SUBTITLE LANG ENGLISH CHINESE This switches the language for disc menu. MENU LANG ENGLISH CHINESE For South Africa, the Middle East In above table the language is changed to “ENGLISH FRENCH RUSSIAN”...
-
Page 12: Discs/Usb Operation
Discs/USB operation 4. Adjust the volume. Preparation To view picture, switch on your TV and change Main unit Remote control its video input mode (example: change to “AV1” if you use “AV1” for the connection). VOLUME Basic playback 1. Select playback source (DVD/CD or 5. - Page 13 Direct playback Skip track (chapter) Main unit Remote control DVD-V Remote control During playback press the f button to skip back to the beginning of the current track. Press the button again immediately to skip 03 CH 001/035 In stop mode or during playback press the numeric back to the beginning of the previous track.
- Page 14 Discs/USB operation (continued) MP3, JPEG, DivX fi les Skip group playback Insert a disc or connect a USB device recorded For MP3 file during playback press the but- MP3, JPEG or DivX files to the unit. The file or disc ton to skip folder.
-
Page 15: Stop Playback
Program playback (maximum 16 items) 4. Repeat steps 2-3 to program your 1. To show program setting picture desired track. In stop mode press the PROG./ANGLE button. Remote control 5. Press the i button. PROG./ Main unit ANGLE Remote control 2. - Page 16 Discs/USB operation (continued) Sound mode Repeat/Random play During playback press the PLAY MODE button You can enjoy the sound from the speakers using repeatedly to select the desired playback mode. the tone you like. Press the PRESET EQ button repeatedly to se- Remote control lect desired sound mode.
-
Page 17: Dvd/Vcd Operation
DVD/VCD operation “ERROR” may appear on the TV screen during Selecting subtitle language operation. This means that the function is not available on the disc now. Remote control Selecting a top menu Remote control Press the button repeatedly during playback until the desired subtitle language appears on the screen. -
Page 18: Picture Operation (Jpeg)
Picture operation (JPEG) Changing picture Picture zoom During the slide show or pause mode During the slide show or pause mode For slide show operation, refer to page14. Remote control ZOOM Remote control Press the ZOOM button repeatedly to select the desired zoom level. -
Page 19: Listening To The Radio
Listening to the radio Unwind the antenna wire, then extend the FM Manual presetting antenna wire as straight as possible for better receiving. FM antenna wire 1. Select FM. Main unit Remote control SELECTOR RADIO 2. Search a receivable station. Remote control Manual tuning PROG. -
Page 20: Clock Setting
Clock setting 3. Select minutes in same method 1. In the standby mode described above. Remote control DISPLAY/ CLOCK Press and hold 4. The clock starts. for 2 seconds. 2. Select hours. Remote control Confi rmation current time In standby mode press the DISPLAY/ CLOCK button. -
Page 21: Timer Setting
Timer setting Set the on and off times, desired playback source. 4. Repeat steps 2-3 to set the hours Operation will start with the selected playback and minutes of the off time. source at the on time. The power will be switched After step 3, "SOURCE"... -
Page 22: External Equipment Operation
Timer setting (continued) To turn off the Timer Setting 2. Press the SLEEP/TIMER button. 1. In the standby mode " 0 " indicator disappears. Remote control Press the DISPLAY/CLOCK button. SLEEP/ TIMER Remote control DISPLAY/ CLOCK External equipment operation You can play music from an external equipment. 3. -
Page 23: Changing The Main Unit And Remote Control Mode
Changing the main unit and remote control mode It is possible to affect the unit when operating the Confi rmation the action remote control of other product. At this moment If the remote control can operate, the setting is please change the remote control mode. correct. -
Page 24: Reference Information
Reference information Unit and disc care Authorized and Trademark This item incorporates copy protection Clean this unit with a soft, dry cloth technology that is protected by U.S. patents Never use alcohol, paint thinner or benzine to and other intellectual property rights of clean this unit. -
Page 25: Troubleshooting Guide
Troubleshooting guide Before requesting service, make the checks below. If you are not sure about some of the check points, or if the solutions below were not a solution to the problem, consult your dealer for instructions. Page Power No power. •... - Page 26 Page Sound No sound. • Examine the connections. • Increase the volume. • There is possibly a pause in the sound when you change the play speed. • Audio is possibly not output because of how the contents DivX are made. Humming heard during •...
-
Page 27: Specifi Cations
Specifi cations General DVD/CD section (For Southeast Asia, Thailand, South Africa, Disc: 8cm /12cm the Middle East) DVD (DVD-Video format) Power supply: AC110 - 240V, 50/60Hz DVD-R/-RW /-R DL (For Australia, New Zealand) (DVD-Video format*1, JPEG, MP3, DivX) Power supply: AC220 - 240V, 50Hz DVD+R/+RW/+R DL (DVD-Video format*1) Power consumption:... - Page 28 If there is a major failure in regard to the product which cannot be remedied then you must notify us within a reasonable period by contact- ing the Panasonic Customer Care Centre. If the failure in the product is not a major failure then Panasonic may choose to repair or replace the product and will do so in a reasonable period of time from receiving notice from you.