Table of Contents
Advertisement
Available languages
Available languages
Advertisement
Table of Contents

Related Manuals for Samson C01


Summary of Contents for Samson C01
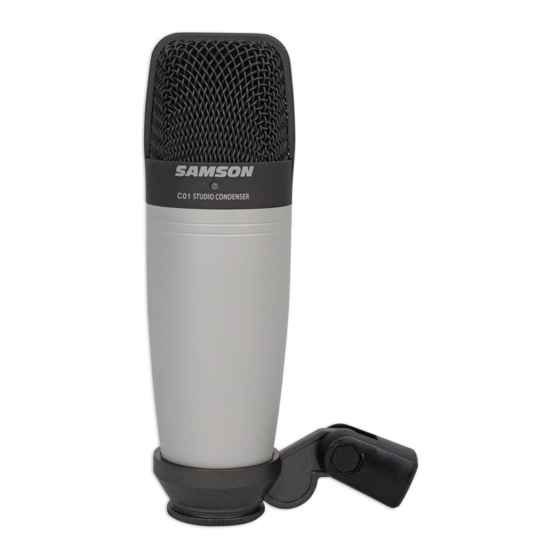
- Page 1 Studio Condenser Microphone...
-
Page 2: Table Of Contents
Setting up the Signal Level P-Popping Stand Mounting the C01 Using the Optional SP01 Shock-mount FRANÇAIS Introduction Présentation des fonctions du C01 Utilisation du C01 Mise sous tension du C01 Directivité Placement du micro Réglage du niveau du signal Bruits de Pop Installation sur pied Suspension anti-choc SP01 “Spider”... -
Page 3: Introduction
In these pages, you’ll find a detailed description of the features of the C01 Studio Condenser Microphone, as well as step-by-step instructions for its setup and use, and full specifications. You’ll also find a warranty card enclosed—... -
Page 4: C01 Features
C01 Features C01 Features • Large Diaphragm Studio Condenser • 19mm Capsule with 3-micron diaphragm • Smooth and transparent sound reproduction • Hyper Cardioid Pick-Up Pattern • 36-52 Volt Phantom Power Operation with Blue LED • Internal Shock-mount • Extended frequency response •... -
Page 5: Operating The C01
INPUT, riding silently along with the audio signal. (Fairly mysterious, eh?) Most mixers have a switch to engage the phantom power so be sure to check that the phantom power is on. The C01 features a blue LED, which will illuminate when phantom power is present. -
Page 6: P-Popping
PEAK or CLIP LED. To set a good level on the mic, set the C01 up in front of the desired sound source and slowly raise the mic trim control until you see the PEAK LED light up. Then, turn the mix trim control down until the LED does not light any more. -
Page 7: Using The Optional Sp01 Shock-Mount
Using the Optional SP01 Shock-Mount Using the Optional SP01 “Spider” Shock-Mount For additional isolation the C01 can be fit- ted on the optional SP01 “Spider” shock mount. Follow the steps below the to install the SP01. • First, screw the SP01 shock mount onto your mic stand or boom arm. -
Page 8: Introduction
Dans ce manuel, vous trouverez une description détaillée des caractéristiques de ce micro à condensateur de studio C01, des instructions pas à pas pour son installation et son utilisation, ainsi que toutes les précisions sur ses caractéris- tiques techniques. Une carte de garantie est également fournie avec l’appareil. -
Page 9: Présentation Des Fonctions Du C01
Présentation du C01 Principales caractéristiques du C01 : • Micro à condensateur de studio à large diaphragme • Capsule 19 mm avec diaphragme 3 microns • Reproduction fidèle et transparente • Polarité hyper-cardioïde • Alimentation fantôme 36-52 Volts (avec témoin led bleu) •... -
Page 10: Utilisation Du C01
Utilisation du C01 Mise sous tension du C01 Le C01 est un micro à condensateur, ce qui implique qu’il doit être alimenté par fantôme. La plupart des consoles de mixage, des préamplificateurs externes et des enregistreurs D-to-D disposent d’une alimentation de ce type. Une alimenta- tion fantôme externe peut également être utilisée si nécessaire. -
Page 11: Réglage Du Niveau Du Signal
équipé de témoins d’écrêtage (PEAK ou CLIP). Pour obtenir un niveau micro idéal, placez le C01 en face de la source à enregistrer et aug- mentez progressivement le gain jusqu’à ce que le témoin PEAK s’allume. -
Page 12: Suspension Anti-Choc Sp01 "Spider" Optionnelle
Suspension anti-choc SP01 optionnelle Afin de garantir une isolation optimale du micro, le C01 peut être installé sur la suspension anti-choc SP01 “Spider” optionnelle. La procédure suivante vous indique comment installer le micro sur sa suspension SP01 : • Tout d’abord, vissez la suspension SP01 sur le pied ou sur la perche micro. -
Page 13: Einleitung
Einleitung Herzlichen Glückwunsch zum Erwerb des Samson C01 Studio- Kondensatormikrofons. Das C01 zeichnet sich durch eine große, 19 mm ultra- dünne Membrankapsel aus, die vielfältige Klangquellen, wie Gesang, Akustikinstrumente und Overhead-Becken, originalgetreu reproduziert. Ein erweiterter Frequenzbereich und eine schnelle Transienten-Ansprache garantieren eine präzise, lineare Wiedergabe über das gesamte Klangspektrum. -
Page 14: C01 Features
C01 Features C01 Features • Studio-Kondensatormikrofon mit großer Membran • 19 mm Kapsel mit 3 Mikron Membran • ausgewogene und transparente Klangreproduktion • Hypernieren-Richtcharakteristik • 36 - 52 Volt Phantomspannungs-Betrieb mit blauer LED-Anzeige • interne Anti-Schockvorrichtung • erweiterter Frequenzgang •... -
Page 15: C01 Bedienen
Sie mit der Hypernieren-Richtcharakteristik die erwünschten Klänge noch stärker von den unerwünschten Klängen trennen. Mikrofonplatzierung Um die Klangqualität des C01 zu maximieren, müssen Sie sorgfältig auf dessen Position und seine Ausrichtung auf das abzunehmende Instrument bzw. den Gesang achten. Alle Mikrofone, besonders unidirektionale oder Nieren- Mikrofone, sind von einem Phänomen begleitet, das man “Proximity- oder... -
Page 16: Signalpegel Einstellen
Rauschen optimieren. Ein guter Mikro-Vorverstärker mit Trim- Regler besitzt auch eine PEAK oder CLIP LED. Um einen guten Mikropegel einzustellen, bauen Sie das C01 vor der gewünschten Klangquelle auf und drehen Sie den Mic Trim-Regler langsam auf, bis die PEAK LED leuchtet. -
Page 17: Der Optionale Sp01 "Spider"Anti-Schock
SP01 • Lockern Sie jetzt die Rändelschraube, ANTI-SCHOCK um den Winkel des Mikrofons einzus- tellen, und richten Sie das C01 auf die gewünschte Position aus. Drehen Sie anschießend die Rändelschraube wieder fest, um das Mikrofon zu fixie ren. Anmerkung: Achten Sie darauf, RÄNDEL-... -
Page 18: Introducción
Introducción Le felicitamos por la compra del micrófono condensador de estudio C01 de Samson. El C01 incorpora una gran cápsula del diafragma ultrafina de 19 mm que reproduce con gran fidelidad muchas fuentes de sonido, incluyendo voca- les, instrumentos acústicos y platos de batería, por citar sólo algunos. La amplia respuesta de frecuencia y la rápida respuesta dinámica garantizan una repro-... -
Page 19: Funciones Y Características Del C01
Funciones y características del C01 Funciones y características del C01 • Micrófono condensador de estudio con diafragma de gran tamaño • Cápsula de 19 mm con diafragma de 3 micras • Reproducción del sonido suave y transparente • Patrón de captación del sonido hipercardiode •... -
Page 20: Utilizar El C01
Para maximizar la calidad del sonido hay que prestar mucha atención a la ubica- ción del C01 y a cómo está situado para el instrumento o vocalista que va a cap- tar con el micrófono. Todos los micrófonos, especialmente los unidireccionales o cardioides, muestran un fenómeno conocido como “efecto de proximidad.”... -
Page 21: Ajustar El Nivel De La Señal
¡conéctese! Ajustar el nivel de la señal Al conectar el C01 a la entrada de un mezclador o una grabadora, compruebe que la entrada sea de nivel de micrófono. Además, compruebe que la potencia fantasma esté... -
Page 22: Utilizar El Aislante De Golpes Sp01 "Spider" Opcional
Retire el pivote giratorio del C01 girando el cuello roscado en sentido antihorario, tal como muestra la figura • Instale el C01 en el SP01 introducien- CUELLO do el micrófono en el centro de la ROSCADO telaraña, colocando el C01 sobre la placa de montaje inferior. -
Page 23: Specifications
Hauteur : 180 mm, Largeur : 54 mm Profondeur : 54 mm Poids brut : 1,15 kg, (2,5 lbs.) Les caractéristiques de l’appareil sont susceptibles d’être modifiées sans avis préalable. C01 Technische Daten Frequenzgang 40 ~ 18000 Hz Richtcharakteristik Hyperniere... - Page 24 C01 POLAR PATTERN C01 FREQUENCY RESPONSE Samson Technologies Corp. 575 Underhill Blvd. P.O. Box 9031 Syosset, NY 11791-9031 Phone: 1-800-3-SAMSON (1-800-372-6766) Fax: 516-364-3888 www.samsontech.com...