Haier HLP21E User Manual
Haier portable electronic washer user manual
Hide thumbs
Also See for HLP21E:
- User manual (19 pages) ,
- User manual (68 pages) ,
- User manual (68 pages)
Table of Contents

Subscribe to Our Youtube Channel
Related Manuals for Haier HLP21E


Summary of Contents for Haier HLP21E
- Page 1 HLP21E MANUAL 6/20/03 10:03 AM Page 2 ® What The World Comes Home To Portable Electronic Washer Lave-Linge Électronique Mobile Lavarropas Eléctrico portátil User Manual- Model # Guide de l'Utilisateur- Modèle # HLP21E Manual del Usuario- Modelo #...
-
Page 2: Important Safety Instructions
HLP21E MANUAL 6/20/03 10:03 AM English IMPORTANT SAFETY INSTRUCTIONS Warning – To reduce the risk of fire, electric shock, or injury to persons when using your appliance, follow basic precautions, including the following: 1. Read all instructions before using the appliance. -
Page 3: Save These Instructions
Risk of child entrapment. Before throwing away your old appliance, remove the door so that children may not easily become trapped inside. Thank you for purchasing our Haier product. This easy-to-use manual will guide you in getting the best use of your washer. -
Page 4: Table Of Contents
HLP21E MANUAL 6/20/03 10:03 AM Page 5 English Table Of Contents PAGE SAFETY INSTRUCTIONS ...1-2 PARTS AND FEATURES ...4-5 OPERATING YOUR WASHER ...6-11 UNPACKING AND ACCESSORIES INVENTORY ...12 PROPER LOCATION ...13 INSTALLATION INSTRUCTIONS ...14-16 UNIT DIMENSIONS ...17 ELECTRICAL CONNECTIONS ...18 PROPER CARE AND CLEANING ...19... -
Page 5: Operating Instructions
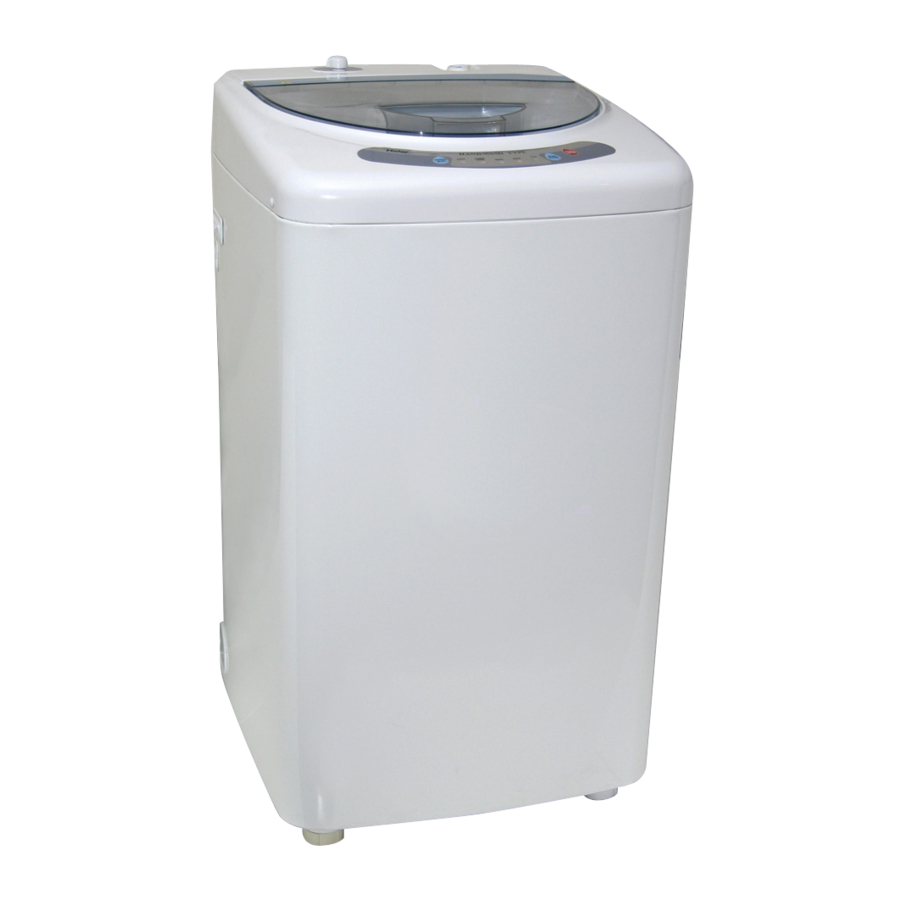
HLP21E MANUAL 6/20/03 10:03 AM OPERATING INSTRUCTIONS Parts and Features 1. Top Lid 2. Control Panel 3. Washer Cabinet Page 6 4. Front Leveling Leg 5. Cabinet Handle (located on both sides of the washer) English... - Page 6 HLP21E MANUAL 6/20/03 10:03 AM English 1. Water Inlet Valve 2. Water Absorption Cushion 3. Water Level Selector Page 7 4. Power Cord Holder Clip 5. Power Cord (115 Volt / 60 Hz) 6. Drain Hose...
-
Page 7: Page
HLP21E MANUAL 6/20/03 10:03 AM OPERATING YOUR WASHER The Control Panel PROGRAM SELECT Power ON/OFF: (1) • Press the button once to turn ON the power to the washer. Press it again to turn the power OFF. Start/Pause: (2) • Press this button once to start the wash process. Press this button once again to pause the activity during the wash cycle. -
Page 8: Proper Use Of Detergent
HLP21E MANUAL 6/20/03 10:03 AM English • Pre-treat all stains and heavily soiled areas for best results. • Do not overload your washer. • Close the door properly after loading the clothes. • When loading wet items, keep water level high enough to keep the unit in balance and to allow clothing to float easily in the water. - Page 9 HLP21E MANUAL 6/20/03 10:03 AM Selecting the Wash Cycle • Press the "Program Select" button for your desired wash cycle. Choose between 7 options. • The total time includes the normal water inlet time and drain time. The total washing time may be affected by the water inlet pressure and water level.
- Page 10 HLP21E MANUAL 6/20/03 10:03 AM English Wash Program Soak (approx minutes) Wash, Rinse & Spin Twice Wash, Wash, Rinse & Spin Quick, Wash, Rinse & Spin Selecting the Water Level • There are 3 water levels to chose from: Low, Medium and High. Your selection may depend on your wash load.
-
Page 11: End-Of-Cycle Signal
HLP21E MANUAL 6/20/03 10:03 AM End-of-Cycle Signal The machine will beep at the end of the cycle, indicating that the washing is complete. The "Wash/Rinse/Spin" indicator lights will still be ON. The washer will turn OFF automatically in approximately 10 minutes after the completion of the cycle. -
Page 12: Normal Operating Sounds
HLP21E MANUAL 6/20/03 10:03 AM Page 13 English Normal Operating Sounds The following sounds are normally heard during the operation of the washer: • Tumbling sounds can be heard as heavy wet clothes in the washer are tossed around continuously. -
Page 13: Unpacking And Accessories Inventory
HLP21E MANUAL 6/20/03 10:03 AM Unpacking and Accessories Inventory Unpacking 1. Remove all packing materials. This includes the foam base and all adhesive tape holding the washer accessories inside and outside. Slide out and remove the bottom Styrofoam that is used to protect the washer from shipping damage due to vibrations and shock. -
Page 14: Proper Location
HLP21E MANUAL 6/20/03 10:03 AM English Proper Location General • Select a suitable location for the washer on a hard even surface away from direct sunlight and heat sources (e.g., radiators, baseboard heaters, cooking appliances, etc.). • Any floor unevenness should be corrected with the leveling leg located on the bottom right corner of the washer. -
Page 15: Installation Instructions
HLP21E MANUAL 6/20/03 10:03 AM Installation Instructions Read carefully and understand all installation instructions before installing this washing machine. If after completing the process you are still unsure whether the washer has been properly installed, we recommend that you contact a qualified installer. -
Page 16: Installing Your Washer
HLP21E MANUAL 6/20/03 10:03 AM English Installing the Lint Filter The lint filter must be installed before the washer is used. The lint filter is packaged with the User Manual. Leveling the Washer Your washer has an adjustable leveling leg that is located on the front right corner. -
Page 17: Installing Quick Sink Adapter
HLP21E MANUAL 6/20/03 10:03 AM Installing Quick Sink Adapter: When installing the quick sink faucet adapter to the faucet, follow the steps below: 1. First, remove the aerator from your faucet nozzle and determine the size/type of the faucet. 2. Once you determine the size/type of the faucet (Outside Threaded End or Inside Threaded End), place the proper sized rubber washer into the silver faucet adapter. -
Page 18: Unit Dimensions
HLP21E MANUAL 6/20/03 10:03 AM Page 19 English Unit Dimensions 17-1/4” 17-1/4” 38-5/8” 29-15/16” 17-5/8” 17-5/8”... -
Page 19: Electrical Connections
HLP21E MANUAL 6/20/03 10:03 AM Electrical Connections Grounding Instructions This appliance must be grounded. In the event of an electrical short circuit, grounding reduces the risk of electric shock by providing an escape wire for the electrical current. This appliance is equipped with a cord having a grounding wire with a grounded plug. -
Page 20: Proper Care And Cleaning
HLP21E MANUAL 6/20/03 10:03 AM English Proper Care and Cleaning Warning! Always unplug your appliance before cleaning to avoid electric shock. Ignoring this warning may result in personal injury or death. Before using cleaning products, always read and follow the cleaning product manufacturer’s instructions and warnings to avoid personal injury and... -
Page 21: Troubleshooting Guide
HLP21E MANUAL 6/20/03 10:03 AM Troubleshooting Guide Before calling for service, determine the symptoms and follow the suggested solutions: Washer does not operate: • Check if the unit is plugged in. The plug may have come loose. • Check if the electrical wall receptacle is of proper voltage. - Page 22 HLP21E MANUAL 6/20/03 10:03 AM English Washer makes noises: • Washer may need to be reinstalled and leveled. Refer to the washer installation section. • Wash load may need to be rebalanced, as the load may be uneven. • Coins, loose change, buttons or other heavy objects may be making the noise.
-
Page 23: Limited Warranty
No other warranty applies For Warranty Service Contact your nearest authorized service cen- ter. All service must be performed by a Haier authorized service center. For the name and telephone number of the nearest authorized service center please call 1-877-337-3639. - Page 24 IMPORTANT Do Not Return This Product To The Store If you have a problem with this product, please contact the "Haier Customer Satisfaction Center" at 1-877-337-3639. DATED PROOF OF PURCHASE, MODEL # AND SERIAL # REQUIRED FOR WARRANTY SER - IMPORTANT Ne pas renvoyer cet appareil au magasin.
Need help?
Do you have a question about the HLP21E and is the answer not in the manual?
Questions and answers