
Related Manuals for Digimerge DGR104


Summary of Contents for Digimerge DGR104
-
Page 1: Digital Video Recorder
Four Channel Digital Video Recorder Models: DGR104 Installation / User Manual Digimerge Technologies Inc. - Page 2 Under the copyright laws, this documentation may not be copied, photocopied, reproduced, translated, or reduced to any electronic medium or machine-readable form, in whole or part without the prior written consent of Digimerge Technologies Inc., except in the manner described in the documentation.
-
Page 3: Table Of Contents
Table of Contents Important Safety Instructions................................3 Introduction ....................................4 Features .......................................4 System Contents ..................................5 Getting Started .....................................5 Front Panel Controls ..................................6 Back Panel ....................................8 Accessing the Main Menu ................................9 Main Menu....................................9 System Set Up..................................10 Setting the Audio Input Channel............................10 Setting the Internal Audible Alarm Buzzer...........................10 Setting the External Audible Alarm device ..........................10 Setting the Alarm Duration ..............................11 Setting the Dwell Time ................................11... -
Page 4: Important Safety Instructions
Important Safety Instructions All the safety and operating instructions should be read before operating this equipment. The improper operation may cause irreparable damage to the appliance. Lift and place this equipment gently. Do not expose this equipment to direct sunlight. Do not use this equipment near water or in contact with water. -
Page 5: Introduction
Introduction The DGR104 combines a 4 channel multiplexer with a Digital Video Recorder (DVR). The DVR offers many advantages over traditional time lapse VCR’s, allowing you to quickly access and search for a specific time segment or event which has been recorded. This high quality recorded video can be viewed at various playback speeds as well as frame-by-frame with the Jog Button feature To learn more about Digimerge products, please visit our website at www.digimerge.com. -
Page 6: System Contents
System Contents The DGR104 box should include the items listed below. Please take a moment to verify that no items are missing from the package. DGR104 Digital Video Recorder Hard Disk Drive in Cartridge (not included in all models) 2 Keys for... -
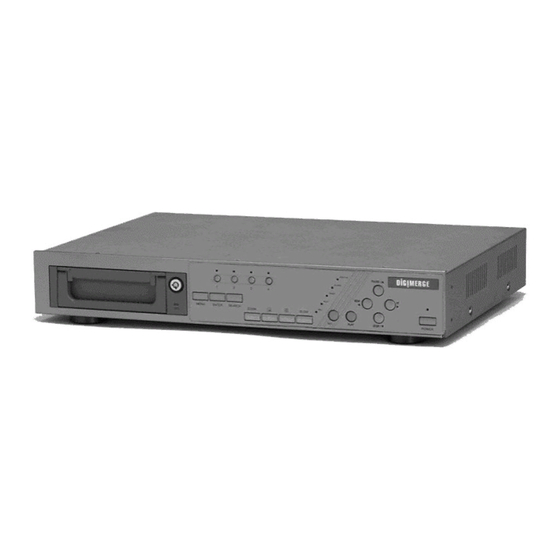
Page 7: Front Panel Controls
Front Panel Controls REMOVABLE HDD CARTRIDGE Please refer to page.19 Appendix #1. LED LIGHT The LED Light is ON under following condition. • HDD Full: HDD is full • ALARM: If you want to turn off the ALARM LED light, please refer to page 13 and set the Camera / ALARM item as OFF (all of the cameras should be set as OFF.) •... - Page 8 15. REC • Press REC to start recording. 16. SLOW • To slow down speed of play mode. 17. CAMERA SELECT (1-4) • Press the Camera Select (1-4) to select specified camera...
-
Page 9: Back Panel
Back Panel POWER INPUT Connects to the Power cord. EXTERNAL I/O Connects to a PC for Remote Control via RS-232 or to an Alarm Block. (see appendix 6 for more info) 75/HI When using the LOOP function, allows for HI impedance or 75ohms. VIDEO INPUT (1-4) Connects to a video source i.e (camera). -
Page 10: Accessing The Main Menu
Accessing the Main Menu The Menu allows you to configure your DVR settings and program various recording options. Follow these steps in order to access the Menu: Press the MENU button. The password screen will appear: Password: 0000 The default Password is 0000. To change the number of the Password, use the ◄... -
Page 11: System Set Up
System Set Up The system menu is used to configure the system level options of the DGR104… To access the System features, press MENU followed by the 4-digit password. Use the ▲ / ▼ to scroll to the ‘System’ option and press ENTER. -
Page 12: Setting The Alarm Duration
Setting the Alarm Duration To set the duration of the Alarm: On the System screen, press ▲ / ▼ to select Alarm Duration, then press ENTER. Press ▲ / ▼ to select the desired time (10s, 15s, 20, 30, 1min, 2min, 3min, 5min, 10min, 15min, 30min, always) Press MENU to confirm your change. -
Page 13: Changing The System Password
Changing the System Password On the System screen, press ▲ / ▼ to select New Password, then press ENTER. Press ▲ / ▼ to choose a number, then press ◄ / ► to move to the next digit: Press MENU to confirm your change. Press ▲... -
Page 14: Timer Recording Setup
The remote connection on the DVR uses 8 data bits, 1 start bit, and 1 stop bit, no Parity. Below is an example of the data stream with the control codes shown. ACT – OxFF OxCO STOP – Ox7F FUNCTION Please refer to Appendix 3 for information on the Pin connections and command protocols that would be used in this... - Page 15 Press ◄ / ► move location to Timer Enable Yes or No setup YES : To confirm Timer Enable Scheduling Timer Record feature NO : To confirm no Timer Enable No Scheduling Timer Record feature Press MENU to exit and confirm current operation. Press MENU again to exit and close TIMER setup mode.
-
Page 16: Record Settings
Record Settings On the Main menu, selecting the Record option will allow you to set the quality and speed of (Menu) recordings. Timer ► Record Pressing ENTER after scrolling to the Record option will bring up the following menu Alarm options: Remote System... -
Page 17: Camera Channel Setup
Camera Channel Setup To access the Camera option, press MENU followed by the 4-digit password. Use the ▲ / ▼ to scroll to the Camera option and press ENTER. TITLE DWELL ALARM RECORD ---01 EVENT ---02 EVENT ---03 EVENT ---04 EVENT The options available in this section are as follows…... - Page 18 Record Method This feature is used to select the DVR record method as either EVENT / NORMAL / OFF. Press ▲ / ▼ to select the desired time camera channel (1-4), then press ENTER. Press ◄ / ► to select the Record Method feature on the screen. Press ▲...
-
Page 19: Motion Detection
Motion Detection The Motion Detect feature provides a visual indication on the monitor when movement is detected in the picture. Note that this does not trigger recording. Press MENU to enter the menu set up, then ▼ to CAMERA setup. Press ENTER twice to enter the Motion Detection Setup. - Page 20 Figure 1-1 MOTION DETECTION SETUP – 1~4 Figure 1-2 MOTION DETECTION SETUP – LINE Figure 1-3 MOTION DETECTION SETUP – ALL...
-
Page 21: Event Log Viewing
Use the ▲ / ▼ to scroll through the events on the display and ◄ / ► to go to the next page. To view (Menu) the video associated with an event, scroll to the event and press ENTER. Timer Record The following is a list of events that can be displayed on the DGR104. Alarm Remote M-HDD WARNING: Master HDD might be failed... -
Page 22: Operation
Recording Methods The DGR104 offers a variety of flexible recording modes. The unit can be set up to record continually, following a schedule, or by record events. In addition, the recording speed and resolution is also configurable (these options are configurable through the system menu). -
Page 23: Picture In Picture (Pip)
Picture in Picture (PIP): This button is used to configure the monitor so a full screen is displayed in the background with a 1/16th size screen insert. Press the button to display the PIP mode. Press SELECT then ◄ / ► button to move the insert screen. Press MENU to exit Zoom: Feature is used to enlarge the display (2X) the size of the main picture. -
Page 24: Key Lock
Press STOP on the front panel whenever you want to return the DVR to live monitoring mode. Key Lock For added security, you can Lock the buttons on your DGR104. Locking disables the functionality of the buttons and prevents accidental key presses from altering the operation of the DGR104. -
Page 25: Troubleshooting
Troubleshooting PROBLEM SOLUTION HDD not found Need to insert HDD Make sure that the HDD Cartridge is locked, then press any key to continue No Power Check the power source cord connections Check that there is power at the outlet Buttons aren’t working when pressed Check if the system is in Key Lock mode Press MENU and ENTER at the same time to... -
Page 26: Technical Specifications
Technical Specifications Video format NTSC/EIA or PAL/CCIR HDD storage IDE type, UTMA 66 above, 2 removable HDD’s supported Record mode Manual / Alarm / Timer Camera input signal Composite video signal 1 Vp-p 75Ω BNC, 4 Channels Camera loop back Composite video signal 1 Vp-p 75Ω... -
Page 27: Appendix 1: Installing The Hdd
Appendix 1: Installing the HDD NOTE: The HDD has the same purpose in a DGR104 as a videocassette does in a VCR. However, installing the HDD is a bit more complicated. Please follow the next steps carefully in order to ensure proper installation. - Page 28 Step 8: Lock the Cartridge To Lock the cabinet, turn the key clockwise to Position A. (locked) (unlocked) To unlock the cabinet, turn the key counter-clockwise to Position B. NOTE: The DGR104 will not function if the key is not in the locked position.
-
Page 29: Appendix 2: Connection Diagram To Cameras And Monitor
Appendix 2: Connection Diagram to Cameras and Monitor... -
Page 30: Appendix 3: Pin Configurations
Appendix 3: Pin Configurations 9 pin Comm Port 25 Pin Comm Port... -
Page 31: Pin References For Rs-232 / Alarm Block
Pin References for RS-232 / Alarm Block PIN 1. GND GROUND PIN 18. ALARM INPUT 1 Used to connect an alarm sensor between ALARM INPUT 1 (PIN 18) and GND (PIN 1) to trigger an alarm on Camera 1, which can activate the internal audible alarm and start recording. PIN 5. -
Page 32: Appendix 4: Rack Mount Installation
Appendix 4: Rack Mount Installation Screws and brackets for rack mounting applications can be purchased as an optional accessory. Front Angle with Rack Mount Side View with Rack Mount For more information about the rack mount & other accessories through Digimerge, please visit: www.digimerge.com. -
Page 33: Appendix 5: Recording Times (In Hours)
Appendix 5: Recording Times (in Hours) NTSC SYSTEM Best 16hr 32hr 60hr 120hr 240hr 480hr High 20hr 40hr 75hr 150hr 300hr 600hr Record Quality Normal 32hr 64hr 120hr 240hr 480hr 960hr Basic 54hr 105hr 200hr 400hr 800hr 1600hr HDD Type 80GB Best 24hr... -
Page 34: Appendix 6: Rs232 Remote Protocol
Appendix 6: RS232 Remote Protocol The RS-232 protocol allows you to control the DGR104 from a PC or any other serial device. Data: 8 bit data, 1 start bit, 1 stop bit 0xCO FUNCTION STOP (0xFF) 0X7F FEATURE CODE ASCII... -
Page 35: Appendix 7: Compatible Hdd Brands
7200 rpm Seagate Barracuda 7200.7 Plus, ST3160023A 160GB 7200 rpm Western Digital Caviar WD1200BB-00CAA1 120GB 7200rpm Western Digital Caviar WD2000BB-00DWA0 200GB 7200rpm Note: The above brands and models of HDD have been tested and they are compatible with the DGR104. -
Page 36: Limited Warranty
No claims or statements regarding the product, whether written or verbal, by salespeople, retailers, dealers or distributors, that are not contained in this limited warranty or in the owner's manual are authorized by Digimerge and do not modify or expand this warranty. - Page 37 Digimerge Technologies Inc. 300 Alden Road Markham Ontario L3R 4C1 www.digimerge.com rev04...