Table of Contents
Advertisement
Advertisement
Table of Contents

Related Manuals for Oce TC4


Summary of Contents for Oce TC4
- Page 1 Océ TC4 scanner Don't wait User manual Operating information...
- Page 2 Océ-Technologies B.V. Océ, Océ TC4 are registered trademarks of Océ-Technologies B.V. ® ® ® ® ® Adobe , Acrobat , Reader and Distiller are registered trademarks of Adobe Systems Incorporated. ® ® PostScript 3™ is a registered trademark of Adobe Systems Incorporated.
- Page 3 All rights reserved. No part of this work may be reproduced, copied, adapted, or transmitted in any form or by any means without written permission from Océ. Océ makes no representation or warranties with respect to the contents hereof and specifi- cally disclaims any implied warranties of merchantability or fitness for any particular purpose.
- Page 4 Trademarks Trademarks Océ, Océ PlotWave™ 300 and the Océ Express WebTools are registered trademarks of Océ-Technologies B.V. ® ® ® Adobe and PostScript 3™ are registered trademarks of Adobe Systems Incorporated. ® ® Macintosh is a registered trademark of Apple Computer, Inc.
-
Page 5: Table Of Contents
'File type'.....................40 'Resolution'..................42 'Original type' and background compensation........43 'Original width'...................44 'Remove strip'..................45 ® Scan jobs on the Océ TC4 Power Logic controller application...46 Scan jobs management ..............46 Manage scan destinations in the 'Scan jobs' workspace....49 Scan jobs tasks...................53 Define file names................54... - Page 6 ® Install and start Océ Power Logic controller Remote......69 Install Océ Power Logic controller Remote on your system...69 ® Start the Océ TC4 Power Logic application with Océ Power Logic controller Remote................71 Connect to the controller..............74 ® Use Océ Power Logic controller Remote..........76...
- Page 7 Accounting software: Océ Account Center..........157 An overview of Océ Account Center.............158 ® Océ Account Logic ................161 Introduction to Océ Account logic..........161 Summary of Océ Account Logic.............162 ® Océ TC4 Power Logic controller setup..........163 ® Océ Account Console ................164 Introduction to Océ Account Console..........164...
- Page 8 Calibrate the scanner...............172 Clear an original jam on the scanner..........174 Scanner error-messages and solutions..........175 Appendix A Overview and tables..................177 Overview of the Océ TC4 system............178 Scanner operator panel.................179 Specifications of the Océ TC4...............181 Specifications of the Océ TC4............181 ® Specifications Océ Power Logic controller........183...
-
Page 9: Chapter 1 Introduction
Chapter 1 Introduction... -
Page 10: Notes For The Reader
Notes for the reader Notes for the reader Introduction This manual helps you to use the Océ TC4. The manual contains a description of the product and guidelines to use and operate the Océ TC4. Definition Attention-Getters Parts of this manual require your special attention. These parts can provide the following: Additional general information, for example, information that is useful when you perform a task. - Page 11 Before using this Océ product, make sure that you read and understand the safety infor- mation which is part of the user documentation. You can download the safety information via http://global.oce.com/support/ or, if applicable, find it on the user documentation CD/DVD that is delivered together with the machine or obtain the safety information from your local Océ...
-
Page 12: Available Documentation
User manual - Safety infor- On http://glob- mation al.oce.com/support/ Available as a PDF file in multiple languages. The Océ TC4 Power Log- Océ TDS-TCS connectiv- CD-ROM, as a PDF file in ® ity manual. English only. controller Integrated Océ... - Page 13 CD-ROM, as a PDF file in Manual multiple languages. Océ Repro Desk on-line Embedded in the applica- help tion as on-line help file in multiple languages. Note: Visit Océ on the internet at http://global.oce.com/support/ for the latest information. Chapter 1 - Introduction...
-
Page 14: How To Use This Manual
This manual contains the following chapters. Chapters Section Topics Introduction contains a general introduction to the Océ TC4 and the concept, including a general de- scription of the main features. Use scanner introduction basic and extended scan-to-file jobs scan job management on the Océ TC4 ®... - Page 15 How to use this manual Chapters Section Topics Océ License Logic introduction perform tasks in the Océ License Logic application Océ Account Center Océ Account Logic Océ Account Console Maintain the Océ maintain the scanner Appendix A Overview and tables overview of the system overview of the graphical operator panels system specifications...
-
Page 16: The Product Concept And Complete Workflow
The product concept and complete workflow The product concept and complete workflow Definition A complete Océ solution includes several different hardware and software products to manage your complete document workflow. The complete document workflow includes several different jobs and documents. The following illustration gives an overview of a complete Océ... - Page 17 The product concept and complete workflow Do which job where Use the following products to do the following jobs. Scan-to-file jobs on the scanner operator panel Set up and control the complete workflow on the controller. Chapter 1 - Introduction...
-
Page 18: The Océ Tc4 Key Concepts
The Océ TC4 key concepts Green key principle The Océ TC4 is a very user-friendly scanner. The scanner is very easy to operate. The scanner templates offer you extended ease of use because you can use them to store pre- ferred combinations of settings. -
Page 19: User Interaction
User interaction User interaction Introduction The user can communicate with the Océ TC4 from local locations and remote locations. Operator panels The Océ TC4 offers the following user interfaces. A scanner operator panel for the scanner allows you to define the settings for scan jobs but also allows you to set scanner settings. -
Page 20: The Océ Tc4 Users
Introduction The Océ TC4 will be used by various users within your company or department. Depend- ing on the tasks that you need to perform on the Océ TC4 you may need certain access ® rights to the Océ TC4 and the Océ TC4 Power Logic controller. - Page 21 'Anonymous' user. Repro operator The repro operator is responsible for the daily use of the Océ TC4 in a central repro de- partment. This person makes scans on the scanner. ® In the integrated Power Logic...
-
Page 22: Get To Know The Océ Tc4
The Océ TC4 The configuration of the Océ TC4 The Océ TC4 is a high quality and fast wide format color scanner for scanning engineering documents. The Océ TC4 is available as a scanner only configuration. The Océ TC4 offers scan-to-file functionality. The Océ TC4 can be adapted to the fit in just the way you want it. -
Page 23: The Océ Tc4 Components
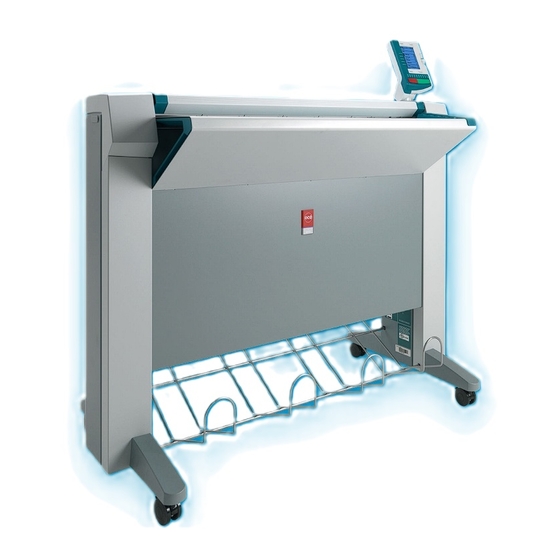
Scanner ® Océ TC4 Power Logic controller The Océ TC4 scanner [11] scanner Use the Océ TC4 scanner to make scan-to-file jobs, in color, grayscales or black and white. ® The Océ TC4 Power Logic controller ® The Océ TC4 is equipped with a Océ TC4 Power Logic controller which helps you to make optimum use of your scanner. - Page 24 It monitors the set memory to display the available storage space on the controller. Optional software ® You can order the following optional features for the Océ TC4 Power Logic controller. Account Logging. ®...
-
Page 25: Turn On And Off The Océ Tc4
Turn on and off the Océ TC4 Introduction ® You can turn on and off the Océ TC4 scanner. The Océ TC4 Power Logic controller is switched on and off separately from the scanner. You do not have to use a specific order in which you turn on and off the Océ... - Page 26 Turn on and off the Océ TC4 Chapter 1 - Introduction...
-
Page 27: Chapter 2 Use The Océ Tc4
Chapter 2 Use the Océ TC4... -
Page 28: Use The Scanner Operator Panel
Note that the scanner operator panel also uses icons to explain a setting. The following illustration shows the scanner operator panel. For more information about the keys on ‘Scanner operator panel’ on page 179 Chapter 2 - Use the Océ TC4... - Page 29 Use the scanner operator panel Illustration [12] The operator panel of the Océ TC4 scanner Define job settings with the left soft keys and the scroll wheel Select a job template with one of the left softkeys. The top 5 settings appear.
- Page 30 A setting that contains a list of values, like 'Lighter/darker'. Open the setting with the scroll-wheel key. Define the required value with the scroll wheel. The value and icon changes. Close the setting with the scroll-wheel key. Chapter 2 - Use the Océ TC4...
- Page 31 Select 'Close' with the lower-scroll-wheel key. Repeat from step 4 to define the next setting. Note: Use the 'Defaults' option at the lower-left key to set all settings of the job template to default. Chapter 2 - Use the Océ TC4...
-
Page 32: Basic Scan-To-File Jobs On The Scanner
Océ TC4 Power Logic controller application. You can use the scroll wheel to see the other settings. After you start a scan- to-file job, you can manage your jobs from the 'Scan jobs' workspace in the Océ TC4 ® Power Logic controller application. - Page 33 Define the job settings. Select the required template at the scanner operator panel and change the pre-defined settings only if necessary. Press the green start key. Result You get a tuned digital file of your original. Chapter 2 - Use the Océ TC4...
-
Page 34: Do A Basic Scan-To-File Job
If you must enter the same value for a setting very often, you can set this value as the de- ® fault value for that setting in the Océ TC4 Power Logic controller application. After you press the start key, the scanner operator panel always shows the job number and status of the job. -
Page 35: Do An Extended Scan-To-File Job
If you must enter the same value for a setting very often, you can set this value as the de- ® fault value for that setting in the Océ TC4 Power Logic controller application. After you press the start key, the scanner operator panel always shows the job number and status of the job. - Page 36 Repeat the selection of settings from bullet 3 if you need to define more settings. Press the green 'Start' key. Result The scanner scans the original and sends the scanned file to the defined scan-to-file des- tination. Chapter 2 - Use the Océ TC4...
-
Page 37: Stop A Scan-To-File Job
When you press the red stop key while the scanner scans, the scan process stops. The scanner rewinds the original and the scan-to-file job is cancelled. When you press the red stop key while the scanner rewinds, the rewind process continues. The scan-to-file job is cancelled. Chapter 2 - Use the Océ TC4... -
Page 38: Extended Scan-To-File Jobs
Use this setting to define the width of the original that the scanner scans.‘'Original width'’ on page 44 'Remove strip' Use this setting to define blank areas on the sides of the scanned image. ‘'Remove strip'’ on page 45 Chapter 2 - Use the Océ TC4... - Page 39 Negative values mean less exposure and darker scanned output. Positive values mean more exposure and grayer scanned output. Note: This setting can only be set if the color mode you select is gray or black and white. Chapter 2 - Use the Océ TC4...
-
Page 40: File Type
Color mode: Grayscale Color mode File type Compression Organization 'Grayscale' 'TIFF' 'None' 'Raw' 'Packbits' 'Tiled' 'Striped' 'PDF' 'None' Not available 'Flate' JPEG Quality Maximum High Medium Minimum JPEG Quality Maximum High Medium Minimum Chapter 2 - Use the Océ TC4... - Page 41 Color mode: Color Color mode File type Compression Organization 'Color' 'TIFF' 'None' 'Raw' 'Packbits' 'Tiled' 'Striped' 'PDF' 'None' Not available 'Flate' JPEG Quality Maximum High Medium Minimum JPEG Not available Quality Maximum High Medium Minimum Chapter 2 - Use the Océ TC4...
-
Page 42: Resolution
Select the required scan resolution with the scroll wheel. Setting Value in dots per inch 'Resolution' '72 dpi' '100 dpi' '150 dpi' '200 dpi' '300 dpi' '400 dpi' '600 dpi' Note: A higher resolution increases the file size. Chapter 2 - Use the Océ TC4... -
Page 43: Original Type' And Background Compensation
The compensation depends on the type of the originals. If enabled, the background compensa- tion for 'Photo' or 'Grays&Lines' originals is a standard value. Value Auto Chapter 2 - Use the Océ TC4... -
Page 44: Original Width
Océ Settings Editor. 'Custom' Custom-selected width. Use this setting if the 'Auto' setting or the 'Standard' set- ting does not give the required result. Chapter 2 - Use the Océ TC4... -
Page 45: Remove Strip
'Remove strip' - Use this setting to remove a strip from 'Right' the right side of the image/original viewed from the face-up direction. This action decreases the image width. Chapter 2 - Use the Océ TC4... -
Page 46: Scan Jobs On The Océ Tc4 Power Logic Controller Application
Scan jobs management ® Scan jobs on the Océ TC4 Power Logic controller application Scan jobs management 'Scan jobs' workspace ® The 'Scan jobs' workspace in the Power Logic controller application allows you to configure your scan jobs workflow. The 'Scan jobs' workspace is divided in three areas that manage the complete scan jobs workflow. - Page 47 The remote destination is a directory on a workstation that is accessible through the network. Use the toolbar at the top of the 'Scan jobs' workspace to create, edit and delete the remote scan job destinations. Chapter 2 - Use the Océ TC4...
- Page 48 Only a scan job that is stored at a local destination on the controller can be opened with ® ® the view application Océ View Station LT . Océ View Station LT is only accessible from the controller. Power Logic controller Remote does not support this functionality. Chapter 2 - Use the Océ TC4...
-
Page 49: Manage Scan Destinations In The 'Scan Jobs' Workspace
Select the 'On controller' area in the 'Scan jobs' workspace. Open the ‘File’ menu and select 'New' or click the 'New' button in the toolbar. A sec- ondary window appears in which you can define the properties of the new local destination. Chapter 2 - Use the Océ TC4... - Page 50 SMB destination. The 'Scan jobs' view area then shows the contents of the new SMB destination. Create a web destination with FTP Create a home directory and a subdirectory on a workstation. For example c:Ftp/Scan Chapter 2 - Use the Océ TC4...
- Page 51 The destination properties are now locked. Note: This option is only available if you are logged on as a key operator. Unlock a scan destination Select a scan destination. Open the ‘File’ menu and select 'Properties'. Chapter 2 - Use the Océ TC4...
- Page 52 Select a destination. Open the ‘File’ menu and select 'Delete' or click the 'Delete' button in the toolbar. The selected scan destination is deleted. Note: You are not able to delete the last scan destination. Chapter 2 - Use the Océ TC4...
-
Page 53: Scan Jobs Tasks
Scan jobs tasks Introduction ® The 'Scan jobs' workspace in the Océ TC4 Power Logic controller application allows you to configure and manage the scan job settings and the scan destinations. In addition you can manage your scan jobs workflow. You only set up your scan workflow once. -
Page 54: Define File Names
Scan the originals. You can scan now with automatic file name numbering. Select the above destination on the scanner operator panel and set all scan-to-file properties. While you scan, the scanner operator panel displays the file name. Chapter 2 - Use the Océ TC4... - Page 55 Click ‘Apply’ to accept the destination properties. The ‘properties’ window stays open and is ready for the next scan-to-file action after the current original is scanned. Scan the original. Repeat step 4, 5 and 6 for each original. Chapter 2 - Use the Océ TC4...
-
Page 56: View The Properties Of The Scanned File
View the properties of the scanned file Purpose Check the properties of a scanned file. Before you begin Make sure you have sufficient permissions when you log on to the Océ TC4 Power ® Logic controller application. 'Anonymous' - permission, editing and other actions are allowed... -
Page 57: Delete Scanned Files
You do not want to keep the scanned file. You want to clean up a local scan destination. Before you begin Make sure you have sufficient permissions when you log on to the Océ TC4 Power ® Logic controller application. -
Page 58: Resend Scanned Files From The Unsent Scans Folder
Purpose To send scanned files that could not be delivered to their initial destination to the same destination. Before you begin Make sure you have sufficient permissions when you log on to the Océ TC4 Power ® Logic controller application. -
Page 59: How To Retrieve Scanned Files Via Ftp
File Transfer Protocol (FTP). Also if during scanning to a remote destination, something goes wrong, you can retrieve your files from the local host. [35] How to retrieve scan files Chapter 2 - Use the Océ TC4... - Page 60 ‘Unsent’ directory if you want to retrieve a file from ‘Unsent’ folder on the local host. Get the data file (for example: bugatti.tif) via the ‘Get’ command. Quit FTP by entering the ‘bye’ command. Chapter 2 - Use the Océ TC4...
-
Page 61: Océ View Station Lt
Purpose Check the quality of the scanned file before you archive the scanned file. Before you begin Make sure you have sufficient permissions when you log on to the Océ TC4 Power ® Logic controller application. 'Anonymous' - permission, editing and other actions are allowed... - Page 62 ® View locally scanned files with Océ View Station ® the view button in the Océ TC4 Power Logic controller application to open the secondary window manually. The procedure below describes this action in detail. How to view a locally stored scanned file ®...
-
Page 63: Functions In Océ View Station ® Lt
View toolbar displays and removes the toolbar that contains buttons. The View toolbar appears, by default, below the menu bar. It serves as a fast means of selecting some File, View, and Preference menu commands. Chapter 2 - Use the Océ TC4... - Page 64 Reduce: Zooms out of the page. Mirror: Mirrors the image. Rotate 90 CCW: Rotates the image 90 degrees counterclockwise. Rotate 90 CW: Rotates the image 90 degrees clockwise. Rotate 180: Rotates the image 180 degrees. Chapter 2 - Use the Océ TC4...
- Page 65 Measurement: When active, it allows you to measure lines and areas on the image. Reference: This small floating window displays the entire current page in miniature for reference. Displays or removes the Detail window. Chapter 2 - Use the Océ TC4...
-
Page 66: View Error In Océ View Station Lt
View error in Océ View Station When the memory is almost full it can occur that the viewer does not show the scanned file. Instead it shows a red border with a red cross. [37] View error Chapter 2 - Use the Océ TC4... -
Page 67: Océpower Logic Controller Remote
Chapter 3 ® OcéPower Logic con- troller Remote... -
Page 68: Introduction To Océ Power Logic Controller Remote
'Configuration' Use this workspace to set all the connectivity and security settings. Note: Certain functions cannot be used when you logon remotely to the Océ TC4 Power ® Logic controller application e.g. scan-to-file viewing with Océ View station LT or using the Océ... -
Page 69: Install And Start Océ Power Logic
Install Océ Power Logic controller Remote on your system ® Install and start Océ Power Logic con- troller Remote Install Océ Power Logic controller Remote on your system Introduction The Océ Power Logic controller Remote application can run on all platforms with Java™ Virtual Machine. - Page 70 Install Océ Power Logic controller Remote on your system From the directory Products/remlogic/Unix, unpack the contents of the file remlog- ic_vX.tar to a subdirectory on the system. Use tar xvf remlogic_vX.tar to unpack the file. Set the environment variable RL_VM_HOME to point to the installation of the JVM. Run the file remlogic.
-
Page 71: Start The Océ Tc4 Power Logic Application With Océ Power Logic Controller Remote
® Start the Océ TC4 Power Logic application with Océ Power Logic controller Remote ® Start the Océ TC4 Power Logic application with Océ Power Logic controller Remote Introduction ® Use the following 2 methods to start the application with Océ Power Logic controller Remote. - Page 72 ® Start the Océ TC4 Power Logic application with Océ Power Logic controller Remote Parameters of supported languages Parameters of supported languages Language Language parameters Country parameters Danish Swedish Norwegian Finnish Hungarian Czech Polish German Dutch UK English US English...
- Page 73 ® Start the Océ TC4 Power Logic application with Océ Power Logic controller Remote Example of a command line parameter The example below shows how to start the controller applications with the configuration file 'Myconfig.cfg', connected to the 'MyTC4' server. The first language is set to UK English and the second language is set to French.
-
Page 74: Connect To The Controller
Add a system to the drop-down list. Remove a system from the drop-down list. When the Océ TC4 is not available in the 'Connect to' window, you must add the Océ TC4 to the list of available systems. How to connect to a system Run the application. - Page 75 Connect to the controller The 'Edit systems' dialog box appears. Select the system you want to remove. Click 'Remove'. The system is removed from the list. Click 'OK' 2 times to return to the application. ® Chapter 3 - OcéPower Logic controller Remote...
-
Page 76: Use Océ Power Logic Controller Remote
Automatic logon ® Use Océ Power Logic controller Remote Automatic logon Introduction The 'Automatic logon' option enables you to start an application automatically in the indicated user mode. How to enable automatic logon Step Action Access Océ Power Logic controller Remote. From the 'Edit' menu, select 'Options'. -
Page 77: Log On To Océ Power Logic Controller Remote
Remote ® Log on to Océ Power Logic controller Remote User modes ® The Océ TC4 Power Logic controller application has the following user modes. Repro operator Key operator System administrator Océ Service. Only assigned operators are allowed to use the user modes. Different passwords are required to access the user modes. - Page 78 ® Log on to Océ Power Logic controller Remote You are now logged on as special user. When you are not logged on, you have 'Anonymous' user permissions. The status bar at the bottom shows the user mode. The logon is limited to one user only. How to log off from the controller application Select the 'Log on' menu and choose 'Log off'.
-
Page 79: Change The 'Password
Change the 'Password' Change the 'Password' Illustration How to change the password Select the 'Log on' menu in the toolbar to log on to the system. Click 'Password' in the dialog box. Open the drop-down list and select a user. Enter the old password. - Page 80 Change the 'Password' ® Chapter 3 - OcéPower Logic controller Remote...
-
Page 81: The Océ Tc4 Power Logic Controller Application
Chapter 4 ® The Océ TC4 Power Logic controller application... -
Page 82: Introduction
The big advantage of this integrated application is that it combines a number of indepen- dent software applications into one powerful application. You only need to logon to one application to have all functionality at your disposal. Illustration [41] Scan jobs screen ® Chapter 4 - The Océ TC4 Power Logic controller application... - Page 83 ® The Océ TC4 Power Logic controller software application ® The software application on the Océ TC4 Power Logic controller ® The software application on the Océ TC4 Power Logic controller allows users to perform different tasks, depending on the role they choose to log on.
-
Page 84: Toolbars And Workspaces
The workspaces can be managed with the functions in the various toolbars. You can also use the top toolbar menu options to manage the workspaces. The status bar displays messages and icons to give the user for example status information about the Océ TC4. ®... - Page 85 Toolbars and workspaces Illustration Available toolbars Toolbar Description Top menu bar ® Chapter 4 - The Océ TC4 Power Logic controller application...
- Page 86 Note: you can also right-click in the area to access a menu with the options available in the toolbar. Status bar Give feedback on the status of the Océ TC4. Controller status feedback Log on information Workspace status feedback System control panel feedback.
- Page 87 'Scan cleanup' settings 'Logging' settings Workspace Description 'Configuration' Manage the network connectivity, security settings and licenses. 'Network' tab ® Power Logic controller identification 'TCP/IP' 'FTP' IPX/SPX 'Security' tab Normal Medium High ® Chapter 4 - The Océ TC4 Power Logic controller application...
-
Page 88: Log On As A Different User
The first user who logs on in a certain user role always has read and write permissions. How to log on as a different user ® Click the Log on menu option in the menu bar of the Océ TC4 Power Logic controller application. A secondary window appears. -
Page 89: Change The Password
System administrator - SysAdm How to change the password ® Click the Log on menu option in the menu bar of the Océ TC4 Power Logic controller application. A secondary window appears. The drop-down box displays a user role already. if necessary select another user role. -
Page 90: Concepts Of The Workspaces
Concepts of the 'Scan jobs' and the 'Scan destinations' Definition A scan job is an analog document that is scanned in on the Océ TC4 scanner. The result is a digital version of the analog document. You can save this digitized document to a pre-defined destination (scan-to-file). - Page 91 Note: Only a scan job that is stored at a local destination on the controller can be opened with ® the view application Océ View Station LT ® Chapter 4 - The Océ TC4 Power Logic controller application...
-
Page 92: Concept Of The 'Scan Destinations
Concept of the 'Scan destinations' Definition A scan destination is a storage area for scan-to-file jobs that you create on the Océ TC4. The scan-to-file jobs are sent to a temporary storage area where you can access the jobs for additional processing. You can create local scan destinations on the Océ TC4 Power ®... - Page 93 Options in the Description 'Scan jobs' workspace 'New' Create a new scan job destination. ® Chapter 4 - The Océ TC4 Power Logic controller application...
- Page 94 If you do not want to use the toolbar options, there are 2 alternative methods to perform ® actions. You can use the menu options in the top toolbar of the Océ TC4 Power Logic controller application or you can right-click to access a menu to perform actions on the selected scan destinations or scan jobs.
-
Page 95: Concept Of The 'Templates' On The Scanner
Individual set- Allows you to set the values for each setting, used in the template. tings ® Chapter 4 - The Océ TC4 Power Logic controller application... -
Page 96: Concept Of The 'Preferences' Workspace
Definition The 'Preferences' workspace allows you to define a number of overall workflow and system settings that manage the behavior of the Océ TC4. These settings are usually set during the installation and are not changed often after installation. The 'Preferences' workspace consists of the following groups of settings. -
Page 97: Concept Of The 'Configuration' Workspace
Definition The 'Configuration' workspace allows you to define a number of network and connectiv- ity settings that manage the Océ TC4. These settings are usually set during the installation and are not changed often after installation. The 'Configuration' workspace consists of the following groups of settings. - Page 98 Concept of the 'Configuration' workspace ® Chapter 4 - The Océ TC4 Power Logic controller application...
-
Page 99: The Océ Publisher Copy Option
Chapter 5 The Océ Publisher Copy option... -
Page 100: Introduction
Introduction Introduction ® If you have access to an Océ ColorWave 600 printer, the Océ TC4 Power Logic controller application offers the Océ Publisher Copy option. Note: You need a license for the Océ Publisher Copy option. This option allows you to send a scanned document directly to the Océ ColorWave 600 printer. - Page 101 Introduction Chapter 5 - The Océ Publisher Copy option...
-
Page 102: Overview Of Océ Publisher Copy
The Océ Publisher Copy sections Overview of Océ Publisher Copy The Océ Publisher Copy sections When you access the Océ Publisher Copy workspace, the following sections are displayed. Section Description The default settings section. In this section you can configure the default Océ Publisher Copy settings. Set the User preferences. - Page 103 The Océ Publisher Copy sections Section Description The 'Copy job progress' section. This section displays information about the progress of the copy jobs. Overview of active jobs and job history. (see ‘The 'Active jobs' section and the 'History' section’ on page 113) Overview of the job status.
-
Page 104: The Default Settings Section
'User Preferences' The default settings section 'User Preferences' Illustration How to set the 'User Preferences' Click 'User Preferences' in the Océ Publisher Copy default settings section (upper right corner). Select the 'Language' you want to apply to the client application. In the 'Measurement unit' section, select 'Inch' or 'Millimeter'. -
Page 105: Change Printer
'Change printer' 'Change printer' Illustration How to change the printer Click 'Change printer' in the Océ Publisher Copy default settings section (upper right corner). The application is disconnected from the current printer. Enter the Host Name of the Océ ColorWave 600 printer that must be used for your copy jobs. -
Page 106: Change The Default Publisher Copy Print (Copy) Template
Change the default Publisher Copy print (copy) template Change the default Publisher Copy print (copy) template Illustration How to change the default Publisher Copy print (copy) template Attention: The default Publisher Copy print (copy) template that you select here only defines the default settings for the printer. -
Page 107: Print (Copy) Template Definition
Print (copy) template definition Print (copy) template definition Definition In a print (copy) template you can define a set of default print settings for a copy job. A built-in print (copy) template is provided by default (Océ Publisher Copy default template). -
Page 108: Set The Default Behaviour For The Media Selection
Set the default behaviour for the media selection Set the default behaviour for the media selection Definition In the 'Media' section of a template, you define the way the system will behave when se- lecting a media for a document. Media settings Define the system behaviour regarding: The 'Media type' selection... - Page 109 Set the default behaviour for the media selection Note: When the template refers to a media type that has been disabled on the printer controller, an error message is displayed: 'The selected media type is not available.' 'Media size' selection 'Automatic media size selection' When you activate the 'Automatic media size selection', you keep a 100% scale and you can decide to cut the media to the image size or to a standard sheet size:...
- Page 110 Set the default behaviour for the media selection In the 'Select any enabled media' mode, the system can select a media that is not loaded. When a submitted job requires an unloaded media, the job status turns into 'Waiting' ('Media not currently loaded on the printer.') and the job is held until you load the needed media.
-
Page 111: Enable Or Disable 'Direct Copy Mode
Enable or disable 'Direct copy mode' Enable or disable 'Direct copy mode' Introduction You can enable or disable the 'Direct copy mode' by clicking the 'Direct copy mode' button in the Océ Publisher Copy default settings section (upper right corner). Illustration When Then... - Page 112 Enable or disable 'Direct copy mode' When Then 'Direct copy mode' is disabled the scanned documents are collected in a job. You can preview documents and edit settings before printing. Note: It is advised to disable 'Direct copy mode' when accounting is requested on the printer.
-
Page 113: The 'Copy Job Progress' Section
The 'Active jobs' section and the 'History' section The 'Copy job progress' section. The 'Active jobs' section and the 'History' section Illustration As soon as a scan job is sent to the printer you can follow the progress of the job in the system: The status of the active jobs in the 'Active jobs' section. - Page 114 The 'Active jobs' section and the 'History' section The 'Status' The 'Rank' in the printer queue The 'Time' when the job was submitted to the printer Additional 'Information' if available. From this section, you can: Configure the 'Job properties' (see ‘View the settings’...
-
Page 115: Job 'Status
Job 'Status' Job 'Status' Introduction Find below the list of possible statuses of a job. More details about the reasons of the status are provided in the 'Information' field. Job 'Status' If the 'Status' of a Then job is: 'Submitting' The job has been submitted and the data is not all received by the printer. - Page 116 Job 'Status' When the 'Status' And the message is: Then 'Waiting' 'Printer Waiting For Media' Load the required media onto or 'Waiting for accounting the printer or enter accounting information'. information at the printer before the job can be printed. When there are more than 1 reason why a job is waiting, the main reason is displayed.
-
Page 117: Track And Manage A Submitted Job
Track and manage a submitted job Track and manage a submitted job Introduction From the 'Jobs' window you can track and manage a submitted job. Attention: To manage all jobs on the Océ ColorWave 600 printer go to the 'Jobs' tab in the Océ Express WebTools. - Page 118 Track and manage a submitted job View the settings Select the job in the 'Active jobs' or 'History' section, Click 'Properties'. In the 'Job Properties' window you can check and view the documents that compose the job. Remove one or several jobs from the 'History' Note: Only the jobs submitted by a user during the running session are displayed in the 'Jobs' window.
-
Page 119: Copy Settings Related To The Scanner
New scan destination Copy settings related to the scanner New scan destination Introduction Océ Publisher Copy adds a new default scan destination on your controller, called Pub- lisher Copy. For copy jobs, you must select the Publisher Copy scan destination. Illustration To select the Publisher Copy scan destination you can do the following. -
Page 120: Define A Publisher Copy Scan Template
Define a Publisher Copy scan template Define a Publisher Copy scan template Before you begin To define a Publisher Copy scan template, you must access the 'Templates' workspace. The 'Templates' section displays an overview of the existing 'Templates on the scanner operator panel' and the 'Template Library'. - Page 121 Define a Publisher Copy scan template Edit or define the scan template settings. Make sure that you select Publisher Copy as the 'Destination'. Click 'OK' to confirm your entries. Drag and drop the new Publisher Copy scan template on an existing scan template in the 'Templates on the scanner operator panel' section.
-
Page 122: Do A Basic Copy Job ('Direct Copy Mode' Enabled)
Basic copy job Do a basic copy job ('Direct copy mode' enabled) Basic copy job Before you begin Make sure that 'Direct copy mode' is enabled (See ‘Enable or disable 'Direct copy mode'’ on page 111). How to do a basic copy job Place the original face down and right aligned. -
Page 123: Do An Extended Copy Job ('Direct Copy Mode' Disabled)
Extended copy job Do an extended copy job ('Direct copy mode' disabled) Extended copy job Before you begin Make sure 'Direct copy mode' is disabled (See ‘Enable or disable 'Direct copy mode'’ on page 111). Your copy job is not automatically sent to the printer. You can edit the print settings before you send the copy job to the printer. - Page 124 Extended copy job Note: You can scan more than one original to the same job. Click 'Print' to send the copy job to the printer. Result The scanner scans the original and you can adjust the print settings defined in the default copy template (See ‘Change the default Publisher Copy print (copy) template’...
-
Page 125: Edit And Adjust The Document Print Settings
The 'Edit Document Print Settings' window Edit and adjust the document print settings The 'Edit Document Print Settings' window Introduction In the 'New Job' - 'Job Composition' window, select one or several documents. Click 'Edit' to open the 'Edit Document Print Settings' window. Illustration In the 'Edit Document Print Settings' window, you can: Select one document in the 'Document List' to display its properties, print settings... - Page 126 The 'Edit Document Print Settings' window - the 'Layout' settings (see ‘ 'Advanced' / 'Layout' settings’ on page 136) - the 'Rendering' settings (see ‘'Advanced' / 'Rendering' settings’ on page 139) - the 'Finishing' settings (see ‘ 'Advanced' / 'Finishing' settings’ on page 142).
-
Page 127: Image Properties
'Image Properties' 'Image Properties' Introduction In the 'Image Properties' section, you can describe the original image and control its display in the preview. If needed, check and adjust the: 'File format' parameters 'Image Orientation': the 'Reading orientation' and the 'Legend position'. Note: The system uses this information to define how to print and fold the image. - Page 128 'Image Properties' 'Legend position' When you set 'Automatic detection of the legend' in the default template, the system analyzes the image to find the location of the legend (within the 'Timeout' limits). It shows the selected corner in the 'Image Orientation' preview. When needed, adjust the 'Legend position' to get the legend on top of the folded packet, in case of folding.
-
Page 129: Print Preview
'Print Preview' 'Print Preview' 'Print Preview' The system displays an interactive preview to represent: The way the system will print the image The effects of the selected settings on the output. Orientation of the image in the 'Print Preview' The orientation of the image displayed in the 'Print Preview' depends on the 'Media size' and cut method you select in the 'Media' settings: When Then... -
Page 130: Set The Basic And Advanced Settings
'Basic' settings Set the Basic and Advanced settings 'Basic' settings Introduction In this tab, you can view the general main settings of a document. Illustration 'Media' You can manually select in the lists the 'Media type' and the 'Media size' to be used. The lists display all the media (type and size) enabled on the printer. - Page 131 'Basic' settings Note: If you select a media not loaded on the printer (or if the roll is empty) and submit the job, the job status will turn into 'Waiting' ('Media not currently loaded on the printer.') and the job will be held until you load the selected media. Note: 'Warning' in case of folding: if the media you select does not support folding, an error message is displayed.
- Page 132 'Basic' settings Note: Some media types cannot be delivered to the 'Top Delivery Tray (TDT)' or to the folder. A media from a roll wider than 36 inches cannot be delivered to the folder. 'General' Enter the number of copies of the document to print, between 1 and 999 ('Copy count'). Chapter 5 - The Océ...
-
Page 133: Advanced' / 'Media' Settings
'Advanced' / 'Media' settings 'Advanced' / 'Media' settings Introduction For each scanned original in the job, the system automatically selects the most appropriate media to be used for printing, according to: Automatically applies the default print settings defined in the template The size of the image in the document The folder value You can manually pick out the media to be used if either:... - Page 134 'Advanced' / 'Media' settings Illustration 'Media' You can manually select in the lists the 'Media type' and the 'Media size' to be used. The lists display all the media (type and size) enabled on the printer. A roll status icon indicates if a specific media type on the printer is available, empty or loaded.
- Page 135 'Advanced' / 'Media' settings Note: 'Warning' in case of folding: if the media you select does not support folding, an error message is displayed. You must select a foldable media (type and size) or disable the folding option to be able to print the job. 'Media information' According to the media selected and the printer capabilities, the 'Media information' in- dicates the 'Media source' to be used and the 'Media orientation' to be used.
-
Page 136: Advanced' / 'Layout' Settings
'Advanced' / 'Layout' settings 'Advanced' / 'Layout' settings Introduction You can define the layout of the image on the media. Illustration 'Scale factor' Define the 'Scale factor' if the image must be scaled on the printout. Select: '1:1 Scale' to keep the original image size. 'Custom scale' to define a custom scale value (from 1% to 1000%). - Page 137 'Advanced' / 'Layout' settings 'Automatic': the orientation of the image is selected by the system in order to optimise the position of the image, according to the settings defined ('Folding', 'Legend posi- tion'...). 'Manual', to manually define the orientation of the image on the media, according to the media previously set in the 'Basic' or 'Media' tab.
- Page 138 'Advanced' / 'Layout' settings 'Adjust alignment': You can change the alignment of the image on the media. The reference is the image displayed in the 'Print Preview'. You can immediately check the effect of the adjustment in the preview. Activate the option and type in a value: In the 'Horizontal' field, a positive value shifts the image to the right of media.
-
Page 139: Advanced' / 'Rendering' Settings
'Advanced' / 'Rendering' settings 'Advanced' / 'Rendering' settings Introduction You can tune the color settings and rendering options. Note: For Océ Publisher Copy it is advised to define the following color settings. 'Color mode': 'Océ enhanced colors' 'RGB input data': 'sRGB' 'Rendering intent': 'Relative colorimetric' Illustration 'Color mode'... - Page 140 'Advanced' / 'Rendering' settings 'Document's color feel' to use the color feel embedded into to the file. This information was set by the application that created the file. 'Océ enhanced colors' to manually finetune the combination of the color in- put data and 'Rendering intent'.
- Page 141 'Advanced' / 'Rendering' settings 'Océ Print Assistant' to select the best print setting for each document, based on the graphical content. It is configured on the printer. Chapter 5 - The Océ Publisher Copy option...
-
Page 142: Advanced' / 'Finishing' Settings
'Advanced' / 'Finishing' settings 'Advanced' / 'Finishing' settings Introduction The 'Finishing' options displayed depend on the printer available options. 'Additional strips' You can add a 'Leading strip' or a 'Trailing strip' to correct the length of the output. The adjustment of the edges changes the output format. The 'Leading strip' adds a strip at the top of the printout (0 to 400 mm / 0 to 15.74 in). -
Page 143: Chapter 6 Océ License Logic
Chapter 6 Océ License Logic... -
Page 144: About Océ Licence Logic
About Océ Licence Logic About Océ Licence Logic Introduction The Océ applications and options are protected against unauthorized use. You need to activate the license to enable an application or option for use. Océ License Logic enables you to manage the licenses very easily. This section describes the following: The basic concept of Océ... -
Page 145: The Possibilities Of Océ License Logic
The possibilities of Océ License Logic The possibilities of Océ License Logic Introduction Océ License Logic has the following possibilities. Possibilities View the current active licenses Get the host id of the Océ system Save the active licenses Perform a license activation job. You can activate new licenses or saved licenses. -
Page 146: The Basic Workflow Of License Activation
The basic workflow of license activation The basic workflow of license activation Introduction Before you can use the possibilities of Océ License Logic, you must log on to Océ License Logic. The following workflow describes per step when to use which possibility. The workflow Select the new options you need. -
Page 147: The Structure Of License Files And Licenses
The structure of license files and licenses The structure of license files and licenses Introduction A license file contains a license per option of your Océ system. You can view the current active licenses with Océ License Logic. You can preview the new active licenses with Océ License Logic during the license activation job. -
Page 148: Control Your Licenses With Océ License Logic
Before you begin To run Océ License Logic remote, you need the host name or IP address of the Océ system. ® How to log on to Océ License Logic on the Océ TC4 Power Logic controller ® Open the Océ TC4 Power Logic controller application. - Page 149 Log on to Océ License Logic Note: URL is case sensitive Enter the following URL in your browser: http://'scanner-name'/LicenseLogic.html. Note: 'Scanner-name' is the host name or IP address of the scanner. The logon window opens. Select system administrator. Enter the 'Password'. Click the 'Logon' button.
-
Page 150: View The Current Active Licenses
View the current active licenses View the current active licenses Introduction When you log on and Océ License Logic detects active licenses, the 'View licenses' window opens and displays the current active licenses. Per option the following fields with license information display. - Page 151 View the current active licenses Before you begin Make sure that the scan system has active licenses. If Océ License Logic does not detect active licenses, the 'No active license' opens ‘Log on to Océ License Logic’ on page 148. How to view license Log on to Océ...
-
Page 152: Get The Host Id Of The Océ System
Get the host id of the Océ system Get the host id of the Océ system Introduction Océ needs the host id and the license numbers of your Océ system to create a new license file. When to do Get the host id to order a resale license file from Océ. Before you begin Open a text editor on the same system that you start Océ... -
Page 153: Save The Current Active Licenses
Save the current active licenses Save the current active licenses Introduction You can save all current active licenses of different licenses types into one single file. Purpose Save the current active licenses for the following purposes. Collect and save all active licenses of different types into one single file Create a back-up file before you start a license activation job. -
Page 154: Perform A License Activation Job
Perform a license activation job Perform a license activation job Introduction You need to activate the licenses on the Océ system to enable an option for use. Océ de- livers the new licenses through one or more license files. Purpose Activate the licenses for the following purposes. - Page 155 Perform a license activation job Click the 'Browse' button to select the location of the license file and click 'OK' Click the 'Next' button A preview of the new license situation displays. What you see depends on the license types in the license file you use ‘The structure of license files and licenses’...
- Page 156 Perform a license activation job Chapter 6 - Océ License Logic...
-
Page 157: Accounting Software: Océ Account Center
Chapter 7 Accounting software: Océ Account Center... -
Page 158: An Overview Of Océ Account Center
An overview of Océ Account Center An overview of Océ Account Center Introduction Use Océ Account Center to manage the account information of the scan-to-file jobs for your Océ TDS and Océ TCS devices. Definition Océ Account Center consists of the following two software modules. Océ... - Page 159 3) Bookkeeper D) Retrieve and use the account information of the scan- ® to-file jobs that is stored on the Océ TC4 Power Logic controller. The log data serves as input for the accounting reports and invoices. Access to Océ Account Logic Provided you have a valid license, you can access the application via the vertical icon ®...
- Page 160 An overview of Océ Account Center Click the Océ Account Logic icon in the vertical icon toolbar. A secondary, smaller window appears on top of the window of the Océ TC4 Power ® Logic controller application. Please note that when you click the screen in the back- ground, the smaller screen with Océ...
-
Page 161: Océ Account Logic
Introduction to Océ Account logic ® Océ Account Logic Introduction to Océ Account logic Introduction Before you begin to use Océ Account Logic, you can change your setting in: ® Océ Settings Editor on the Océ Power Logic controller, or Power Logic controller software application Definition Use Océ... -
Page 162: Summary Of Océ Account Logic
Summary of Océ Account Logic Summary of Océ Account Logic Sections Océ Account Logic has the following sections. The 'File' tab Use this tab to enter account information for scan-to-file jobs. The 'Administration' window. Use this window to define the administrative settings for the application. Access to this window is password protected and limited to the application administrator. -
Page 163: Océ Tc4 Power Logic Controller Setup
Activate Océ Account Logic by activating the licence in Océ License Logic. ® Check the correct settings in the Océ TC4 Power Logic controller application. When you have activated Océ Account Logic the relevant settings in the Océ TC4 Power ® Logic controller application will be set to the correct value. -
Page 164: Océ Account Console
Introduction to Océ Account Console ® Océ Account Console Introduction to Océ Account Console Definition Océ Account Console is installed on the administrator's workstation. Access to Océ Ac- count Console is password protected and limited to the administrator. Purpose Use Océ Account Console is intended for the following actions. Manage, preview, and publish the account information dialog for Océ... -
Page 165: Summary Of Océ Account Console
Summary of Océ Account Console Summary of Océ Account Console Main parts of Océ Account Console An administrator uses Océ Account Console to perform a number of maintenance and configuration tasks. The main functional areas of Océ Account Console are described in the table below. Main parts of Océ... - Page 166 Summary of Océ Account Console Part Description The 'Devices' tab 'Devices' section. 'Create...'. Use this option to create a new device. 'Delete'. Use this option to remove the device. The log data for the device is removed as well. Please note that this action cannot be reversed.
- Page 167 Summary of Océ Account Console Part Description The 'Administra- The administrator screen enables you to perform the following tion' screen. actions. Change the password. Publish the data that are retrieved from other applications. Define the remaining settings for Océ Account Console. Set the regional settings -Application language -Units of measure (metric or imperial values)
- Page 168 Summary of Océ Account Console Chapter 7 - Accounting software: Océ Account Center...
-
Page 169: Maintain The Océ Tc4
Chapter 8 Maintain the Océ TC4... -
Page 170: Maintain The Océ Tc4 Scanner
Make sure you do not damage the sensor at the right of the glass plate. How to clean the glass plate Turn off the Océ TC4 scanner. Pull the top cover towards you and lift the top cover to open it. [65] Open the top cover Chapter 8 - Maintain the Océ TC4... - Page 171 Clean the white plate. Lift the top cover, turn the top cover towards you and push the top cover down until you hear or feel a click. Turn on the Océ TC4 scanner. Chapter 8 - Maintain the Océ TC4...
-
Page 172: Calibrate The Scanner
The message 'Scanner is calibrating...' and the following icon appears. [68] The 'Scanner is calibrating...' icon When the calibration process is ready, the message 'Press OK to continue' and the follow- ing icon appears. [69] The remove the calibration sheet icon Chapter 8 - Maintain the Océ TC4... - Page 173 Select 'OK' with the lower-right softkey. Note: When the calibration process stops or fails, follow the instructions on the scanner oper- ator panel carefully. Result The Océ TC4 scanner is calibrated and the scan quality is correct again. Chapter 8 - Maintain the Océ TC4...
-
Page 174: Clear An Original Jam On The Scanner
Lift the top cover, turn the top cover towards you and push the top cover backwards until you hear or feel a click. Result The green light at the scanner operator panel is on. Chapter 8 - Maintain the Océ TC4... -
Page 175: Scanner Error-Messages And Solutions
Read the error message carefully. [71] The error-message icon Follow the instructions on the scanner operator panel. Result You solved the error with the help of the instructions on the scanner operator panel. Chapter 8 - Maintain the Océ TC4... - Page 176 Scanner error-messages and solutions Chapter 8 - Maintain the Océ TC4...
-
Page 177: Appendix A Overview And Tables
Appendix A Overview and tables... -
Page 178: Overview Of The Océ Tc4 System
The Océ TC4 / Océ TC4XT scanner configuration You can use the Océ TC4 scanner to scan originals with an original thickness up to 3 To scan thick originals up to 15 mm or rigid originals you can use the Océ TC4XT scanner. -
Page 179: Scanner Operator Panel
Scanner operator panel Scanner operator panel scanner Component LED (green and red attention light) Display Upper softkey Scroll wheel key Appendix A - Overview and tables... - Page 180 Scanner operator panel Component Scroll wheel Lower softkey Green start key Stop key Numeric keys Lower softkey 11 / B Left softkeys Upper softkey Appendix A - Overview and tables...
-
Page 181: Specifications Of The Océ Tc4
Specifications of the Océ TC4 Introduction The Océ TC4 is a high quality and fast wide format color scanner for scanning engineering documents. The Océ TC4 offers a scan-to-file functionality. The table below gives you more information on the performance of the scanner, the technical and safety requirements and general information regarding dimensions, weight, power consumption etc. - Page 182 Specifications of the Océ TC4 Maximum media not applicable 2.5 kg/m² weight Dimensions Width: 1,300 mm Width: 1,300 mm Depth: 650 mm Depth: 1,230 mm Height: 1,300 mm Height: 1,300 mm Weight 70 Kg 90 kg Data format TIFF (uncompressed, Packbits, G3, G4 and LZW)
-
Page 183: Specifications Océ Power Logic
® Specifications Océ Power Logic controller ® Specifications Océ Power Logic controller ® Océ Power Logic controller hardware Platform ® Océ controller with Windows XP embedded Memory 1024 Mb Hard disk capacity 250 Gb. Graphical user interface None, optional keyboard, mouse and monitor Standard interface 10/100BaseT with RJ45 Optional interfaces... -
Page 184: Specifications Océ Scan Logic
(future) needs for productivity, quality and advanced functionality. Application ® Scan jobs workspace, part of the Océ TC4 Power Logic con- troller application, integrated scanning solution with Océ View Station LT. - Page 185 Scan to file from the scanner operator panel. Scan directly to a local or a remote destination. Requirements ® ® Océ TC4 Power Logic controller and Océ Power Logic controller Remote to have access to the system. Appendix A - Overview and tables...
- Page 186 ® Specifications Océ Scan Logic Options Océ View Station for editing and enhancement of scanned documents Océ Repro Desk Océ Account Center Océ Publisher Copy Océ Batch Processor for automated editing Appendix A - Overview and tables...
-
Page 187: Original Types For The Scanner
Original types for the scanner Original types for the scanner Scanner The original types that you can use for your color scanner are listed in the table below. Original types Original type Type Icon Black & white / 'Lines&Text' gray [74] Lines / text icon 'Grays&Lines' [75] Grays &... - Page 188 Original types for the scanner Original type Type Icon 'Dark original' [79] Dark original icon Color 'Photo' [80] Photo icon 'Artwork' [81] Artwork icon 'Map' [82] Map icon Appendix A - Overview and tables...
-
Page 189: Appendix B Miscellaneous
Appendix B Miscellaneous... -
Page 190: Reader's Comment Sheet
Reader's comment sheet Reader's comment sheet Questions Have you found this manual to be accurate? O Yes O No Were you able to operate the product, after reading this manual? O Yes O No Does this manual provide sufficient background information? O Yes O No Is the format of this manual convenient in size, readability and arrangement (page layout,... - Page 191 Please return this sheet to: Océ-Technologies B.V. For the attention of ITC User Documentation. P.O. Box 101, 5900 MA Venlo The Netherlands Send your comments by E-mail to: itc-userdoc@oce.com For the addresses of local Océ organisations see: http://www.oce.com Appendix B - Miscellaneous...
-
Page 192: Addresses Of Local Océ Organisations
P.O. Box 363 Postfach 95 Ferntree Gully MDC 1233 Vienna Vic 3165 Wienerbergstrasse 11 Australia Vienna Twin Tower http://www.oce.com.au/ 1100 Vienna Austria http://www.oce.at/ Océ-Belgium N.V./S.A. Océ-Brasil Comércio e Indústria Ltda. J. Bordetlaan 32 Av. das Nações Unidas, 11.857 1140 Brussel... - Page 193 Océ-Deutschland GmbH Océ-Hong Kong and China head office Solinger Straße 5-7 Room 3711-18 Tower 1 45481 Mülheim/Ruhr Millennium City 1 Germany 388 Kwun Tong Road http://www.oce.de/ Kwun Tong Kowloon Hong Kong http://www.oce.com.hk/ Océ-Hungaria Kft. Océ-Ireland Ltd. H-1241 Budapest 3006 Lake Drive Pf.: 237...
- Page 194 Brentwood, Essex CM14 4DZ http://www.oce.nl/ United Kingdom http://www.oce.co.uk/ Océ North America Inc. 100 Oakview Drive Trumbull, CT 06611 http://www.oceusa.com/ Note: The web site http://www.oce.com gives the current addresses of the local Océ organiza- tions and distributors. Appendix B - Miscellaneous...
- Page 195 The addresses of local Océ organizations for information about the Wide Format Printing Systems and the Production Printing Systems can be different from the addresses above. Refer to the web site http://www.oce.com for the addresses you need. Appendix B - Miscellaneous...
- Page 196 Index Index Calibrate scanner Calibrate scanner ..........172 Calibrate wizard a submitted job Calibrate wizard ...........172 Cancel ............117 Change printer Job properties ..........118 Change printer ..........105 Reprint ............117 Change the default copy template Status ............117 Change the default copy template ....106 Access Account Logic Change the password Account Center...
- Page 197 Create a network destination with SMB ..50 Fold ..............142 Create a web destination with FTP Create a web destination with FTP ....50 ..............59 Functions Océ TC4 ............22 Default copy template Change ............106 Define file names Get files Define file names ..........54 Get files ............59...
- Page 198 Index How to send files to the same destination ..58 Legend location ..........128 How to view a file after scanning Licenses How to view a file after scanning ....61 Licenses ............144 How to view a locally stored scanned file Lock a destination How to view a locally stored scanned file ..62 Lock a destination...
- Page 199 Start application ..........71 Power Logic controller: Supported languages Scan destination ...........119 User Preferences ...........104 Power Logic controller: Supported languages ...72 Preferences Océ TC4 scanner Preferences ............96 Océ TC4 scanner ..........22 Print (copy) template functions ............22 Publisher Copy ..........106 Operator panel Print Preview ..........28, 179...
- Page 200 Index Scan jobs tasks right ...............45 Scan jobs tasks ..........53 trailing ............45 Scan jobs workspace Rendering Scan jobs workspace ........46 Color mode ..........139 Deleting a destination ........49 Quality ............139 Local destination ..........49 Rendering Options ........139 Repro operator Lock destination ..........49 Repro operator .........21, 77 Network destination...
- Page 201 ..........109 Menu options ..........63 Media type ...........108 Preference menu ..........63 Scanner ............95 Toolbar options ..........64 The Océ TC4 users View error ............66 The Océ TC4 users ........20 View menu .............63 Toolbars View the current active licenses Toolbars ............84 View the current active licenses ....150...
- Page 202 Index Océ Account Center ........159 Overview ............16 Products ............16 Workspace Configuration ..........86 Preferences ............86 Scan jobs ............86 Templates ............86 Workspaces Workspaces ............84 Repro operator Repro operator ........89...
- Page 204 2009Océ. Illustrations and specifications do not necessarily apply to products and services offered in each local market. Technical For more information visit us at: specifications are subject to change without prior notice. All other trademarks are the property of their respective owners. www.oce.com 2009-11...