Table of Contents
Advertisement
USER GUIDE
Link Plus Single
Link Plus Twin
Link Plus Triple
Digital Cordless Telephone
with Answer Mach
Helpline (for UK only)
Monday to Friday from 9:00am to 5:00pm
Tel: 0845 345 9677
THIS EQUIPMENT IS NOT DESIGNED FOR MAKING
EMERGENCY TELEPHONE CALLS WHEN THE POWER
FAILS. ALTERNATIVE ARRANGEMENTS SHOULD BE
MADE FOR ACCESS TO DIAL EMERGENCY SERVICES.
please read these instructions carefully.
ine
Before operating this set,
Advertisement
Table of Contents

Related Manuals for iDect Link Plus Single


Summary of Contents for iDect Link Plus Single
-
Page 1: User Guide
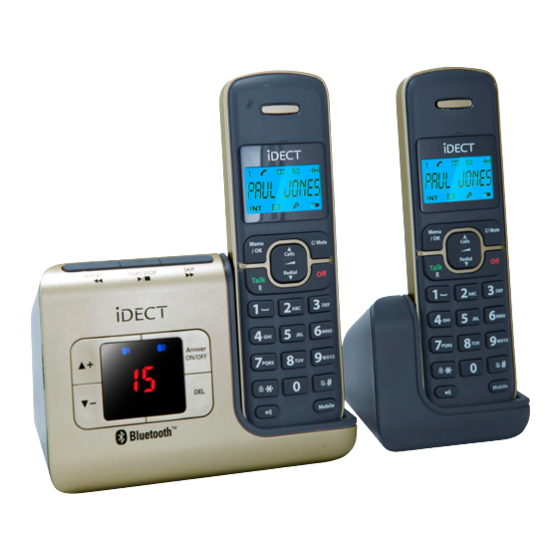
USER GUIDE Link Plus Single Link Plus Twin Link Plus Triple Digital Cordless Telephone with Answer Mach Helpline (for UK only) Monday to Friday from 9:00am to 5:00pm Tel: 0845 345 9677 THIS EQUIPMENT IS NOT DESIGNED FOR MAKING EMERGENCY TELEPHONE CALLS WHEN THE POWER FAILS. -
Page 2: Technical Details
TECHNICAL DETAILS Standard Digital Enhanced Cordless Telecommunication (DECT) 1.88 to 1.9 GHz Frequency range (bandwidth = 20 MHz) Channel bandwidth 1.728 MHz Operating range Up to 300m outdoors; Up to 50m indoors Operating time Standby: 100 hours,Talking: 10 hours Battery charge time:15 hours Temperature range Operating 0 C to 40 C, Storage -20 C to 60 C Electrical power... -
Page 3: Table Of Contents
TABLE OF CONTENTS IMPORTANT SAFETY INSTRUCTIONS·························································· 3 INSTALLING YOUR PHONE ·········································································· 5 CONNECTING THE BASE STATION ································································· 5 INSTALLING AND CHARGING THE BATTERIES ············································· 5 GETTING TO KNOW YOUR PHONE······························································· 6 HANDSET OVERVIEW ····················································································· 6 DISPLAY ICONS AND SYMBOLS······································································ 7 BASE STATION WITH TELEPHONE ANSWERING MACHINE(TAM)CONTROL ······9 BASE TWO DIGIT-LED DISPLAY INFORMATION ············································... - Page 4 CALLER DISPLAY (NETWORK DEPENDENT) ·········································· 23 VIEW THE CALL LIST ···················································································· 23 STORE A CALL LIST NUMBER INTO THE PHONEBOOK ····························· 23 DELETE AN ENTRY IN THE CALL LIST·························································· 24 DELETE ALL CALL LIST ENTRIES ································································· 24 PHONE SETTINGS ······················································································· 25 DATE AND TIME SETTINGS············································································...
-
Page 5: Important Safety Instructions
IMPORTANT SAFETY INSTRUCTIONS When using your telephone equipment, basic safety precautions should always be followed to reduce the risk of fire, electric shock and injury, including the following: 1) Read and understand all the instructions. 2) Follow all warnings and instructions marked on the product. 3) Unplug this product from the wall outlet before cleaning. - Page 6 Package contents The package contains the following items: • 1 Handset • 1 Base station • 1 Mains power adapter • 1 Telephone line cord • 2 Rechargeable batteries • 1 User manual Note: If you have a Twin, Triple or Quad system, you will also have the requisite extra handset(s) and battery packs, and a charger pod for each extra handset.
-
Page 7: Installing Your Phone
INSTALLING YOUR PHONE Connecting the base station 1) Plug the power supply and line cord into the base station. 2) Plug the power adapter into a 230Vac, 50Hz mains socket, and the line cord into your telephone line socket. 3) Always use the cables provided in the box Warning: Use only the provided adaptor, using other power supplies may cause a hazard. -
Page 8: Getting To Know Your Phone
GETTING TO KNOW YOUR PHONE Handset Overview LEFT SOFT KEY In idle mode: In idle mode:Press Press to access the call list to access the main menu In menu mode: In sub-menu mode: Press to scroll up the menu items Press to confirm the selection In Phonebook list / Redial list / During a call: Press to access... -
Page 9: Display Icons And Symbols
Display Icons and Symbols The LCD display gives you information on the current status of the telephone. Steadily on when the handset is in range of the base. Flashes when out of range of the base or not registered to the base. Steadily on when an intercom is in progress. - Page 10 Indicates when the battery needs charging. Flashes when low battery power level is detected. Indicates when a mobile call is in progress. Flashes when a mobile call is on hold. Indicates there is (are) Bluetooth device(s) paired. Flashes when Bluetooth devise is being paired. Indicates when Bluetooth device #1 or #2 is connected with the telephone base.
-
Page 11: Base Station With Telephone Answering Machine(Tam)Control
Base Station with Telephone Answering Machine (TAM) Control REPEAT PLAY/STOP Press to repeat playing the current Press to play messages message from the beginning. Press to stop the Press twice to skip back to the message playback previous message. SKIP Press to skip the current message and play the next... - Page 12 Flashing FF: The TAM memory is full and there are no new messages. Flashing XX alternately with - -: The Time/Date is not set and - - /XX there are XX new messages recorded. Flashing - -: The Time/Date is not set and there are no new messages recorded.
-
Page 13: Menu Structure
Menu Structure In idle mode, press <MENU/OK> to go to CALL LIST, the first option in the menu list. Press <UP> or <DOWN> to go to other options in the menu list. Press <MENU/ OK> to enter a sub-menu or function. Press <C/MUTE>... -
Page 14: Text And Digit Entry Table
Text and Digit Entry Table The following table shows you where each letter and punctuation character can be found, by using repeated presses of the alphanumeric keypad. This will be helpful when storing a name in the phonebook and renaming your handset. In editing mode, a cursor is displayed to indicate the current text entry position. -
Page 15: Using Your Phone
USING YOUR PHONE Introducing Bluetooth Your new telephone system with Bluetooth wireless technology has the following features: Pairing a Bluetooth enabled mobile phone with the telephone base. Two Bluetooth devices can be paired up and connected. Connecting a Bluetooth enabled mobile phone to make and receive MOBILE calls. -
Page 16: Bluetooth Setup
Bluetooth Setup 4.2.1 Setup Mobile To pair and connect a Bluetooth enabled mobile phone: 1. Place your cell phone near the handset and base unit. 2. Press <MENU> and then <UP/DOWN> to select MOBILE SETUP. 3. Press <MENU> and display will show “READY?”. 4. -
Page 17: Make A Call
Note: When pairing a new mobile, the connected mobile has to be disabled temporarily. 4.2.3 Paired Devices The mobile(s) paired up will be displayed in the paired devices list, no matter it (they) is (are) connected or not. You can choose to connect, or remove the mobile from this menu. - Page 18 4.3.2 Direct dialing Using the home line Press <TALK ON> or <SPEAKERPHONE> to take the home line and enter the phone number. Using the mobile line 1. Press <MOBILE> and <MENU/OK>, then enter the phone number. 2. Press <MOBILE> to dial with mobile line. If there are two mobile devices connected, you have to select one device from the list.
-
Page 19: Answer A Call
4.3.5 Call from the redial list Press <DOWN> to access the redial list and then press <UP/DOWN> to select the desired redial number. Using the home line 2. Press <TALK ON> or <SPEAKERPHONE> to dial the selected redial list entry with home line. Using the mobile line 2. -
Page 20: Adjust Volume
Adjust Volume There are 5 levels (VOLUME 1 to VOLUME 5) to choose from for each of the earpiece and speaker volumes. During a call: Press <UP/DOWN> to select volume 1-5. The current setting is shown. When you end the call, the setting will remain at the last selected level. Mute a Call You can talk to someone nearby without letting the caller hear you during a call. -
Page 21: Find The Handset
4.11.2 Store a Redial Number into the Phonebook 1. Follow Steps 1 and 2 in section 4.11.1. 2. Press <MENU/OK> and <UP/DOWN> to select ADD TO PB. 3. Press <MENU/OK> and then enter the name you want to use in the phonebook. - Page 22 4.13.1 Intercom Another Handset 1. In idle mode, press <C/MUTE> and all the other registered handset number will display, along with a "9". 2. Enter the number of the handset that you want to call, or enter "9" to call all handsets.
-
Page 23: Private Phonebook
PRIVATE PHONEBOOK Each handset can store up to 50 private phonebook entries with names and numbers. Each phonebook entry can have a maximum of 20 digits for the phone number and 12 characters for the name. You can also select different ringtones for your phonebook entries. -
Page 24: Edit A Phonebook Entry
Edit a Phonebook Entry In idle: 1. Press <MENU/OK> and <UP/DOWN> to select PHONEBOOK and then press <MENU/OK> to access the phonebook. 2. Press <UP/DOWN> to select the desired phonebook entry. 3. Press <MENU/OK> and <UP/DOWN> to select EDIT. 4. Press <MENU/OK> to display the current name. 5. -
Page 25: Caller Display (Network Dependent)
CALLER DISPLAY (NETWORK DEPENDENT) This feature is available if you have subscribed to the Calling Line Identification service with your network service provider. Your phone can store up to 20 received calls with date/time information in the Call List. The number will be shown on the handset display when the phone is ringing. -
Page 26: Delete An Entry In The Call List
Delete an entry in the Call List 1. Follow Steps 1 and 2 in Section 6.1. 2. Press <MENU/OK> and <UP/DOWN> to select DELETE. 3. Press <MENU/OK> to confirm. Delete all Call list entries 1. Follow Steps 1 and 2 in Section 6.1. 2. -
Page 27: Phone Settings
PHONE SETTINGS Your phone comes with a selection of settings that you can change to personalise your phone the way you like it to work. Date and Time Settings If you subscribe to Caller Display the time and date settings will be automatically updated by the network when you receive an incoming call. -
Page 28: Alarm Settings
Alarm Settings You can set an alarm time on this phone. When an alarm is set, the alarm icon < > is shown on the handset display. When the alarm time is reached, the alarm icon< > and “ALARM ON ” flash on the handset display, and the alarm tone rings for 45 seconds. - Page 29 7.3.2 Set the Ringer Melody for External Calls 1. Press <MENU/OK> and <UP/DOWN> to select HS SETTINGS. 2. Press <MENU/OK> and <UP/DOWN> to select RING SETUP. 3. Press <MENU/OK> and <UP/DOWN> to select EXT RING. Press <MENU/OK> and <UP/DOWN> to select melody you want to hear for external calls.
-
Page 30: Base Settings
7.3.7 Choose the Information to be Displayed in Idle You can choose to display time or handset name in your idle screen. 1. Press <MENU/OK> and <UP/DOWN> to select HS SETTINGS. 2. Press <MENU/OK> and <UP/DOWN> to select HS DISPLAY. 3. - Page 31 7.4.3 De-register a Handset This operation should only be necessary if one of your handsets becomes faulty or lost and needs to be replaced. You will need to enter the 4-digit system PIN (Default PIN is 0000) in order to de-register a handset from the base station.
-
Page 32: Registration
Registration IMPORTANT: When you purchase your phone system, all handsets are already registered to your base, so you do not need to register them. Handset registration is only necessary when you buy extra handsets or if a handset has become faulty. You can register additional handsets to have up to five handsets per base unit, with each handset's number (1 to 5) shown on its display. -
Page 33: Answering Machine
ANSWERING MACHINE Your phone includes a telephone answering machine that records unanswered calls when it is on.The answering machine can store up to 59 messages within the maximum recording time of approximately 15 minutes. As well as recording incoming messages, you can record memos for other users of your phone. If the answering machine memory is full, the Handset will display TAM FULL alternately with the handsets name or time, depending on the... -
Page 34: Delete All Messages In The Ansering Machine
Note: A <STAR icon> is placed at the centre of the bottom of the handset display to indicate that it is a new message. When a message has been played, the <STAR icon> will disappear and will not be shown when you listen to this message again. Note: If there are no messages, the handset display will briefly show "00-00 00-00"... -
Page 35: Answering Machine Settings
4. Press <C> to stop memo recording without saving and return back to ANS. MACHINE menu. Answering Machine Settings You can use the TAM SETTINGS menu through the handset to change the settings of your answering machine. 8.5.1 Set the Answer Mode By default, the answer machine is set in ANS &... - Page 36 8.5.3 Playback and Delete the Outgoing Message (OGM) You can playback your own personalised OGM or the pre-set OGM for ANS & REC mode or ANSWER ONLY mode and choose to delete your personalised OGM during playback and record a new one whenever you want. Please note that pre-set OGM cannot be deleted.
- Page 37 8.5.5 Set the Recording Time of Incoming Message You can set the maximum length of the recording time of the incoming messages. 1. Press <MENU/OK> and <UP/DOWN> to select ANS. MACHINE . 2. Press <MENU/OK> and <UP/DOWN> to select TAM SETTINGS. 3.
- Page 38 8.5.7 Change the Compression Rate Three different compression rates (HIGH, MEDIUM and LOW) are provided for you to select different quality levels of recording incoming message. The lower the compression rate, the higher the recording quality level attained, but the shorter the total recording time available.
-
Page 39: Remote Card
8.5.8.2 Activate or Deactivate the Remote Access 1. Press <MENU/OK> and <UP/DOWN> to select ANS. MACHINE. 2. Press <MENU/OK> and <UP/DOWN> to select TAM SETTINGS. 3. Press <MENU/OK> and <UP/DOWN> to select REMOTE ACC. 4. Press <MENU/OK> and <UP/DOWN> to select ON or OFF to turn the remote access on or off respectively. - Page 40 Note: If your answering machine is switched off, the phone will enter into the remote access mode after 14 rings. You can then enter the <*> key and the 4-digit remote access PIN (Default Remote Access PIN is 0000) to activate the remote access feature. Keys Functions While message is not playing...
-
Page 41: Troubleshooting
TROUBLESHOOTING Problem Causes Solutions a. Check the connections. Unplug a. The connection cord of No dialling tone when and plug back in the mains. the base station is not pressing <TALK > key Check that the telephone cord plugged in. has been plugged into the base b. - Page 42 Technical Support If the fault persists... Disconnect all other instruments connected to the same line as the phone system and try to make a call. Disconnect the base unit from the telephone line and plug a different phone into the master telephone socket. Try making a call.
-
Page 43: Declaration Of Conformity
Country of Origin: China Brand: iDECT complies with the essential protection requirements of R&TTE Directive 1999/5/EC on the approximation of the laws of the Member States relating to Radio Spectrum Matters , the Council Directive 2004/108/EC on the approximation of the laws of the Member Statesrelating to electromagnetic compatibility (EMC) and the European Community Directive 2006/95/EC relating to Electrical Safety. -
Page 44: Guarantee And Service
GUARANTEE AND SERVICE The phone system is guaranteed for 12 months from the date of purchase shown on your sales receipt. This guarantee does not cover any faults or defects caused by accidents,misuse, fair wear and tear, neglect, faults on the telephone line, lightning, tampering with the equipment, or any attempt at adjustment or repair other than through approved agents.