Table of Contents
Advertisement
Quick Links
Advertisement
Table of Contents

Related Manuals for Paradyne BitStorm 6211 CPE


Summary of Contents for Paradyne BitStorm 6211 CPE
- Page 1 BitStorm 6211 CPE User’s Guide Document Number 6211-A2-GB20-00 November 2003...
- Page 2 Paradyne worldwide office locations, use one of the following methods: Internet: Visit the Paradyne World Wide Web site at www.paradyne.com. (Be sure to register your warranty at www.paradyne.com/warranty.) Telephone: Call our automated system to receive current information by fax or to speak with a company representative.
- Page 3 CE Marking When the product is marked with the CE mark on the equipment label, a supporting Declaration of Conformity may be downloaded from the Paradyne World Wide Web site at www.paradyne.com. Select Support -> Technical Manuals -> Declarations of Conformity.
- Page 4 BitStorm 6211 Router User’s Guide FCC Declaration An FCC Declaration of Conformity may be downloaded from the Paradyne World Wide Web site at www.paradyne.com. Select Support -> Technical Manuals -> Declarations of Conformity. Notice to Users of the United States Telephone Network This equipment complies with Part 68 of the FCC rules and the requirements adopted by the Administrative Council for Terminal Attachment (ACTA).
- Page 5 BitStorm 6211 Router User’s Guide Notice to Users of the Canadian Telephone Network NOTICE: This equipment meets the applicable Industry Canada Terminal Equipment Technical Specifications. This is confirmed by the registration number. The abbreviation IC before the registration number signifies that registration was performed based on a Declaration of Conformity indicating that Industry Canada technical specifications were met.
-
Page 6: Table Of Contents
BitStorm 6211 Router User’s Guide Table of Contents Introduction ..........9 Models........................9 Features ....................... 9 System Requirements..................9 Using this Document ..................10 1.4.1 Notational conventions............10 1.4.2 Typographical conventions ..........10 1.4.3 Special messages............... 10 Getting Support ....................10 Getting to Know the BitStorm 6211 CPE............11 Parts List...................... - Page 7 BitStorm 6211 Router User’s Guide Statistics ......................23 4.3.1 LAN Statistics..............23 4.3.2 ATM Statistics ..............23 4.3.3 ADSL Statistics ..............24 Route........................24 ARP ........................25 Quick Setup ..........26 Advanced Setup ........29 WAN ........................29 LAN........................32 NAT ........................33 Firewall .......................
- Page 8 BitStorm 6211 Router User’s Guide...
-
Page 9: Introduction
Configuration program accessible via Microsoft Internet Explorer. Note that Netscape is not supported. System Requirements In order to use the BitStorm 6211 CPE for Internet access, you must have the following: ADSL service subscription from your ISP. One computer containing an Ethernet 10BaseT/100BaseT network interface card (NIC). -
Page 10: Using This Document
Explains terms that may be unfamiliar to the reader. Definition Provides messages of high importance, including messages relating to personal safety or system integrity. WARNING Getting Support Obtain support for your BitStorm 6211 CPE from the service provider you received the device from. -
Page 11: Getting To Know The Bitstorm 6211 Cpe
BitStorm 6211 Router User’s Guide Getting to Know the BitStorm 6211 CPE Parts List In addition to the CD this document resides on, your package contents should include: BitStorm 6211 CPE Power adapter (the supplied power adapter may look different than the one illustrated here) Ethernet cable (RJ45, “straight-through”... -
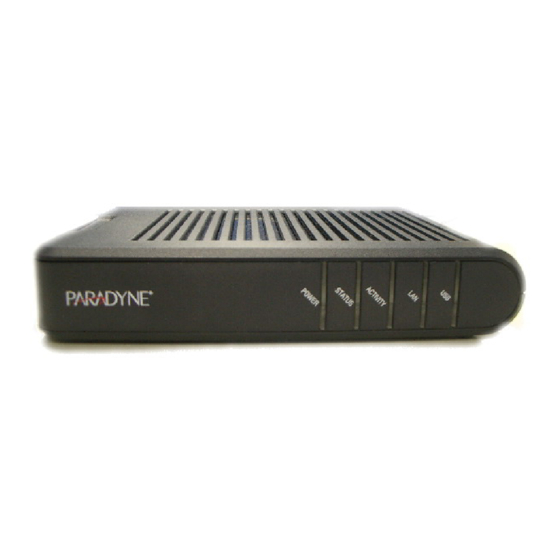
Page 12: Front Panel
BitStorm 6211 Router User’s Guide Front Panel The front panel contains LED indicators that show the status of the unit. 03-17486 Figure 2.2 Front Panel LEDs Table 2.1 Front Panel Label and LEDs Label Color Function POWER Green On: Unit is powered on Off: Unit is powered off On: ADSL link is established and active STATUS... -
Page 13: Rear Panel
BitStorm 6211 Router User’s Guide Rear Panel The rear panel contains the ports for the CPE's data and power connections. RESET LINE DEFAULT CONSOLE POWER 03-17487 Figure 2.3 Rear Panel Connections Table 2.2 Rear Panel Labels and Connectors Label Function POWER Connects to the supplied power adapter Connects the CPE to your PC's Ethernet port, or... -
Page 14: Getting Started
BitStorm 6211 Router User’s Guide Getting Started This chapter provides basic instructions for connecting the CPE to a computer or a LAN and to the Internet via ADSL. Part 1 provides instructions to set up the hardware. Part 2 describes how to configure Internet properties on your computer(s). Part 3 shows you how to access your CPE. - Page 15 BitStorm 6211 Router User’s Guide RESET LINE DEFAULT CONSOLE POWER 03-17488 Figure 3.1 Overview of Hardware Connections You should verify that its LEDs are illuminated as shown in Table 3.1 Table 3.1 LED Indicators This LED: ...should be: POWER Solid green to indicate that the device is turned on. If this light is not on, verify that the power adapter is attached to the CPE and is plugged into a power source.
-
Page 16: Configuring Your Pc
BitStorm 6211 Router User’s Guide Configuring Your PC Before you start to access the CPE via Ethernet, you must configure your PC’s TCP/IP address to be 192.168.1.x, where x is any number between 3 and 254. The subnet mask must be 255.255.255.0. Your CPE’s default IP address is 192.168.1.1. -
Page 17: Windows 2000
BitStorm 6211 Router User’s Guide Figure 3.4 TCP/IP Properties in Windows XP 6. Click on twice to confirm your changes, and close the Control Panel. 3.2.2 Windows 2000: 1. In the Windows task bar, click on the Start button, point to Settings, and then select Control Panel. -
Page 18: Windows Me
BitStorm 6211 Router User’s Guide 10. In the Local Area Connection Properties dialog box, select Internet Protocol (TCP/IP), and then click on 11. In the Internet Protocol (TCP/IP) Properties dialog box, click in the radio button labeled Use the following IP address and type 192.168.1.x (where x is any number between 3 and 254) and 255.255.255.0 in the IP address field and Subnet Mask field, respectively. -
Page 19: Windows Nt 4.0
BitStorm 6211 Router User’s Guide 3. If TCP/IP does not appear as an installed component, click on . The Select Network Component Type dialog box appears. 4. Select Protocol, and then click The Select Network Protocol dialog box appears. 5. Click on Microsoft in the Manufacturers list box, and then click TCP/IP in the Network Protocols list box. -
Page 20: Assigning Ip To Your Pc Automatically By Dhcp
BitStorm 6211 Router User’s Guide 9. In the Protocols tab, select TCP/IP, and then click on 10. In the Microsoft TCP/IP Properties dialog box, click in the radio button labeled Use the following IP address and type 192.168.1.x (where x is any number between 3 and 254) and 255.255.255.0 in the IP address field and Subnet Mask field, respectively. - Page 21 BitStorm 6211 Router User’s Guide The home page of the CPE is shown in Figure 3.6. Figure 3.6 BitStorm 6211 CPE Home Page...
-
Page 22: Device Information
BitStorm 6211 Router User’s Guide Device Information This chapter describes your CPE’s system information and configuration summary when you click on the “System Info” in the left column. Summary You can get the general status report from the CPE by selecting Device Info -> Summary (shown in Figure 4.1) Figure 4.1 Status Summary You can get the WAN status report from the CPE by selecting Device Info ->... -
Page 23: Statistics
BitStorm 6211 Router User’s Guide Statistics 4.3.1 LAN Statistics You can get the LAN status report from the CPE by selecting Device Info -> Statistics -> LAN (shown in Figure 4.3). Figure 4.3 LAN Statistics Page 4.3.2 ATM Statistics You can get the ATM status report from the CPE by selecting Device Info -> Statistics -> ATM (shown in Figure 4.4). -
Page 24: Adsl Statistics
BitStorm 6211 Router User’s Guide 4.3.3 ADSL Statistics You can get the ADSL status report from the CPE by selecting Device Info -> Statistics -> ADSL (shown in Figure 4.5). Figure 4.5 ADSL Statistics Page Route You can get the route status report from the CPE by selecting Device Info -> Route (shown in Figure 4.6). Figure 4.6 Route Status... -
Page 25: Arp
BitStorm 6211 Router User’s Guide You can get the ARP status report from the CPE by selecting Device Info -> ARP (shown in Figure 4.7). Figure 4.7 ARP Status... -
Page 26: Quick Setup
BitStorm 6211 Router User’s Guide Quick Setup This chapter will guide you through the steps necessary to configure your 6211 CPE. 1. If you enable DSL Auto-connect, the 6211 CPE will detect an available VPI/VCI from your ISP. If you do not enable it, you must manually input the VPI/VCI, which are assigned by your ISP, and click (Figure 5.1). - Page 27 BitStorm 6211 Router User’s Guide Figure 5.2 Choose proper connection type 3. For Bridging (for example), enable the bridge service and input the service name. If you want to disable this service, remove the checkmark by clicking on it. Figure 5.3 Bridge service example 4.
- Page 28 BitStorm 6211 Router User’s Guide Figure 5.4 Set up IP address and subnet mask 5. The WAN Setup Summary appears. Click on to make your changes effective, and the router will reboot automatically. If there is anything wrong, you may click on modify previous pages.
-
Page 29: Advanced Setup
BitStorm 6211 Router User’s Guide Advanced Setup 6. Click the sub-menu WAN under Advanced Setup to configure the WAN port setting. Click on to add, to remove, or to edit WAN interfaces. Figure 6.1 WAN Setup 7. To add an interface, input the VPI/VCI and Service Category (supplied by your ISP), and click... - Page 30 BitStorm 6211 Router User’s Guide Figure 6.2 ATM PVC Configuration 8. Choose the proper connection type (PPPoA, PPPoE, MER, IPoA or Bridging) and the encapsulation mode (LLC/SNAP-Bridging or VC/MUX), then click on Figure 6.3 Choose proper connection type 9. For Bridging (for example), enable the bridge service and input the service name. If you want to disable this service, remove the checkmark by clicking on the icon.
- Page 31 BitStorm 6211 Router User’s Guide Your ISP should provide information about the protocols and parameters you need to configure. Figure 6.4 WAN Service Disabling 10. Click on Next. The WAN Setup Summary screen appears. Click on to make your changes effective. Alternatively, you may click on to modify previous pages.
-
Page 32: Lan
BitStorm 6211 Router User’s Guide 11. When you have completed your WAN setup, click on . The CPE will save your configuration and reboot. Figure 6.6 WAN Setup Result 1. Click on the sub-menu LAN under Advanced Setup to configure the LAN port setting. Figure 6.7 LAN Setup... -
Page 33: Nat
BitStorm 6211 Router User’s Guide 2. Click on the button to save the configuration. It is not effective until you reboot the router. Click on button to save the configuration data and reboot the router to make the new configuration effective immediately. 1. - Page 34 BitStorm 6211 Router User’s Guide Port Triggering: Click . Enter the application name, incoming protocol, incoming port range, outgoing protocol, and outgoing port range and click on to forward IP packets for this application to the specified ports (Figure 6.10 and 6.11). Figure 6.10 NAT Port Triggering Page 1 Figure 6.11 NAT Port Triggering Page 2...
-
Page 35: Firewall
BitStorm 6211 Router User’s Guide DMZ host: the CPE will forward IP packets from the WAN that do not belong to any of the applications configured in the Virtual Servers table to the DMZ host computer. You can: Enter the computer's IP address and click to activate the DMZ host. -
Page 36: Outgoing Address Filter
BitStorm 6211 Router User’s Guide Figure 6.14 Firewall Port Filter Page 2 6.4.2 Outgoing Address Filter With the Outgoing Address Filter you can specify host addresses to be blocked from sending packets to the Internet. Click on . Enter the IP address and click on to prevent the PC with this IP address from accessing the Internet. -
Page 37: Mac Filtering
BitStorm 6211 Router User’s Guide Figure 6.16 Firewall Address Filter Page 2 MAC Filtering Use the MAC Filtering feature to filter packets by MAC address. Click on . Enter or select VPI/VCI, Protocol, Destination and Source MAC addresses, and Frame Direction. Click on Figure 6.17 MAC Filtering Page... -
Page 38: Routing
BitStorm 6211 Router User’s Guide Routing 6.6.1 Static Route Click on the sub-menu Static Route under Routing to view the static route table. Click on to add a static route to the router. Click on to save your entry. Figure 6.18 Static Route Page Figure 6.19 Add Static Route 6.6.2 Configure the Route Information Protocol (RIP) for your LAN by clicking the on the RIP sub-menu... - Page 39 BitStorm 6211 Router User’s Guide Figure 6.20 RIP Setup...
-
Page 40: Default Gateway
BitStorm 6211 Router User’s Guide 6.6.3 Default Gateway If the Enable Automatic Assigned Default Gateway checkbox is selected, the router will accept the first received default gateway assignment from one of the PPPoA, PPPoE or MER/DHCP enabled PVC(s). If the checkbox is not selected, enter the static default gateway or a WAN interface, or both. Click to save your changes. -
Page 41: Dns
BitStorm 6211 Router User’s Guide Domain Name System (DNS) servers map the user-friendly domain names that users type into their Web browsers (such as "yahoo.com") to the equivalent numerical IP addresses that are used for Internet routing. When a user types a domain name into a browser, the browser sends a request to a DNS server to obtain the equivalent IP address. -
Page 42: Dsl
BitStorm 6211 Router User’s Guide 6.8.1 DSL Setting There are several ADSL setting parameters available on the CPE listed below: ADSL line modulation: Auto Mode, G.DMT/G.Lite, T1.413, G.DMT and G.Lite. Phone line pair: Inner or Outer pair of RJ11 connector You may click to save it or click to configure other advanced parameters. - Page 43 BitStorm 6211 Router User’s Guide Figure 6.24 ADSL Advanced Settings Figure 6.25 ADSL Tone Settings...
-
Page 44: Management
BitStorm 6211 Router User’s Guide Management The chapter contains management instructions for software upgrade and restore configuration. Update Software You can update the the CPE’s software by selecting Management -> Update Software. Choose the proper file location to update your CPE. It will reboot automatically. Figure 7.1 Update Software Page Restore Settings You may restore the CPE’s default settings by selecting Management ->... - Page 45 BitStorm 6211 Router User’s Guide Figure 7.2 Restore Settings...
-
Page 46: Local Access
BitStorm 6211 Router User’s Guide Local Access User name admin (system administrator) has unrestricted access to change and view configuration of your CPE. You may change its password by clicking on the sub-menu Local Access under Management. Enter the password for user name admin twice and click on Figure 7.3 Local Access Setup User Access User name user (general user) can access to the CPE to view configuration and statistics, and update the... -
Page 47: Remote Access
BitStorm 6211 Router User’s Guide Remote Access You may enable or disable this remote access feature by clicking the sub-menu Remote Access under Management. User name "support" is for an ISP technician to access your CPE for maintenance and diagnostics. Enter the password for user name support twice and click on Figure 7.5 Remote Access Setup Reboot Router You can reboot the CPE by clicking on the sub-menu Reboot Access under Management. -
Page 48: Diagnostics
BitStorm 6211 Router User’s Guide Diagnostics This chapter shows the diagnostic report of the CPE (Figure 6.1), which includes: The connection status of the CPE to your Ethernet The ADSL connection status of the CPE to your ISP and related OAM information. Figure 8.1 Diagnostics Page... -
Page 49: Index
BitStorm 6211 Router User’s Guide Index 6210, 9 default IP information, 20 6211, 9 LAN Statistics, 23 ADSL Statistics, 24 LEDs, 12 ARP, 25 Login, 20 ATM Statistics, 23 Management, 44 bridge, 9 Network interface card, 9 Connectors Notational conventions, 10 rear panel, 13 Package contents, 11 Device Information, 22...