Table of Contents
Advertisement
Quick Links
Advertisement
Table of Contents

Related Manuals for Bulldog Security Deluxe 62I


Summary of Contents for Bulldog Security Deluxe 62I
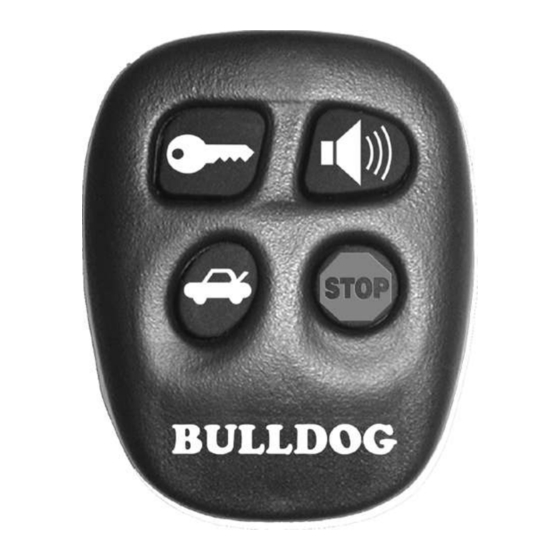
- Page 1 Deluxe 62I Deluxe Remote Starter with Alarm and Keyless Entry Bulldog Security www.bulldogsecurity.com 225 Technology Way • Steubenville, OH 43952 800-878-8007 I N S T A L L A T I O N A N D O W N E R ’ S G U I D E ©2003 JBS Technologies, LLC...
-
Page 2: Your Warranty
City _________________________________ State ______ Zip Code ___________ FCC/ID J3S0045CHOO - This device complies with Part 15 of FCC rules and regulations. Date of Purchase _____________________ Model: Deluxe 62I Operation of this unit is subject to the following two conditions. (1) This device may not cause harmful interference. -
Page 3: Table Of Contents
OPERATING INSTRUCTIONS CONTENTS DELUXE 62I Adjusting Shock Sensor (Vehicle must be disarmed with engine off) The on-board shock sensor can be programmed for sensitivity by holding down Button Deluxe Remote Starter with Alarm and Keyless Entry #4 (Stop) for 5 seconds until a chirp or horn honk is heard. Release Button #4. Tap the System Features ................ -
Page 4: System Features
SYSTEM FEATURES OPERATING INSTRUCTIONS Security System Features Trunk Release Output The remote car starter includes an optional output that can be used to do one of the Starter Immobilizer Prevents the vehicle from being hotwired when the system is following: open the trunk, roll up the windows (optional module required), close the sun with Relay armed. - Page 5 OPERATING INSTRUCTIONS SYSTEM FEATURES Keyless Entry Features Button #1: Remote starts your vehicle from up to a quarter Remote Keyless Entry* Remotely locks and unlocks your power door locks with built-in mile. relays onboard. Button #2: Arm locks and disarm unlocks your power door locks.
-
Page 6: Technical Assistance
U.S.A. The dependability and variety of features make release. Silent arming/disarming is now programmed on. To program it back on, repeat these Bulldog Security the leader in the industry. steps. After the parking lights flash again three (3) times, silent arming/disarming is programmed off. -
Page 7: Precautions
PRECAUTIONS PROGRAMMING INSTRUCTIONS Programming Hot Start This system is designed to be used with fuel-injected and diesel Press and hold the brake, then press and hold Button #2 (Arm/Disarm) until the parking lights vehicles with automatic transmissions only. flash twice. Release Button #2. Press and hold Button #3, the parking lights will flash once. Each continuous flash represents a progression in degrees: one (1) flash = 150ºF, two (2) SAFETY FIRST! flashes = 140ºF, three (3) flashes = 130ºF, four (4) flashes = 120ºF, five (5) flashes = 110ºF,... -
Page 8: Neutral Safety Switch
Press and hold the brake, then press and hold Button #4 (stop) until the parking lights flash When installing a Bulldog Security remote starter on GM vehicles or Dodge four (4) times. Release Button #4. Press and release Button #2, the parking lights will flash Dakotas built prior to 1996, you must: Use the diagram below to create once the shock sensor is now ON. -
Page 9: Antenna Placement
PROGRAMMING INSTRUCTIONS ANTENNA PLACEMENT WE RECOMMEND THAT YOU USE FACTORY SETTINGS FIRST Antenna Entering Programming Mode Antenna Wire Make sure your key is not in the ignition and the brake is pressed. The brake is to remain pressed as long as you want to remain in programming mode. The unit will exit the programming mode simply by releasing the brake. - Page 10 INSTALLATION DIAGRAM CONNECTING DOORLOCKS WHEN ADDING 5-PIN DOORLOCK HARNESS DOORLOCK ACTUATORS security.com bulldog www. DOOR #1 800-878-8007 CENTRAL LOCKING RED 12 V CONSTANT Standards With SYSTEM Comply Tested 12V(+) Security Bulldog M200 WHITE/BLACK ACCESSORY RED 12 V CONSTANT 12V(+) YELLOW/BLACK STARTER CRANK ANTENNA PLUG DOORLOCK...
- Page 11 CONNECTING THE 18-PIN HARNESS CONNECTING DOORLOCKS IN (+) MODULE LAYOUT “Type C” Reverse Polarity DOOR LOCK HARNESS 18-PIN HARNESS IGN 1 IGN 2 (5-pin harness) ANTENNA POWER GREEN/BLACK Unlock Out OUT (-) DOOR 18 17 16 15 14 13 12 LOCK GREEN/WHITE Unlock In MOTOR...
- Page 12 CONNECTING THE 18-PIN HARNESS CONNECTING DOORLOCKS 6. BLACK/BLUE (-) Hood Switch Input “Type A” (+) Positive (5-pin harness) This feature will keep the engine from starting or shut off the engine when the hoop is opened. Locate a good chassis ground with one inch of GREEN/BLACK Unlock Out clearance for adjustment.
-
Page 13: Connecting The 18-Pin Harness
CONNECTING THE 18-PIN HARNESS TESTING DOORLOCKS Testing Switch Wire and Motor Wires 17. GREY/BLACK (-) Horn Output This wire will provide a negative output to the vehicles horn relay. for” Type C” Door Locks 18. GREY (+) Siren Output Before connecting, you must now determine which wire is the switch wire This wire will provide a positive output for an aftermarket siren or and which is the motor wire. -
Page 14: Making Main Power, Ignition And Accessory Connections 1
MAKING MAIN POWER, IGNITION AND ACCESSORY TESTING DOORLOCKS CONNECTIONS TO THE IGNITION SWITCH HARNESS There are four basic types or door locks: “Type A” Door Lock Test (Most GMs and some Chryslers) Probe both of your door lock wires going to the door lock switch usually located in the driver’s kick panel.