Table of Contents
Advertisement
Advertisement
Table of Contents

Related Manuals for Pfaff hobbylock 2.0


Summary of Contents for Pfaff hobbylock 2.0
- Page 1 O w n e r ’ s M a n u a l...
-
Page 2: Important Safety Instructions
This household sewing machine is designed to comply with IEC/EN 60335-2-28 and UL1594 IMPORTANT SAFETY INSTRUCTIONS When using an electrical appliance, basic safety precautions should always be followed, including the following: Read all instructions before using this household sewing machine. DANGER - To reduce the risk of electric shock: •... -
Page 3: Table Of Contents
Table of contents Machine maintenance ............20 Parts of the machine ..............4 Cleaning ..................20 Accessories ..................5 Oiling ..................... 20 Connecting the foot control and the power supply ..5 Replacing the stationary cutter ......... 21 Setting up the telescopic thread stand ......6 Storage .................. -
Page 4: Parts Of The Machine
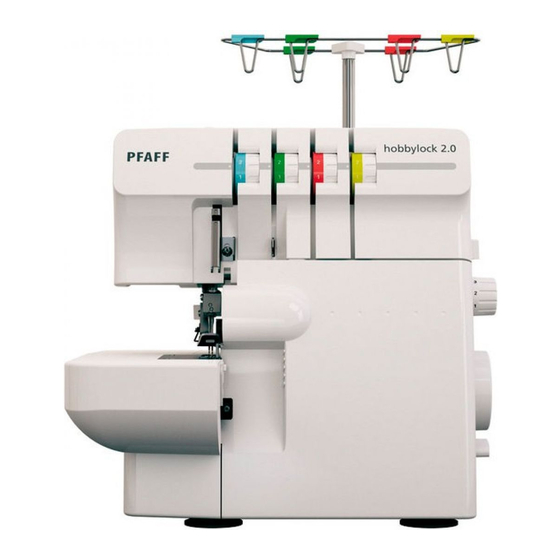
Parts of the machine 1. Presser foot pressure adjustment knob 2. Left needle thread tension dial (blue) 3. Right needle thread tension dial (green) 4. Upper looper thread tension dial (red) 5. Lower looper thread tension dial (yellow) 6. Handle 7. -
Page 5: Accessories
Accessories 1. Needle pack including three needles, size #14/90 and two needles, size #12/80. Two needles, size #14/90, are in the machine on delivery. 2. Screwdriver 3. Tweezers 4. Thread unreeling discs (4) 5. Lint brush 6. Knife blade (for the stationary lower cutter) 7. -
Page 6: Setting Up The Telescopic Thread Stand
Setting up the telescopic thread stand Pull out the spool stand in the direction of the arrow (A) Extend the telescopic thread stand to its full height, then turn until it clicks into place. Place the thread spools or cones over the cone holders on the spool pin. -
Page 7: Presser Foot Lift
Presser foot lift Raise the presser foot with the presser foot lift lever (A) at the back of the machine. Changing the needles Turn off the main power switch and unplug the machine. 1. Turn the hand wheel toward you until the needles are at the highest position. -
Page 8: Disengage The Movable Upper Cutter
Disengage the movable upper cutter Place the movable upper cutter in nonworking position 1. Turn the hand wheel toward you until the upper cutter is raised to the highest position. 2. Open the front cover. 3. Push the movable cutter holder to the right as far as it will 4. -
Page 9: Threading The Machine
Threading the machine A color coded diagram is located inside the front cover for quick reference. When threading the machine, thread only in the following order: 1. Upper looper threading - (Red) 2. Lower looper threading - (Yellow) 3. Right needle threading - (Green) 4. -
Page 10: Threading The Upper Looper (Red)
Threading the upper looper (red) 1. Pass the thread from back to front through the thread guides on the thread stand (1). 2. Pull the thread from left to right under the thread guide at the back on the top cover (2). 3. -
Page 11: Threading The Lower Looper (Yellow)
Threading the lower looper (yellow) 1. Pass the thread from back to front through the thread guide on the thread stand (1). 2. Pull the thread from left to right under the thread guide on the back of the top cover (2). 3. -
Page 12: Threading The Right Needle (Green)
Threading the right needle (green) 1. Pass the thread from back to front through the thread guides on the thread stand (1). 2. Pull the thread from left to right under the thread guide on the back of the top cover (2). 3. -
Page 13: Changing Threads
Changing threads The following is an easy way to change threads: 1. Cut the thread in use near the spool, behind the guides on the telescopic thread stand. 2. Remove the thread spool and place the new thread on the spool pin. -
Page 14: Thread Tension Settings
Thread tension settings Right side Upper looper thread Set the thread tension to suit the type of fabric and thread used. As the number on the thread tension discs increases, the thread Lower looper thread tension becomes tighter. Lower looper thread and upper looper thread should be well balanced with the same tension (both looper threads should cross at the edge of the fabrics). -
Page 15: Differential Feed Adjustment
Differential feed adjustment The differential feed system consists of two sets of feed teeth arranged one behind the other. Both feed teeth work independently of each other to give perfect results when sewing on speciality fabrics. When the amount of feed by the front feed teeth is changed in relation to the feed by the rear feed teeth it will “stretch”... -
Page 16: Presser Foot Pressure Adjustment
Presser foot pressure adjustment The presser foot pressure is pre-set for sewing based on normal conditions. Adjustment might in some conditions be necessary. Increase or decrease the pressure until you are satis ed with the result. Always test sew on a sample of your fabric before sewing on your garment. -
Page 17: Stitch Nger Lever Setting
Stitch nger lever setting The stitch nger lever should be set to “S” for all standard overlock sewing. To sew rolled edge you need to retract the stitch nger by setting the stitch nger lever to “R”. When moving the stitch nger, be sure to push the lever as far as it will go in each direction. -
Page 18: Flatlock Sewing
Flatlock sewing A Flatlock Stitch is made by adjusting the tension of the 2- or 3-thread overlock stitch, sewing the seam and pulling the fabric apart to atten the seam. The tensions must be adjusted correctly for the fabric to pull at. The Flatlock Stitch can be used both as a decorative construction stitch, sewing two pieces together (Standard Flatlock Stitch), or for ornamentation only on one piece of fabric (Ornamental... -
Page 19: Corded Overlock
Corded overlock Corded overlock can be used to strengthen stitches when joining elastic fabrics such as knits. Cording prevents knit fabrics from stretching and also stabilize the seams. 1. Insert the cord through the hole in the front of the foot. 2. -
Page 20: Machine Maintenance
Machine maintenance An overlock requires more frequent maintenance than a conventional machine for two reasons: A lot of lint is produced when the cutters are cutting the the fabric. An overlock runs at a very high speed and needs to be oiled frequently to lubricate the internal working parts. -
Page 21: Replacing The Stationary Cutter
Replacing the stationary cutter Turn off the main power switch and unplug the machine. The stationary cutter should be changed when it becomes dull. The stationary cutter can be replaced according to the following directions. If you are having any dif culties, consult your dealer to make the necessary adjustments. -
Page 22: Trouble Shooting
Trouble shooting Problem Solution Page Fabric does not feed well - Lengthen stitch length. - Increase presser foot pressure for heavy weight fabric. - Decrease presser foot pressure for light weight fabric. - Check the differential feed. Needle breaks - Insert needle correctly. - Do not pull fabric while sewing. -
Page 23: Stitch Table
Stitch table Explanation of the fabric symbols Woven light Stretch light Chiffon, voil, organza, charmeuse, nylon, tricot, Please note: batiste, silk, etc. single knit jerseys, etc. The settings shown in this table are our recommendations based on normal conditions. It may be necessary to adjust Woven medium Stretch medium the thread tension according to the stitch, type of fabric... - Page 24 Combination Needle Stitch Stitch Differ- Stitch 2-thread Thread tension position length width ential nger con- Stitch Fabric feed verter 2-thread overlock, wrap, narrow Right R(3.5) 2-thread rolled edge Right Not recommended Right Not recommended 2-thread narrow edge Right Not recommended Right Not recommended 2-thread atlock stitch...
- Page 25 Combination Needle Stitch Stitch Differ- Stitch 2-thread Thread tension position length width ential nger con- Stitch Fabric feed verter 3-thread overlock stitch, wide Left R(3.5) 3-thread overlock stitch, narrow Right R(3.5) 3-thread atlock stitch, narrow Left R(3.5) 3-thread stretch overlock Right R(3.5)
- Page 26 Combination Needle Stitch Stitch Differ- Stitch 2-thread Thread tension position length width ential nger con- Stitch Fabric feed verter 3-thread rolled edge Right Not recommended Right Not recommended 3-thread narrow edge Right Not recommended Right Not recommended 3-thread atlock stitch, wide Left R(3.5)
-
Page 27: Fabric / Needle / Thread Table
Such modi cations, however, will always be to the bene t of the user and the product. Intellectual Property PFAFF and HOBBYLOCK are trademarks of KSIN Luxembourg II, S.ar.l. - Page 28 www.pfaff.com...