Table of Contents
Advertisement
Advertisement
Table of Contents

Related Manuals for Grizzly G5959


Summary of Contents for Grizzly G5959
-
Page 1: Instruction Manual
MODEL G5959 AND G9957 INSTRUCTION MANUAL COPYRIGHT © 1998 BY GRIZZLY INDUSTRIAL, INC. WARNING: NO PORTION OF THIS MANUAL MAY BE REPRODUCED IN ANY SHAPE OR FORM WITHOUT THE WRITTEN APPROVAL OF GRIZZLY INDUSTRIAL, INC. OCTOBER, 2001 PRINTED IN TAIWAN... - Page 2 To reduce your exposure to these chemicals: work in a well ventilated area, and work with approved safety equipment, such as those dust masks that are specially designed to fil- ter out microscopic particles. G5959/G9957 12" Table Saw...
-
Page 3: Table Of Contents
1. SAFETY SAFETY RULES FOR ALL TOOLS ...2 ADDITIONAL SAFETY INSTRUCTIONS FOR TABLE SAWS ...4 SAFETY ACCESSORIES ...5 COMMON DEFINITIONS, TERMS AND PHRASES ...7 2. CIRCUIT REQUIREMENTS 220V SINGLE AND THREE OPERATION ...8 GROUNDING ...9 EXTENSION CORDS ...9 3. INTRODUCTION COMMENTARY...10 UNPACKING ...11 PIECE INVENTORY ...11... -
Page 4: Safety
G5959/G9957 12" Table Saw VISITORS... - Page 5 15. USE RECOMMENDED ACCESSORIES. Consult the owner’s manual for recom- mended accessories. The use of improper accessories may cause risk of injury. G5959/G9957 12" Table Saw 16. REDUCE THE RISK OF UNINTENTION- 17. MANY WOODWORKING TOOLS CAN LENGTH 50ft 100ft 18.
-
Page 6: Additional Safety Instructions For Table Saws
NEVER stand or have any part of your body in line with the path of the saw blade. USE GREAT CARE WHEN CUTTING WITH A DADO BLADE. There is a high degree of risk involved with any dado oper- ation. -
Page 7: Safety Accessories
We also carry a wide selection of table inserts (shown in Figure 1) in the Grizzly catalog. Be sure to hold the insert firmly in place with a piece of wood when creating slots. Never hold the table insert... - Page 8 40° angle at one end of the board and make a number of end cuts at approximately and 2" to 3" deep. We also offer a number of featherboards in the Grizzly catalog. See Figure 3. Figure 3. Featherboard. G5959/G9957 12" Table Saw ⁄...
-
Page 9: Common Definitions, Terms And Phrases
It is important that you read and become familiar with them before assembling, adjusting or operating this machine. Your safety is VERY important to us at Grizzly! Arbor: Metal shaft extending from the drive mechanism, to which the cutting blade is attached. -
Page 10: Circuit Requirements
The motor will safely draw about 30 amps at 220V under load. If you operate the Model G5959 on any circuit that is already close to its capacity, it might blow a fuse or trip a circuit breaker. However, if an unusual load does not exist, and power failure still occurs, have the cir- cuit inspected by a qualified electrician. -
Page 11: Grounding
Serious injury may occur. G5959/G9957 12" Table Saw Extension Cords We do not recommend the use of extension cords on 220V equipment. It is much better to arrange the placement of your equipment and the installed wiring to eliminate the need for extension cords. -
Page 12: Introduction
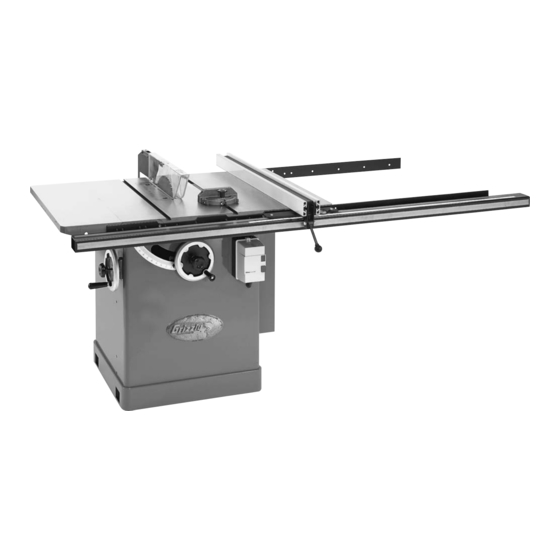
SECTION 3: INTRODUCTION Commentary We are proud to offer the Grizzly Model G5959/ 9957 12" Table Saw. The Model G5959/9957 is part of a growing Grizzly family of fine woodwork- ing machinery. When used according to the guidelines set forth in this manual, you can expect years of trouble-free, enjoyable operation and proof of Grizzly’s commitment to customer satis-... -
Page 13: Unpacking
Unpacking The Model G5959/9957 is shipped from the man- ufacturer in a carefully packed carton. If you dis- cover the machine is damaged after you have signed for delivery, please call Customer Service immediately for advice. When you are completely satisfied with the con- dition of your shipment, you should inventory its parts. -
Page 14: Clean Up
Clean up The table and other unpainted parts of the Model G5959/9957 are coated with a waxy grease that protects them from corrosion during shipment. Clean this grease off with a solvent cleaner or cit- rus-based degreaser such as Grizzly’s G7895 Degreaser. -
Page 15: Assembly
Failure to do so could result in injury. Most of your Model G5959/9957 has been assem- bled at the factory, but some parts must be assembled or installed after delivery. We have organized the assembly process into steps. -
Page 16: Fence Rails
Figure 9. Place a combination square set at ⁄ ", at the edge of the table, and adjust the rail so it is consistently the table. Figure 9. Front rail attachment procedure. G5959/G9957 12" Table Saw ⁄ " below the top of... -
Page 17: Guard Support Shaft
DO NOT overtighten. IMPORTANT: Make sure the blade is installed with the teeth facing the front of the saw. Motor Bracket Remove Before Operating Saw Figure 11. Remove motor bracket. G5959 and G9957 12" Table Saw... -
Page 18: Blade Guard/Splitter
Your saw comes from the factory with a red motor bracket designed to protect the motor assembly during shipping. Remove the bracket shown in Figure 11. Blade Guard/Splitter Slip the blade guard/splitter over the mount- ing bolts as shown in Figure 12. The wash- ers should be between the bolt head and the slots. - Page 19 You can always adjust the splitter back to the left with washers. Tighten the cap screw and setscrew securely. G5959/G9957 12" Table Saw 9. Moving the arbor bracket moves the V-belts 10. Recheck guard alignment to the blade and to 11.
-
Page 20: Table Insert
45° position. Wear leather gloves while rotating the blade to prevent being cut. Be sure to review the “Blade Alignment,” instructions before operating the saw. -18- adjust- Figure 18. Setscrew on each corner of insert. G5959/G9957 12" Table Saw... -
Page 21: Adjustments
Retighten the locking knob. Recheck your blade height with the sample material and re-adjust, if necessary. G5959/G9957 12" Table Saw adjust- loose clothing 45° Stop Bolt... -
Page 22: Miter Slot To Blade
Miter Slot to Blade Your table saw will give the best results if the miter slot and rip fence are adjusted parallel to the blade. If they are not exactly parallel, your cuts and finished work will be lower in quality, but more important, it increases the risk of kickback. - Page 23 G5959/G9957 12" Table Saw ", repeat Steps 9- Blade tilted to 45° Figure 24. 45° blade parallelism.
-
Page 24: Miter Gauge
Figure 26. Miter gauge assembly. -22- The rip fence included with your Model G5959/9957 12" Table Saw is designed to pro- vide excellent ripping accuracy when properly adjusted. There are three main adjustments to concern yourself with: square, parallelism and clamping pressure. -
Page 25: Blade Alignment
Be sure clamp- ing pressure is still adequate. Figure 29. Aligning fence parallel to miter slot. G5959/G9957 12" Table Saw Blade Alignment The blade position can be adjusted slightly in case it contacts the table insert when raised or tilted. - Page 26 Recheck guard alignment to the blade and to the table top. Adjust as nec- essary and tighten down all the bolts before use. repeat Steps 1-6. Check all other adjust- ments. and adjust as necessary. G5959/G9957 12" Table Saw...
-
Page 27: Operations
SECTION 6: OPERATIONS Pre-Run Check Before you begin to use your Model G5959/9957 12" Table Saw, you should give it a thorough inspection. While making your inspection, ask yourself the following questions: Are all the fasteners tight? Is the blade mounted correctly? -
Page 28: Blade Selection
If anything appears abnormal, immediately turn off the saw and fix the problem. If a problem exists that is beyond the scope of this manual, call our service department. If the saw is behaving normally, turn it off and prepare to make a cut according to the instructions outlined in the following sec- tions. -
Page 29: Crosscutting
Inspect the miter gauge. Is it properly set and tight? Move the rip fence completely out of the way. Turn on the saw and allow it to come to full speed. Hold the workpiece firmly against the face of the miter gauge and ease it into the blade as shown in Figure 36. -
Page 30: Ripping
Page 45, or you can purchase the G3445 or G1411 push stick from the Grizzly catalog. Use them to hold the workpiece against the table and fence, and push the -28- workpiece fully past the blade. -
Page 31: Dado Operations
Dado Operations In addition to its ability to rip and crosscut lumber, the table saw is also an invaluable tool for creat- ing a variety of dadoes. These non-through cuts can be created with a regular saw blade or with specially-designed dado blade as shown in Figure 38. -
Page 32: Rabbet Operations
-30- Rabbet Operations In addition to its ability to create a variety of dadoes, this table saw can be used to cut L- shaped rabbets. These cuts can be created with a regular saw blade or with specially designed stacking or wobbling dado blades. - Page 33 Sacrificial Fence Sacraficial Fence Dado Blade Dado Blade Figure 41. Rabbet cutting. G5959/G9957 12" Table Saw Rabbeting operations can also be accomplished using a conventional saw blade. To create a sin- gle-blade rabbet: Instructions on using moulding heads have been intentionally left out. They are very...
-
Page 34: Maintenance
SECTION 7: MAINTENANCE General Regular periodic maintenance on your Model G5959/9957 will ensure its optimum performance. Make a habit of inspecting your machine each time you use it. Check for the following conditions and repair or replace when necessary: 1. Loose mounting bolts. -
Page 35: Lubrication
G5959/G9957 12" Table Saw The shielded ball bearings in the motor and throughout the Model G5959/9957 require no fur- ther lubrication during their lifetime. When they do wear out, replacements can be obtained through the Grizzly Parts Department. -
Page 36: Closure
Washington location using the address in the Introduction. The specifications, drawings, and photographs illustrated in this manual represent the Model G5959/9957 as supplied when the manual was prepared. However, due to Grizzly’s policy of continuous improvement, changes may be made at any time with no obligation on the part of Grizzly. -
Page 37: Machine Data
Maximum Rip to Right of Blade...50'' Maximum Front of Table to Center of Blade ...18 Maximum Front of Table at Maximum Cut ...13 Motor: Horsepower ...G5959: 5 H.P. Single-Phase, G9957: 7 Voltage ...G5959: 220V, G9957: 220/440V Amps ...G5959: 30A, G9957: 22/11A R.P.M..3450 R.P.M. -
Page 38: Wiring Diagram
220 VOLT POWER SOURCE Disconnect power from machine before performing electrical service. Failure to do this will result in a shock hazard leading to injury or death. -36- SINGLE-PHASE 5L3 NO 13 6T3 NO 14 30 36 MOTOR G5959/G9957 12" Table Saw... - Page 39 Failure to do this will result in a shock hazard leading to injury or death. G5959/G9957 12" Table Saw THREE-PHASE 220 VOLT POWER SOURCE 5L3 NO 13 6T3 NO 14 22 28 MOTOR © G i l I d...
-
Page 40: Parts Breakdown And Parts Lists
128A 128A K IC T I- V IC 134A 134B... - Page 45 053 PSB26M CAP SCREW M6-1 X 12 054 PLW05M LOCK WASHER 12MM 055 PN09M HEX NUT M12-1.75 G5959/G9957 12" Table Saw 056 P5959056 057A P5959057A BALL PIN 8 X 20 058 P5959058 059A P5959059A BALL PIN 8 X 20 ⁄...
- Page 46 LOCK NUT M5-0.8 SCALE GUARD WARNING LABEL MACHINE ID/WARNING LABEL SAFETY GLASSES LABEL UNPLUG LABEL READ MANUAL LABEL ELECTRICITY LABEL CAST LOGO RETAINER GUARD SUPPORT ARM SPRING BLADE SPLITTER PAWL RETAINER PRP42M ROLL PIN 3 X 20 G5959/G9957 12" Table Saw...
-
Page 47: Troubleshooting Guide
Hand wheels won’t turn. Bullets are wedged. Roll pin or setscrew in worm gear is contacting geared trunnion. G5959/G9957 12" Table Saw POSSIBLE CAUSE Check power line for proper voltage. Inspect all lead connections on motor for loose or open con- nections. - Page 48 -46- G5959/G9957 12" Table Saw...
- Page 49 NOTES G5959/G9957 12" Table Saw -47-...
-
Page 50: Warranty And Returns
WARRANTY AND RETURNS Grizzly Industrial, Inc. warrants every product it sells for a period of 1 year to the original purchaser from the date of purchase. This warranty does not apply to defects due directly or indirectly to misuse, abuse, negligence, accidents, repairs or alterations or lack of maintenance. -
Page 51: Warranty Card
Do you think your purchase represents good value? ___Yes Would you recommend Grizzly Industrial to a friend? ___Yes Would you allow us to use your name as a reference for Grizzly customers in your area? Note: We never use names more than three times. ___Yes Comments:_________________________________________________... - Page 52 FOLD ALONG DOTTED LINE FOLD ALONG DOTTED LINE Send a Grizzly Catalog to a friend: Name_______________________________ Street_______________________________ City______________State______Zip______ GRIZZLY INDUSTRIAL, INC. P.O. BOX 2069 BELLINGHAM, WA 98227-2069 TAPE ALONG EDGES--PLEASE DO NOT STAPLE Place Stamp Here...