AEG L 75480 WD User Manual
Hide thumbs
Also See for L 75480 WD:
- User manual (40 pages) ,
- User manual (40 pages) ,
- User manual (76 pages)
Table of Contents
Advertisement
Advertisement
Table of Contents

Related Manuals for AEG L 75480 WD


Summary of Contents for AEG L 75480 WD
- Page 1 L 75480 WD EN WASHER DRYER USER MANUAL...
-
Page 2: Table Of Contents
CONTENTS 4 SAFETY INFORMATION 6 TECHNICAL INFORMATION 7 PRODUCT DESCRIPTION 8 CONTROL PANEL 12 PROGRAMMES 15 CONSUMPTION VALUES 16 BEFORE FIRST USE 16 USING THE APPLIANCE - WASHING ONLY 19 AT THE END OF THE PROGRAMME 20 USING THE APPLIANCE - DRYING ONLY 21 USING THE APPLIANCE - WASHING &... - Page 3 ENGLISH FOR PERFECT RESULTS Thank you for choosing this AEG product. We have created it to give you impeccable performance for many years, with innovative technologies that help make life simpler – features you might not find on ordinary appliances. Please spend a few minutes reading to get the very best from it.
-
Page 4: Safety Information
SAFETY INFORMATION Before the installation and use of the ap- GENERAL SAFETY pliance, carefully read the supplied in- • Do not use the appliance for professio- structions. The manufacturer is not re- nal use. The appliance is only for do- sponsible if an incorrect installation and mestic use. -
Page 5: Water Connection
ENGLISH with a hinge on the opposite side in cleaning pads, solvents or metal ob- such a way that a full opening of the jects. door is restricted. • Fabric softener or equivalent products INSTALLATION must be used as specified by the fabric •... -
Page 6: Technical Information
• Make sure not to cause damage to the must be the correct type for the neces- mains plug and cable. sary load. It must agree with the last electrical legislation. The switch must • Connect the mains plug to the mains... -
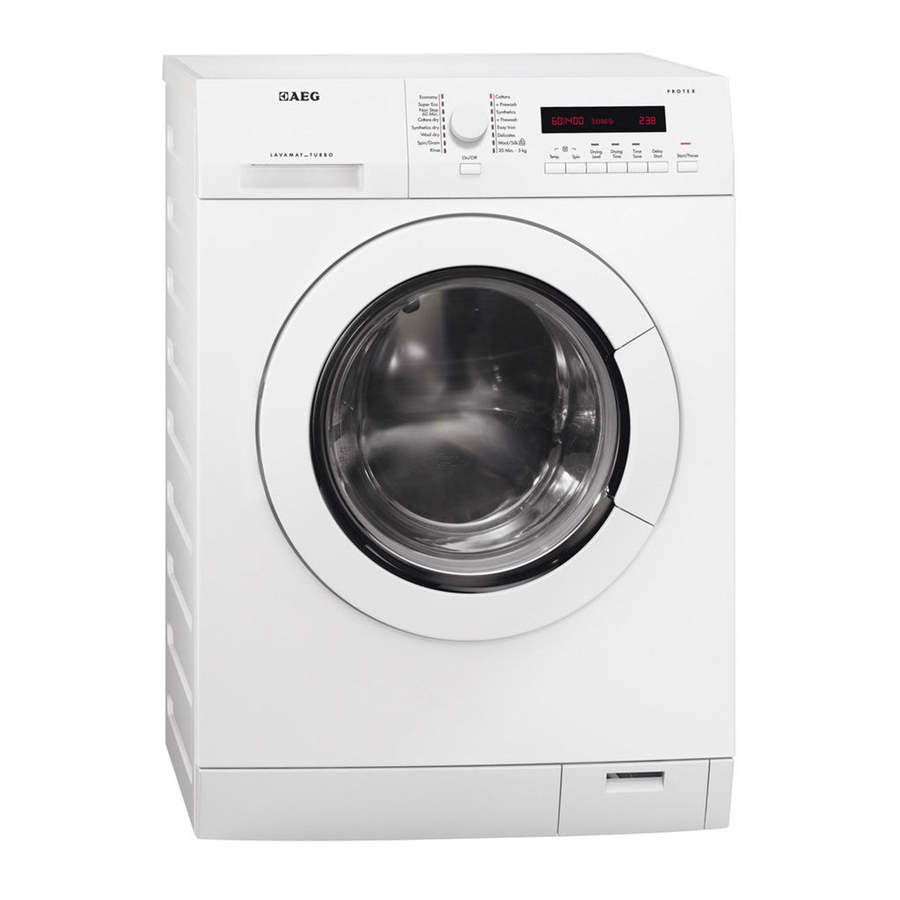
Page 7: Product Description
ENGLISH PRODUCT DESCRIPTION Worktop Feet for the appliance level Detergent dispenser Water drain hose Control panel Water inlet valve Door handle Mains cable Rating plate Transit bolts Drain pump Feet for the appliance level ACCESSORIES Spanner To remove the transit bolts. Plastic caps To close the holes on the rear side of the cabinet after the removal of the... -
Page 8: Control Panel
CONTROL PANEL Cottons + Prewash Synthetics + Prewash Easy Iron Delicates Wool/Silk 20 Min. - 3 kg On/Off On/Off button The AUTO Stand-by function automatical- ly deactivates the appliance to decrease Programme knob the energy consumption when: Display • You do not use the appliance for 5 mi-... -
Page 9: Delay Start Button
ENGLISH Dryness levels symbols: Iron dry Store dry Extra dry The display symbols: Washing phase Drying phase Extra rinse Child lock You cannot open the appliance door when the symbol is on. You can open the door only when the symbol goes off. If the programme is completed but the symbol stays on: •... -
Page 10: Drying Time Button
10 www.aeg.com The display shows only the spin TIME SAVE BUTTON speeds available with the set pro- gramme. Press the button to decrease the pro- gramme duration. • Deactivate the spin phase. • Press one time to set 'Shortened dura- •... - Page 11 ENGLISH • After you press the Start/Pause button , all the buttons and the programme knob are deactivated.
-
Page 12: Programmes
12 www.aeg.com PROGRAMMES Programme Type of load Cycle Functions Temperature max. weight of load description WASHING PROGRAMMES Cottons White and coloured Wash SPIN REDUCTION 95° - Cold cotton with normal Rinses RINSE HOLD soil. Long spin EXTRA RINSE max. 8 kg... - Page 13 ENGLISH Programme Type of load Cycle Functions Temperature max. weight of load description Rinse All fabrics. One rinse with ad- SPIN REDUCTION ditive spin phase RINSE HOLD EXTRA RINSE Spin/Drain All fabrics Drainage of the SPIN REDUCTION The maximum load of water NO SPIN the laundry is related...
- Page 14 14 www.aeg.com 6) Cotton Energy Saving programme » at 60°C with a load of 8 kg is the reference programme for the data entered in the energy label, in compliance with EEC 92/75 standards. PROGRAMMES FOR AUTOMATIC DRYING Level of dryness...
-
Page 15: Consumption Values
ENGLISH CONSUMPTION VALUES Programme Energy con- Water con- Programme sumption sumption duration (KWh) (litres) (minutes) White Cottons 95° Cottons 60° 1.60 For the dura- tion of the Cotton Energy Saving Pro- 1.04 programmes, gramme 60° please refer to the dis- Cottons 40°... -
Page 16: Before First Use
16 www.aeg.com BEFORE FIRST USE To activate the drain system, put 2 li- detergent dispenser. Set and start a tre of water in the main wash com- programme for cotton at the highest partment of the detergent dispenser. temperature without laundry. This re-... - Page 17 ENGLISH The detergent compartment for the prewash phase, the soak pro- gramme and for the stain function. Add the detergent for prewash, soak and stain remover before the start of the programme. The detergent compartment for the washing phase. If you use a liquid detergent, put it immediately before you start the programme.
- Page 18 18 www.aeg.com To use liquid detergent, turn the flap down. With the flap in the position DOWN: – Do not use gelatinous or thick liquid detergents. – Do not put more liquid deter- gent than the limit showed in the flap.
-
Page 19: At The End Of The Programme
ENGLISH nutes or hours. The related symbols To open the appliance door: comes on. Press button . The door lock sym- Press button , the appliance starts bol in the display goes off. the countdown of the delay start. Open the appliance door. When the countdown is completed, Close the appliance door and press the programme starts automatically. -
Page 20: Using The Appliance - Drying Only
20 www.aeg.com USING THE APPLIANCE - DRYING ONLY WARNING! Set time value • Each time you press this button the Open the water tap. Put the drain hose time value increases by 5 minutes. in the sink or connect to the drain pipe. -
Page 21: Using The Appliance - Washing & Drying
ENGLISH USING THE APPLIANCE - WASHING & DRYING NON-STOP PROGRAMME - The last minutes of the drying cy- cle the appliance performs the an- WASHING & AUTOMATIC ti-crease and the cooling phases. DRYING • When the programme is completed, the appliance stops automatically. CAUTION! Do not put a plastic device/ball •... - Page 22 22 www.aeg.com If you set a drying time of only 10 • Press button to start the pro- minutes, the final time value in- gramme. cludes also the anti-crease and the cooling phases. • Press button 4 to start the programme.
-
Page 23: Helpful Hints And Tips
ENGLISH HELPFUL HINTS AND TIPS THE LAUNDRY LOAD DETERGENTS AND ADDITIVES • Divide the laundry in: white, coloured, • Only use detergents and additives spe- synthetics, delicates and wool. cially made for washing machines. • Obey the washing instructions that are •... -
Page 24: Drying Hints
24 www.aeg.com Water hardness Level Type °dH °T.H. mmol/l Clarke medium 8-14 16-25 1.6-2.5 10-16 hard 15-21 26-37 2.6-3.7 17-25 very hard > 21 > 37 >3.7 >25 DRYING HINTS DRYING CYCLE DURATION The drying time can change depending Prepare the drying cycle •... -
Page 25: Care And Cleaning
ENGLISH CARE AND CLEANING WARNING! CAUTION! Do not use alcohol, solvents or chemical products. Disconnect the appliance from the mains supply before you clean it. MAINTENANCE WASH DESCALING With the low temperature programmes it is possible that some detergent stays in The water we use contains limescale. -
Page 26: Detergent Dispenser
26 www.aeg.com DETERGENT DISPENSER To clean the dispenser: Press the lever. Pull the dispenser out. Remove the top part of the liquid ad- ditive compartment. Clean all the parts with water. Clean the dispenser recess with a brush. Put back the dispenser in the recess. -
Page 27: To Clean The Drain Pump
ENGLISH To clean the drain pump: Open the drain pump door. Pull the flap out to remove it. Put a container below the recess of the drain pump to collect the water that flows out. Press the two levers and pull forward the drainage duct to let the water flow out. - Page 28 28 www.aeg.com Clean the filter under the water tap and put it back in the pump into the special guides. Make sure that you tighten correctly the filter to prevent leakages. Put the flap back and close the drain pump door.
-
Page 29: Frost Precautions
ENGLISH Put the drainage duct back and close the drain pump flap. When you drain the water with the emer- gency drain procedure, you must activate again the drain system: Put 2 litres of water in the main wash compartment of the detergent dis- penser. -
Page 30: Troubleshooting
30 www.aeg.com TROUBLESHOOTING The start of the appliance does not occur • - The appliance does not drain or it stops during operation. the water. First try to find a solution to the problem • - The appliance door is open or (refer to the table). - Page 31 ENGLISH Problem Possible cause Possible solution The anti-flood de- • Disconnect the appliance. vice is on. • Close the water tap. • Contact the service centre. The spin phase The spin phase is off. Set the spin programme. does not operate. The filter of the drain Clean the filter of the drain pump is blocked.
- Page 32 32 www.aeg.com Problem Possible cause Possible solution The appliance fills The end of the drain Make sure that the drain hose is with water and hose is too low. in the correct position. drain immediately. The washing re- The detergent you used...
-
Page 33: Installation
ENGLISH INSTALLATION FIXING PLATE KIT (405517114) Follow the instructions supplied with the kit. Available from your authorized dealer. If you install the appliance on a plinth, se- cure the appliance in the fixing plates. UNPACKING Use the gloves. Remove the external film. - Page 34 34 www.aeg.com Open the door. Remove the polystyr- ene piece from the door seal and all the items from the drum. Put one of the polystyrene packaging elements on the floor behind the ap- pliance. Carefully put down the appli- ance with the rear side on it.
-
Page 35: Positioning And Levelling
ENGLISH Remove the three bolts. Use the key supplied with the appliance. Pull out the plastic spacers. Put the plastic caps in the holes. You can find these caps in the user man- ual bag. WARNING! We recommend that you keep the Remove all the packaging and the packaging and the transit bolts for transit bolts before you install the... - Page 36 36 www.aeg.com • The appliance must be level and stable. CAUTION! Do not put cardboard, wood or equivalent materials below the appliance feet to adjust the level. THE INLET HOSE • Connect the hose to the appliance. Turn the inlet hose only left or right.
-
Page 37: Water Drainage
ENGLISH Water-stop device The inlet hose has a water stop device. This device prevents water leaks in the hose because of its natural ageing. The red sector in the window «A» shows this fault . If this occur, close the water tap and con- tact the service centre to replace the hose. - Page 38 38 www.aeg.com Without the plastic hose guide. • To a sink spigot. Refer to the illustration. Put the drain hose in the spigot and tighten it with a clip. Make sure that the drain hose makes a loop to prevent that remaining particles go in the appliance from the sink.
- Page 39 ENGLISH...
- Page 40 132926380-A-142012...