Table of Contents
Advertisement
Quick Links
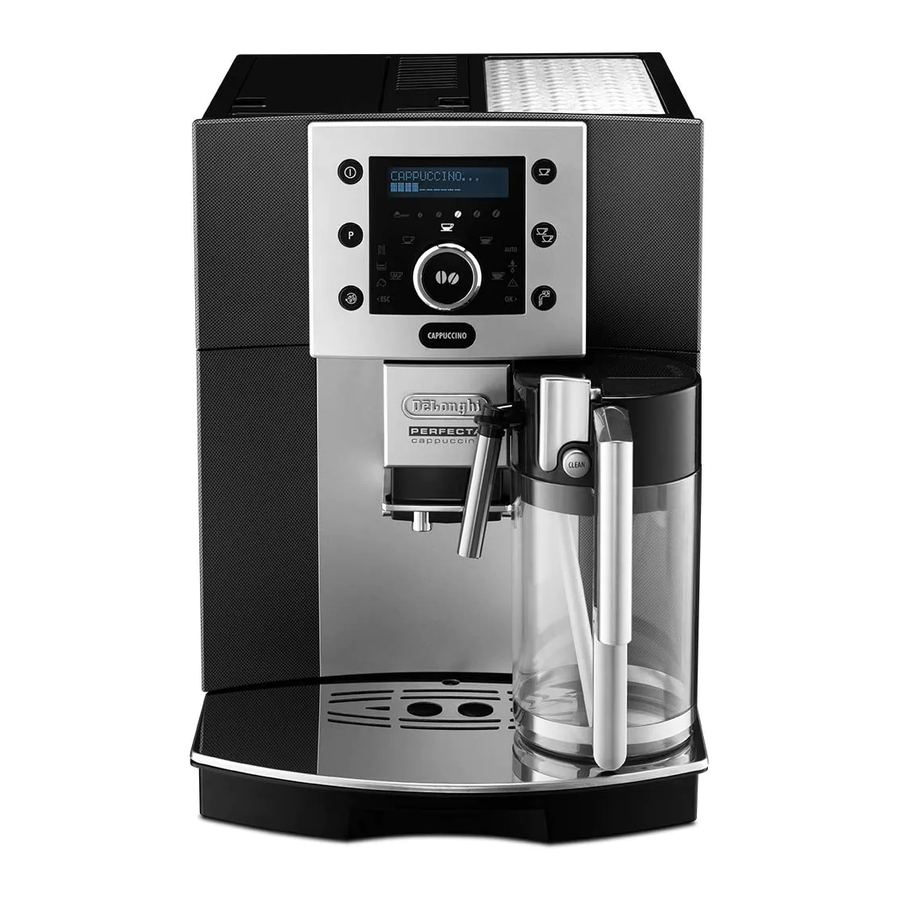
FULLY AUTOMATIC COFFEE CENTER 5500
IMPORTANT INSTRUCTIONS - SAVE THESE INSTRUCTIONS
Register this product on-line and receive a free trial issue of Cook's Illustrated. Visit
http://registration.delonghi-csservice.com. Visit www.delonghi.com for a list of service centers near you.
(U.S. and Canada only).
MACHINE À CAFÈ AUTOMATIQUE ESAM5500
MODE D'EMPLOI IMPORTANT - CONSERVEZ LES PRESENTES INSTRUCTIONS
Enregistrez ce produit en ligne et recevez un numéro gratuit de Cook's Illustrated. Visitez
http://registration.delonghi-csservice.com.
Visitez www.delonghi.com pour y voir une liste des centres de réparation proches de chez vous.
(É.-U. et Canada seulement).
CAFETERA SUPERAUTOMATICA ESAM5500
INSTRUCIONES IMPORTANTES- REPASE Y GUARDE ESTAS INSTRUCCIONES-
LEA ESTE INSTRUCTIVO ANTES DE UTILIZAR EL APARATO
Registre este producto en línea y reciba un ejemplar gratis de Cook's Illustrated.
Visite http://registration.delonghi-csservice.com.
Visite www.delonghi.com para ver la lista de centros de servicios cercanos a usted.
(Sólo Estados Unidos y Canada
MACCHINA PER CAFFÈ SUPERAUTOMATICA ESAM5500
ISTRUZIONI IMPORTANTI- CONSERVARE LE ISTRUZIONI
Registra questo prodotto "on-line" per ricevere una copia omaggio della rivista "Cook's Illustrated".
Visita http://registration.delonghi-csservice.com.
Visita www.delonghi.com per una lista dei centri di servizio a te piu vicini.
(Solo Stati Uniti e Canada)
ELECTRONIC CHARACTERISTICS:
CARACTÉRISTIQUES ÉLECTRIQUES:
CARACTERISTICAS ELECTRICAS:
CARATTERISTICHE ELETTRICHE:
120V ˜ 60HZ 1350W
EN
FR
ES
IT
Advertisement
Table of Contents
Troubleshooting

Related Manuals for DeLonghi 5500


Summary of Contents for DeLonghi 5500
- Page 1 MODE D’EMPLOI IMPORTANT - CONSERVEZ LES PRESENTES INSTRUCTIONS Enregistrez ce produit en ligne et recevez un numéro gratuit de Cook's Illustrated. Visitez http://registration.delonghi-csservice.com. Visitez www.delonghi.com pour y voir une liste des centres de réparation proches de chez vous. (É.-U. et Canada seulement). CAFETERA SUPERAUTOMATICA ESAM5500...
- Page 3 A14 A15 Ready espresso...
- Page 4 1 normal coffee...
- Page 5 CLEAN...
-
Page 6: Table Of Contents
INDEX IMPORTANT SAFEGUARDS...7 INTRODUCTION...8 Symbols used in these instructions ...8 Letters in brackets...8 Troubleshooting and repairs ...8 DESCRIPTION...9 Description of the appliance...9 Description of milk container ...9 Description of control panel...9 Explanation of indicator lights...9 PRELIMINARY CHECKS...10 Controls after transport...10 Installing the appliance ...10 Connecting the appliance ...10 Using the appliance for the first time...10... -
Page 7: Save These Instructions
I M P O R T A N T S A F E G U A R D S When using electrical appliances, basic safety precautions should always be followed, including the fol- lowing. • Read all instructions carefully. • Make sure the voltage of your electrical system corresponds to the voltage shown on the bot- tom of the machine. -
Page 8: Introduction
INTRODUCTION Thank you for choosing the ESAM 5500 automat- ic coffee maker. We hope you enjoy using your new appliance. Take a few minutes to read these instructions. This will avoid all risks and damage to the machine. Symbols used in these instructions Important warnings are identified by these sym- bols. -
Page 9: Description
DESCRIPTION Description of the appliance (pag. 3 - Grinding coarseness regulator knob Bean container lid Container for coffee beans Ground coffee feed funnel Compartment for measuring scoop Cup warmer shelf Water tank Infuser Coffee grounds container A10. Cup tray A11. Drip tray A12. -
Page 10: Preliminary Checks
PRELIMINARY CHECKS Controls after transport After removing the packaging, make sure the product is complete and undamaged and that all accessories are present. Do not use the appliance if it is visibly damaged. Contact the Customer Service Center if product seems damaged in any way. -
Page 11: Setting The Clock
TURNING THE APPLIANCE N.B.! Before turning the appliance on, make sure the main switch is in the I position (fig. 30). Each time the appliance is turned on, it performs an automatic preheat and rinse cycle which can- not be interrupted. The appliance is ready for use only after comple- tion of this cycle. -
Page 12: Descaling
Descaling 1. Press the P button to enter the menu; 2. Turn the selection knob until "Descaling" is displayed; 3. Press the button; 4. The message "Confirm?" is displayed. 5. Press the button to confirm (or the button to cancel the operation); 6. -
Page 13: Removing The Filter
Removing the filter If you want to use the appliance without a filter, you must remove it and notify the appliance of its removal as follows: 1. Press the P button to enter the menu; 2. Turn the selection knob until "Install Filter" is displayed;... -
Page 14: Preparing Coffee Using Coffee Beans
Preparing coffee using coffee beans Important! Do not use caramelized or candied coffee beans as they could stick to the coffee mill and make it unusable. 1. Fill the container (A3) with coffee beans (fig. 2. Place under the coffee spouts: - 1 cup, if you want to make 1 coffee (fig. -
Page 15: Making Milk-Based Drinks
MAKING MILK-BASED DRINKS Filling and attaching the milk container 1. Turn the lid of the milk container clockwise until it becomes noticeably difficult to turn, then remove the lid. 2. Fill the milk container with a sufficient quanti- ty of milk, not exceeding the MAX level marked on the handle (fig. -
Page 16: Cappuccino
Programming the quantity of coffee and milk in the cup for cappuccino or frothed milk The appliance is factory preset to automatically deliver 2.4oz of frothed milk and 2.7oz of coffee. To modify these quantities, proceed as follows: 1. Place a cup under the coffee spouts and the frothed milk spout (fig. -
Page 17: Cleaning And Maintenance
CLEANING AND MAINTENANCE Danger of electric shock! Before perform- ing any cleaning operations, the machine must be turned off and disconnected from the mains power supply. Never immerse the coffee maker in water. Important! Danger of burns. Allow the machine to cool down before cleaning. Important! •... -
Page 18: Cleaning The Spouts
Cleaning the spouts 1. Clean the nozzle (A15), ideally each time the frother is used, with a sponge or cloth (fig. 21). 2. Check regularly (about once a month) that the holes in the coffee spout (A14) are not blocked. If necessary, remove coffee deposits with a toothpick (fig. -
Page 19: Setting Water Hardness
wise then remove it. 2. Remove the milk spout and intake tube. 3. Remove the pointer by pulling it outwards. 4. Wash all the components thoroughly with hot water and mild dish detergent. Make sure there are no milk residues left inside the holes and the groove on the fine end of the pointer. -
Page 20: Technical Specification
After about a minute, 1, 2, 3, or 4 red squares form, depending on the hardness of the water. Each square corresponds to one level. Setting water hardness 1. Press the P button to enter the menu. 2. Turn the selection knob to select "Water Hardness". -
Page 21: Displayed Messages
DISPLAYED MESSAGES DISPLAYED MESSAGE FILL TANK! GROUND TOO FINE ADJUST MILL! Insert water spout and press INSERT WATER SPOUT! EMPTY GROUNDS CONTAINER INSERT GROUNDS CONTAI- INSERT MILK CONTAINER! ADD PRE-GROUND COFFEE! POSSIBLE CAUSE • The water tank is empty or positioned incorrectly. - Page 22 DISPLAYED MESSAGE DESCALE! LESS COFFEE! FILL BEANS CONTAINER! INSERT INFUSER ASSEMBLY! CLOSE DOOR! GENERAL ALARM! POSSIBLE CAUSE • This indicates the presence of limescale in the machine. • The ground coffee funnel is clogged. • Too many coffee beans or too much ground coffee has been added.
-
Page 23: Troubleshooting
TROUBLESHOOTING Below is a list of some of the possible malfunctions. If the problem cannot be resolved as described, contact a Customer Service Center. PROBLEM The coffee is not hot The coffee is not creamy enough The coffee runs out too slowly or in drips. - Page 24 PROBLEM The coffee does not come out of one of the spouts. The coffee does not come out of the spouts, but around the service door (A12). Water comes out of the spouts instead of coffee. The milk does not come out of the milk spout (B5).
-
Page 25: Limited Warranty
Please contact our toll free hotline at #1-866-Latte-Best (Hours of Operation: Monday - Friday 8:30am - 8pm, Saturday 9:30am - 5:30pm) or log onto our website at www.delonghi.com. For all accessories, spare parts or replacement parts, please contact our parts division at 1-866-528-8323. - Page 26 6150 McLaughlin Road Mississauga, Ontario L5R 4E1 Canada #1-866-Latte-Best 1-866-528-8323 Fiducia Italiana S.A de C.V. Pestalozzi 814 Col. Del Valle Del. Benito Juarez México D.F. 03100 tels: 5543 1447 y 5543 6492 Lada sin costo: 01800 711 8805 www.delonghi.com 5713210861/ 07.08...