Table of Contents
Advertisement
Quick Links
INDEX
.......................................26
Symbols used in these instructions ........26
Letters in brackets ..................................26
Troubleshooting and repairs ...................26
........................................................26
Fundamental safety warnings ..................26
Designated use .......................................27
Instructions .............................................27
..........................................27
Description of appliance ..........................27
Description of milk container ..................27
Description of control panel ..................27
Description of lights ................................28
Controls after transport ...........................28
Installing the appliance ...........................28
Connecting the appliance ........................28
Setting up the appliance ..........................29
Setting the language ..............................30
Setting the clock .....................................30
Setting auto-start time ............................30
Setting the temperature ..........................30
Setting auto-off .......................................30
Statistics function ...................................31
....................................31
Selecting the coffee taste ........................31
Regulating the coffee mill .......................31
Preparing coffee using coffee beans .......32
Making cappuccino .................................33
Making frothed milk ................................33
Making caffelatte ....................................33
.........................28
..........29
.......29
....30
......................32
25
Making hot milk ......................................33
milk in the cup ........................................34
Preparation .............................................34
Changing the quantity ............................34
..................................................35
Cleaning the coffee maker........................35
Cleaning the drip tray ..............................35
Cleaning the water tank ...........................35
Cleaning the coffee spouts ....................35
Cleaning the hot water nozzle ..................35
Cleaning the infuser .................................36
Cleaning the milk container .....................36
.............................................37
Measuring water hardness ......................37
Setting water hardness ............................37
..................................................38
...............................41
GB
.....................34
.............37
...............38
.......................39
Advertisement
Table of Contents
Troubleshooting

Related Manuals for DeLonghi ESAM 5500


Summary of Contents for DeLonghi ESAM 5500
-
Page 1: Table Of Contents
INDEX Making hot milk ........33 Cleaning the milk container after use ..33 INTRODUCTION Programming the quantities of coffee and ........26 milk in the cup ........34 Symbols used in these instructions ..26 Letters in brackets ........26 PREPARING HOT WATER .....34 Troubleshooting and repairs ....26 Preparation ..........34 Changing the quantity ......34 SAFETY... -
Page 2: Introduction
INTRODUCTION SAFETY Thank you for choosing the ESAM 5500 automa- Fundamental safety warnings tic coffee maker. We hope you enjoy using your new appliance. Take a few minutes to read these instructions. Danger! This is an electrical appliance This will avoid all risks and damage to your and may cause electric shock. -
Page 3: Designated Use
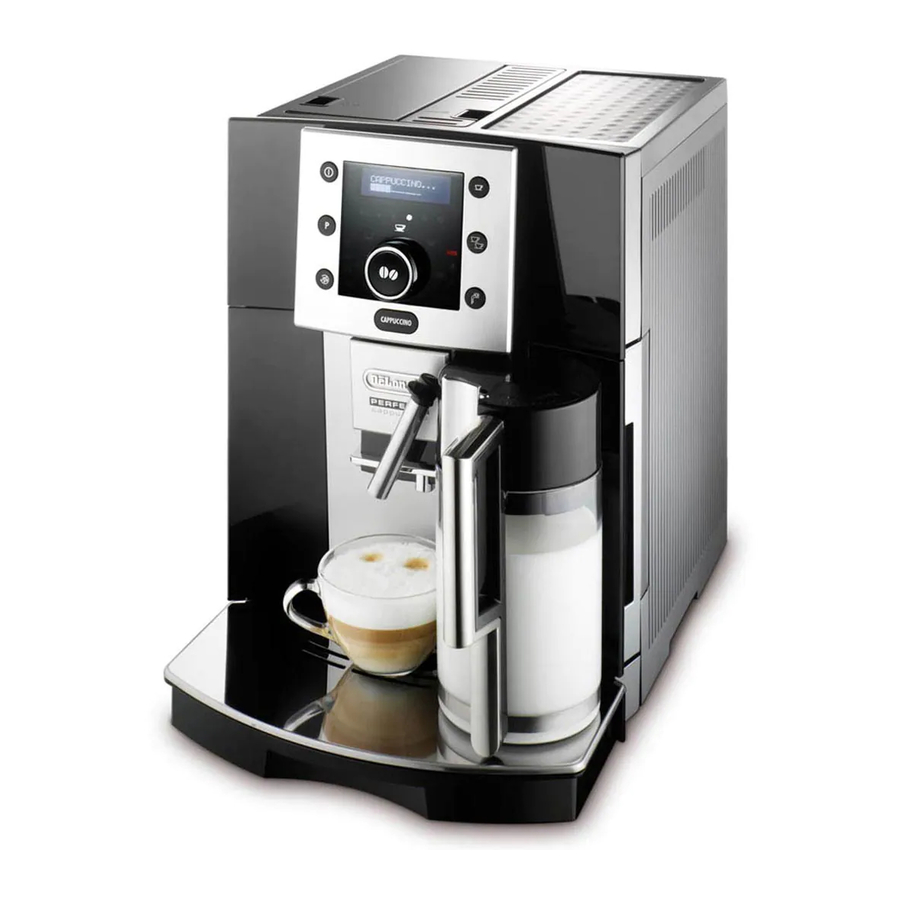
Designated use DESCRIPTION This appliance is designed and made to prepare Description of appliance coffee and heat drinks. All other use is considered improper. (page 3 - This appliance is not suitable for commercial use. Grinding adjustment knob The manufacturer is not liable for damage deri- Bean container lid ving from improper use of the appliance. -
Page 4: Description Of Lights
CAPPUCCINO button: deliver PRELIMINARY CHECKS cappuccino or frothed milk. Selection dial: turn to select the Controls after transport required quantity of coffee. (When in After removing the packaging, make sure the pro- the settings MENU, turn to select the duct is complete and undamaged and that all required function). -
Page 5: Setting Up The Appliance
Setting up the appliance TURNING THE APPLIANCE • Coffee has been used to factory test the NB! Before turning the appliance on, make appliance and it is therefore completely nor- sure the main switch on the back of the appliance mal for there to be traces of coffee in the mill. -
Page 6: Changing The Menu Settings
CHANGING THE MENU 8. Press the button to exit the menu. After confirming the time, the red AUTO light on SETTINGS the display comes on indicating that the function is active. Setting the language To deactivate the function: 1. Press the P button to enter the settings menu. To modify the language on the display, proceed as 2. -
Page 7: Statistics Function
2. Turn the selection dial until "Default Values" is Selecting the quantity of coffee in displayed; the cup 3. Press the button to confirm; To select the quantity of coffee, turn the selection 4. The message "Confirm?" is displayed. dial until the light corresponding to the required 5. -
Page 8: Preparing Coffee Using Coffee Beans
Preparing coffee using coffee beans • Never use more than 1 level measure or it could dirty the inside of the coffee maker or Important! Do not use caramelised or can- block the funnel. died coffee beans as they could stick to the coffee mill and make it unusable. -
Page 9: Making Cappuccino
hot water nozzle as described in the section Making frothed milk "Cleaning the milk container". 1. After attaching the milk container, position the frothed milk regulator according to the quan- 3. Make sure the milk intake tube is correctly tity of froth required (see previous section). inserted in the bottom of the milk container lid 2. -
Page 10: Programming The Quantities Of Coffee And Milk In The Cup
When "Press CLEAN button" flashes on the display PREPARING HOT WATER (each time you use a milk function): 1. Leave the milk container in the machine (you Preparation do not need to empty it); 2. Place a cup or other recipient under the milk Important! Danger of burns. -
Page 11: Cleaning
CLEANING you make the next coffees, the grounds container may fill up more than expected and clog the machine. Cleaning the coffee maker The following parts of the machine must be clea- Cleaning the drip tray ned regularly: coffee grounds container (A3), Important! If the drip tray is not emptied drip tray (A11), regularly, the water could overflow from the edge... -
Page 12: Cleaning The Inside Of The Coffee Maker
power supply. NB! If the infuser is Never immerse the coffee maker in water. difficult to insert, you must Cleaning the inside of the coffee first adapt it to the right maker dimension by pressing it forcefully from the bottom 1. -
Page 13: Descaling
DESCALING with clean water and replace. "Rinsing... Press OK" is displayed. Descale the machine when the red light 10. Empty the container used to collect the desca- the message "DESCALE!" flash on the display. ler solution and replace it under the hot water spout. -
Page 14: Technical Specification
5. Press the button to confirm the setting. 6. Press the button to exit the menu. The coffee maker is now reprogrammed with the new water hardness setting. TECHNICAL SPECIFICATION Voltage: 220-240 V~ 50/60 Hz 10A max. Absorbed power: 1350 W Pressure: 15 bars Water tank capacity: 1.7 litres Size: LxHxD: 272x374x441 mm... -
Page 15: Displayed Messages
DISPLAYED MESSAGES DISPLAYED MESSAGE POSSIBLE CAUSE REMEDY FILL TANK! • The water tank is empty or • Fill the tank with water positioned incorrectly. and/or insert it correctly, pushing it as far as it will go until it clicks into place. GROUND TOO FINE ADJUST •... - Page 16 DISPLAYED MESSAGE POSSIBLE CAUSE REMEDY • This indicates the presence • The descaling procedure DESCALE! of limescale in the coffee described in the "Descaling" maker. section needs to be perfor- med as soon as possible. • The pre-ground coffee fun- •...
-
Page 17: Troubleshooting
TROUBLESHOOTING Below is a list of some of possible malfunctions. If the problem cannot be resolved as described, contact customer services. PROBLEM POSSIBLE CAUSE REMEDY The coffee is not hot • The cups have not been • Warm the cups by rinsing preheated. - Page 18 PROBLEM POSSIBLE CAUSE REMEDY Coffee does not come out of • The spouts are blocked. • Clean the spouts with a one of the spouts. toothpick. The coffee does not come out • The holes in the spouts are • Clean the spouts with a of the spouts, but around the clogged with dry coffee...