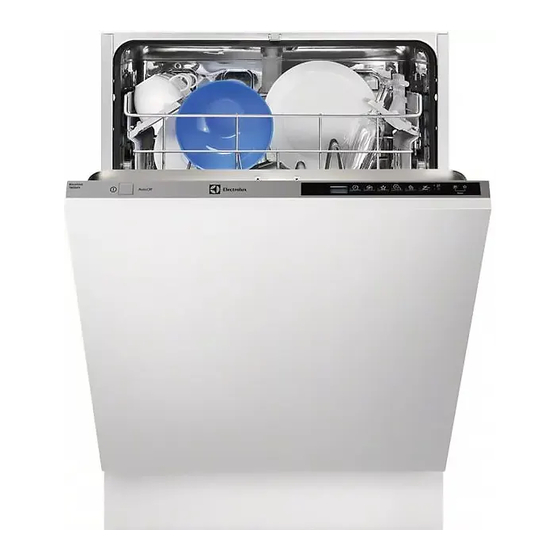
Summary of Contents for Electrolux ESL499
- Page 1 I N S T R U C T I O N B O O K L E T M A N U A L I N S T R U C C I O N E S L I V R O I N S T R U Ç...
-
Page 2: Table Of Contents
CONTENTS Warnings ...............page Installation . -
Page 3: Warnings
WARNINGS It is most important that this instruction book Under no circumstances should you attempt to should be retained with the appliance for future repair the machine yourself. Repairs carried out by reference. Should the appliance be sold or trans- inexperienced persons may cause injury or serious ferred to another owner, or should you move malfunctioning. -
Page 4: Installation
INSTALLATION Remove all packaging before positioning the For making the connection itself, the coupling nut fitted machine. to the machine's supply hose is designed to screw onto either a 3/4 inch gas thread spout, or to a purpose-made quick-coupling tap such as the Press- Positioning Block. -
Page 5: Use
Control panel START THE CONTROLS 1. ON/OFF button In this fully integrated appliance the controls are locat- ed on top of the door. When selecting a programme, Press this button to preset the dishwasher to accept the door needs to be partially opened. settings (selection of wash programmes, drying Audible signals have been introduced to help indicate options, delayed start, etc.). - Page 6 START 5. Programme selector button 8. Delayed Start button To select the required programme, press this button Allows the start of the programme to be delayed by a until the number corresponding to the chosen pro- minimum of 1 hour, up to 9 hours. gramme appears in the digital display (4) (see wash How to set the delayed start programme guide).
- Page 7 The Water Softener - 5 seconds after this button has last been pressed, the machine returns to programme setting mode and Water contains varying amounts of lime and mineral memorises the level set. salts depending on the area in which you live: these Important are deposited on the dishes leaving white marks.
- Page 8 Rinse Aid To help you to correctly dose the right amount of The use of this liquid ensures thorough rinsing, spot detergent, inside the con- and streak free drying, making the water run quickly tainer there are two refe- off the dishes for sparkling results. It is automatically rence marks: added during the hot rinse.
- Page 9 Loading your Machine The two rear rows of prongs on the lower basket can be easily lowered to allow you to load pots, pans and Before placing dishes in the machine, remove any bowls. scraps of food from the plates (small bones, To lower the prongs: toothpicks, fish bones, scraps of meat and vegetables, slightly pull them upward...
-
Page 10: Adjusting The Height Of The Upper Basket
Adjusting the Height of the Upper Basket If washing very large plates (over 27 cm and up to 31 cm in diameter) you can load them in the lower basket after moving the upper basket to the higher position as follows: Move the front runner stops (A) of the upper basket out- ward and slide the basket... -
Page 11: Washing Programmes
PTP16GB... -
Page 12: Washing Programmes
Operating Sequence 7 Starting the wash programme Open the water tap. Close the dishwasher door. An 1 Check that the filters are clean audible signal lasting about 1 second informs you that (see cleaning instructions) the programme has been started. If a delayed start has been selected, the dishwasher 2 Depress the ON/OFF pushbutton starts the countdown and the number of hours to go... -
Page 13: Maintenance And Cleaning
MAINTENANCE AND CLEANING Cleaning the Central Filters Check that the spray arm nozzles are not obstructed. To remove the bottom spray arm, release it from its (After each wash) securing catches and pull it out. Inspect the central filters (B) and (C) and remove any Clean the external surfaces of the machine and scraps of food with a brush, under running water. -
Page 14: Servicing
SERVICING Certain problems are due to lack of simple maintenance or oversights and can be solved easily without having to call out an engineer. Therefore before calling the Service, consult the check list here below. The following alarms, in the form of letters (A, C, F, L, H, P) flash in the digital display window. The dishwasher fails to start or stops during operation;... - Page 15 Visible lime deposits or white film on the Protection against flooding dishes In order to prevent water floods, the dishwasher has been provided with two additional devices, having the The rinse aid has run out or too little is being used. following characteristics: 1.
-
Page 16: Building-In
BUILDING-IN Building-in features Mounting of decor panel onto the door The height of the panel depends on the height of the This dishwasher is designed to be fitted under a kitchen plinth of adjacent kitchen units (see kitchen plinth counter or sink. adjustment). - Page 17 Securing under a counter Levelling Secure the dishwasher to Make sure that the dishwasher door closes properly, the counter on the front without rubbing on sides. Otherwise level the machine part by means of two by slightly screwing or unscrewing the two front feet 4,2x13 screws provided until perfect closure of the door is reached.


